Use the Azure portal to manage users on your Azure Stack Edge Pro FPGA
Important
Azure Stack Edge Pro FPGA devices will reach end-of-life in February 2024. If you are considering new deployments, we recommend that you explore Azure Stack Edge Pro 2 or Azure Stack Edge Pro GPU devices for your workloads.
This article describes how to manage users on your Azure Stack Edge Pro FPGA device. You can manage the Azure Stack Edge Pro FPGA via the Azure portal or via the local web UI. Use the Azure portal to add, modify, or delete users.
In this article, you learn how to:
- Add a user
- Modify user
- Delete a user
About users
Users can be read-only or full privilege. As the names indicate, the read-only users can only view the share data. The full privilege users can read share data, write to these shares, and modify or delete the share data.
- Full privilege user - A local user with full access.
- Read-only user - A local user with read-only access. These users are associated with shares that allow read-only operations.
The user permissions are first defined when the user is created during share creation. Modification of share-level permissions is currently not supported.
Add a user
Do the following steps in the Azure portal to add a user.
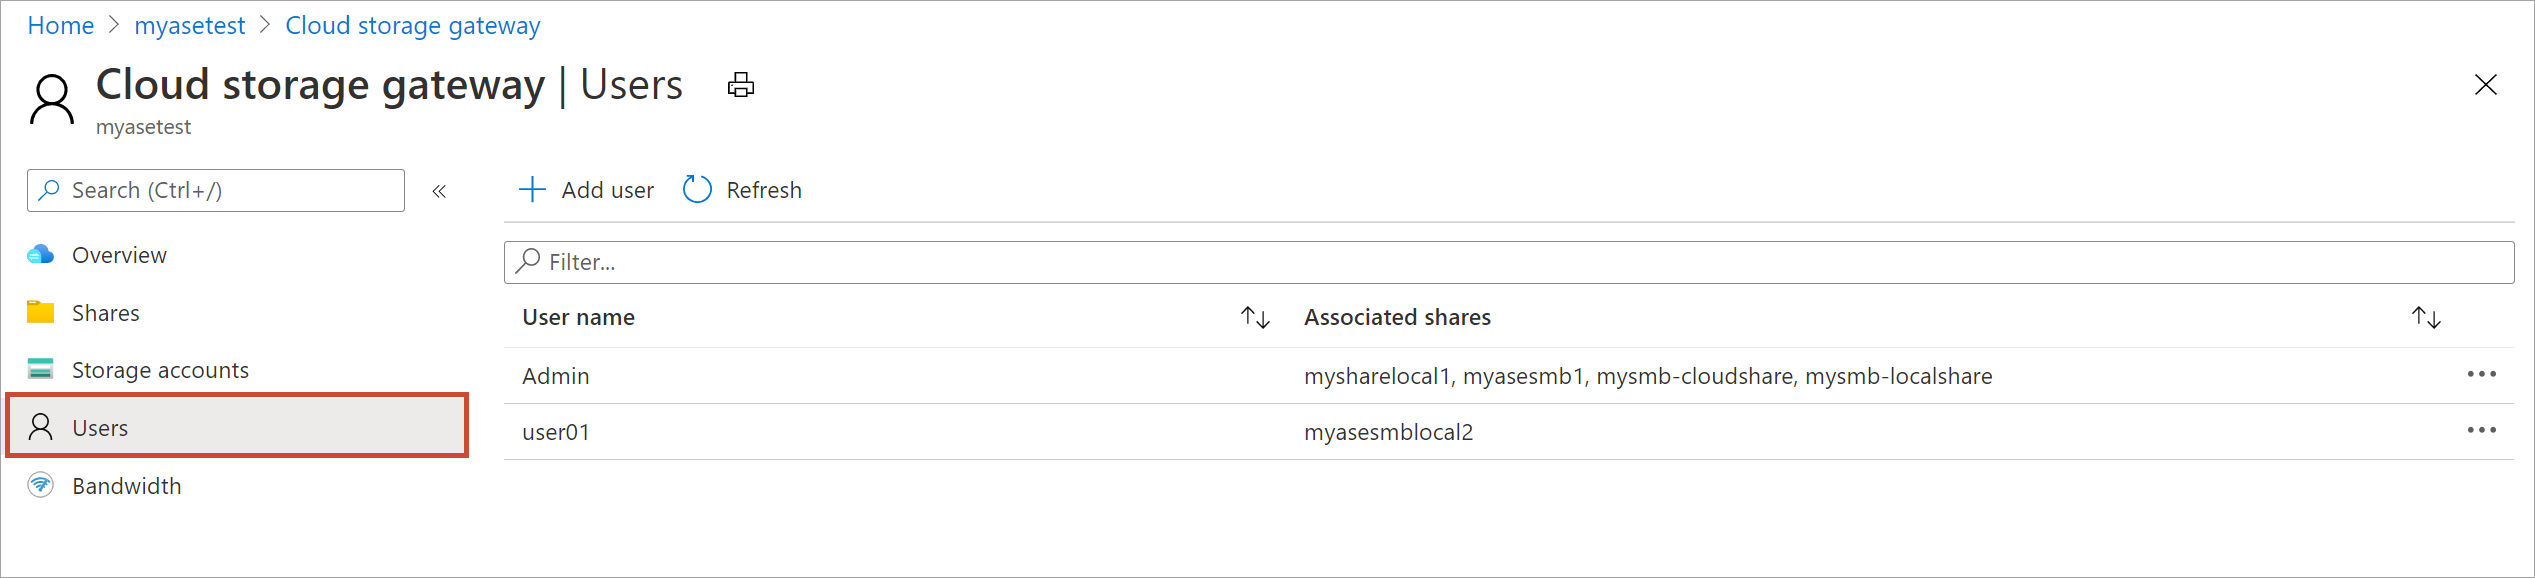
In the Azure portal, go to your Azure Stack Edge resource and then go to Users. Select + Add user on the command bar.
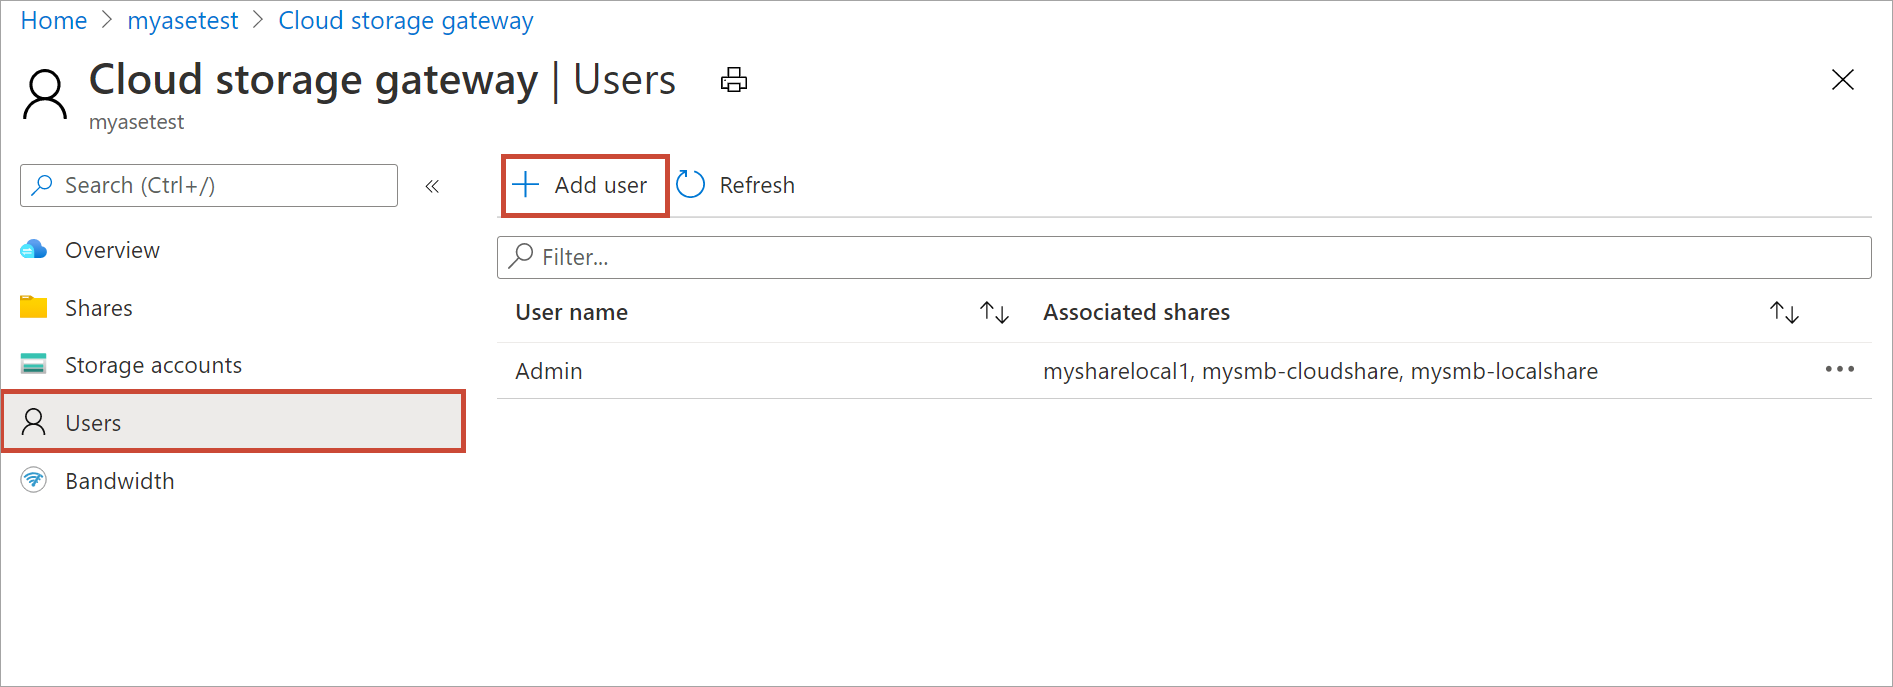
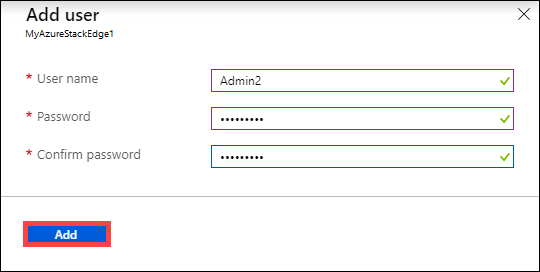
Specify the username and password for the user you want to add. Confirm the password and select Add.
Important
These users are reserved by the system and should not be used: Administrator, EdgeUser, EdgeSupport, HcsSetupUser, WDAGUtilityAccount, CLIUSR, DefaultAccount, Guest.
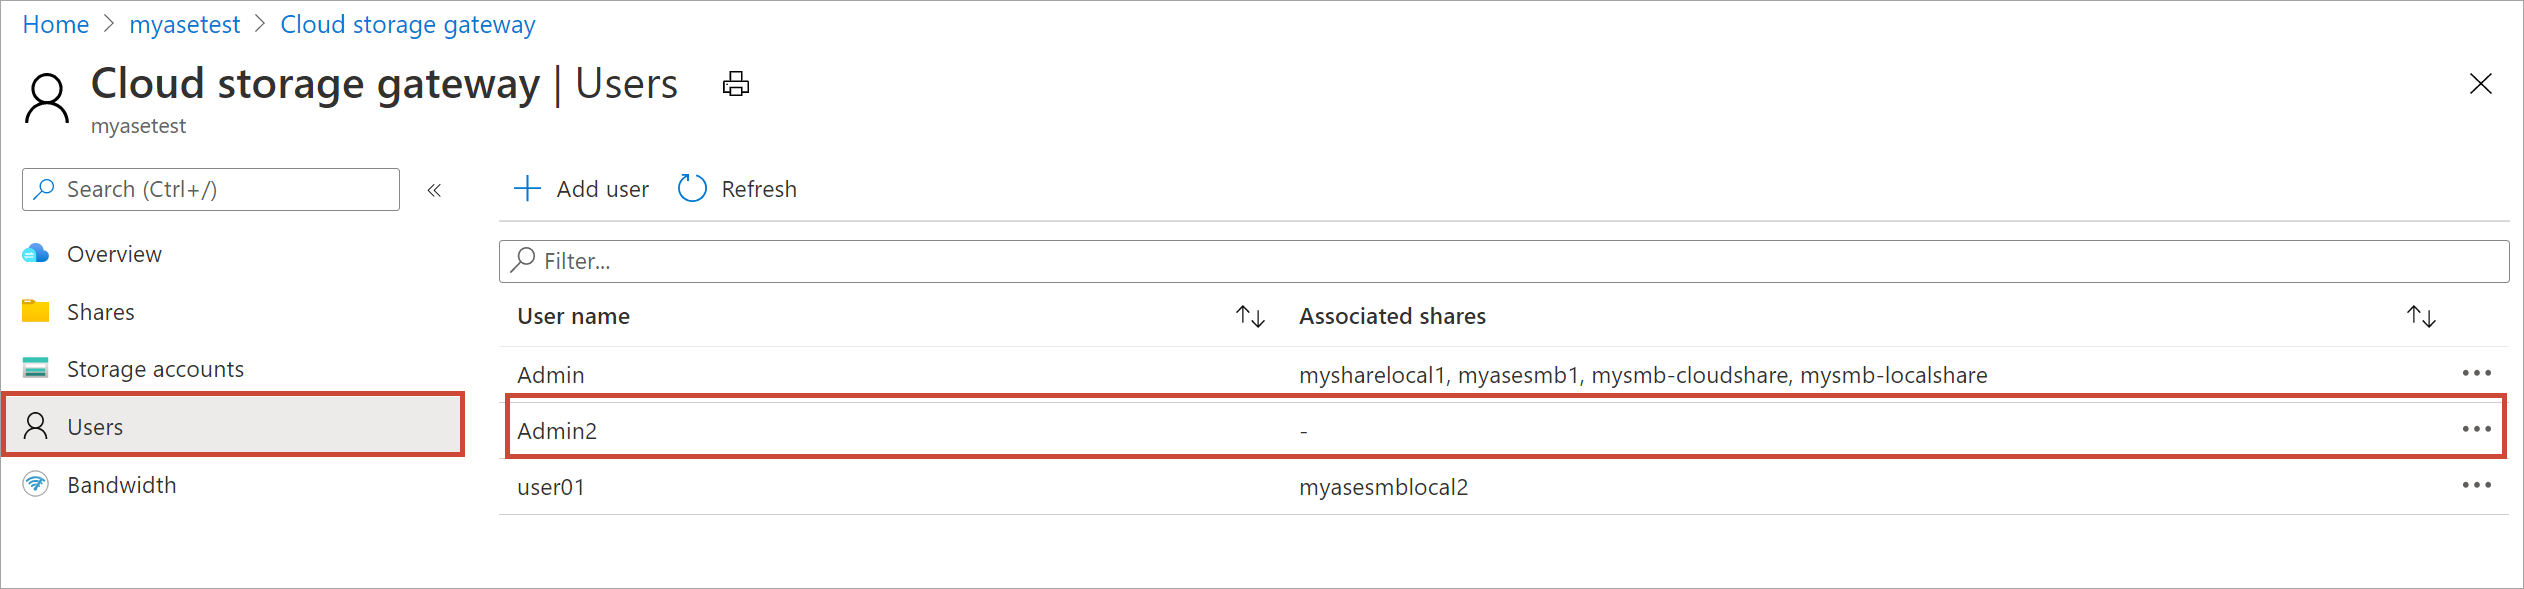
A notification is shown when the user creation starts and is completed. After the user is created, from the command bar, select Refresh to view the updated list of users.
Modify user
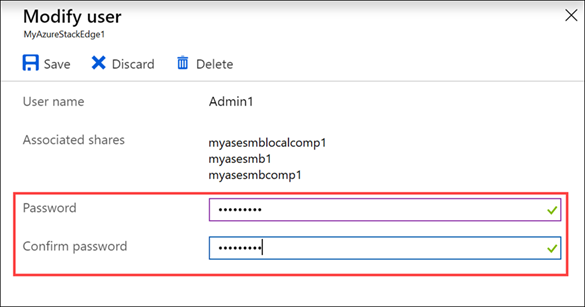
You can change the password associated with a user once the user is created. Select from the list of users. Enter and confirm the new password. Save the changes.
Delete a user
Do the following steps in the Azure portal to delete a user.
In the Azure portal, go to your Azure Stack Edge resource and then go to Users.
Select a user from the list of users and then select Delete.

When prompted, confirm the deletion.
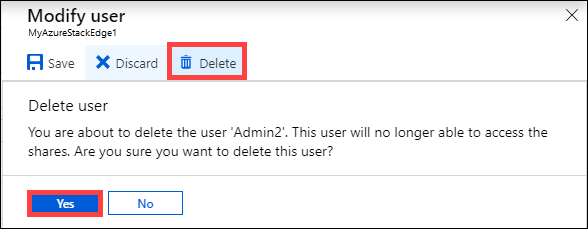
The list of users is updated to reflect the deleted user.
Next steps
- Learn how to Manage bandwidth.
Feedback
Coming soon: Throughout 2024 we will be phasing out GitHub Issues as the feedback mechanism for content and replacing it with a new feedback system. For more information see: https://aka.ms/ContentUserFeedback.
Submit and view feedback for