Tutorial: Implement Azure Databricks with an Azure Cosmos DB endpoint
This tutorial describes how to implement a VNet injected Databricks environment with a Service Endpoint enabled for Azure Cosmos DB.
In this tutorial you learn how to:
- Create an Azure Databricks workspace in a virtual network
- Create an Azure Cosmos DB service endpoint
- Create an Azure Cosmos DB account and import data
- Create an Azure Databricks cluster
- Query Azure Cosmos DB from an Azure Databricks notebook
Prerequisites
Before you start, do the following:
Download the Spark connector.
Download sample data from the NOAA National Centers for Environmental Information. Select a state or area and select Search. On the next page, accept the defaults and select Search. Then select CSV Download on the left side of the page to download the results.
Download the pre-compiled binary of the Azure Cosmos DB Data Migration Tool.
Create an Azure Cosmos DB service endpoint
Once you have deployed an Azure Databricks workspace to a virtual network, navigate to the virtual network in the Azure portal. Notice the public and private subnets that were created through the Databricks deployment.
Select the public-subnet and create an Azure Cosmos DB service endpoint. Then Save.

Create an Azure Cosmos DB account
Open the Azure portal. On the upper-left side of the screen, select Create a resource > Databases > Azure Cosmos DB.
Fill out the Instance Details on the Basics tab with the following settings:
Setting Value Subscription your subscription Resource Group your resource group Account Name db-vnet-service-endpoint API Core (SQL) Location West US Geo-Redundancy Disable Multi-region Writes Enable 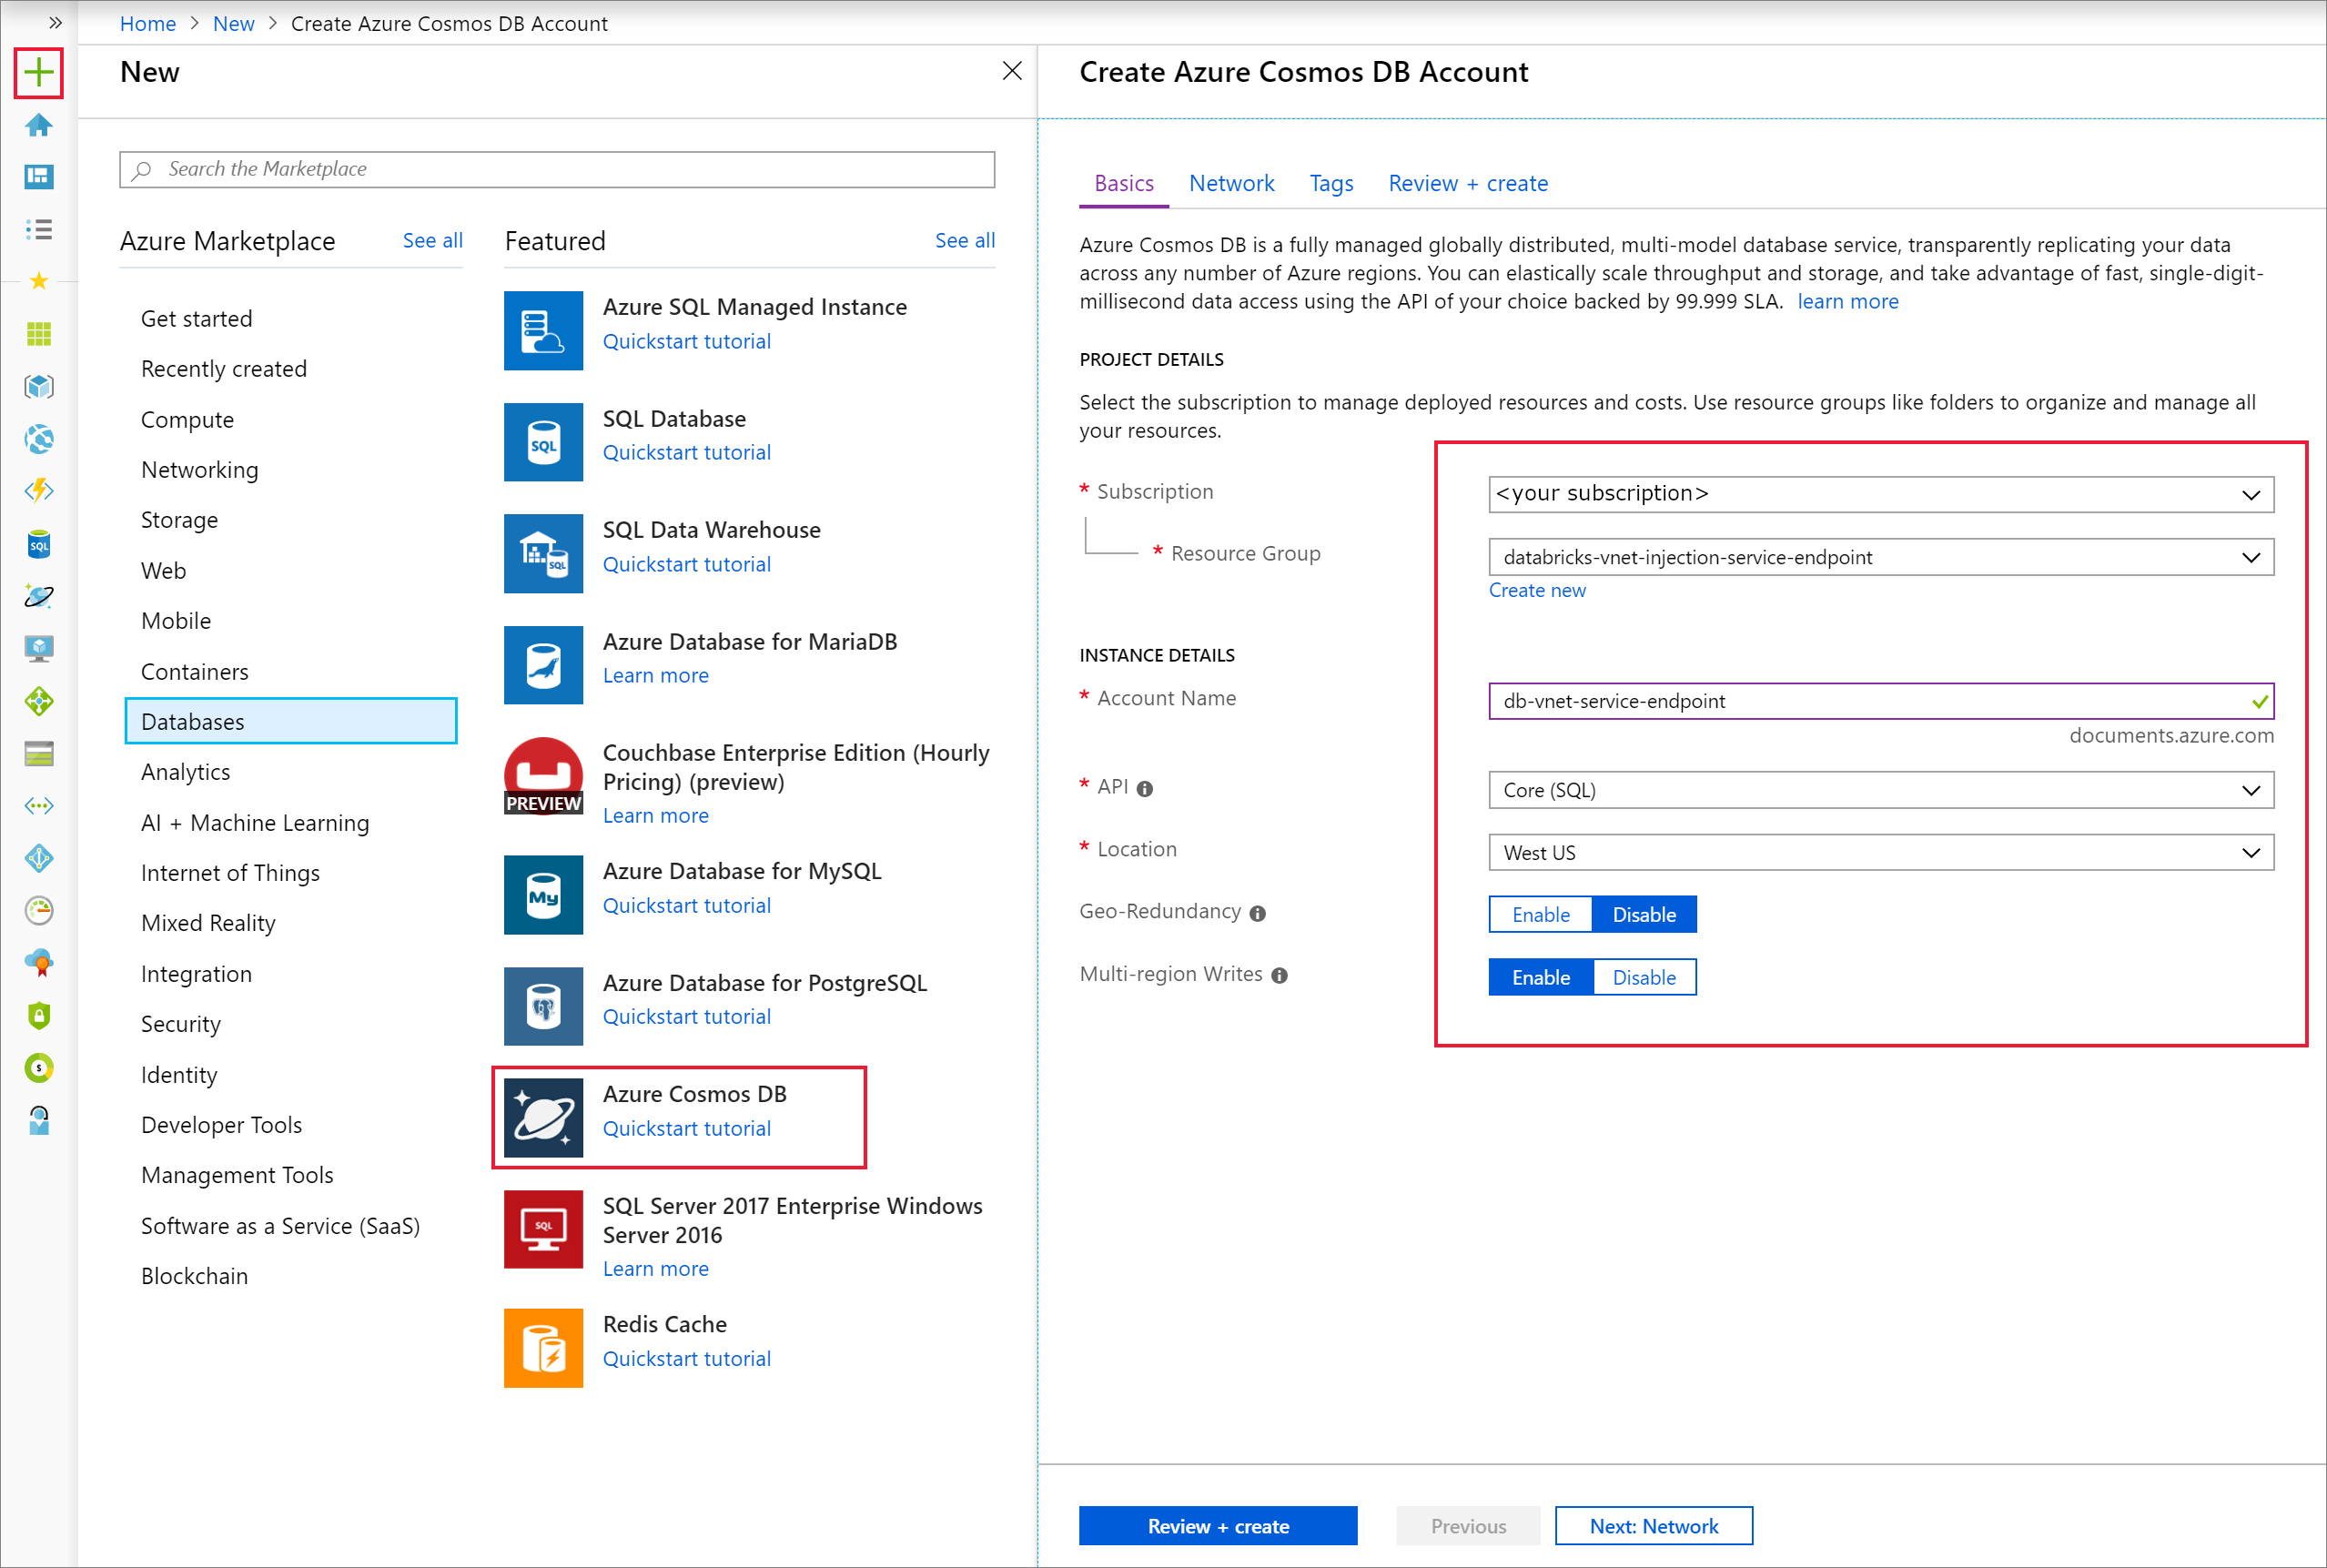
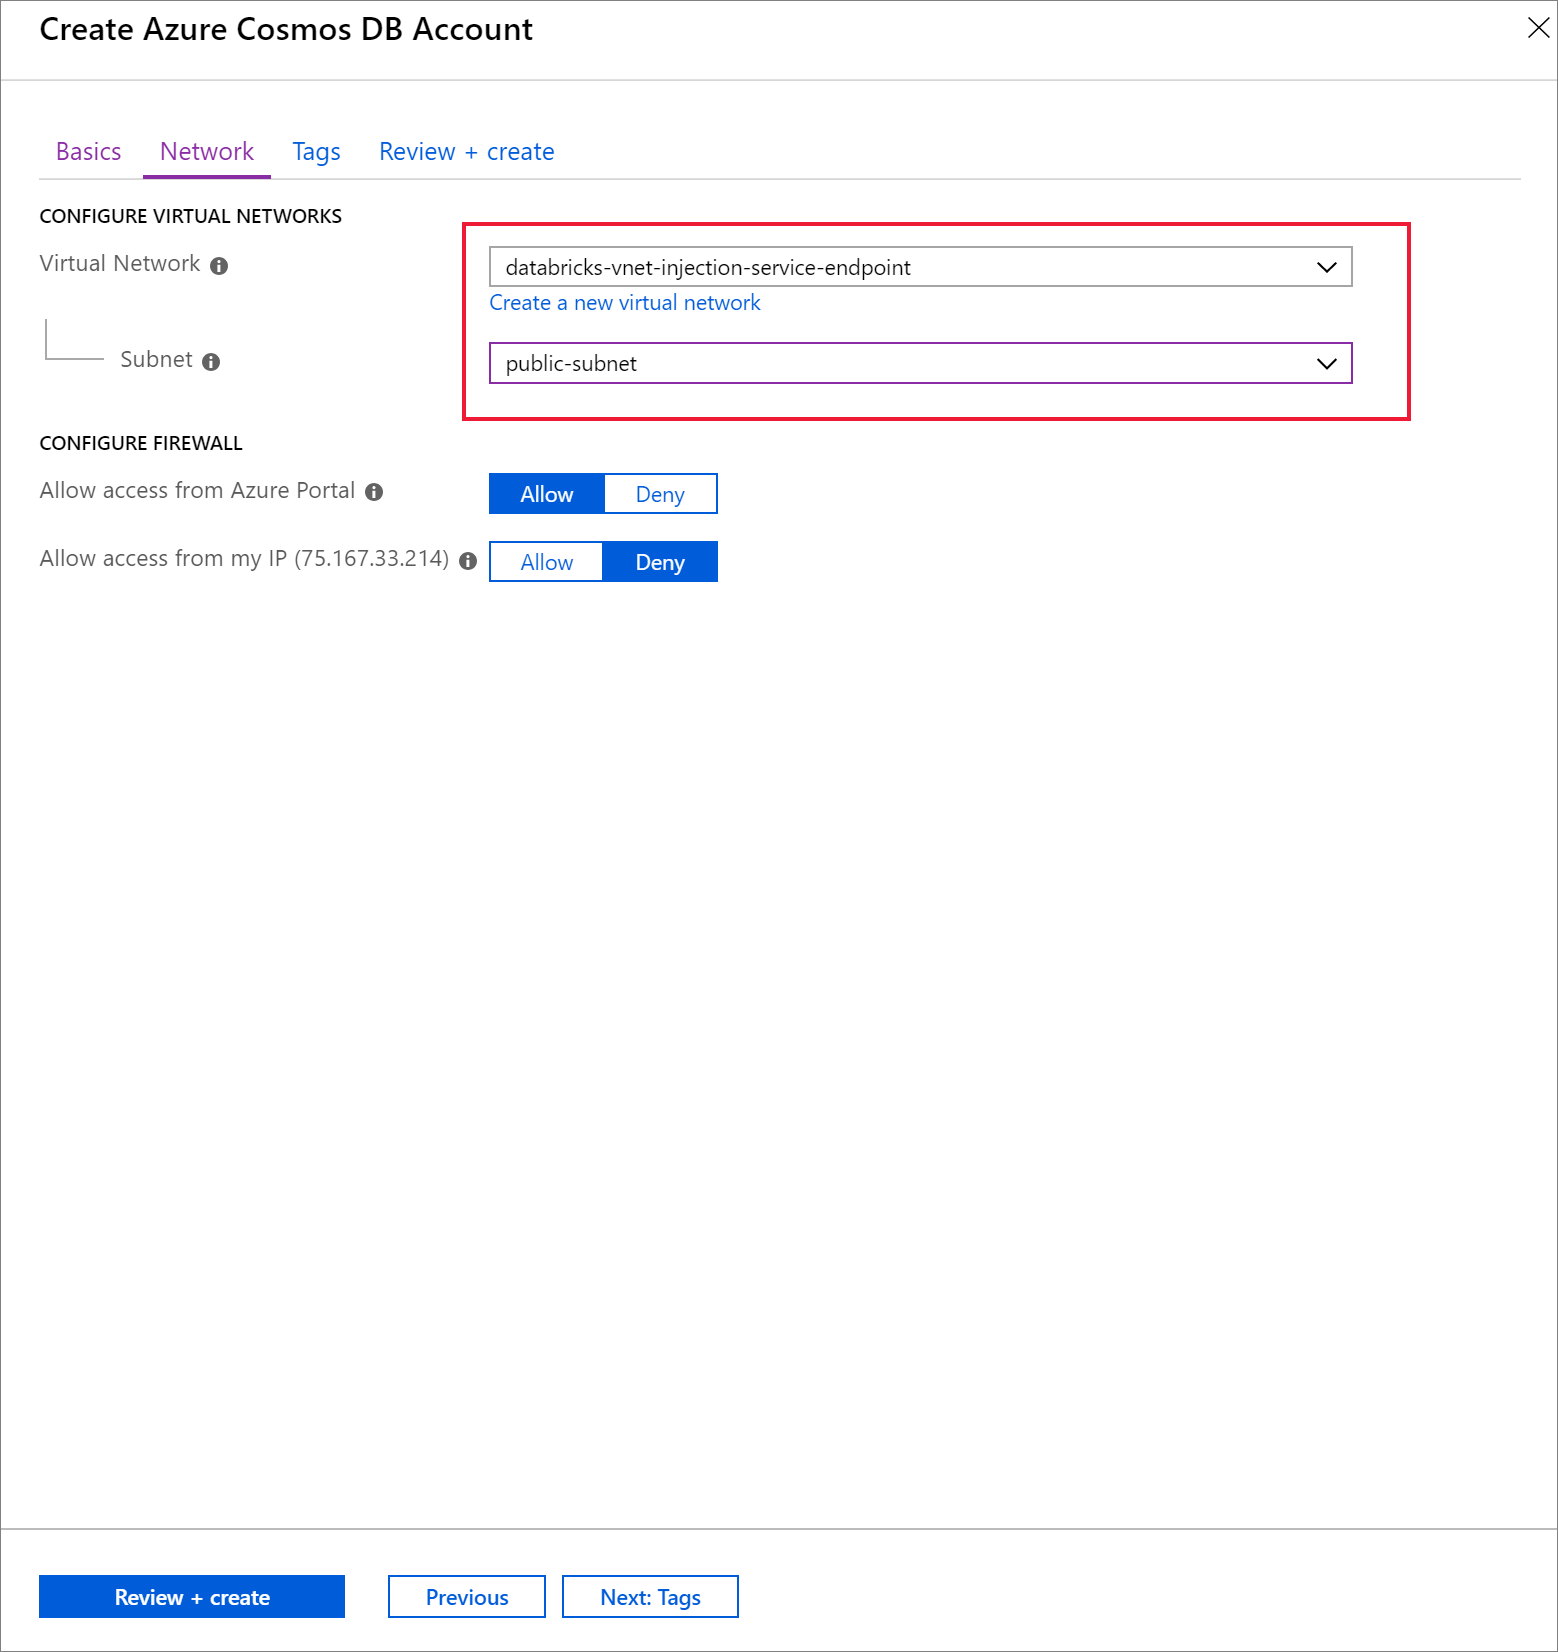
Select the Network tab and configure your virtual network.
a. Choose the virtual network you created as a prerequisite, and then select public-subnet. Notice that private-subnet has the note 'Microsoft AzureCosmosDB' endpoint is missing'. This is because you only enabled the Azure Cosmos DB service endpoint on the public-subnet.
b. Ensure you have Allow access from Azure portal enabled. This setting allows you to access your Azure Cosmos DB account from the Azure portal. If this option is set to Deny, you will receive errors when attempting to access your account.
Note
It is not necessary for this tutorial, but you can also enable Allow access from my IP if you want the ability to access your Azure Cosmos DB account from your local machine. For example, if you are connecting to your account using the Azure Cosmos DB SDK, you need to enable this setting. If it is disabled, you will receive "Access Denied" errors.
Select Review + Create, and then Create to create your Azure Cosmos DB account inside the virtual network.
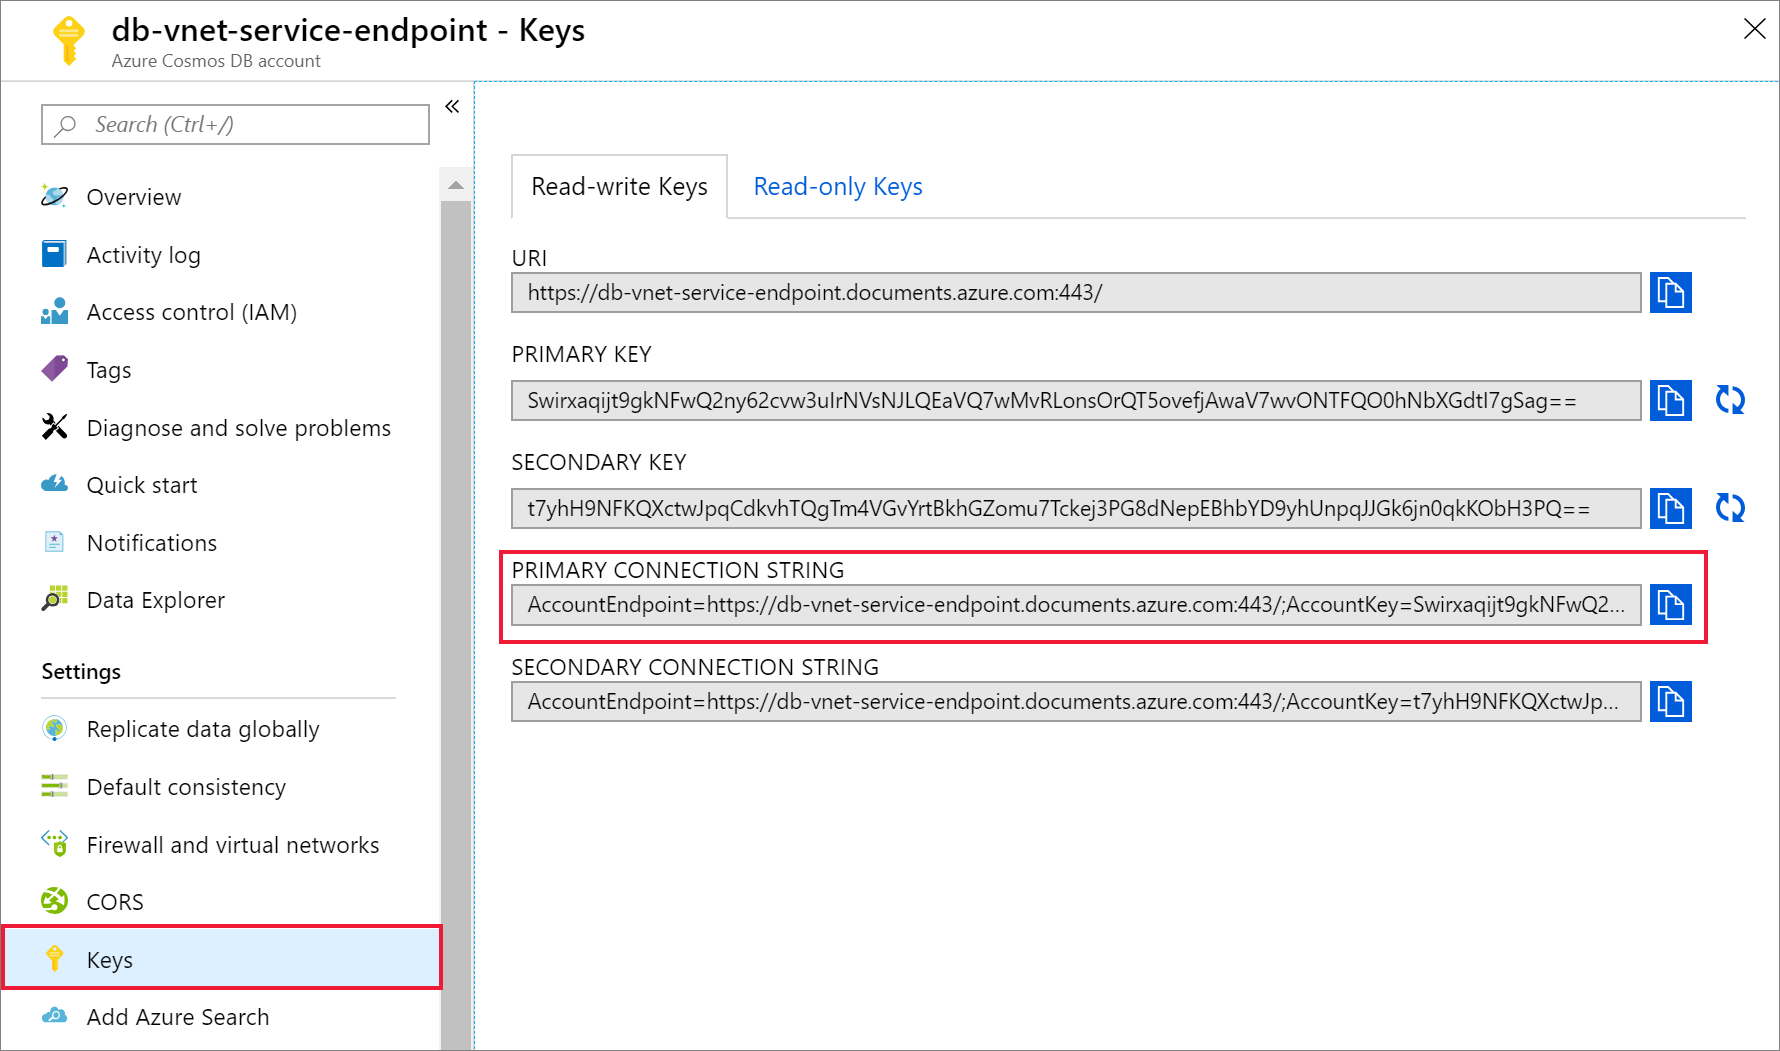
Once your Azure Cosmos DB account has been created, navigate to Keys under Settings. Copy the primary connection string and save it in a text editor for later use.
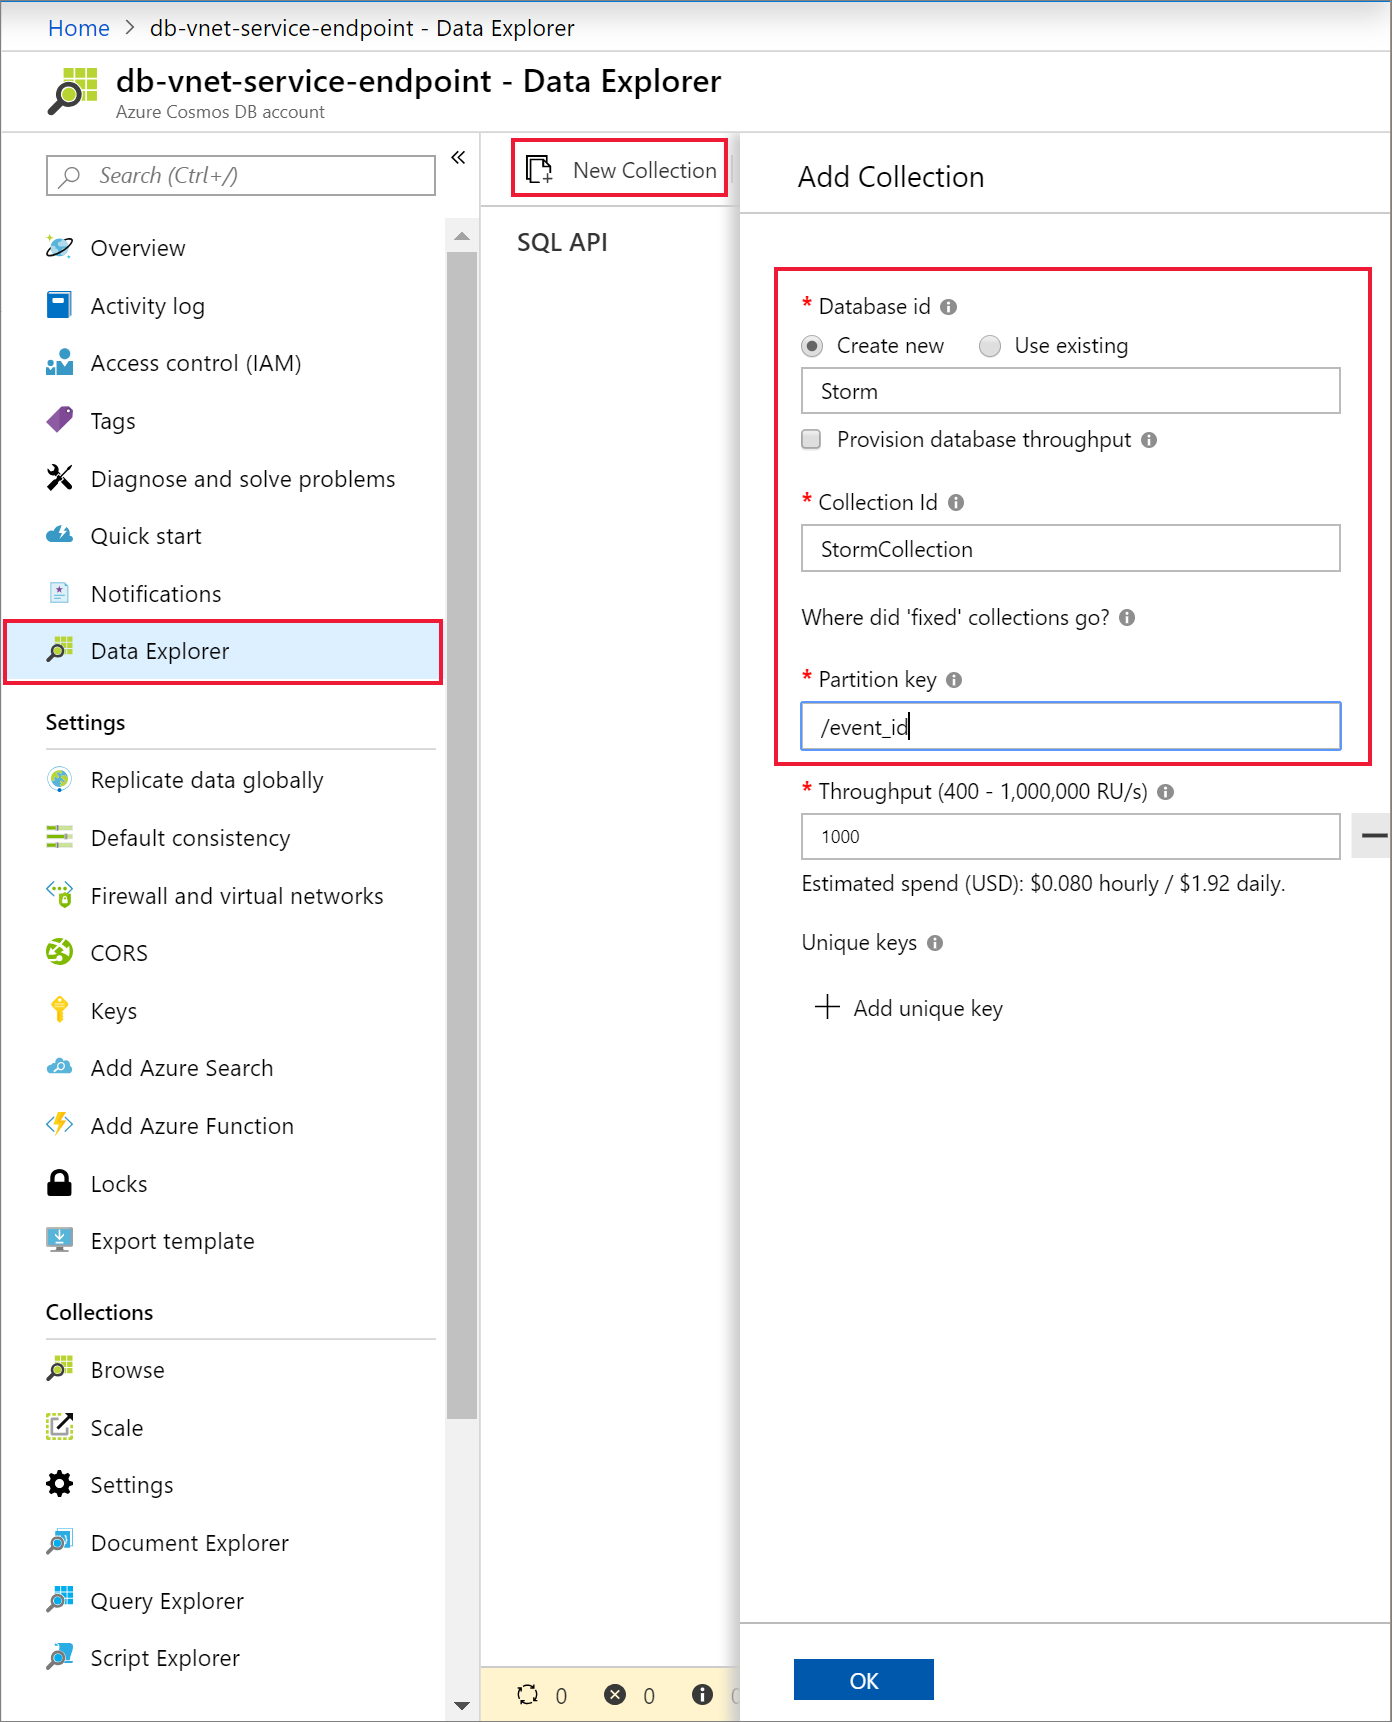
Select Data Explorer and New Container to add a new database and container to your Azure Cosmos DB account.
Upload data to Azure Cosmos DB
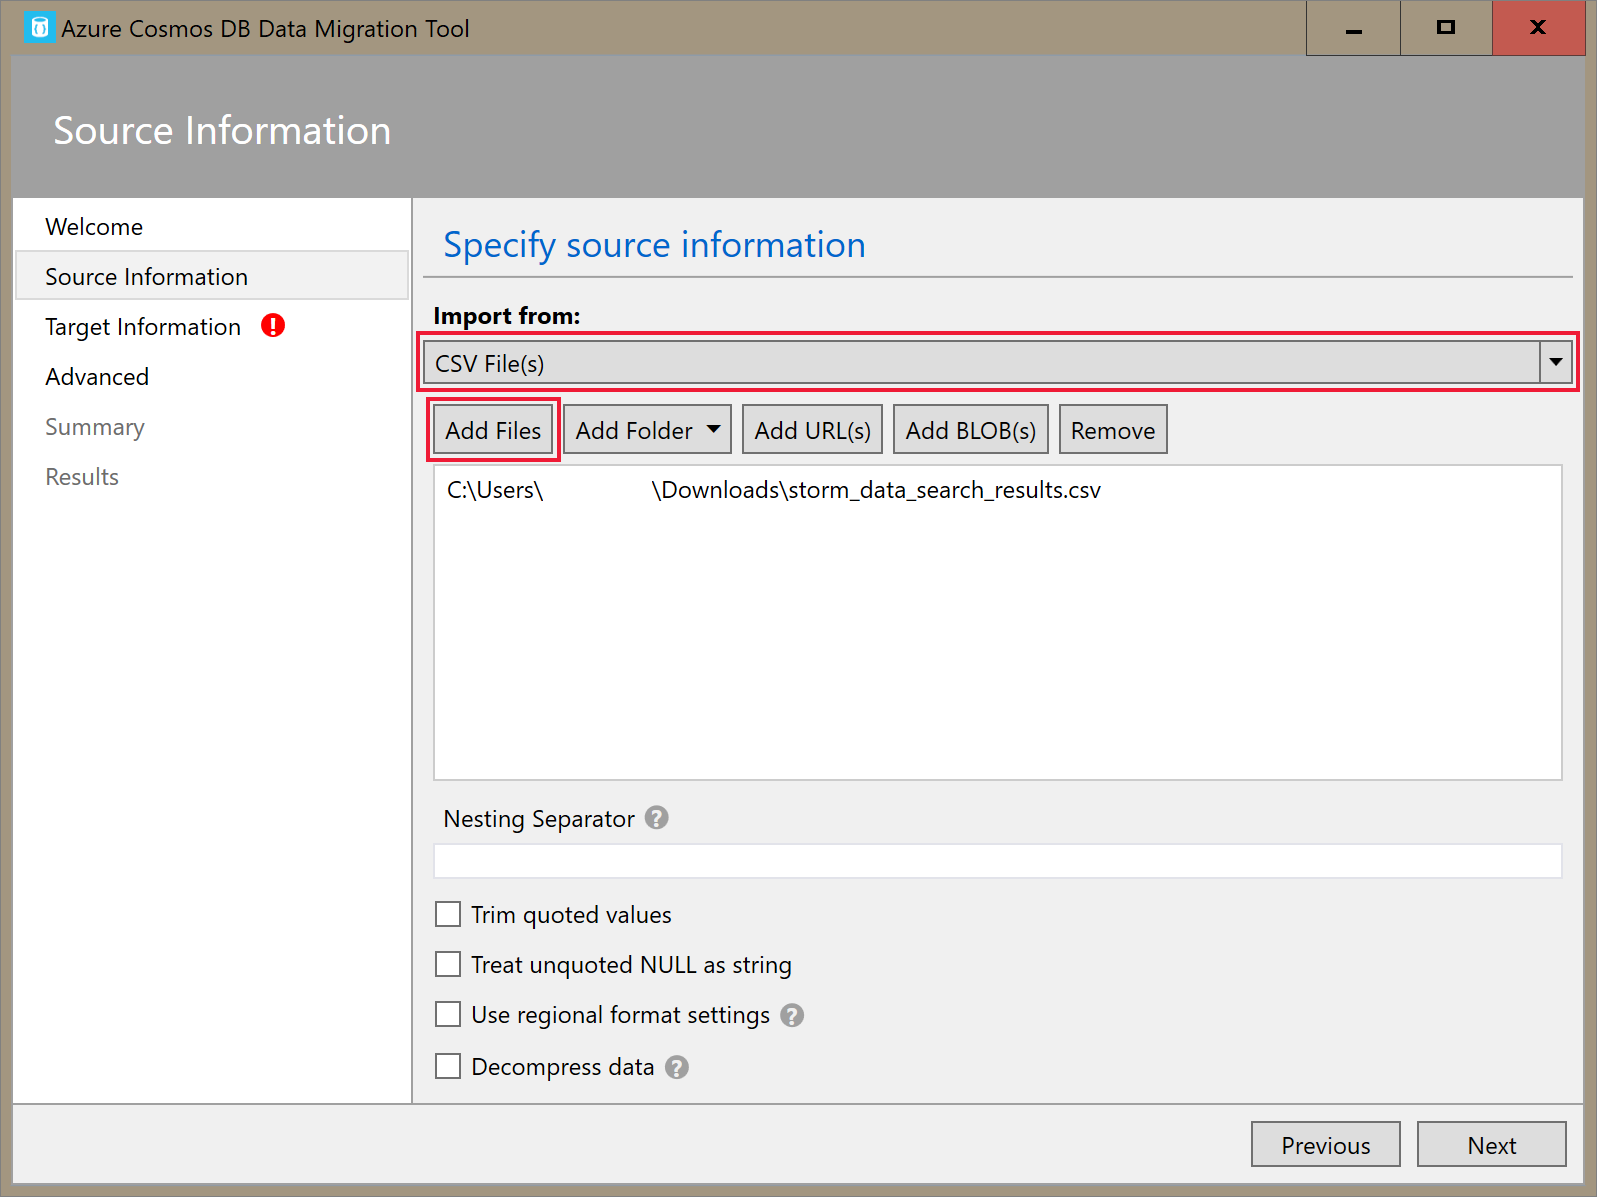
Open the graphical interface version of the data migration tool for Azure Cosmos DB, Dtui.exe.
On the Source Information tab, select CSV File(s) in the Import from dropdown. Then select Add Files and add the storm data CSV you downloaded as a prerequisite.
On the Target Information tab, input your connection string. The connection string format is
AccountEndpoint=<URL>;AccountKey=<key>;Database=<database>. The AccountEndpoint and AccountKey are included in the primary connection string you saved in the previous section. AppendDatabase=<your database name>to the end of the connection string, and select Verify. Then, add the Container name and partition key.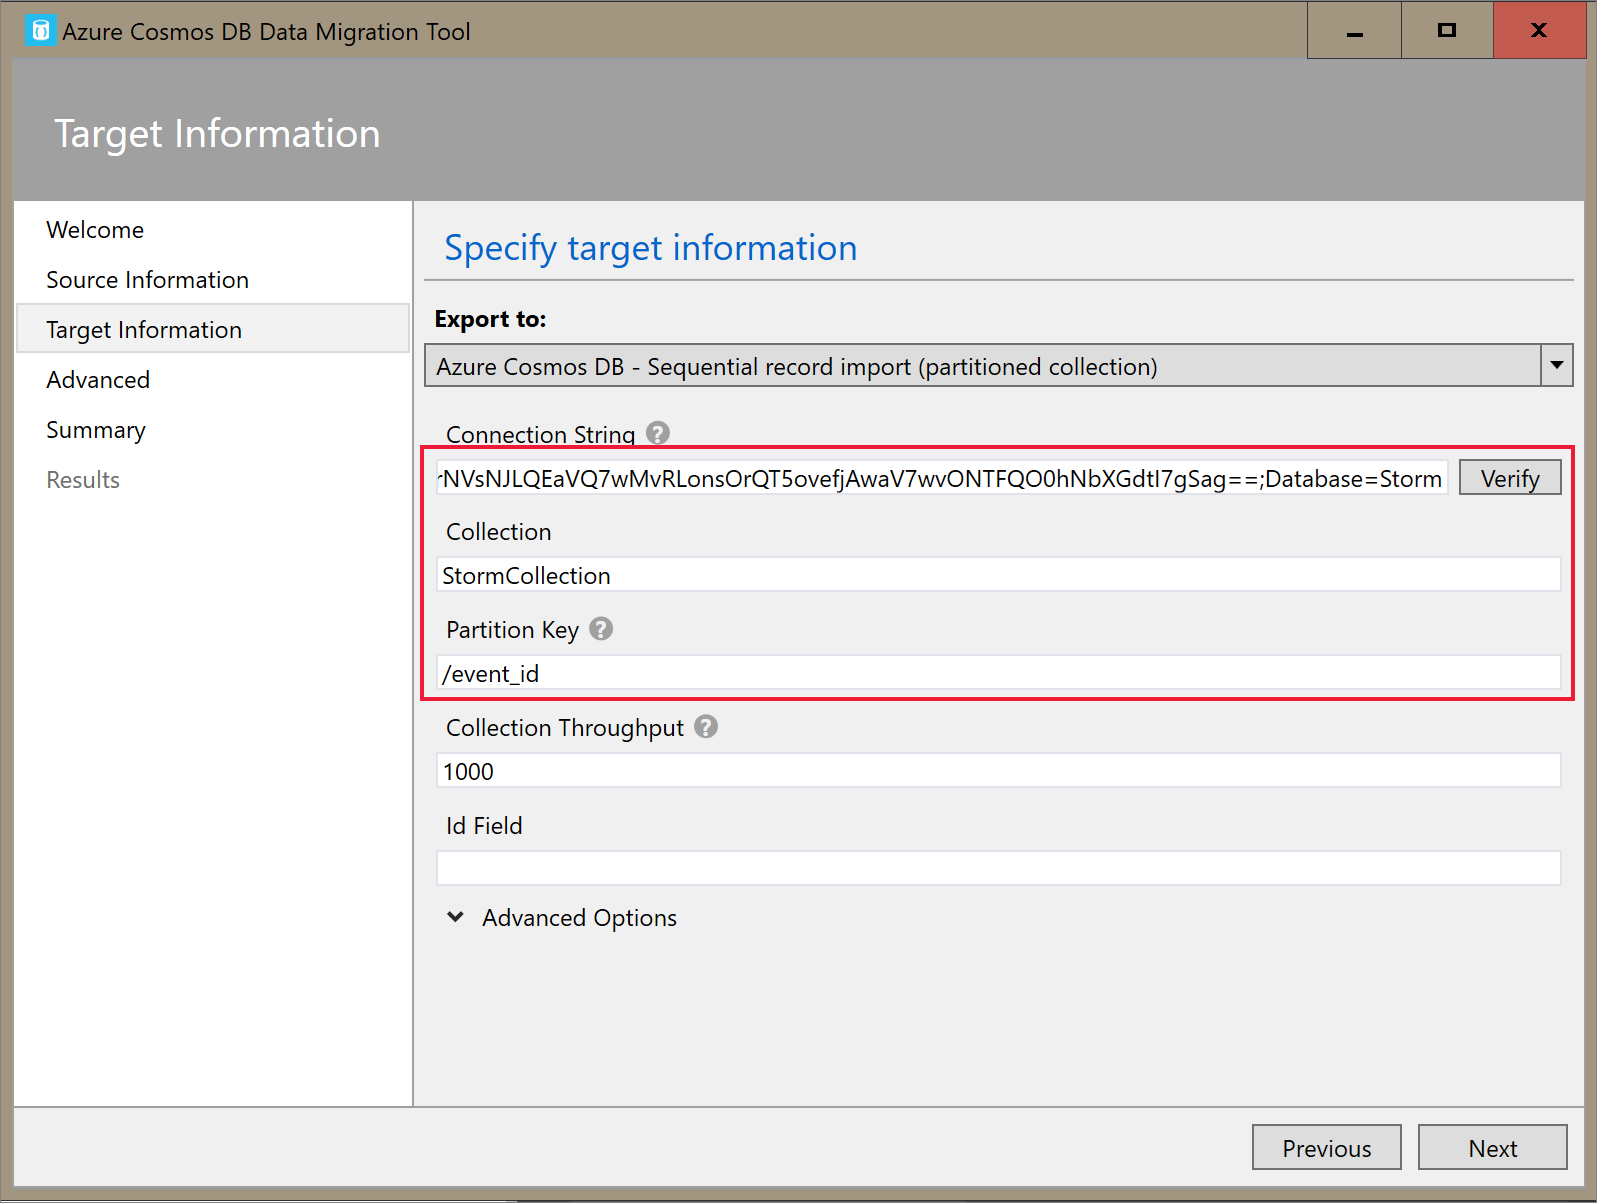
Select Next until you get to the Summary page. Then, select Import.
Create a cluster and add library
Navigate to your Azure Databricks service in the Azure portal and select Launch Workspace.
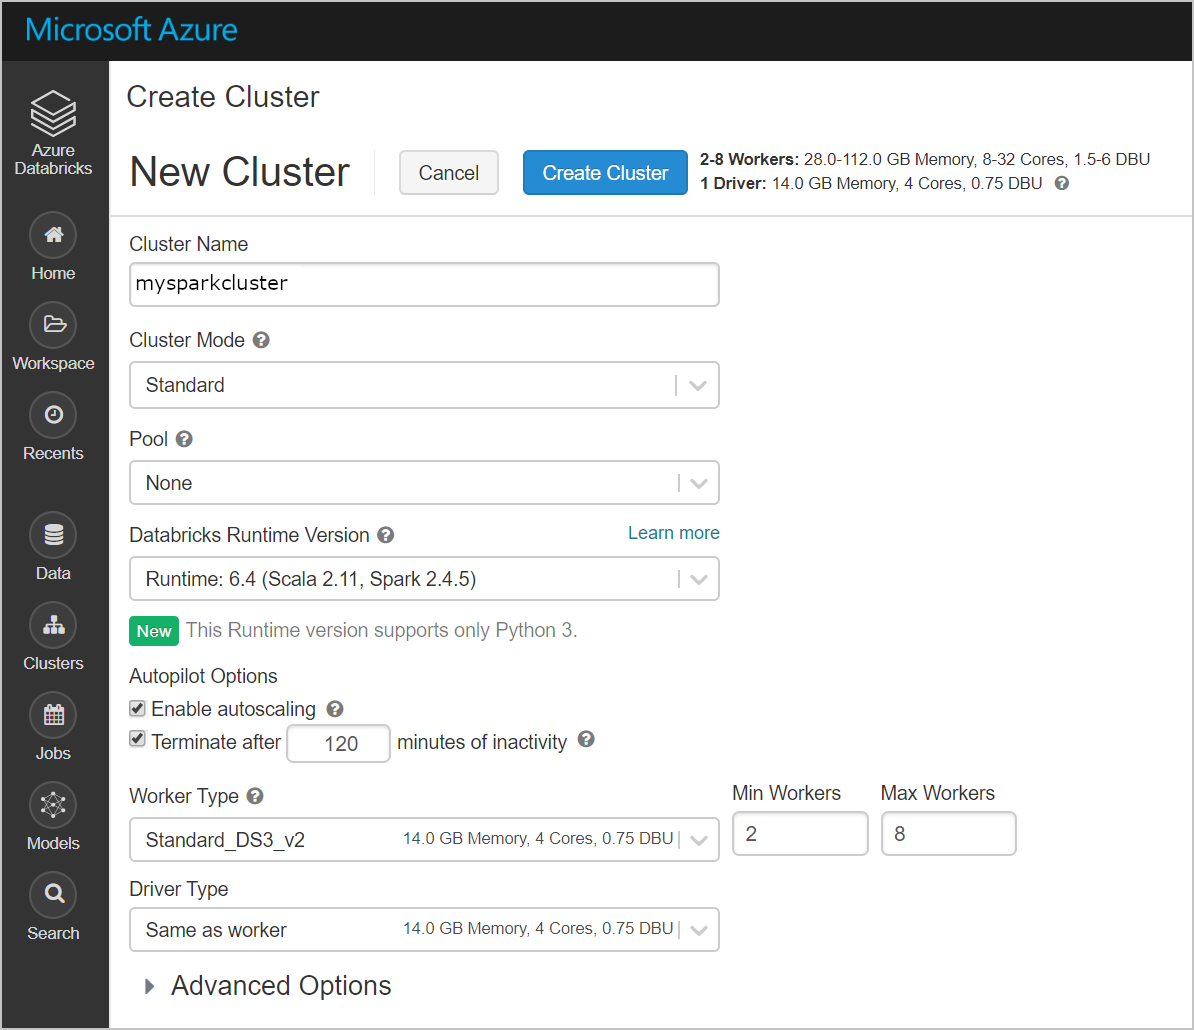
Create a new cluster. Choose a Cluster Name and accept the remaining default settings.
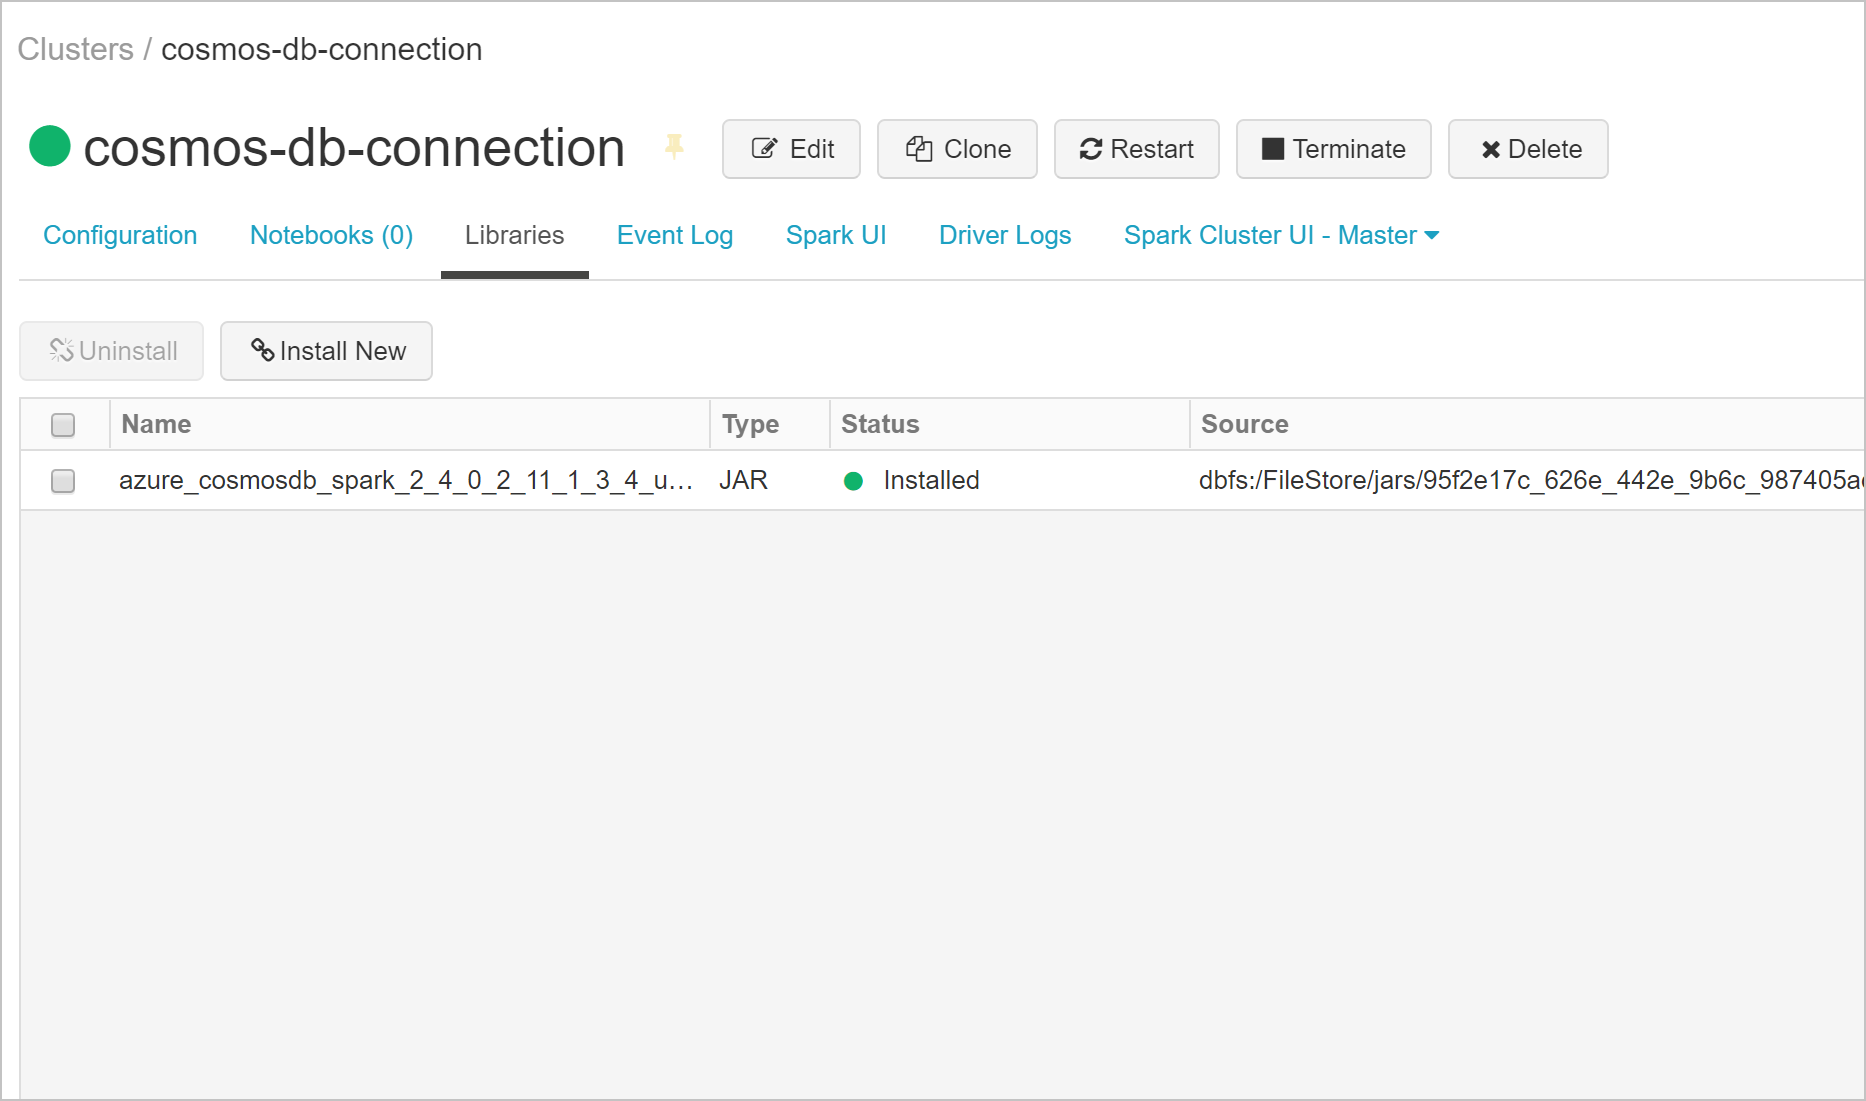
After your cluster is created, navigate to the cluster page and select the Libraries tab. Select Install New and upload the Spark connector jar file to install the library.
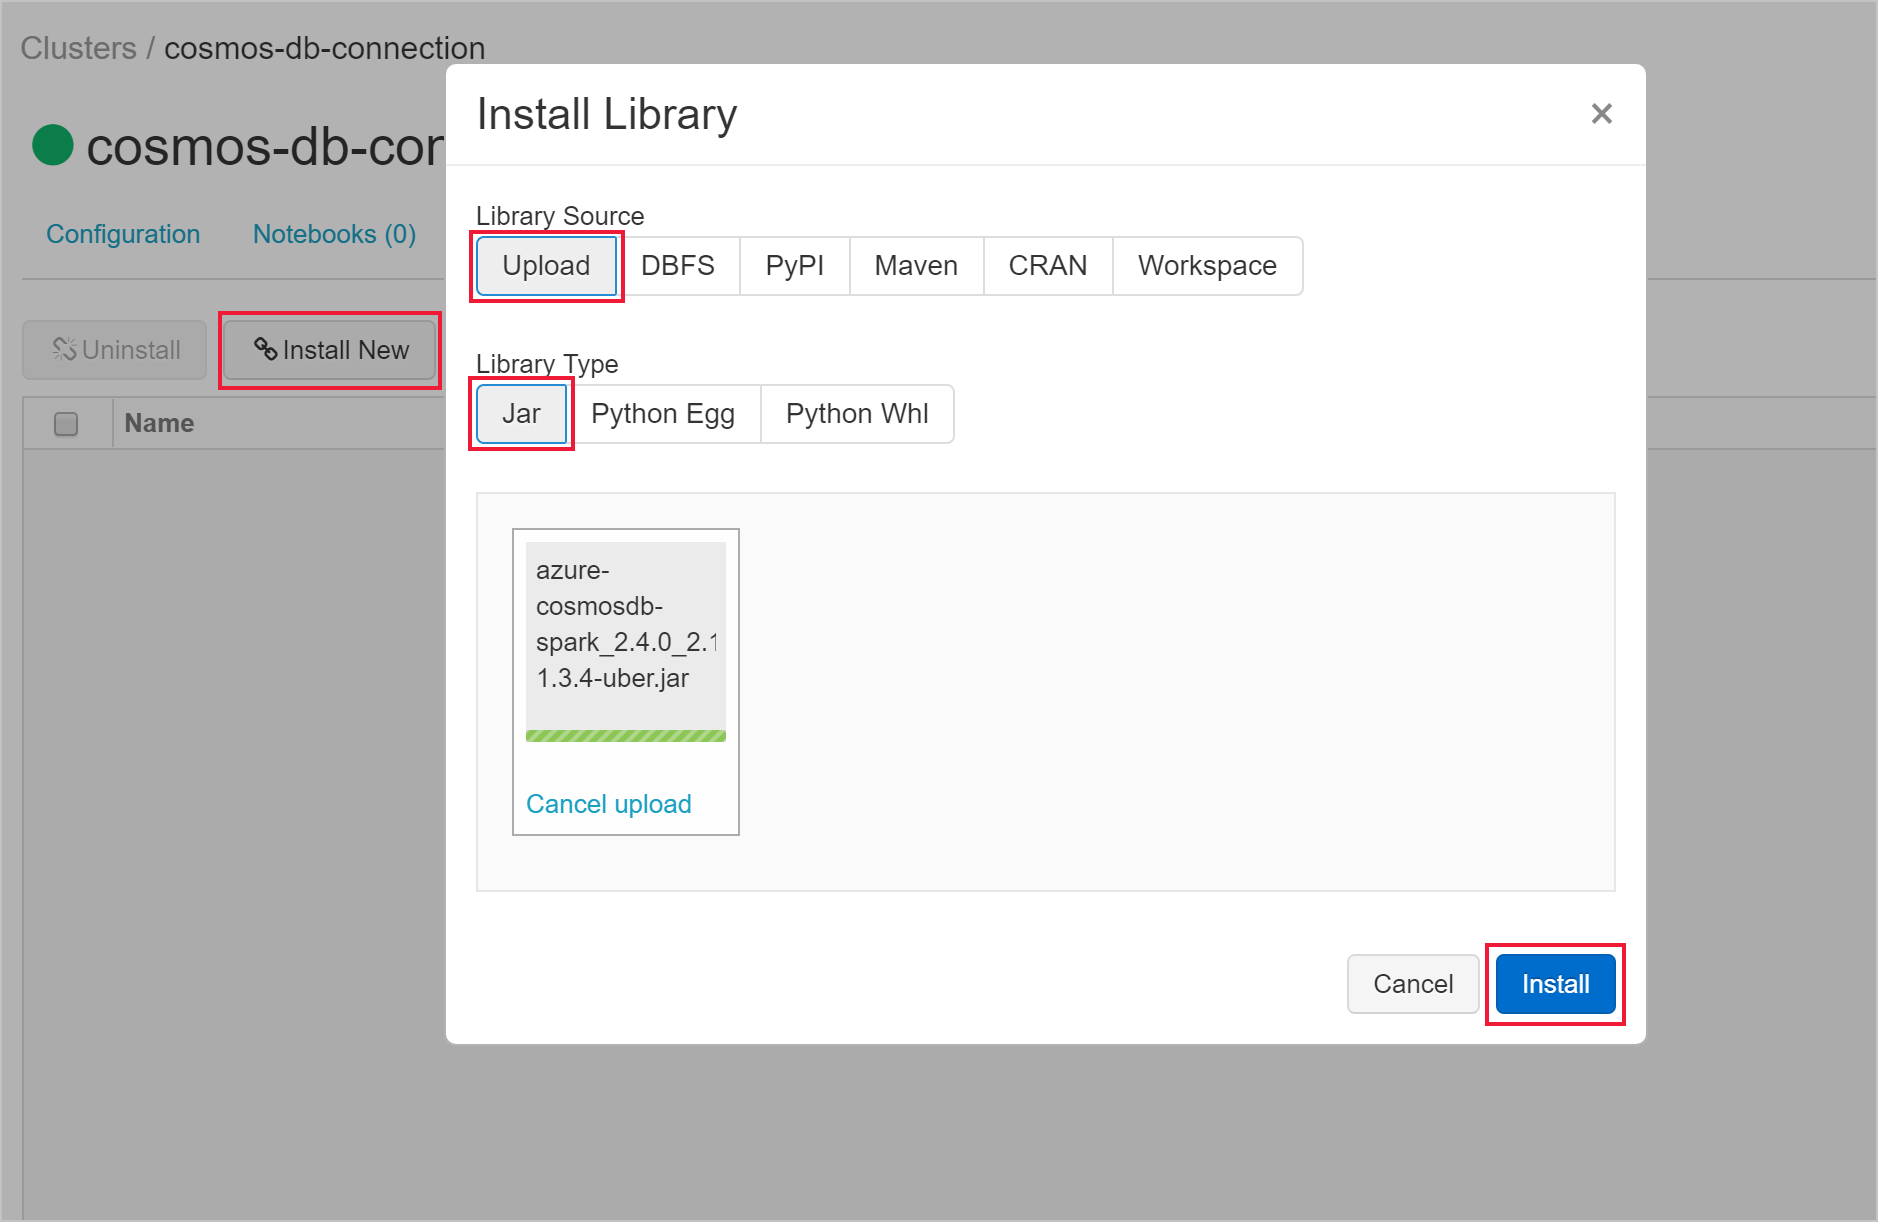
You can verify that the library was installed on the Libraries tab.
Query Azure Cosmos DB from a Databricks notebook
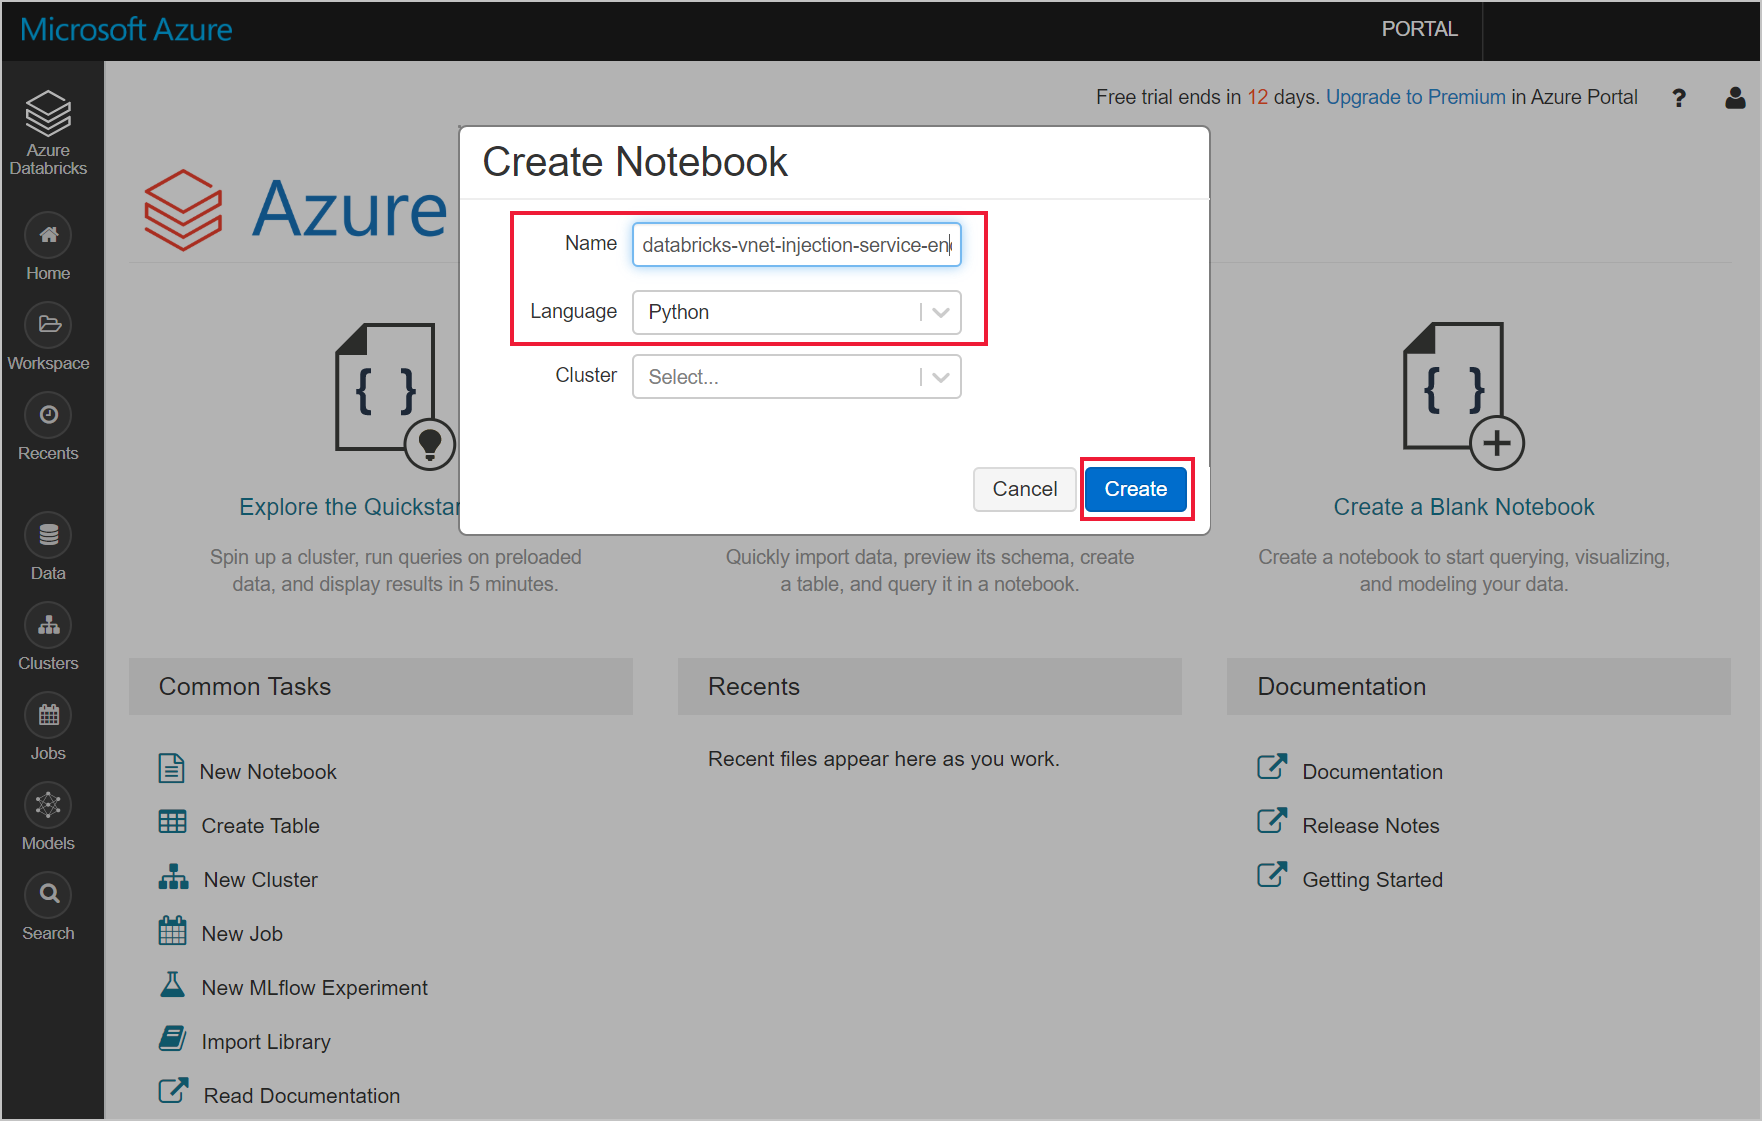
Navigate to your Azure Databricks workspace and create a new python notebook.
Run the following python code to set the Azure Cosmos DB connection configuration. Change the Endpoint, Masterkey, Database, and Container accordingly.
connectionConfig = {
  "Endpoint" : "https://<your Azure Cosmos DB account name.documents.azure.com:443/",
  "Masterkey" : "<your Azure Cosmos DB primary key>",
  "Database" : "<your database name>",
  "preferredRegions" : "West US 2",
  "Container": "<your container name>",
  "schema_samplesize" : "1000",
  "query_pagesize" : "200000",
  "query_custom" : "SELECT * FROM c"
}
Use the following python code to load the data and create a temporary view.
users = spark.read.format("com.microsoft.azure.cosmosdb.spark").options(**connectionConfig).load()
users.createOrReplaceTempView("storm")
Use the following magic command to execute a SQL statement that returns data.
%sql
select * from storm
You have successfully connected your VNet-injected Databricks workspace to a service-endpoint enabled Azure Cosmos DB resource. To read more about how to connect to Azure Cosmos DB, see Azure Cosmos DB Connector for Apache Spark.
Clean up resources
When no longer needed, delete the resource group, the Azure Databricks workspace, and all related resources. Deleting the job avoids unnecessary billing. If you're planning to use the Azure Databricks workspace in future, you can stop the cluster and restart it later. If you are not going to continue to use this Azure Databricks workspace, delete all resources you created in this tutorial by using the following steps:
From the left-hand menu in the Azure portal, click Resource groups and then click the name of the resource group you created.
On your resource group page, select Delete, type the name of the resource to delete in the text box, and then select Delete again.
Next steps
In this tutorial, you've deployed an Azure Databricks workspace to a virtual network, and used the Azure Cosmos DB Spark connector to query Azure Cosmos DB data from Databricks. To learn more about working with Azure Databricks in a virtual network, continue to the tutorial for using SQL Server with Azure Databricks.
Feedback
Coming soon: Throughout 2024 we will be phasing out GitHub Issues as the feedback mechanism for content and replacing it with a new feedback system. For more information see: https://aka.ms/ContentUserFeedback.
Submit and view feedback for