Configure Visual Studio Code for Go development
In this quickstart, you install and configure the Go for Visual Studio Code extension.
In the Go Developer Survey 2020 Results, 41% of respondents chose Visual Studio Code as their most preferred editor for Go. This makes Visual Studio Code the most popular editor for Go developers.
Visual Studio Code and the Go extension provide IntelliSense, code navigation, and advanced debugging. In this quickstart, you configure Visual Studio Code. Then you write, run, and debug a sample Go program.
1. Install Go
To install Go, follow these steps:
- In a web browser, go to go.dev/doc/install.
- Download the version for your operating system.
- Once downloaded, run the installer.
- Open a command prompt, then run
go versionto confirm Go was installed.
2. Install Visual Studio Code
Follow these steps to install Visual Studio Code:
- In a web browser, go to code.visualstudio.com.
- Download the version for your operating system, supports Windows, Linux, and macOS.
- Once downloaded, run the installer. This will only take a minute.
3. Install the Go extension
| Instructions | Screenshot |
|---|---|
| In Visual Studio Code, bring up the Extensions view by clicking on the Extensions icon in the Activity Bar. Or use keyboard shortcut (Ctrl+Shift+X). |

|
| Search for the Go extension, then select install. |

|
4. Update the Go tools
| Instructions | Screenshot |
|---|---|
| In Visual Studio Code, open Command Palette's Help > Show All Commands. Or use the keyboard shortcut (Ctrl+Shift+P) |
|
Search for Go: Install/Update tools then run the command from the pallet |

|
| When prompted, select all the available Go tools then click OK. |

|
| Wait for the Go tools to finish updating. |

|
5. Write a sample Go program
| Instructions | Screenshot |
|---|---|
| In Visual Studio Code, open the folder where you'll create the root directory of your Go application. To open the folder, select the Explorer icon in the Activity Bar then click Open Folder. |

|
Click New Folder in the Explorer panel, then Create the root director for your sample Go application named sample-app |

|
Select New File in the Explorer panel, then name the file main.go |

|
Open a terminal, Terminal > New Terminal, then run the command go mod init sample-app to initialize your sample Go app. |

|
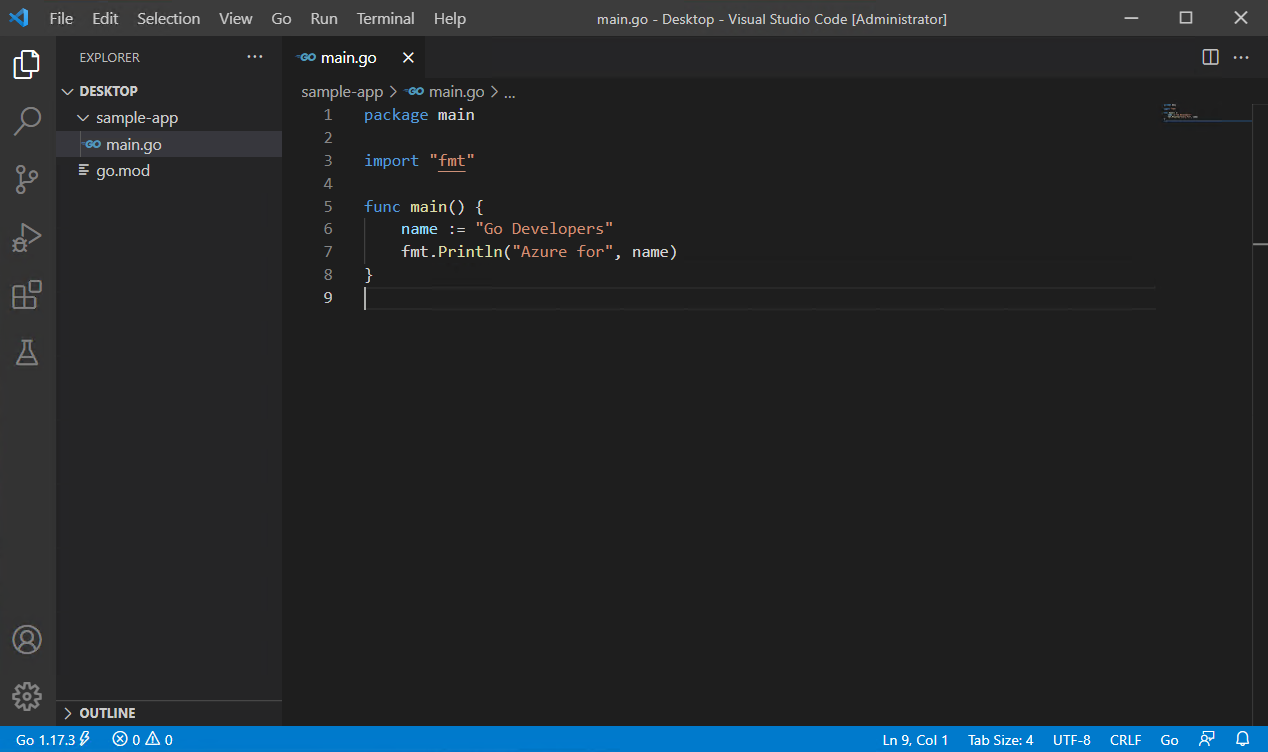
Copy the following code into the main.go file. |

|
Sample code:
package main

import "fmt"

func main() {
    name := "Go Developers"
    fmt.Println("Azure for", name)
}
6. Run the debugger
| Instructions | Screenshot |
|---|---|
| Create a break point on line 7 by clicking to the left of the numbered line. Or place your cursor on line 7 and hit F9. |

|
| Bring up the Debug view by clicking on the debug icon in the Activity Bar on the side of Visual Studio Code. Or use keyboard shortcut (Ctrl+Shift+D). |

|
Select Run and Debug, or hit F5 to run the debugger. Then Hover over the variable name on line 7 to see its value. Exit the debugger by clicking Continue on the debugger bar or hit F5. |

|
Next steps
Feedback
Coming soon: Throughout 2024 we will be phasing out GitHub Issues as the feedback mechanism for content and replacing it with a new feedback system. For more information see: https://aka.ms/ContentUserFeedback.
Submit and view feedback for