Change a project process from Basic to Agile
Azure DevOps Services | Azure DevOps Server 2022 | Azure DevOps Server 2020
If you want to switch from the Basic process to an inherited Agile process for your project, follow the steps in this article.
Before you change your process, you should learn about the new process you're switching to. The Basic and Agile processes have the same Task and Epic work item types, but most of the values for the State and Reason fields are different.
| Process | Work item types | Workflow |
|---|---|---|
| Basic | 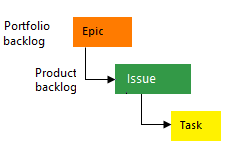 |
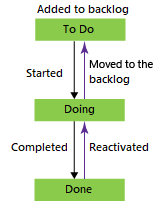 |
| Agile | 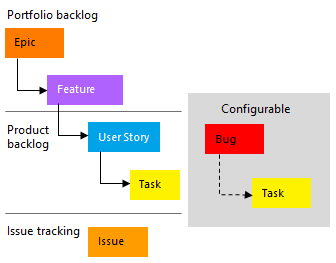 |
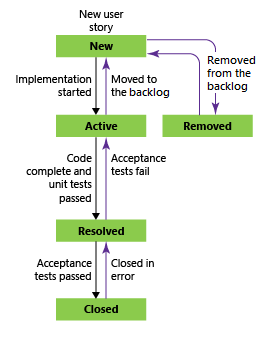 |
Some of the benefits of changing your process from Basic to Agile are:
- You can use separate bugs to track code defects, instead of issues and user stories
- You can follow the Agile workflow states, which are different from the Basic process states
- You can access both Feature and Epic portfolio backlogs, which help you organize your work items
- You can comply with your organization’s requirement to use a customized inherited process based on the Agile process
For more information, see About processes and process templates.
Prerequisites
- To create, delete or edit a process, you must be a member of the Project Collection Administrators group, or have the collection-level permissions Create process, Delete process, Edit process, or Delete a field from organization. For more information, see Set permissions and access for work tracking, Customize an inherited process.
- Even if you have Basic or Stakeholder access, you can still change a process if someone gives you permissions to do so.
- To update Kanban boards, you must be the team administrator or a member of the Project Administrators group
- To update and change the type of your existing work items, you must be a member of the project.
Note
The images you see from your web portal may differ from the images you see in this article. These differences result from updates made to Azure DevOps. However, the basic functionality available to you remains the same unless explicitly mentioned.
Change the process
Sign in to your organization:
https://dev.azure.com/{yourorganization}.Select
 Organization settings.
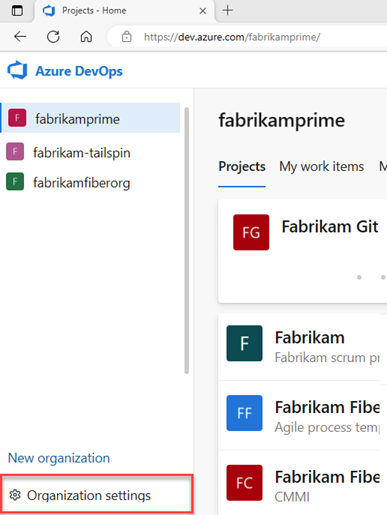
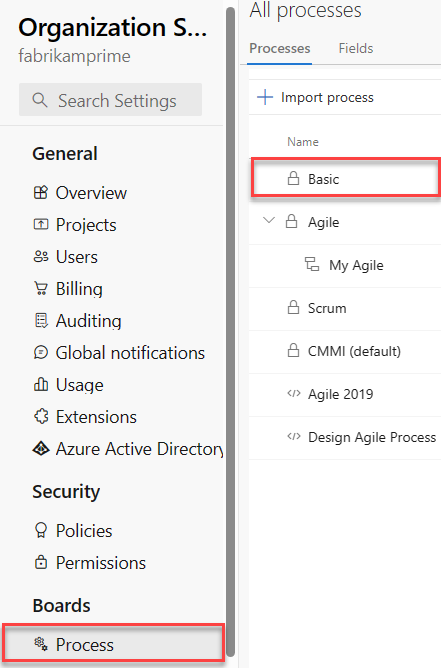
Select Process, and then choose Basic.
Choose Projects.

For the project you want to change, select the
 actions icon and select Change process and follow the steps in the wizard.
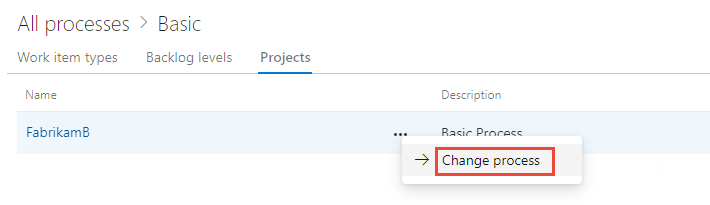
Choose Agile from the dropdown menu, and then select Save.

The wizard displays the following information. Notice the steps to manually update your work items and board settings and Close the window when you're done.
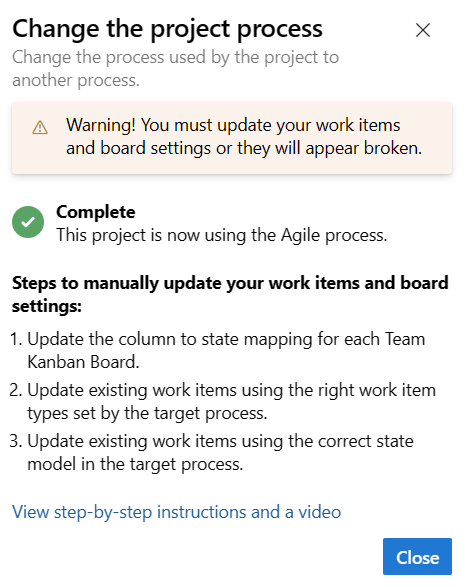
(Optional) If you had existing work items, manually update work items and board settings.
- Update the column to state mapping for each team Kanban board.
- Update existing work items using the work item types set by the target process.
- Update existing work items using the correct state model of the target process.
Update Kanban board column-to-state settings
You can customize Kanban boards to display intermediate columns. For each column added, you must choose a valid workflow state for the work item types displayed on the board. To learn more, see Workflow states & state categories.
For each team, open your Kanban board, and then select Correct this now or select the
 gear icon to configure the board settings.
The Settings dialog opens. Those tabs that display a
 required icon need correction.
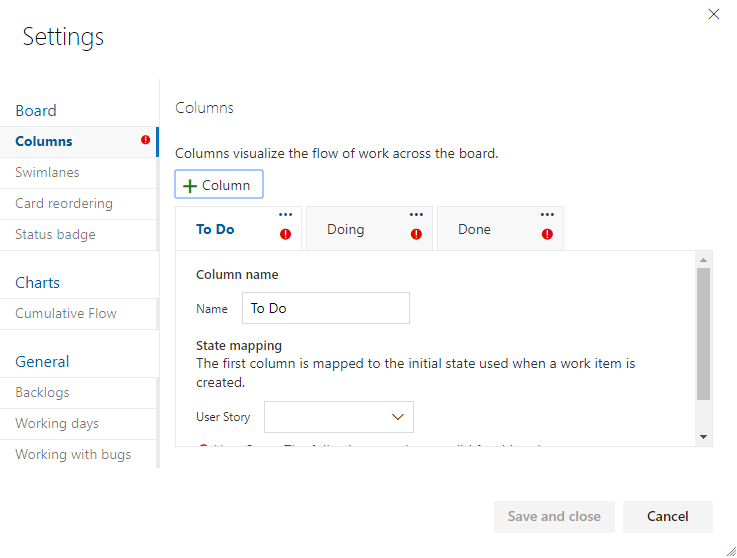
Rename each column and choose the correct state for each column so that the column-to-state mapping is correct. As needed, add one or more columns. Save your work when you're done. For more information, see Manage columns on your Kanban board.
Update work items
Create a query to get a list of all Issues, Tasks, and Epics.

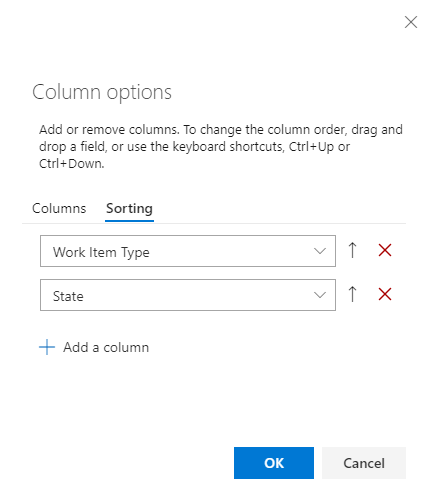
Edit your columns to be sure you show the State and Reason fields. Select the Sorting tab, and then set it to sort the list by work item type and state value.
For more information, see Bulk add and modify work items in Excel.
Select Results to show the list of work items.
Highlight all Issues, choose the
actions icon, select Change type, and change the type to User Story and Save.
You might receive errors where the work item type and the state are mismatched. In that case, you can't save your changes until you update the state, which is described in the next step.
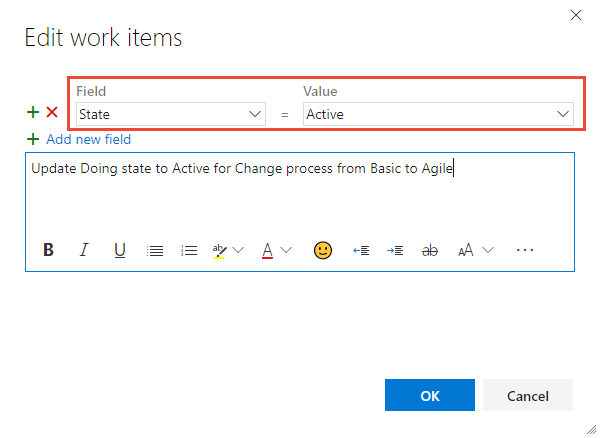
Sort the work items by the State column, highlight all work items of the same State, such as Doing, choose the
actions icon, and then select Edit. Add the State field and select Active for the value. For more information, see Bulk edit work items.
Repeat these steps for the Done state, changing it to Closed; and the To Do state, changing it to New.
When you're done, Save your changes.
Verify your changes
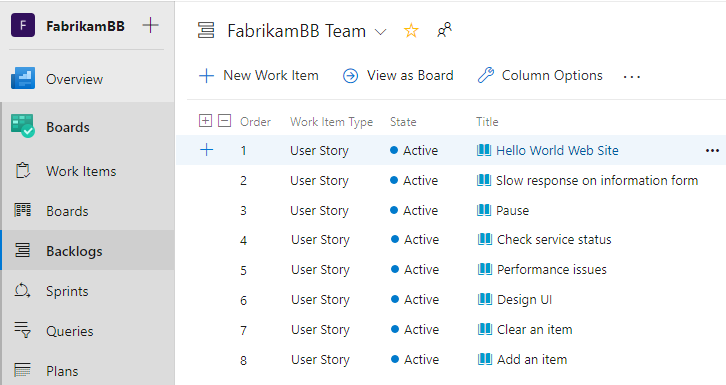
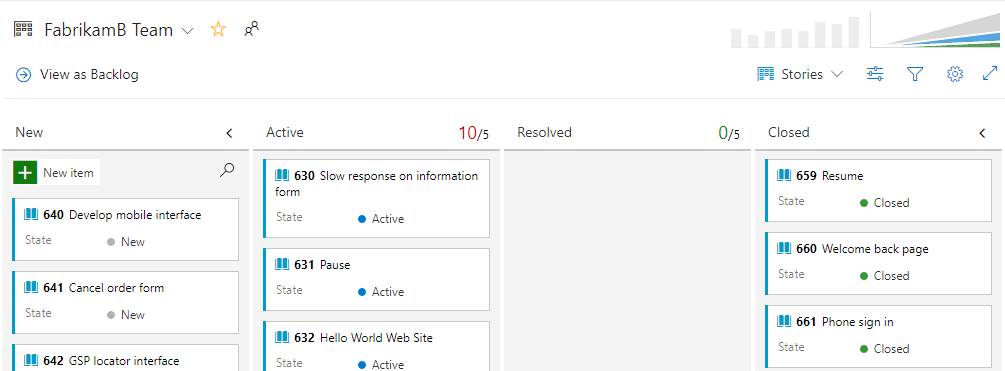
Go to your team backlog and review the user stories.
To change any user stories to bugs, do so now using bulk update and update the Change type. If you want to show bugs at the same level as user stories, make that change now. For more information, see Show bugs on backlogs and boards.
Go to your team board and verify that the column settings are valid.
Related articles
Feedback
Coming soon: Throughout 2024 we will be phasing out GitHub Issues as the feedback mechanism for content and replacing it with a new feedback system. For more information see: https://aka.ms/ContentUserFeedback.
Submit and view feedback for