Events
Mar 17, 9 PM - Mar 21, 10 AM
Join the meetup series to build scalable AI solutions based on real-world use cases with fellow developers and experts.
Register nowThis browser is no longer supported.
Upgrade to Microsoft Edge to take advantage of the latest features, security updates, and technical support.
Azure DevOps Services | Azure DevOps Server 2022 - Azure DevOps Server 2019
Azure Key Vault allows developers to securely store and manage sensitive information like API keys, credentials, or certificates. Azure Key Vault service supports two types of containers: vaults and managed HSM (Hardware Security Module) pools. Vaults can store both software and HSM-backed keys, secrets, and certificates, while managed HSM pools exclusively support HSM-backed keys.
In this tutorial, you will learn how to:
An Azure DevOps organization and a project. Create an organization or a project if you haven't already.
An Azure subscription. Create an Azure account for free if you don't have one already.
If you already have your own repository, proceed to the next step. Otherwise, import the following sample repository into your Azure Repo.
Sign in to your Azure DevOps organization, and then navigate to your project.
Select Repos, and then select Import. Enter the following repository URL, and then select Import.
https://github.com/MicrosoftDocs/pipelines-dotnet-core
Sign in to the Azure portal, and then select the Cloud Shell button in the upper-right corner.
If you have more than one Azure subscription associated with your account, use the command below to specify a default subscription. You can use az account list to generate a list of your subscriptions.
az account set --subscription <YOUR_SUBSCRIPTION_NAME_OR_ID>
Set your default Azure region. You can use az account list-locations to generate a list of available regions.
az config set defaults.location=<YOUR_REGION>
Create a new resource group.
az group create --name <YOUR_RESOURCE_GROUP_NAME>
Create a new Azure Key Vault.
az keyvault create \
  --name <YOUR_KEY_VAULT_NAME> \
  --resource-group <YOUR_RESOURCE_GROUP_NAME>
Create a new secret in your Azure key vault.
az keyvault secret set \
  --name <YOUR_SECRET_NAME> \
  --value <YOUR_ACTUAL_SECRET> \
  --vault-name <YOUR_KEY_VAULT_NAME>
Sign in to the Azure portal, then search for the Managed Identities service in the search bar.
Select Create, and fill out the required fields as follows:
Select Review + create when you're done.
Once the deployment is complete, select Go to resource, then copy the Subscription and Client ID values to use in upcoming steps.
Navigate to Settings > Properties, and copy your managed identity's Tenant ID value for later use.
Navigate to Azure portal, and use the search bar to find the key vault you created earlier.
Select Access policies, then select Create to add a new policy.
Under Secret permissions, select Get and List checkboxes.
Select Next, then paste the Client ID of the managed identity you created earlier into the search bar. Select your managed identity.
Select Next, then Next once more.
Review your new policies, and then select Create when you're done.
Sign in to your Azure DevOps organization, and then navigate to your project.
Select Project settings > Service connections, and then select New service connection to create a new service connection.
Select Azure Resource Manager, then select Next.
For Identity Type, select Managed identity from the dropdown menu.
For Step 1: Managed identity details, fill out the fields as follows:
Subscription for managed identity: Select the subscription containing your managed identity.
Resource group for managed identity: Select the resource group hosting your managed identity.
Managed Identity: Select your managed identity from the dropdown menu.
For Step 2: Azure Scope, fill out the fields as follows:
Scope level for service connection: Select Subscription.
Subscription for service connection: Select the subscription your managed identity will access.
Resource group for Service connection: (Optional) Specify to limit managed identity access to one resource group.
For Step 3: Service connection details:
Service connection name: Provide a name for your service connection.
Service Management Reference: (Optional) Context information from an ITSM database.
Description: (Optional) Add a description.
In Security, select the Grant access permission to all pipelines checkbox to allow all pipelines to use this service connection. If you don't select this option, you must manually grant access to each pipeline that uses this service connection.
Select Save to validate and create the service connection.

Sign in to your Azure DevOps organization, and then navigate to your project.
Select Pipelines, and then select New Pipeline.
Select Azure Repos Git (YAML), and then select your repository.
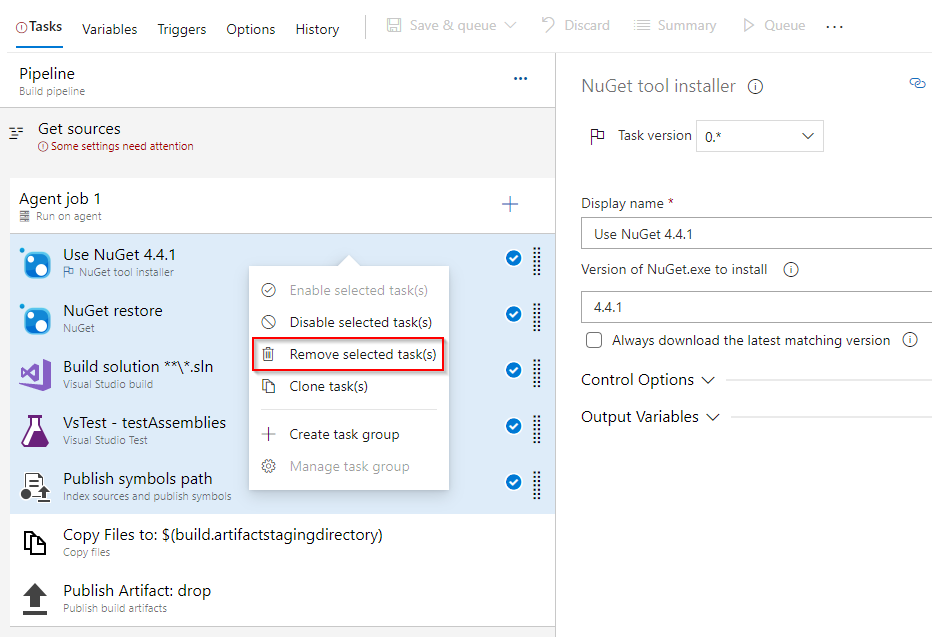
Select the Starter pipeline template.
The default pipeline will include a script that runs echo commands. Those are not needed so we can delete them.
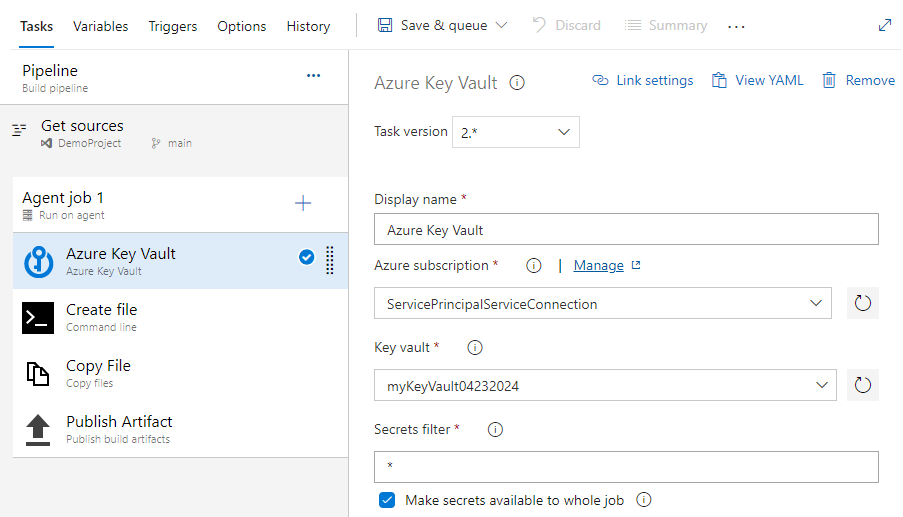
Add the AzureKeyVault task, replacing the placeholders with the name of the service connection you created earlier and your key vault name. Your YAML file should resemble the following snippet:
trigger:
- main

pool:
  vmImage: ubuntu-latest

steps:
- task: AzureKeyVault@2
  displayName: Azure Key Vault
  inputs:
    azureSubscription: 'SERVICE_CONNECTION_NAME'
    KeyVaultName: 'KEY_VAULT_NAME'
    SecretsFilter: '*'
    RunAsPreJob: false
Let's add the following tasks to copy and publish our secret. This example is for demonstration purposes only and should not be implemented in a production environment.
trigger:
- main
pool:
vmImage: ubuntu-latest
steps:
- task: AzureKeyVault@2
displayName: Azure Key Vault
inputs:
azureSubscription: 'SERVICE_CONNECTION_NAME'
KeyVaultName: 'KEY_VAULT_NAME'
SecretsFilter: '*'
RunAsPreJob: false
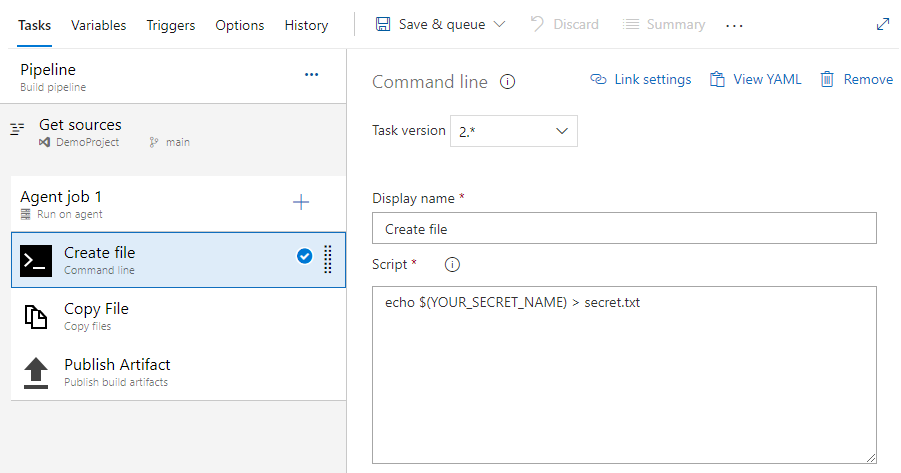
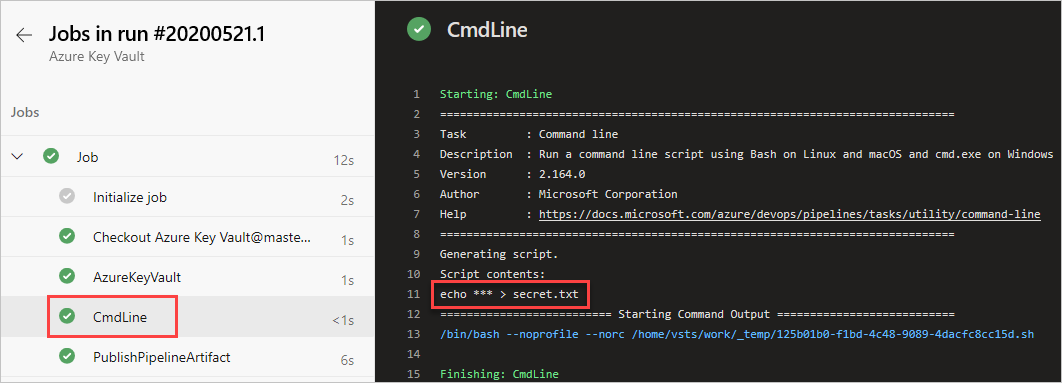
- task: CmdLine@2
displayName: Create file
inputs:
script: 'echo $(SECRET_NAME) > secret.txt'
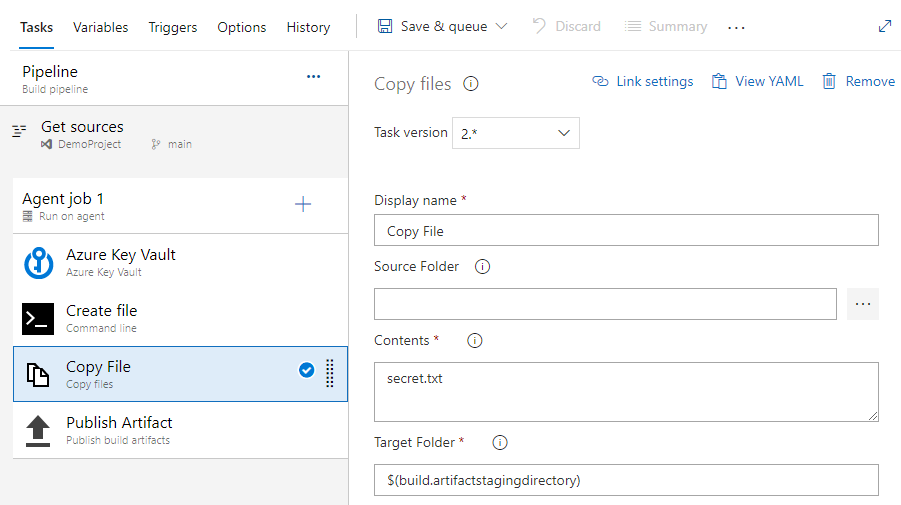
- task: CopyFiles@2
displayName: Copy file
inputs:
Contents: secret.txt
targetFolder: '$(Build.ArtifactStagingDirectory)'
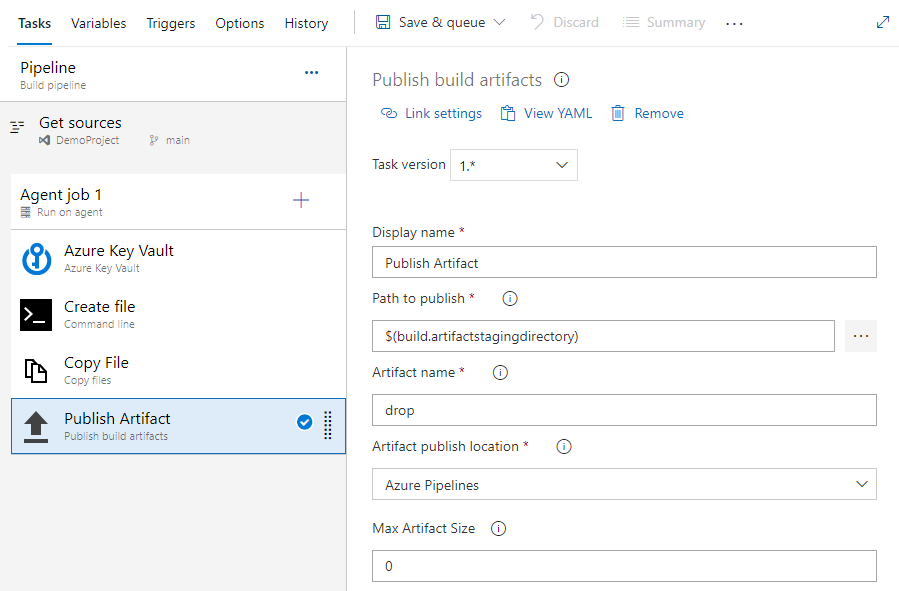
- task: PublishBuildArtifacts@1
displayName: Publish Artifact
inputs:
PathtoPublish: '$(Build.ArtifactStagingDirectory)'
ArtifactName: 'drop'
publishLocation: 'Container'
Select Save and run, and then select it once more to commit your changes and trigger the pipeline. You may be asked to allow the pipeline access to Azure resources, if prompted select Allow. You will only have to approve your pipeline once.
Select the CmdLine task to view the logs.
Once the pipeline run is complete, return to the pipeline summary and select the published artifact.

Select drop > secret.txt to download it.
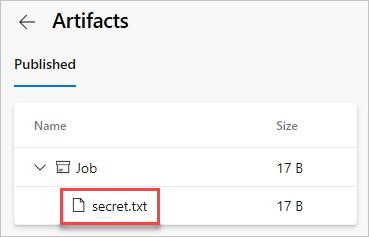
Open the text file you just downloaded, the text file should contain the secret from your Azure key vault.
Warning
This tutorial is for educational purposes only. For security best practices and how to safely work with secrets, see Manage secrets in your server apps with Azure Key Vault.
Follow the steps below to delete the resources you created:
If you've created a new organization to host your project, see how to delete your organization, otherwise delete your project.
All Azure resources created during this tutorial are hosted under a single resource group. Run the following command to delete your resource group and all of its resources.
az group delete --name <YOUR_RESOURCE_GROUP_NAME>
A: If you encounter an error indicating that the user or group does not have secrets list permission on key vault, run the following commands to authorize your application to access the key or secret in the Azure Key Vault:
az account set --subscription <YOUR_SUBSCRIPTION_ID>

az login

$spnObjectId = az ad sp show --id <YOUR_SERVICE_PRINCIPAL_ID>

az keyvault set-policy --name <YOUR_KEY_VAULT_NAME> --object-id $spnObjectId --secret-permissions get list
Events
Mar 17, 9 PM - Mar 21, 10 AM
Join the meetup series to build scalable AI solutions based on real-world use cases with fellow developers and experts.
Register nowTraining
Module
Manage secrets in your server apps with Azure Key Vault - Training
Learn how to create an Azure Key Vault to store secret values and how to enable secure access to the vault.
Certification
Microsoft Certified: Identity and Access Administrator Associate - Certifications
Demonstrate the features of Microsoft Entra ID to modernize identity solutions, implement hybrid solutions, and implement identity governance.