Resize a lab VM in Azure DevTest Labs
Azure DevTest Labs supports changing the size of a lab virtual machine (VM), based on changing needs for CPU, network, or disk performance. This article describes how to resize a lab VM.
Note
The resize feature complies with lab policy for allowed VM sizes. You can resize a VM only to sizes that lab policy allows.
Stop the VM
To avoid losing work, disconnect from and stop the VM before resizing it.
If you're connected to the VM through secure shell (SSH) or remote desktop session (RDP), save your work and disconnect from the VM.
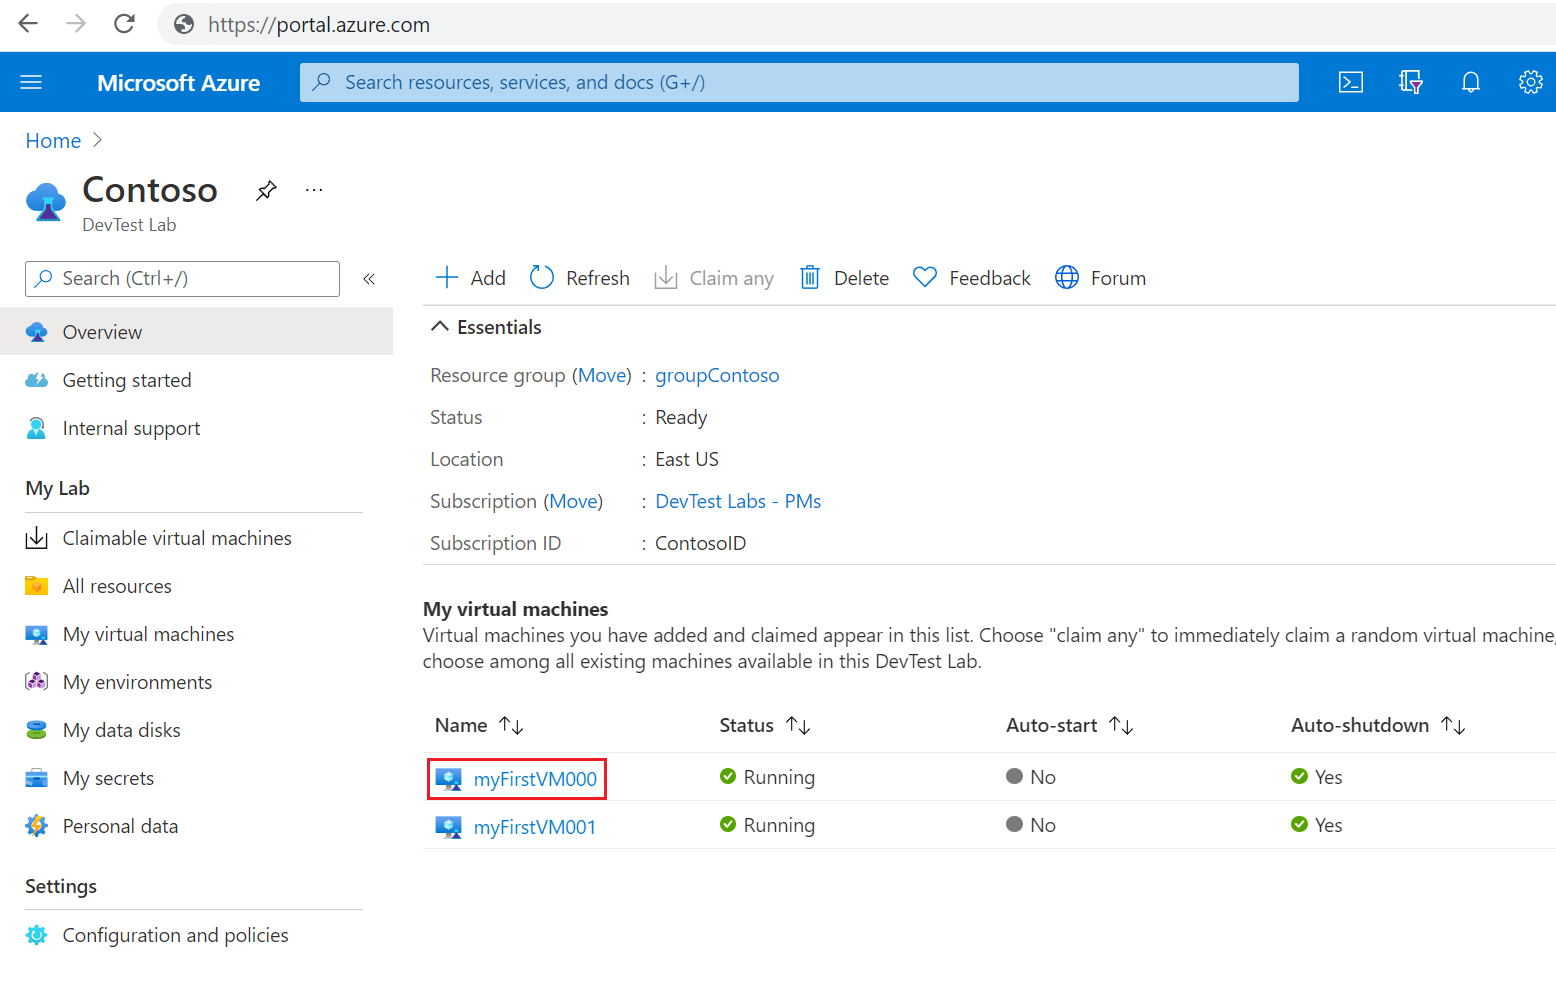
In the Azure portal, on your lab's Overview page, select the VM you want to resize from the list under My virtual machines.
On the VM's Overview page, select Stop on the toolbar.
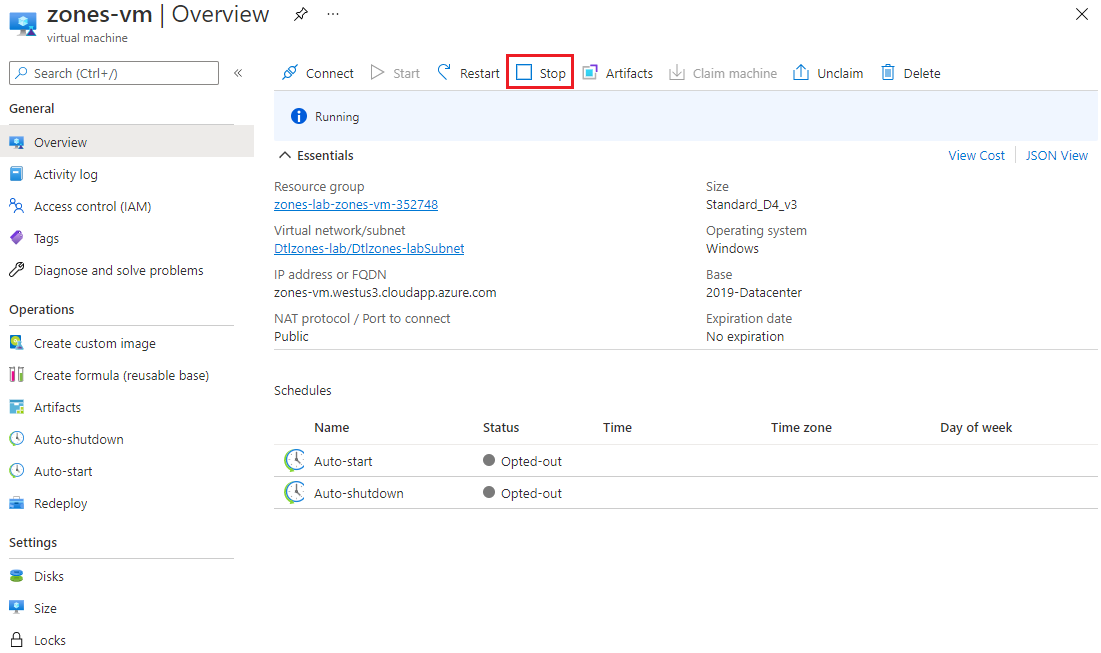
Once the VM stops, or if the VM is already stopped, Stop is grayed out.
Resize the VM
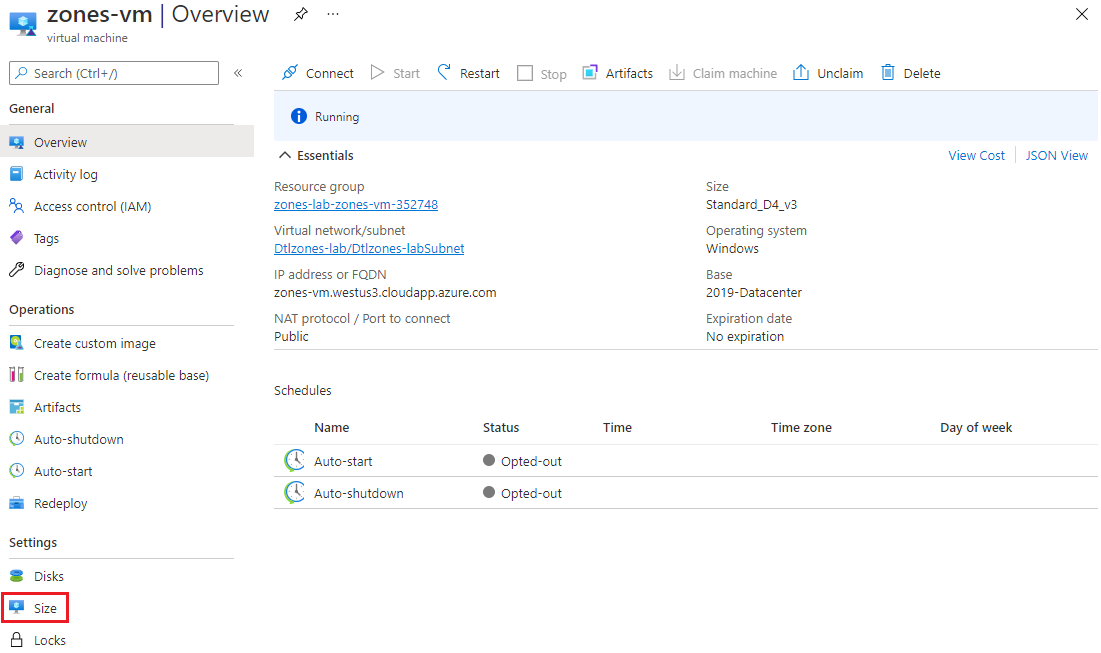
On the VM's Overview page, select Size under Settings in the left navigation.
On the Select a VM size screen, select a new size for your VM, and then select Select.

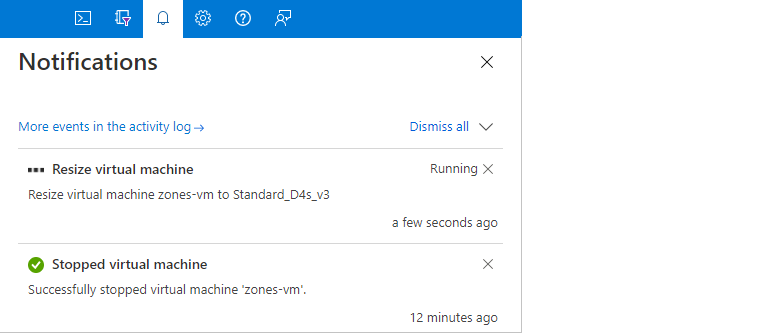
You can check the status of the resize operation in the Notifications window.
When the resize finishes, start the VM by selecting Start from the VM's Overview page toolbar.
Next steps
For more information about the resize feature for Azure VMs, see Resize virtual machines.
Feedback
Coming soon: Throughout 2024 we will be phasing out GitHub Issues as the feedback mechanism for content and replacing it with a new feedback system. For more information see: https://aka.ms/ContentUserFeedback.
Submit and view feedback for