Quickstart: Route Blob storage events to web endpoint by using Bicep
Azure Event Grid is an eventing service for the cloud. In this article, you use a Bicep file to create a Blob storage account, subscribe to events for that blob storage, and trigger an event to view the result. Typically, you send events to an endpoint that processes the event data and takes actions. However, to simplify this article, you send the events to a web app that collects and displays the messages.
Bicep is a domain-specific language (DSL) that uses declarative syntax to deploy Azure resources. It provides concise syntax, reliable type safety, and support for code reuse. Bicep offers the best authoring experience for your infrastructure-as-code solutions in Azure.
Prerequisites
If you don't have an Azure subscription, create a free account before you begin.
Create a message endpoint
Before subscribing to the events for the Blob storage, let's create the endpoint for the event message. Typically, the endpoint takes actions based on the event data. To simplify this quickstart, you deploy a pre-built web app that displays the event messages. The deployed solution includes an App Service plan, an App Service web app, and source code from GitHub.
Select Deploy to Azure to deploy the solution to your subscription. In the Azure portal, provide values for the parameters.
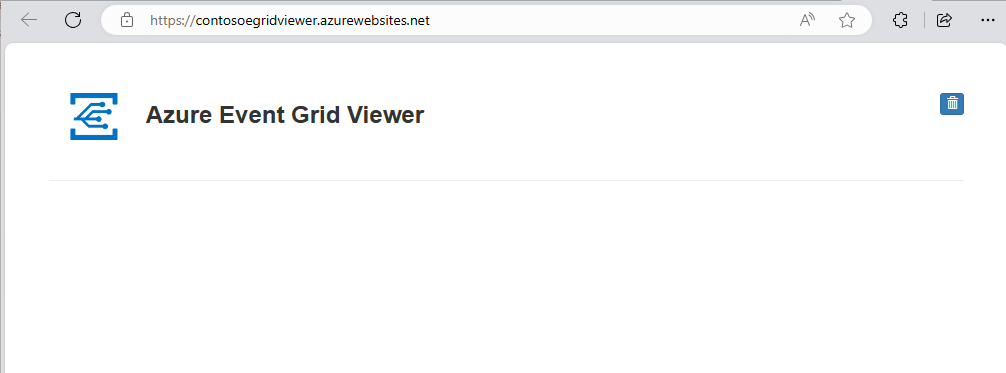
The deployment may take a few minutes to complete. After the deployment has succeeded, view your web app to make sure it's running. In a web browser, navigate to:
https://<your-site-name>.azurewebsites.netYou see the site but no events have been posted to it yet.
Review the Bicep file
The Bicep file used in this quickstart is from Azure Quickstart Templates.
@description('Provide a unique name for the Blob Storage account.')
param storageAccountName string = 'storage${uniqueString(resourceGroup().id)}'

@description('Provide a location for the Blob Storage account that supports Event Grid.')
param location string = resourceGroup().location

@description('Provide a name for the Event Grid subscription.')
param eventSubName string = 'subToStorage'

@description('Provide the URL for the WebHook to receive events. Create your own endpoint for events.')
param endpoint string

@description('Provide a name for the system topic.')
param systemTopicName string = 'mystoragesystemtopic'

resource storageAccount 'Microsoft.Storage/storageAccounts@2023-01-01' = {
  name: storageAccountName
  location: location
  sku: {
    name: 'Standard_LRS'
  }
  kind: 'StorageV2'
  properties: {
    accessTier: 'Hot'
    minimumTlsVersion: 'TLS1_2'
    supportsHttpsTrafficOnly: true
    allowBlobPublicAccess: false
  }
}

resource systemTopic 'Microsoft.EventGrid/systemTopics@2023-12-15-preview' = {
  name: systemTopicName
  location: location
  identity: {
    type: 'SystemAssigned'
  }
  properties: {
    source: storageAccount.id
    topicType: 'Microsoft.Storage.StorageAccounts'
  }
}

resource eventSubscription 'Microsoft.EventGrid/systemTopics/eventSubscriptions@2023-12-15-preview' = {
  parent: systemTopic
  name: eventSubName
  properties: {
    destination: {
      properties: {
        endpointUrl: endpoint
      }
      endpointType: 'WebHook'
    }
    filter: {
      includedEventTypes: [
        'Microsoft.Storage.BlobCreated'
        'Microsoft.Storage.BlobDeleted'
      ]
    }
  }
}

output name string = eventSubscription.name
output resourceId string = eventSubscription.id
output resourceGroupName string = resourceGroup().name
output location string = location
Two Azure resources are defined in the Bicep file:
- Microsoft.Storage/storageAccounts: create an Azure Storage account.
- Microsoft.EventGrid/systemTopics: create a system topic with the specified name for the storage account.
- Microsoft.EventGrid/systemTopics/eventSubscriptions: create an Azure Event Grid subscription for the system topic.
Deploy the Bicep file
Save the Bicep file as main.bicep to your local computer.
Deploy the Bicep file using either Azure CLI or Azure PowerShell.
az group create --name exampleRG --location eastus az deployment group create --resource-group exampleRG --template-file main.bicep --parameters endpoint=<endpoint>Note
Replace <endpoint > with the URL of your web app and append
api/updatesto the URL.When the deployment finishes, you should see a message indicating the deployment succeeded.
Note
You can find more Azure Event Grid template samples here.
Validate the deployment
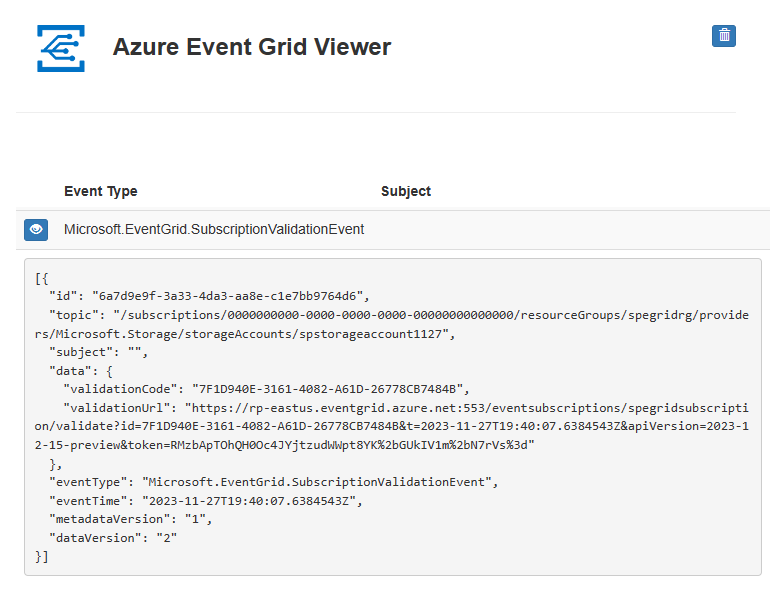
View your web app again, and notice that a subscription validation event has been sent to it. Select the eye icon to expand the event data. Event Grid sends the validation event so the endpoint can verify that it wants to receive event data. The web app includes code to validate the subscription.
Now, let's trigger an event to see how Event Grid distributes the message to your endpoint.
You trigger an event for the Blob storage by uploading a file. The file doesn't need any specific content. The articles assumes you have a file named testfile.txt, but you can use any file.
When you upload the file to the Azure Blob storage, Event Grid sends a message to the endpoint you configured when subscribing. The message is in the JSON format and it contains an array with one or more events. In the following example, the JSON message contains an array with one event. View your web app and notice that a blob created event was received.

Clean up resources
When no longer needed, delete the resource group.
Next steps
For more information about Azure Resource Manager templates and Bicep, see the following articles:
Feedback
Coming soon: Throughout 2024 we will be phasing out GitHub Issues as the feedback mechanism for content and replacing it with a new feedback system. For more information see: https://aka.ms/ContentUserFeedback.
Submit and view feedback for