Configure caching on Azure Front Door
This article shows you how to configure caching on Azure Front Door. To learn more about caching, see Caching with Azure Front Door.
Prerequisites
Before you can create an Azure Front Door endpoint with Front Door manager, you must have an Azure Front Door profile created. The profile must have at least one or more endpoints. To organize your Azure Front Door endpoints by internet domains, web applications, or other criteria, you can use multiple profiles.
To create an Azure Front Door profile and endpoint, see Create an Azure Front Door profile.
Caching can significantly decrease latency and reduce the load on origin servers. However, not all types of traffic can benefit from caching. Static assets such as images, CSS, and JavaScript files are ideal for caching. While dynamic assets, such as authenticated API endpoints, shouldn't be cached to prevent the leakage of personal information. We recommend having separate routes for static and dynamic assets, with caching disabled for the latter.
Warning
Before you enable caching, thoroughly review the caching documentation, and test all possible scenarios before enabling caching. As noted previously, with misconfiguration you can inadvertently cache user specific data that can be shared by multiple users resulting privacy incidents.
Configure caching by using the Azure portal
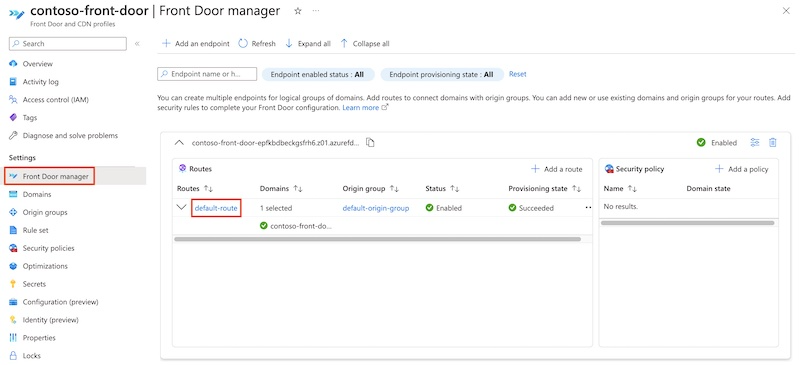
Sign in to the Azure portal and navigate to your Azure Front Door profile.
Select Front Door manager and then select your route.
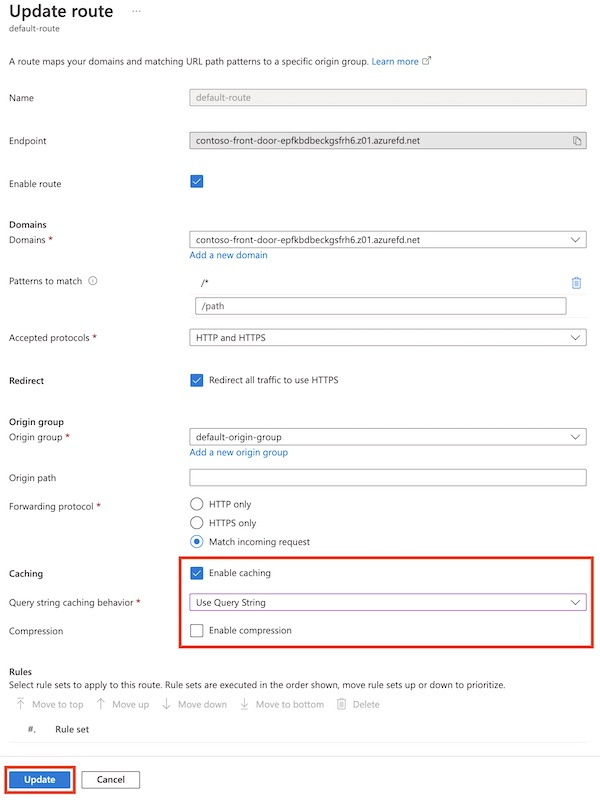
Select Enable caching.
Specify the query string caching behavior. For more information, see Caching with Azure Front Door.
Optionally, select Enable compression for Front Door to compress responses to the client.
Select Update.
Next steps
- Learn about the use of origins and origin groups in an Azure Front Door configuration.
- Learn about rules match conditions in an Azure Front Door rule set.
- Learn more about policy settings for Web Application Firewall (WAF) with Azure Front Door.
- Learn how to create custom rules to protect your Azure Front Door profile.
Feedback
Coming soon: Throughout 2024 we will be phasing out GitHub Issues as the feedback mechanism for content and replacing it with a new feedback system. For more information see: https://aka.ms/ContentUserFeedback.
Submit and view feedback for