Use firewall to restrict outbound traffic using Azure CLI
Important
This feature is currently in preview. The Supplemental Terms of Use for Microsoft Azure Previews include more legal terms that apply to Azure features that are in beta, in preview, or otherwise not yet released into general availability. For information about this specific preview, see Azure HDInsight on AKS preview information. For questions or feature suggestions, please submit a request on AskHDInsight with the details and follow us for more updates on Azure HDInsight Community.
When an enterprise wants to use their own virtual network for the cluster deployments, securing the traffic of the virtual network becomes important. This article provides the steps to secure outbound traffic from your HDInsight on AKS cluster via Azure Firewall using Azure CLI.
The following diagram illustrates the example used in this article to simulate an enterprise scenario:

The example demonstrated in this article is using Azure Could Shell.
Define the variables
Copy and execute in the Azure Cloud Shell to set the values of these variables.
PREFIX="hdiaks-egress"
RG="${PREFIX}-rg"
LOC="eastus"
HDIAKS_CLUSTER_POOL=${PREFIX}
VNET_NAME="${PREFIX}-vnet"
HDIAKS_SUBNET_NAME="${PREFIX}-subnet"
# DO NOT CHANGE FWSUBNET_NAME - This is currently a requirement for Azure Firewall.
FWSUBNET_NAME="AzureFirewallSubnet"
FWNAME="${PREFIX}-fw"
FWPUBLICIP_NAME="${PREFIX}-fwpublicip"
FWIPCONFIG_NAME="${PREFIX}-fwconfig"
FWROUTE_NAME="${PREFIX}-fwrn"
FWROUTE_NAME_INTERNET="${PREFIX}-fwinternet"

Create a virtual network and subnets
Create a resource group using the az group create command.
az group create --name $RG --location $LOCCreate a virtual network and two subnets.
Virtual network with subnet for HDInsight on AKS cluster pool
 az network vnet create \
      --resource-group $RG \
      --name $VNET_NAME \
      --location $LOC \
      --address-prefixes 10.0.0.0/8 \
      --subnet-name $HDIAKS_SUBNET_NAME \
      --subnet-prefix 10.1.0.0/16
Subnet for Azure Firewall.
az network vnet subnet create \
   --resource-group $RG \
   --vnet-name $VNET_NAME \
   --name $FWSUBNET_NAME \
   --address-prefix 10.2.0.0/16
Important
- If you add NSG in subnet
HDIAKS_SUBNET_NAME, you need to add certain outbound and inbound rules manually. Follow use NSG to restrict the traffic. - By default, route table will not be associated with subnet. If required, user has to create a route table and associate it with the cluster pool.
- If you add NSG in subnet
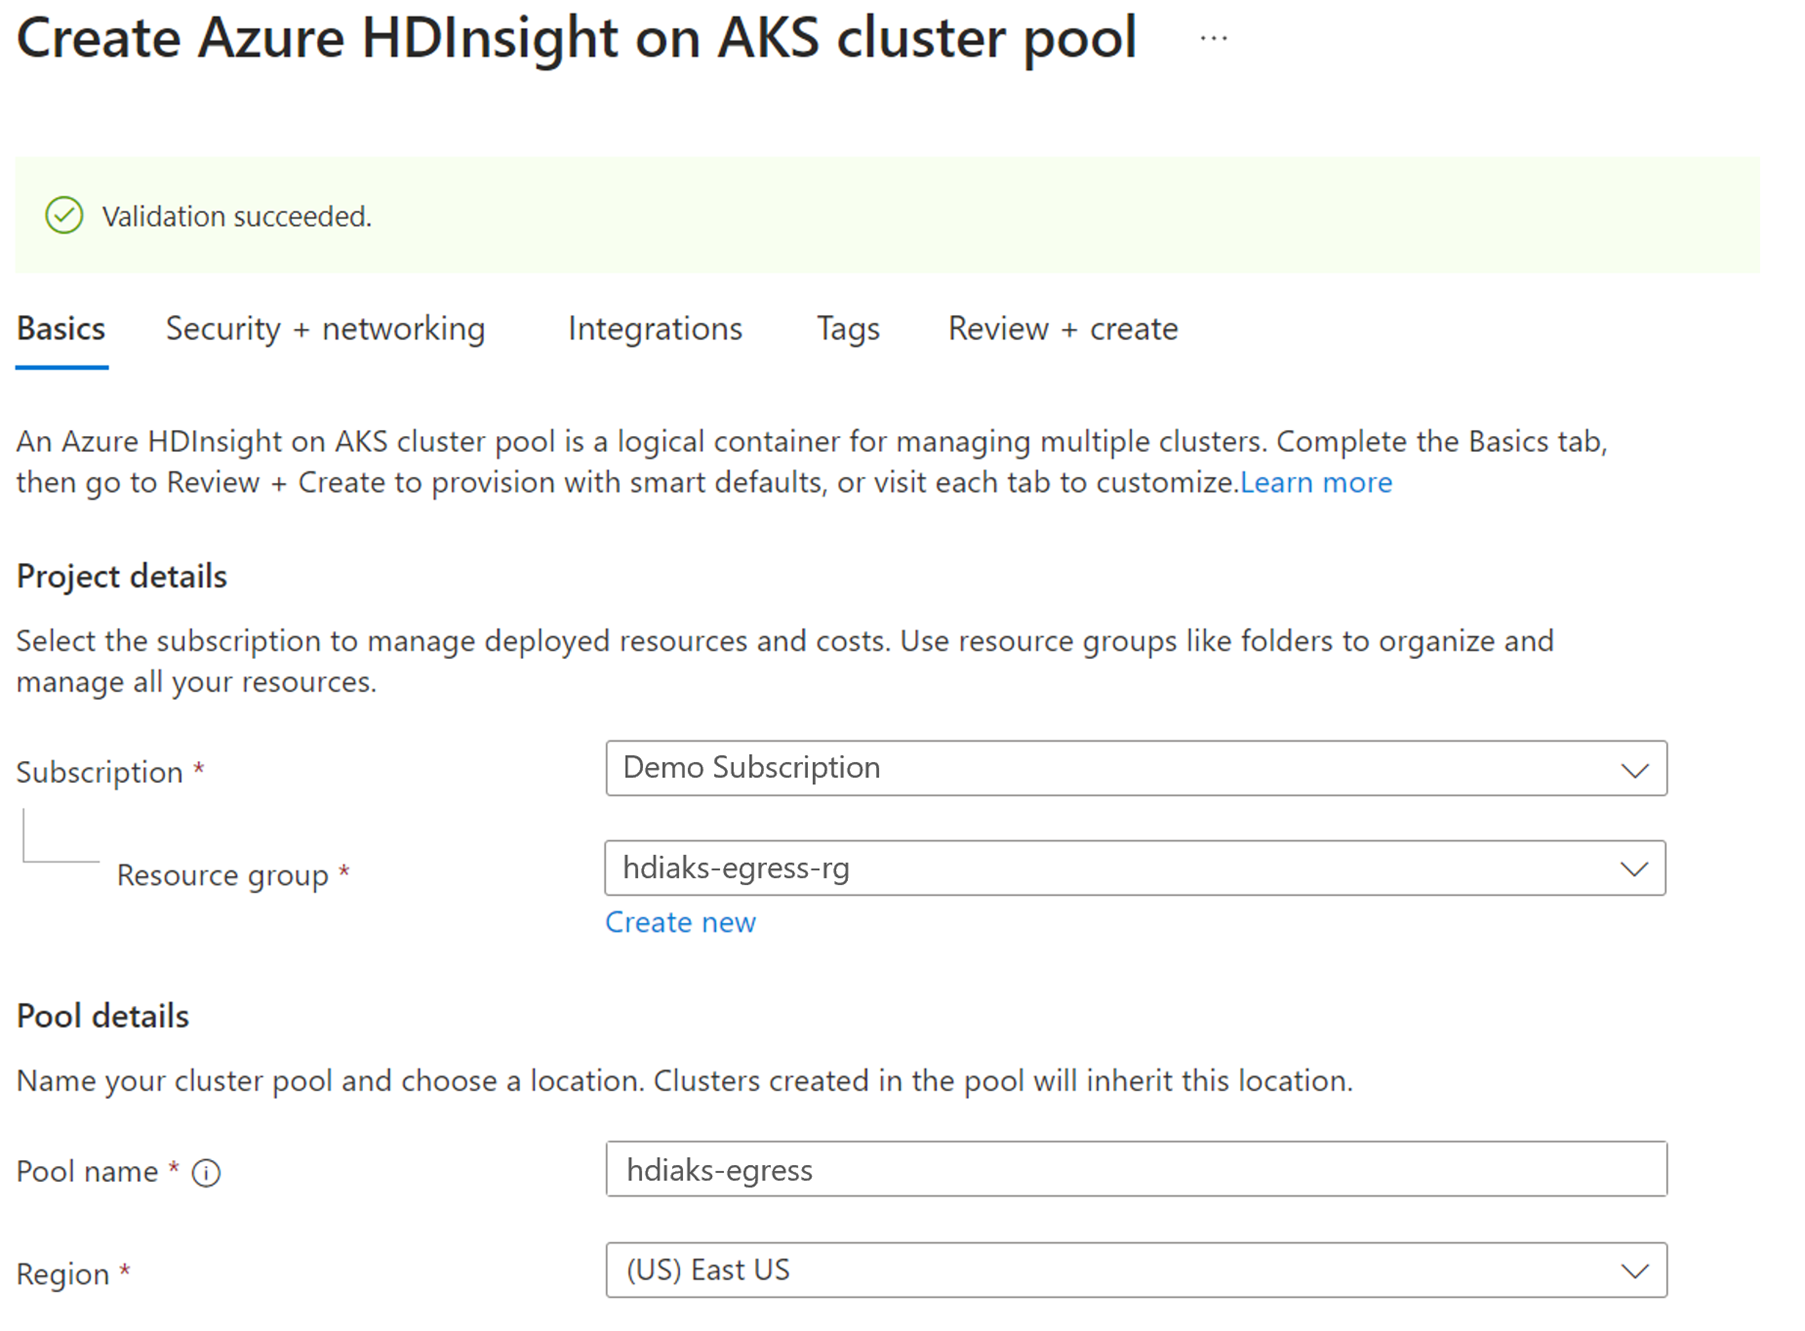
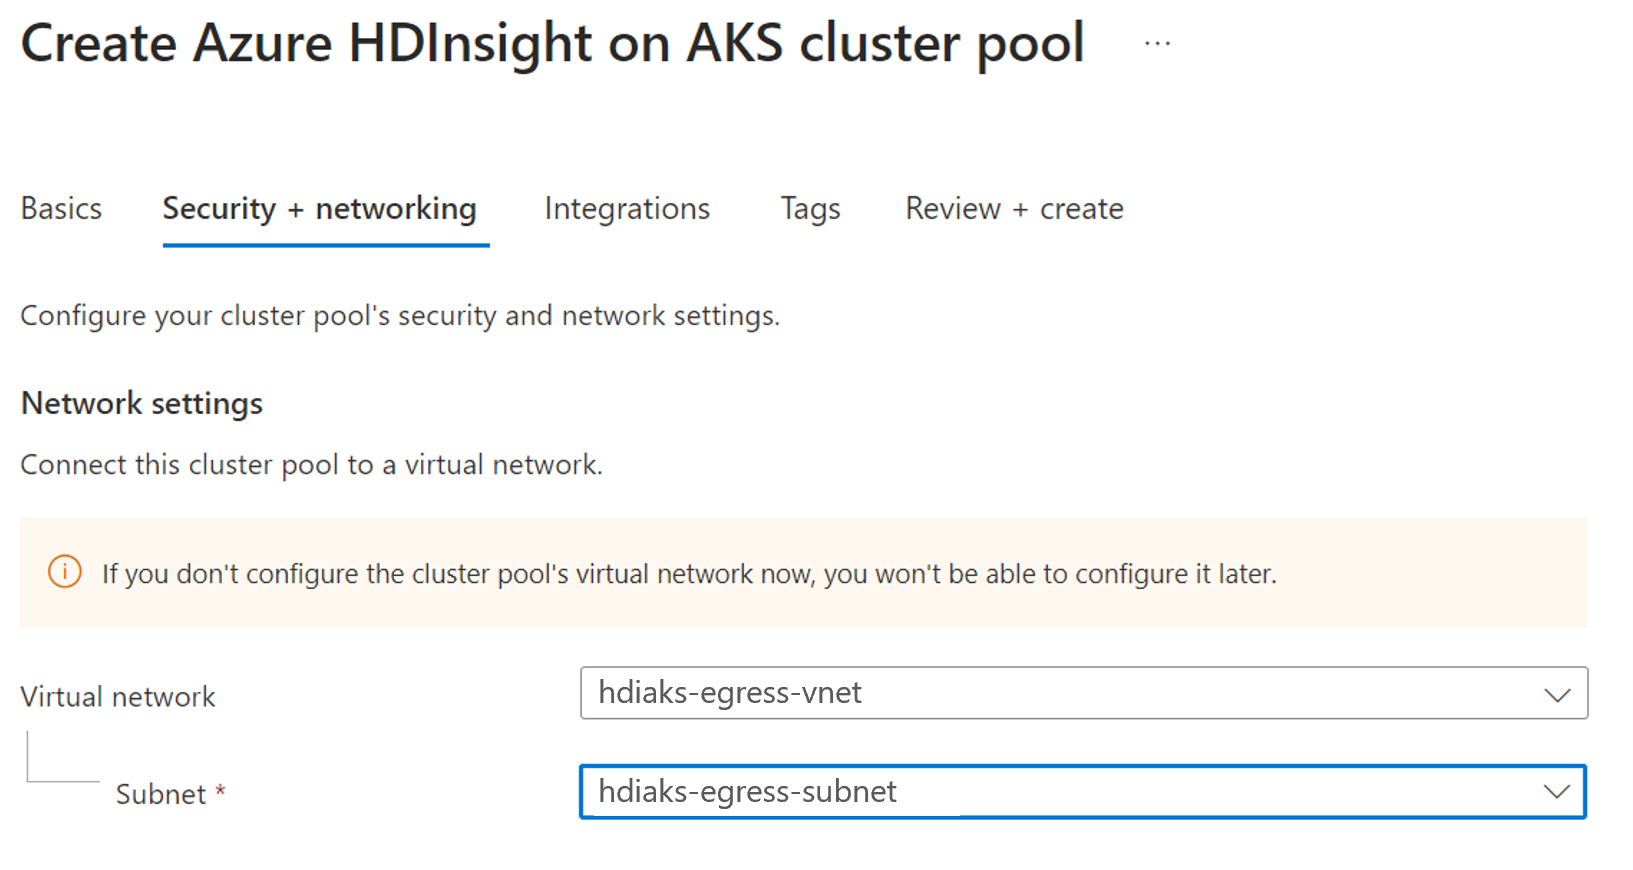
Create HDInsight on AKS cluster pool using Azure portal
Create a cluster pool.
Create a route table.
Create a route table and associate it with the cluster pool. For more information, see create a route table.


Get AKS cluster details created behind the cluster pool
Follow the steps to get the AKS cluster information, which is useful in the subsequent steps.
AKS_MANAGED_RG=$(az network vnet subnet show --name $HDIAKS_SUBNET_NAME --vnet-name $VNET_NAME --resource-group $RG --query routeTable.resourceGroup -o tsv)

AKS_ID=$(az group show --name $AKS_MANAGED_RG --query managedBy -o tsv)

HDIAKS_MANAGED_RG=$(az resource show --ids $AKS_ID --query "resourceGroup" -o tsv)

API_SERVER=$(az aks show --name $HDIAKS_CLUSTER_POOL --resource-group $HDIAKS_MANAGED_RG --query fqdn -o tsv)
Create firewall
Create a Standard SKU public IP resource. This resource is used as the Azure Firewall frontend address.
az network public-ip create -g $RG -n $FWPUBLICIP_NAME -l $LOC --sku "Standard"Register the Azure Firewall preview CLI extension to create an Azure Firewall.
az extension add --name azure-firewallCreate an Azure Firewall and enable DNS proxy.
az network firewall create -g $RG -n $FWNAME -l $LOC --enable-dns-proxy trueCreate an Azure Firewall IP configuration.
az network firewall ip-config create -g $RG -f $FWNAME -n $FWIPCONFIG_NAME --public-ip-address $FWPUBLICIP_NAME --vnet-name $VNET_NAMEOnce the IP configuration command succeeds, save the firewall frontend IP address for configuration later.
FWPUBLIC_IP=$(az network public-ip show -g $RG -n $FWPUBLICIP_NAME --query "ipAddress" -o tsv)
FWPRIVATE_IP=$(az network firewall show -g $RG -n $FWNAME --query "ipConfigurations[0].privateIPAddress" -o tsv)
Add network and application rules to the firewall
Create the network rules.
az network firewall network-rule create -g $RG -f $FWNAME --collection-name 'aksfwnr' -n 'apiudp' --protocols 'UDP' --source-addresses '*' --destination-addresses "AzureCloud.$LOC" --destination-ports 1194 --action allow --priority 100

az network firewall network-rule create -g $RG -f $FWNAME --collection-name 'aksfwnr' -n 'apitcp' --protocols 'TCP' --source-addresses '*' --destination-addresses "AzureCloud.$LOC" --destination-ports 9000

az network firewall network-rule create -g $RG -f $FWNAME --collection-name 'aksfwnr' -n 'apiserver' --protocols 'TCP' --source-addresses '*' --destination-fqdns "$API_SERVER" --destination-ports 443

#Add below step, in case you are integrating log analytics workspace

az network firewall network-rule create -g $RG -f $FWNAME --collection-name 'aksfwnr' -n 'azuremonitor' --protocols 'TCP' --source-addresses '*' --destination-addresses "AzureMonitor" --destination-ports 443
Create the application rules.
az network firewall application-rule create -g $RG -f $FWNAME --collection-name 'aksfwar' -n 'aks-fqdn' --source-addresses '*' --protocols 'http=80' 'https=443' --fqdn-tags "AzureKubernetesService" --action allow --priority 100

az network firewall application-rule create -g $RG -f $FWNAME --collection-name 'aksfwar' -n 'acr' --source-addresses '*' --protocols 'https=443' --target-fqdns "hiloprodrpacr00.azurecr.io"

az network firewall application-rule create -g $RG -f $FWNAME --collection-name 'aksfwar' -n 'blob' --source-addresses '*' --protocols 'https=443' --target-fqdns "*.blob.core.windows.net"

az network firewall application-rule create -g $RG -f $FWNAME --collection-name 'aksfwar' -n 'servicebus' --source-addresses '*' --protocols 'https=443' --target-fqdns "*.servicebus.windows.net"

az network firewall application-rule create -g $RG -f $FWNAME --collection-name 'aksfwar' -n 'gsm' --source-addresses '*' --protocols 'https=443' --target-fqdns "*.table.core.windows.net"

az network firewall application-rule create -g $RG -f $FWNAME --collection-name 'aksfwar' -n 'gcsmonitoring' --source-addresses '*' --protocols 'https=443' --target-fqdns "gcs.prod.monitoring.core.windows.net"

az network firewall application-rule create -g $RG -f $FWNAME --collection-name 'aksfwar' -n 'graph' --source-addresses '*' --protocols 'https=443' --target-fqdns "graph.microsoft.com"
Create route in the route table to redirect the traffic to firewall
Create a route table to be associated to HDInsight on AKS cluster pool. For more information, see create route table commands.
Create cluster
In the previous steps, we routed network traffic to firewall.
The following steps provide details about the specific network and application rules needed by each cluster type. You can refer to the cluster creation pages for creating Apache Flink, Trino, and Apache Spark clusters based on your need.
Important
Before creating a cluster, make sure to run the following cluster specific rules to allow the traffic.
Trino
Add the following network and application rules for a Trino cluster.
 az network firewall application-rule create -g $RG -f $FWNAME --collection-name 'aksfwar' -n 'dfs' --source-addresses '*' --protocols 'https=443' --target-fqdns "*.dfs.core.windows.net"

 az network firewall application-rule create -g $RG -f $FWNAME --collection-name 'aksfwar' -n 'mysql' --source-addresses '*' --protocols 'mssql=1433' --target-fqdns "*.database.windows.net"
Change the
Sql.<Region>in following syntax to your region as per your requirement. For example:Sql.EastUSaz network firewall network-rule create -g $RG -f $FWNAME --collection-name 'aksfwnr' -n 'mysql' --protocols 'TCP' --source-addresses '*' --destination-addresses Sql.<Region> --destination-ports "11000-11999"
Apache Flink
Add the following application rule for an Apache Flink cluster.
az network firewall application-rule create -g $RG -f $FWNAME --collection-name 'aksfwar' -n 'dfs' --source-addresses '*' --protocols 'https=443' --target-fqdns "*.dfs.core.windows.net"
Apache Spark
Add the following network and application rules for a Spark cluster.
Change the
Storage.<Region>in the following syntax to your region as per your requirement. For example:Storage.EastUSaz network firewall network-rule create -g $RG -f $FWNAME --collection-name 'aksfwnr' -n 'smb' --protocols 'TCP' --source-addresses '*' --destination-addresses "Storage.<Region>" --destination-ports 445 az network firewall application-rule create -g $RG -f $FWNAME --collection-name 'aksfwar' -n 'dfs' --source-addresses '*' --protocols 'https=443' --target-fqdns "*.dfs.core.windows.net"Change the
Sql.<Region>in the following syntax to your region as per your requirement. For example:Sql.EastUSaz network firewall network-rule create -g $RG -f $FWNAME --collection-name 'aksfwnr' -n 'mysql' --protocols 'TCP' --source-addresses '*' --destination-addresses "Sql.<Region>" --destination-ports '11000-11999' az network firewall application-rule create -g $RG -f $FWNAME --collection-name 'aksfwar' -n 'mysql' --source-addresses '*' --protocols 'mssql=1433' --target-fqdns "*.database.windows.net"
Solve symmetric routing issue
The following steps allow you to request cluster by cluster load balancer ingress service and ensure the network response traffic doesn't flow to firewall. Add a route to the route table to redirect the response traffic to your client IP to Internet and then, you can reach the cluster directly.
az network route-table route create -g $AKS_MANAGED_RG --name clientip --route-table-name $ROUTE_TABLE_NAME --address-prefix {Client_IPs} --next-hop-type Internet
If you can't reach the cluster after having configured NSG, follow use NSG to restrict the traffic to allow the traffic.
Tip
If you want to allow more traffic, you can configure it over the firewall.
How to debug
If you find the cluster works unexpectedly, you can check the firewall logs to find which traffic is blocked.
Feedback
Coming soon: Throughout 2024 we will be phasing out GitHub Issues as the feedback mechanism for content and replacing it with a new feedback system. For more information see: https://aka.ms/ContentUserFeedback.
Submit and view feedback for