Create and Publish your Mobile App
In this article, we will learn about how to create and publish the Mobile App (available only for Android platform) for your training portal.
.png)
For setting up the mobile app for your training portal, you will need a mobile app APK/AAB file and setup your Google PlayStore account. The APK/AAB file can be generated in two ways,
Warning
Community Training team will soon be deprecating the process of requesting mobile application from the platform and support only progressive web applications (PWA) for both android and iOS.
Steps to create Mobile Application
Option 1: Creating a progressive web application (PWA) for android
What are Progressive Web Applications?
Progressive Web Apps (PWAs) provide access to open web technologies for cross-platform interoperability and provide your users with an app-like experience customized for their devices.
PWAs are websites that are progressively enhanced to function like installed apps on supporting platforms, and like regular web sites on other browsers.
The qualities of a PWA combine the best of the web and compiled apps. PWAs run in browsers, like websites, but have access to app features like the ability to work offline, be installed on the operating system, support push notifications and periodic updates, access hardware features, and more.
When installed, PWAs are just like other apps on Windows or Android. They can be added to the Start Menu, pinned to the Taskbar, handle files, run on user login on Desktop and in Android PWA will added as native application in app tray.
Since a progressive web app is a type of webpage/website known as a web application, they do not require separate bundling or distribution. By following simple Installation Requirements as mentioned below, administrators can enable PWA to be available for learners to install on their devices. With PWA Builder, you can then build android app for you PWA enabled instance.
Installation Requirements for PWA mobile application
Step 1: Update the configuration on the platform
Login to Azure portal.
Navigate to Application Settings from your instance's app service.
Under Application settings tab, filter for Features:EnableWebAppInstall and set the Value as ‘true’
If this setting was not found then click on ‘New application setting’, provide Features:EnableWebAppInstall under Name and Value as ‘true’ as shown below.
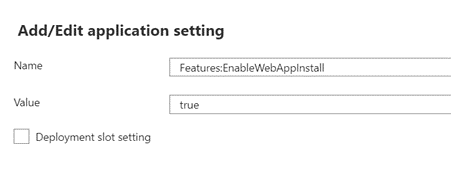
Click OK and then Save the changes.
Step 2: Update Settings in Admin View for Mobile Application
Login to your Community Training portal and switch to administrator view
Click on Settings option from the left navigation panel and navigate to Mobile Application section.
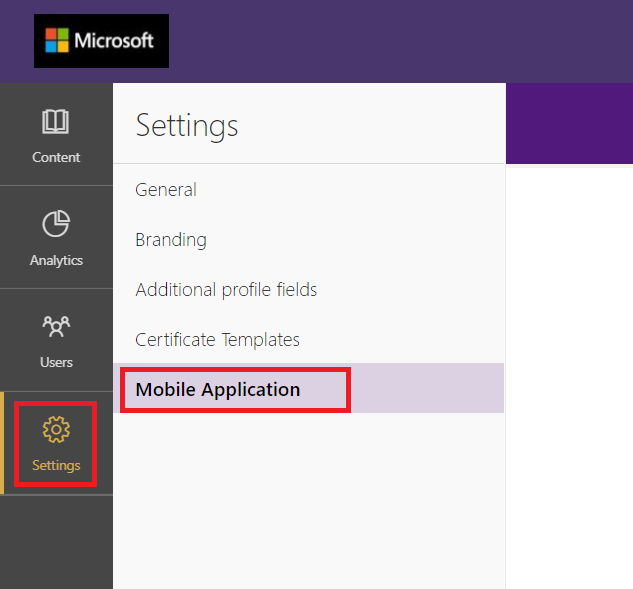
Under Mobile Application setting you need to specify following information:
Setting Description Mobile Application Name You can specify your Instance name, this name will be used for rendering splash screen (Android), Start menu item (Windows) Mobile Application Short Name This will be used to generate the App icon name on the device app tray. You can mention a shorter acronym of your instance name. Application Background Color This setting will be used for rendering Splash screen (Android) Application Logo (512 px by 512 px) The logo must be 512x512 pixels, MCT uses this image to render Splash screen, Start menu, App Launcher item for your PWA.
Installing PWA on your Desktop and Mobile Device
Once the Installation Requirements for PWA are satisfied, as you login to your MCT instance you will be seeing an icon on the search bar of your browser indicating PWA app is available for installation.
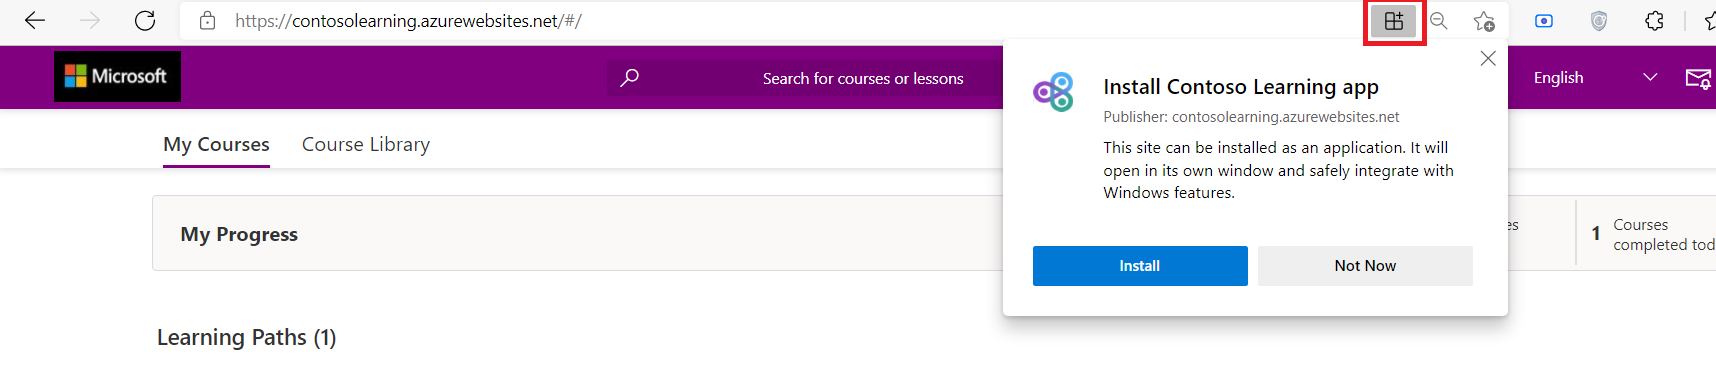
Users can now install the PWA which renders your MCT webapp as a native application.
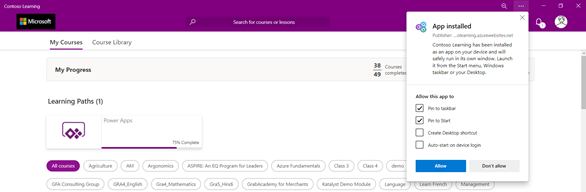
After successful installation, you can check options to allow the app to pin to taskbar, pin to start, create a Desktop shortcut as per your requirement.
For mobile devices (Android), users can install PWA by clicking on the prompt (add to home screen banner) that they receive while browsing your MCT instance or clicking on ‘install app’ from browser options.
.jpg)
Note
Devices & Browser Compatibility:
The PWA flow works as expected when using chromium-based browsers such as Microsoft Edge, Google Chrome.
For Firefox browser in desktop, the PWA install icon will not be seen on the URL bar, however the service workers will be installed. In Mobile Firefox browser, you will have Add to home screen option that can install PWA.
Safari on iOS doesn’t support add to home screen banner, however the option is visible in the browser menu. You might notice some inconsistencies with PWA on iOS.
Generate Android App Bundle using PWA Builder
As you enabled the PWA, in the backend there will be a service worker and a web manifest added, through which you can build a native Android application that can be bundled to be uploaded to your play store. We recommend using PWABuilder an online GUI tool that can generate APK & AAB files for your instance.
Prerequisites
Raise a ticket with MCT support team requesting KeyStore file in case you wanted to have an update for your existing mobile application.
Part 1: Steps to Generate Android App Bundle
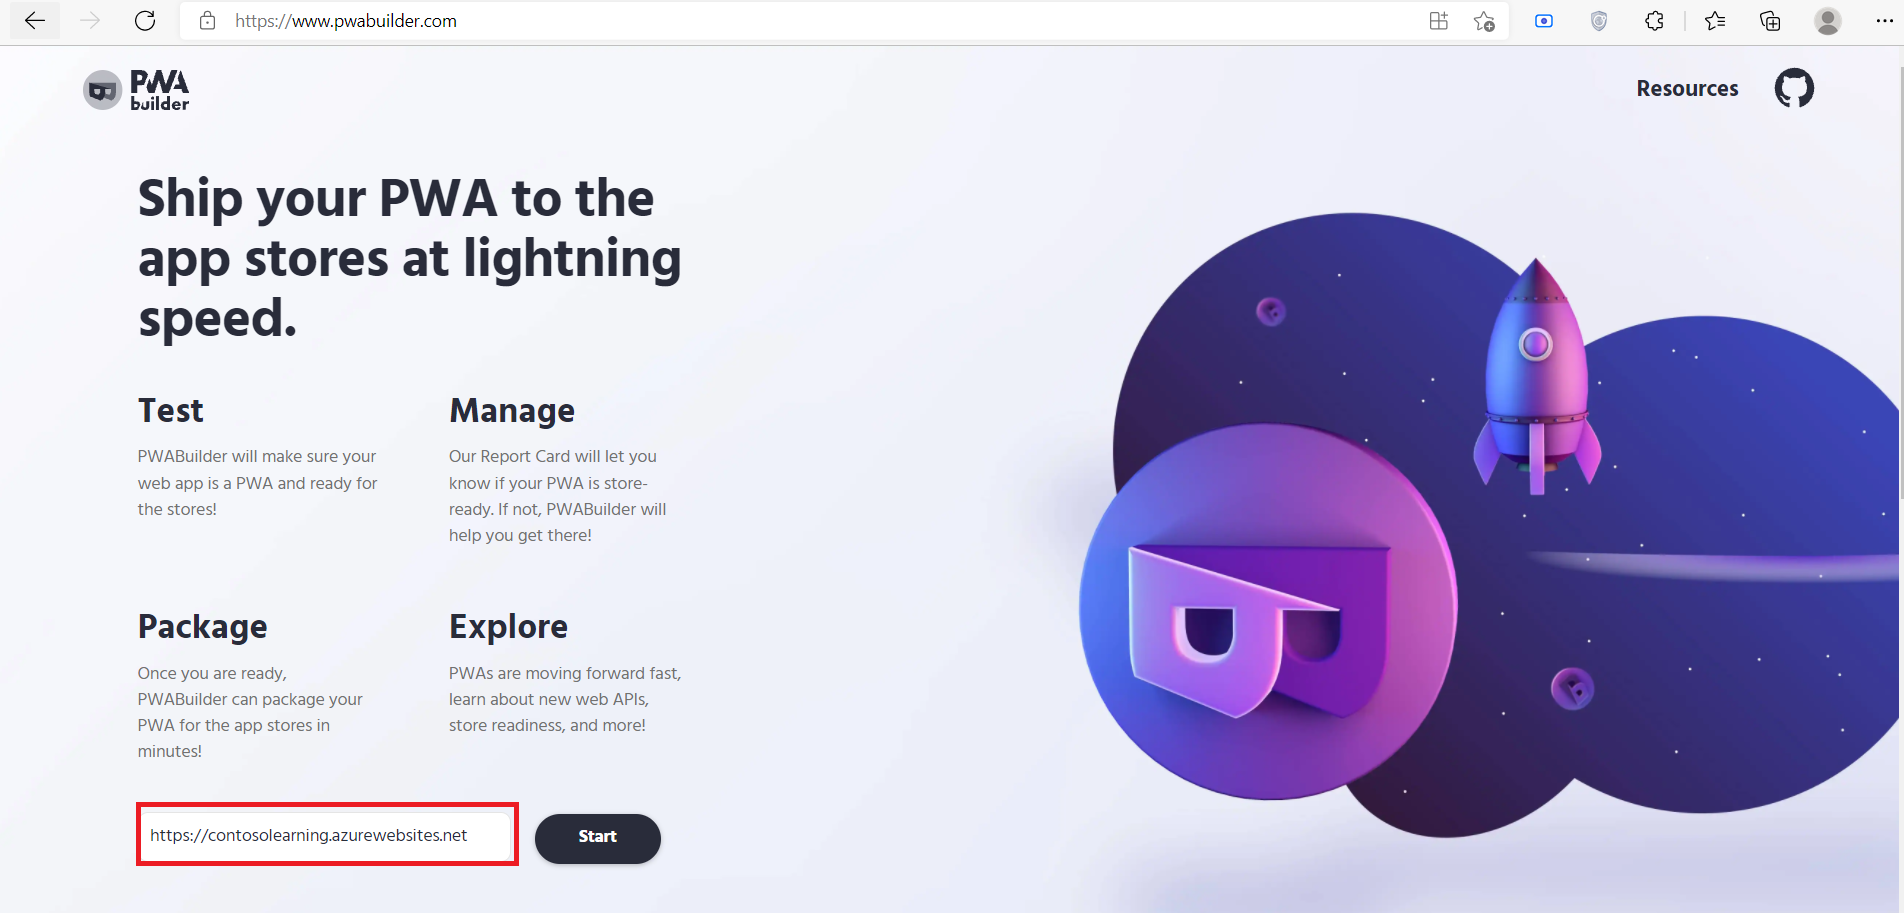
Open PWABuilder
In the text box on homepage of PWA builder, enter your instance URL (eg: contosolearning.azurewebsites.net) and click ‘Start’. In the backend PWABuilder will verify if you have a service worker and manifest available for your PWA.
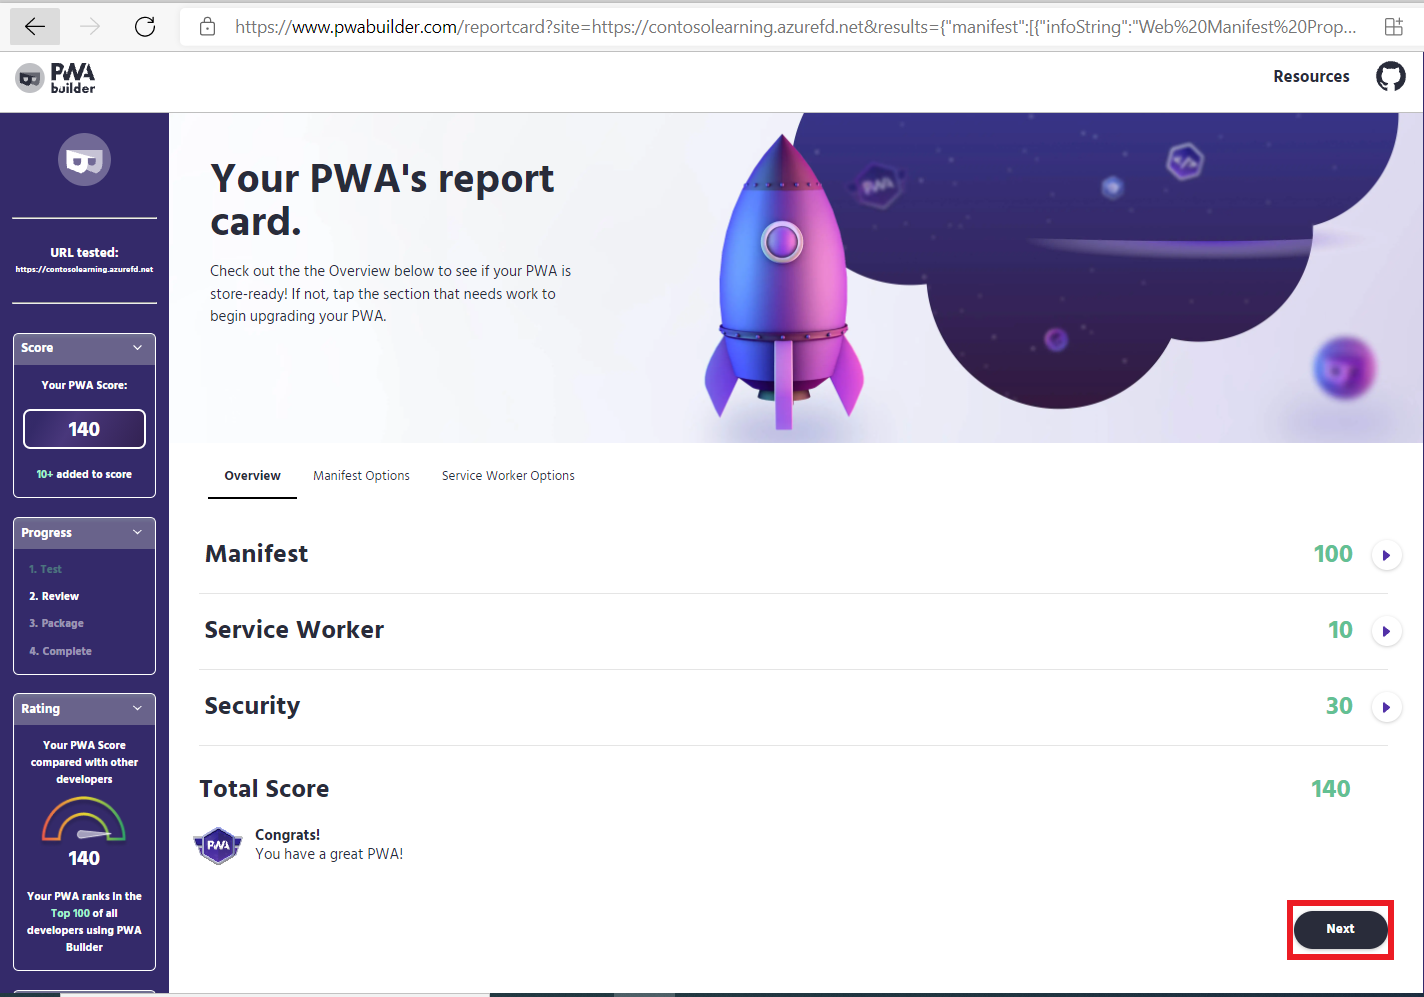
Click Next on the PWA’s report card page, score 130 and above suggests that you have met requirements by PWABuilder.
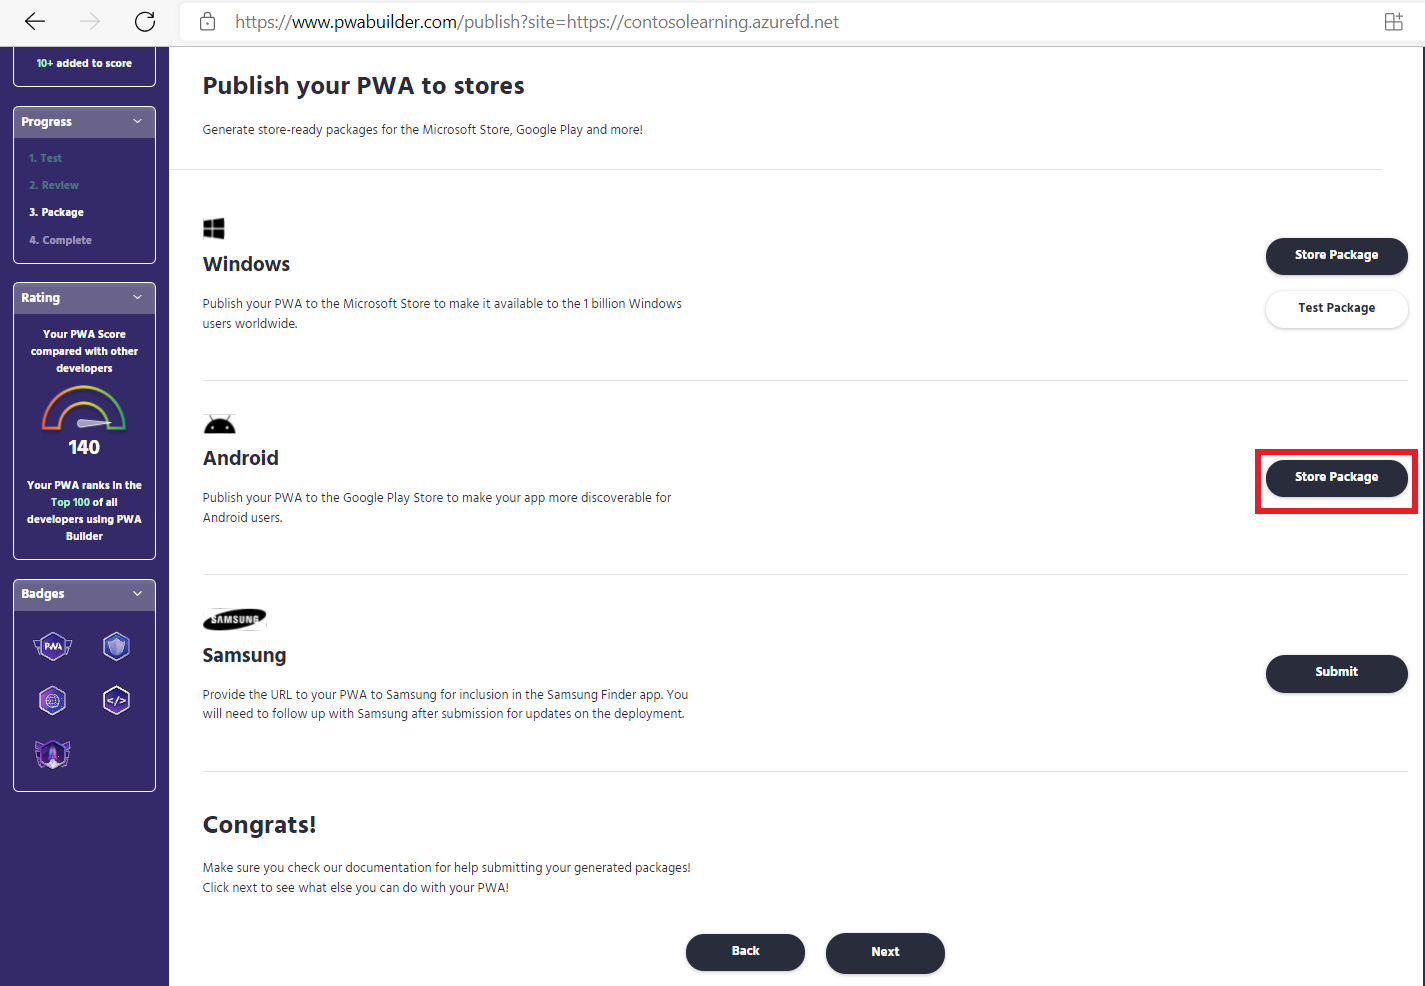
You will be redirected to page where you can generate Android App bundle, to the right in Android section, click on "Store package".
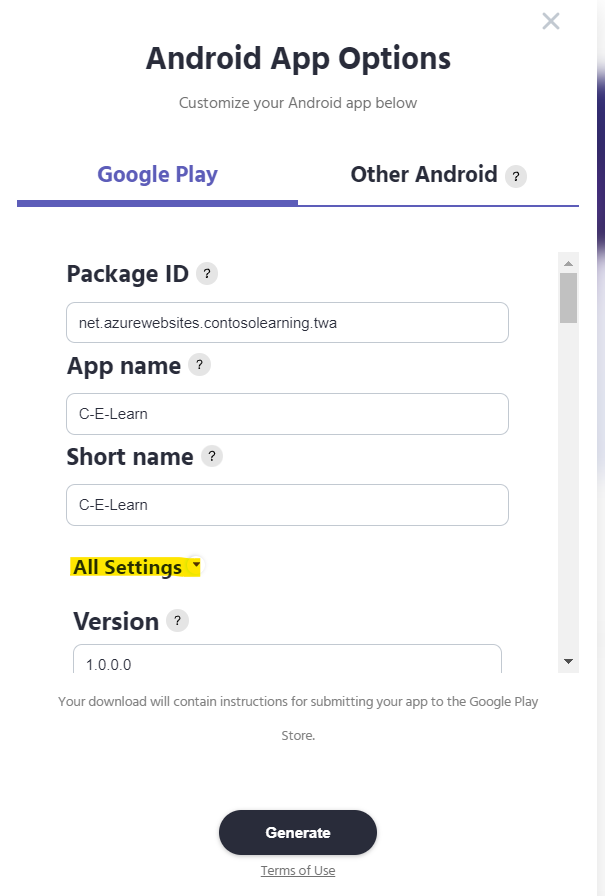
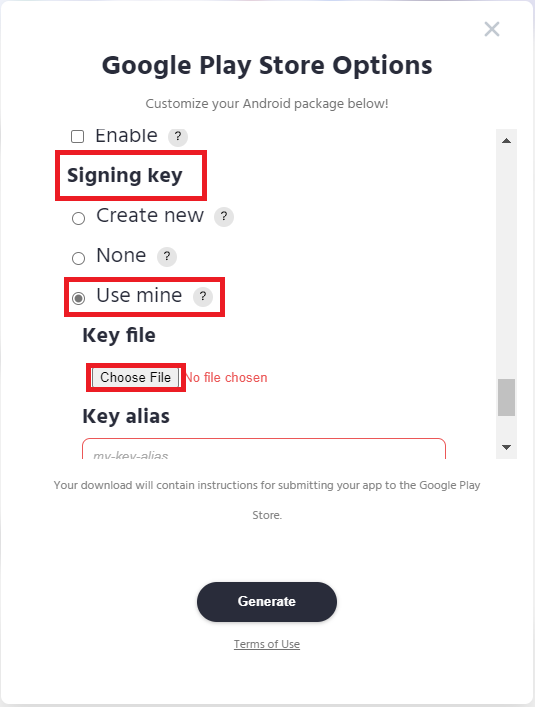
In 'Android App Options' window:
If you want to update an existing application then mention Package ID of your previously published android app.
If creating application for first time, you can choose to leave it with pre-populated ID.
Provide App name and Launcher name for your application. If creating application for the first time, then you can proceeed to Step 6 generating your app bundle
Click on “All Settings” and increment your App version and App Version Code by 1 from the version of your existing app, if creating the app for first time do not increment the value.
Scroll to “Signing Key”, choose ‘Use Mine’ and upload the key store file that you received from MCT support team.
Download your application bundle.
Finish the process by running a script with steps as mentioned in this document that will allow you for Digital Asset linking.
Note
Difference between installing PWA from browser and installing from Play Store?
- There will be no difference in learning experience. However, with Play Store you can have access to analytics and ability to choose who can download the application. As Play Store certifies the application, it is more secure.
Advantages of PWA over Native application
PWAs are light weight applications when compared to Native applications, therefore they occupy less space (typically less than 10 MB).
Easy to maintain, as PWA is essentially a browser page running as Native application it would be at-par with updates released for web application.
Any updates sent to web application would be automatically synced with your PWA.
Things to remember when migrating from Native application to PWA
If you have updated your native application in Play Store with PWA then app gets automatically updated to user based on their device settings, else user needs to manually update the application from Play Store.
Downloaded content will not be migrated from Native to PWA application. Learner needs to download the content again for offline consumption.
Option 2: Requesting a mobile app AAB from the platform team
Visit Community Training Helpdesk.
.png)
Click on Sign in on the top-left corner of the homepage. Use your Azure AD or Social accounts to register and sign in.
Click on Create Support Ticket and enter the following values:
Field Description Title Enter "Request a Mobile App" Type Select "Request” Subject Select "Mobile App" Description Check Step 4 Provide the following information in the Description section of the Support Ticket -
Application Color Code (HEX format) - This color will be used in the mobile app as shown in the image at the start of the article. For eg, Orange
Portal URL - This is the instance of the platform for which the mobile app will be generated
Application Name - This is the name of the mobile app when published on playStore
Supported Languages - This is the list of languages supported in the mobile app
Sample Description Content
- Application Color Code - #FFA500
- Portal URL - https://contoso.azurefd.net/
- Application Name - Contoso Learning Center
- Language - English, Spanish, Telugu
Create a zip file with the following assets and attach it to the form.
App icon with the following dimensions (in pixels): 24x24, 36x36, 48x48, 72x72, 96x96, 144x144. The icon on the phone screen used to launch the app is the app icon. App icon must have transparent background.
Splash screen logo with the following dimensions (in pixels): 150x150, 225x225, 300x300, 450x450. The screen that appears when the app opens is the splash screen, shown below.
.png)
Here is sample zip file for reference: MobileApp_Assets.zip
That's all! You’ll receive a link on your contact email address to download the mobile AAB & APK files from our support team (in 4-5 business days).
Steps to publish your mobile app to the playStore
Before you begin
Follow the steps above for creating your mobile app and ensure you have received the download link to your Mobile APK & AAB files from Microsoft.
We provide two files i.e., the APK & AAB file, you can use the APK file to test your app before publishing and to publish you may use the AAB bundle which contains support to multiple android versions and supports 32 & 64 bit.
Sign up on Google Play console in order to publish your app on Google PlayStore.
Steps to publish your mobile app
Download the AAB file to your computer from the email you received from our support team, after creating your Mobile App.
Follow the instructions given here to upload and publish your APK on the Google Play Store.
Note
The steps to publish AAB files are similar to the steps used in publishing an APK file.
Once you have uploaded and published your AAB file, navigate to Settings -> Users & Permissions.
.png)
Click on “Invite New User”.
.png)
Enter the email address as sangamdeployments@gmail.com.
.png)
Leave Access Expiry date as Never.
Select the role as Release Manager.
Choose your mobile app from Choose an App dropdown.
Click on Send Invitation.
Important: Send an email note to the Community Training team that the permission has been shared. You can reply to the email chain in which AAB file was shared with you.
Note
If there is any change/update in login type configuration on your instance then the mobile application needs to be updated.
Note
- To use office files in PWA in offline, we will be providing files to publish the application in Google Play store.
- Users can request support by raising a ticket Community Training Helpdesk.
Please reach out to us via HelpDesk if you have any further queries.
Feedback
Coming soon: Throughout 2024 we will be phasing out GitHub Issues as the feedback mechanism for content and replacing it with a new feedback system. For more information see: https://aka.ms/ContentUserFeedback.
Submit and view feedback for