dTPM access for Azure IoT Edge for Linux on Windows
Applies to: ![]() IoT Edge 1.4
IoT Edge 1.4
Important
IoT Edge 1.4 is the supported release. If you are on an earlier release, see Update IoT Edge.
A Trusted platform module (TPM) chip is a secure crypto-processor that is designed to carry out cryptographic operations. This technology is designed to provide hardware-based, security-related functions. The Azure IoT Edge for Linux on Windows (EFLOW) virtual machine doesn't have a virtual TPMs attached to the VM. However, the user can enable or disable the TPM passthrough feature, that allows the EFLOW virtual machine to use the Windows host OS TPM. The TPM passthrough feature enables two main scenarios:
- Use TPM technology for IoT Edge device provisioning using Device Provisioning Service (DPS)
- Read-only access to cryptographic keys stored inside the TPM.
This article describes how to develop a sample code in C# to read cryptographic keys stored inside the device TPM.
Important
The access to the TPM keys is limited to read-only. If you want to write keys to the TPM, you need to do it from the Windows host OS.
Prerequisites
A Windows host OS with a TPM or vTPM (ig using Windows host OS virtual machine).
EFLOW virtual machine with TPM passthrough enabled. Using an elevated PowerShell session, use
Set-EflowVmFeature -feature "DpsTpm" -enableto enable TPM passthrough. For more information, see Set-EflowVmFeature to enable TPM passthrough.Ensure that the NV index (default index=3001) is initialized with 8 bytes of data. The default AuthValue used by the sample is {1,2,3,4,5,6,7,8} which corresponds to the NV (Windows) Sample in the TSS.MSR libraries when writing to the TPM. All index initialization must take place on the Windows Host before reading from the EFLOW VM. For more information about TPM samples, see TSS.MSR.
Warning
Enabling TPM passthrough to the virtual machine may increase security risks.
Create the dTPM executable
The following steps show you how to create a sample executable to access a TPM index from the EFLOW VM. For more information about EFLOW TPM passthrough, see Azure IoT Edge for Linux on Windows Security.
Open Visual Studio 2019 or 2022.
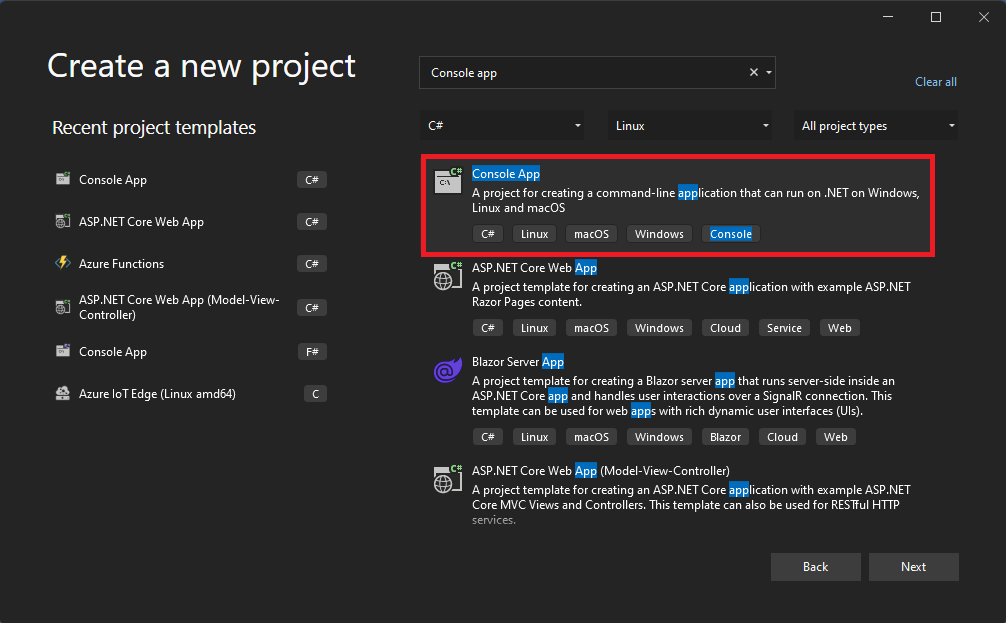
Select Create a new project.
Choose Console App in the list of templates then select Next.
Fill in the Project Name, Location and Solution Name fields then select Next.
Choose a target framework. The latest .NET 6.0 LTS version is preferred. After choosing a target framework, select Create. Visual Studio creates a new console app solution.
In Solution Explorer, right-click the project name and select Manage NuGet Packages.
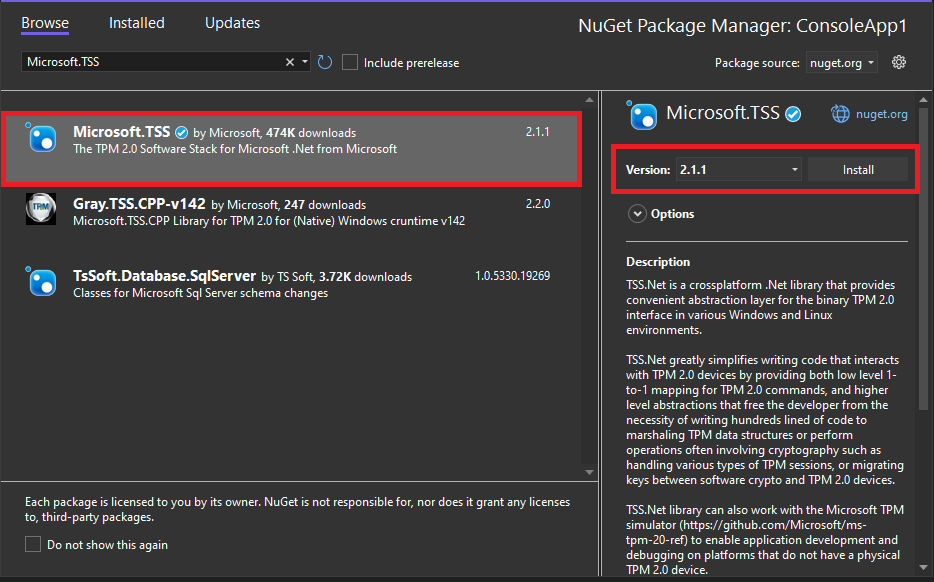
Select Browse and then search for
Microsoft.TSS. For more information about this package, see Microsoft.TSS.Choose the Microsoft.TSS package from the list then select Install.
Edit the Program.cs file and replace the contents with the EFLOW TPM sample code - Program.cs.
Select Build > Build solution to build the project. Verify the build is successful.
In Solution Explorer, right-click the project then select Publish.
In the Publish wizard, choose Folder > Folder. Select Browse and choose an output location for the executable file to be generated. Select Finish. After the publish profile is created, select Close.
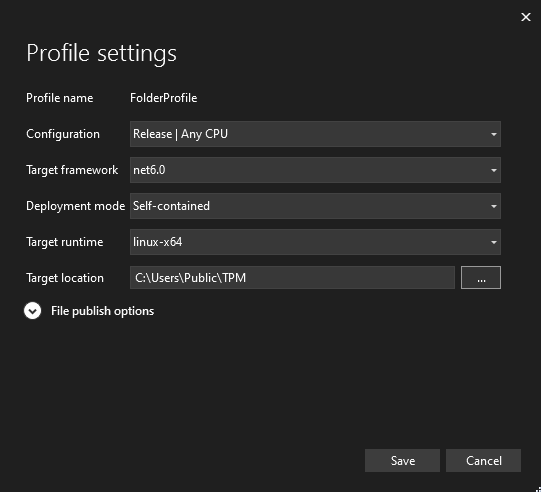
On the Publish tab, select Show all settings link. Change the following configurations then select Save.
- Target Runtime: linux-x64.
- Deployment mode: Self-contained.
Select Publish then wait for the executable to be created.
If publish succeeds, you should see the new files created in your output folder.
Copy and run the executable
Once the executable file and dependency files are created, you need to copy the folder to the EFLOW virtual machine. The following steps show you how to copy all the necessary files and how to run the executable inside the EFLOW virtual machine.
Start an elevated PowerShell session using Run as Administrator.
Change directory to the parent folder that contains the published files. For example, if your published files are under the folder TPM in the directory
C:\Users\User. You can use the following command to change to the parent folder.cd "C:\Users\User"Create a tar file with all the files created in previous steps. For more information about PowerShell tar support, see Tar and Curl Come to Windows. For example, if you have all your files under the folder TPM, you can use the following command to create the TPM.tar file.
tar -cvzf TPM.tar ".\TPM"Once the TPM.tar file is created successfully, use the
Copy-EflowVmFilecmdlet to copy the tar file created to the EFLOW VM. For example, if you have the tar file name TPM.tar in the directoryC:\Users\User. you can use the following command to copy to the EFLOW VM.Copy-EflowVmFile -fromFile "C:\Users\User\TPM.tar" -toFile "/home/iotedge-user/" -pushFileConnect to the EFLOW virtual machine.
Connect-EflowVmChange directory to the folder where you copied the tar file and check the file is available. If you used the example above, when connected to the EFLOW VM, you'll already be at the iotedge-user root folder. Run the
lscommand to list the files and folders.Run the following command to extract all the content from the tar file.
tar -xvzf TPM.tarAfter extraction, you should see a new folder with all the TPM files.
Change directory to the TPM folder.
cd TPMAdd executable permission to the main executable file. For example, if your project name was TPMRead, your main executable is named TPMRead. Run the following command to make it executable.
chmod +x TPMReadTo solve an ICU globalization issue, run the following command. For example, if your project name is TPMTest run:
sed -i '/"configProperties": /a \\t"System.Globalization.Invariant\": true,' TPMTest.runtimeconfig.jsonThe last step is to run the executable file. For example, if your project name is TPMTest, run the following command:
./TPMTestYou should see an output similar to the following.
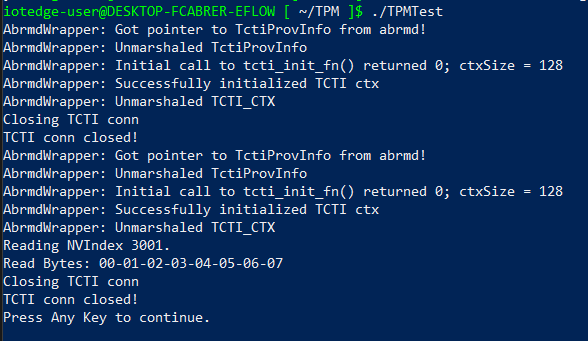
Next steps
Feedback
Coming soon: Throughout 2024 we will be phasing out GitHub Issues as the feedback mechanism for content and replacing it with a new feedback system. For more information see: https://aka.ms/ContentUserFeedback.
Submit and view feedback for