Manage labs
This article describes how a lab plan owner or administrator can view and delete all the labs associated with a lab plan.
Lab plans and labs are sibling resources contained in a resource group. Administrators can use existing tools in the Azure portal to manage labs.
View labs
Open the Resource Group page.
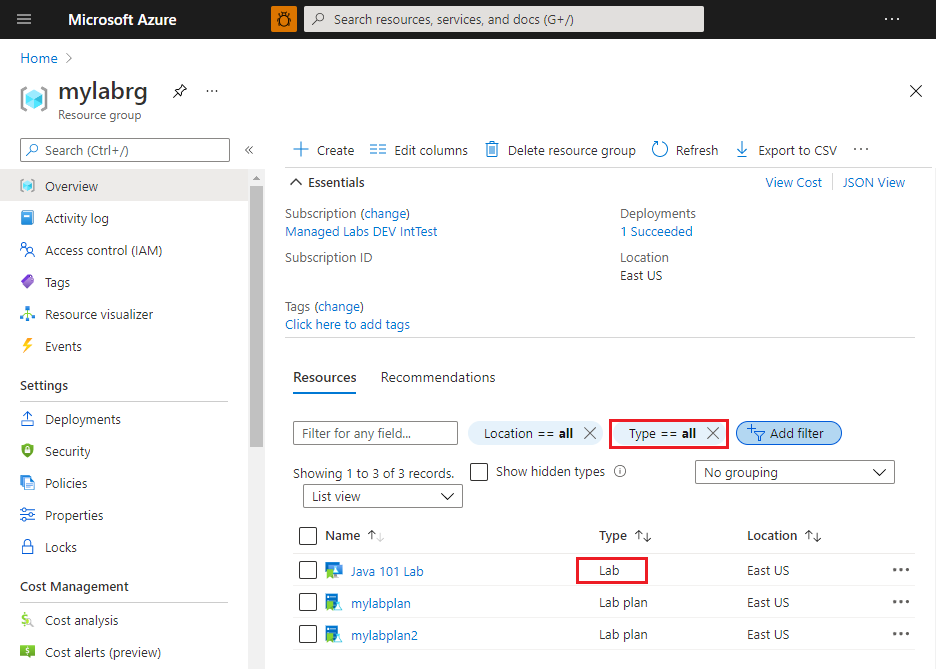
To view only lab resources, set a filter for
Type == Lab.You see a list of labs with the following information:
- Name of the lab.
- Type of the resource (Lab).
- Location of the lab.
Open a lab to view additional information such as the associated lab plan, OS type, and virtual machine size.
Delete a lab
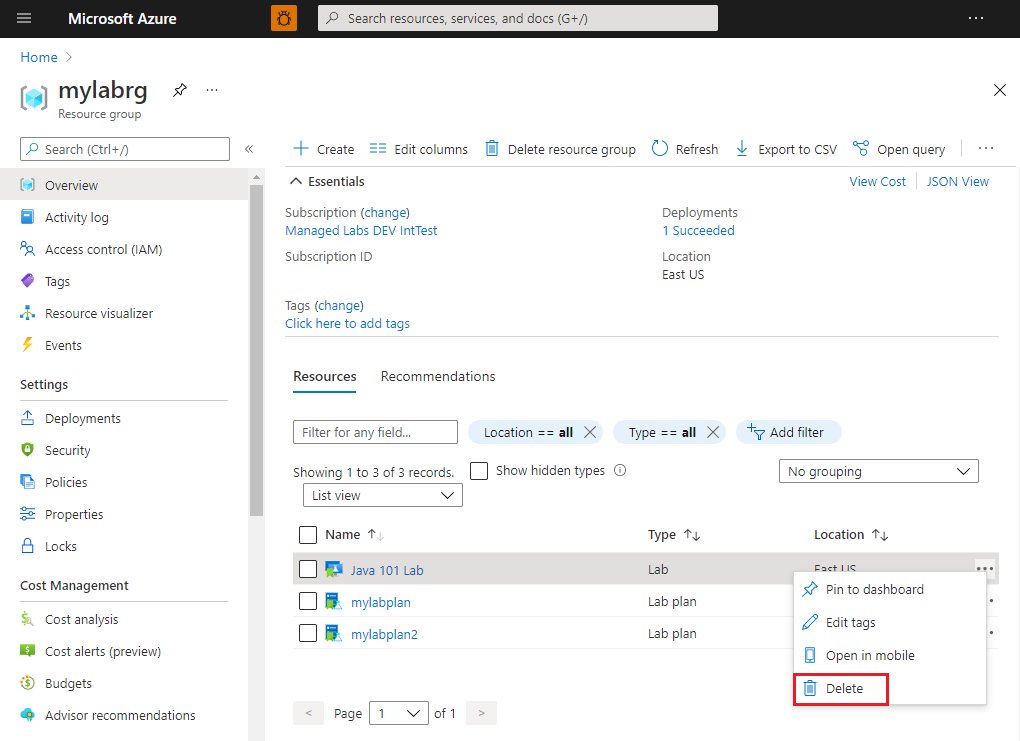
Open the Resource Group page.
To view only lab resources, set a filter for
Type == Lab.Select ... (ellipsis), and then select Delete.
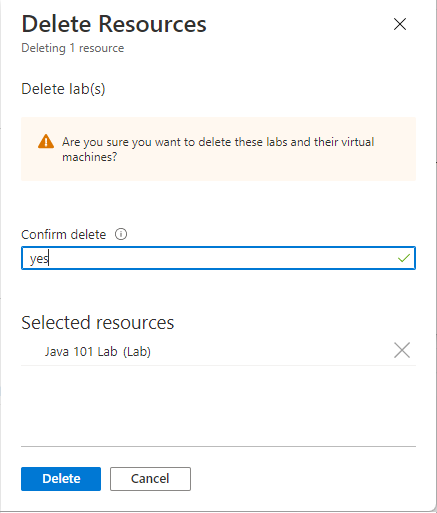
Type Yes on the warning message.
Next steps
See other articles in the How-to guides -> Create and configure lab plans (lab plan owner) section of the table-of-content (TOC).
Feedback
Coming soon: Throughout 2024 we will be phasing out GitHub Issues as the feedback mechanism for content and replacing it with a new feedback system. For more information see: https://aka.ms/ContentUserFeedback.
Submit and view feedback for