Manage Machine Learning Studio (classic) web services using API Management
APPLIES TO:  Machine Learning Studio (classic)
  Azure Machine Learning
Important
Support for Machine Learning Studio (classic) will end on 31 August 2024. We recommend you transition to Azure Machine Learning by that date.
Beginning 1 December 2021, you will not be able to create new Machine Learning Studio (classic) resources. Through 31 August 2024, you can continue to use the existing Machine Learning Studio (classic) resources.
- See information on moving machine learning projects from ML Studio (classic) to Azure Machine Learning.
- Learn more about Azure Machine Learning
ML Studio (classic) documentation is being retired and may not be updated in the future.
Overview
This guide shows you how to quickly get started using API Management to manage your Machine Learning Studio (classic) web services.
What is Azure API Management?
Azure API Management is an Azure service that lets you manage your REST API endpoints by defining user access, usage throttling, and dashboard monitoring. See the Azure API management site for more details. To get started with Azure API Management, see the import and publish guide. This other guide, which this guide is based on, covers more topics, including notification configurations, tier pricing, response handling, user authentication, creating products, developer subscriptions, and usage dashboarding.
Prerequisites
To complete this guide, you need:
- An Azure account.
- An AzureML account.
- The workspace, service, and api_key for an AzureML experiment deployed as a web service. For details on how to create an AzureML experiment, see the Studio quickstart. For information on how to deploy a Studio (classic) experiment as a web service, see the Studio deployment how-to for details on how to deploy an AzureML experiment as a web service. Alternately, Appendix A has instructions for how to create and test a simple AzureML experiment and deploy it as a web service.
Create an API Management instance
You can manage your Machine Learning web service with an API Management instance.
- Sign in to the Azure portal.
- Select + Create a resource.
- In the search box, type "API management", then select the "API management" resource.
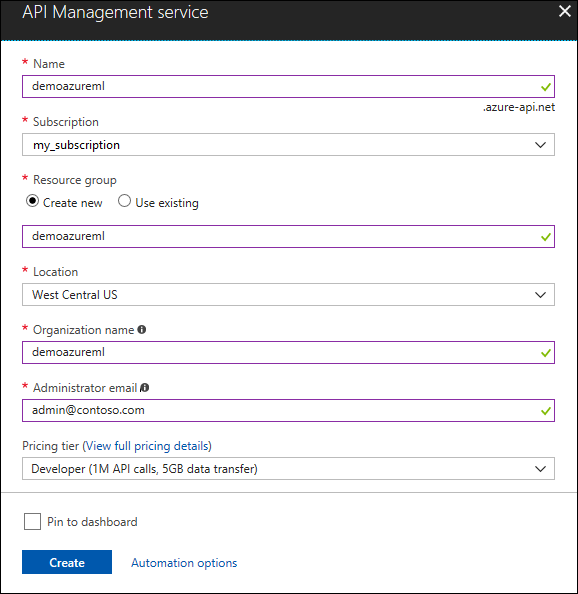
- Click Create.
- The Name value will be used to create a unique URL (this example uses "demoazureml").
- Select a Subscription, Resource group, and Location for your service instance.
- Specify a value for Organization name (this example uses "demoazureml").
- Enter your Administrator email - this email will be used for notifications from the API Management system.
- Click Create.
It may take up to 30 minutes for a new service to be created.
Create the API
Once the service instance is created, the next step is to create the API. An API consists of a set of operations that can be invoked from a client application. API operations are proxied to existing web services. This guide creates APIs that proxy to the existing AzureML RRS and BES web services.
To create the API:
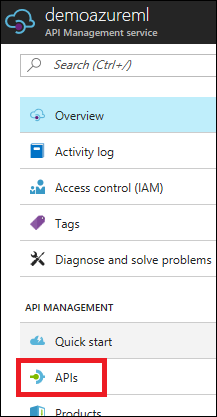
In the Azure portal, open the service instance you created.
In the left navigation pane, select APIs.
Click Add API.
Enter a Web API name (this example uses "AzureML Demo API").
For Web service URL, enter "
https://ussouthcentral.services.azureml.net".Enter a **Web API URL suffix". This will become the last part of the URL that customers will use for sending requests to the service instance (this example uses "azureml-demo").
For Web API URL scheme, select HTTPS.
For Products, select Starter.
Click Save.
Add the operations
Operations are added and configured to an API in the publisher portal. To access the publisher portal, click Publisher portal in the Azure portal for your API Management service, select APIs, Operations, then click Add operation.
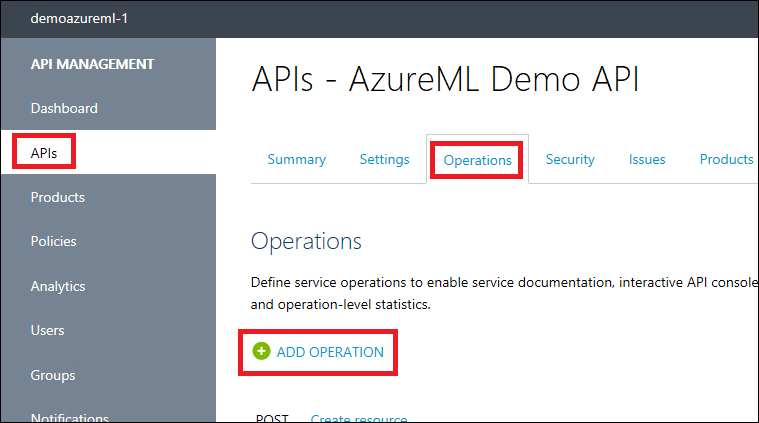
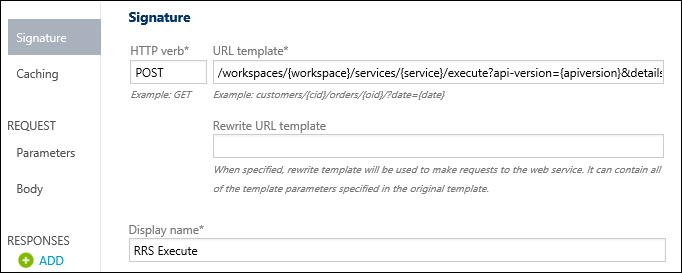
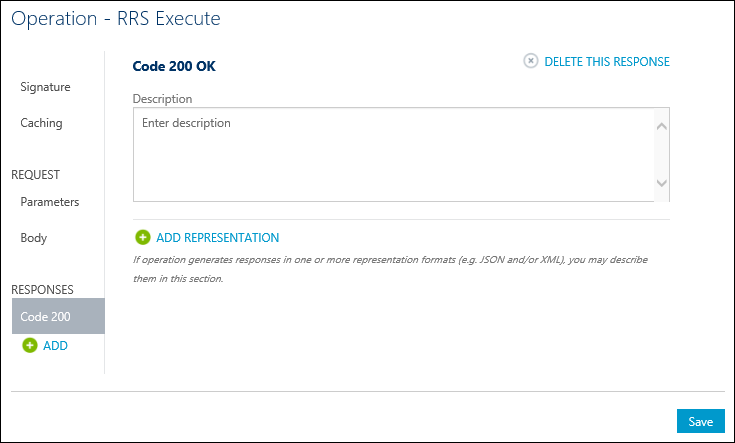
The New operation window will be displayed and the Signature tab will be selected by default.
Add RRS Operation
First create an operation for the AzureML RRS service:
For the HTTP verb, select POST.
For the URL template, type "
/workspaces/{workspace}/services/{service}/execute?api-version={apiversion}&details={details}".Enter a Display name (this example uses "RRS Execute").
Click Responses > ADD on the left and select 200 OK.
Click Save to save this operation.
Add BES Operations
Note
Screenshots are not included here for the BES operations as they are very similar to those for adding the RRS operation.
Submit (but not start) a Batch Execution job
- Click add operation to add a BES operation to the API.
- For the HTTP verb, select POST.
- For the URL template, type "
/workspaces/{workspace}/services/{service}/jobs?api-version={apiversion}". - Enter a Display name (this example uses "BES Submit").
- Click Responses > ADD on the left and select 200 OK.
- Click Save.
Start a Batch Execution job
- Click add operation to add a BES operation to the API.
- For the HTTP verb, select POST.
- For the HTTP verb, type "
/workspaces/{workspace}/services/{service}/jobs/{jobid}/start?api-version={apiversion}". - Enter a Display name (this example uses "BES Start").
- Click Responses > ADD on the left and select 200 OK.
- Click Save.
Get the status or result of a Batch Execution job
- Click add operation to add a BES operation to the API.
- For the HTTP verb, select GET.
- For the URL template, type "
/workspaces/{workspace}/services/{service}/jobs/{jobid}?api-version={apiversion}". - Enter a Display name (this example uses "BES Status").
- Click Responses > ADD on the left and select 200 OK.
- Click Save.
Delete a Batch Execution job
- Click add operation to add a BES operation to the API.
- For the HTTP verb, select DELETE.
- For the URL template, type "
/workspaces/{workspace}/services/{service}/jobs/{jobid}?api-version={apiversion}". - Enter a Display name (this example uses "BES Delete").
- Click Responses > ADD on the left and select 200 OK.
- Click Save.
Call an operation from the Developer portal
Operations can be called directly from the Developer portal, which provides a convenient way to view and test the operations of an API. In this step, you will call the RRS Execute method that was added to the AzureML Demo API.
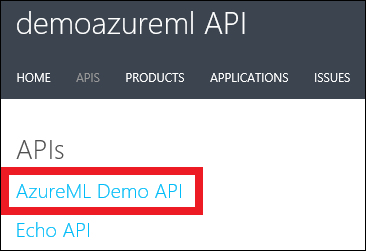
Click Developer portal.

Click APIs from the top menu, and then click AzureML Demo API to see the operations available.
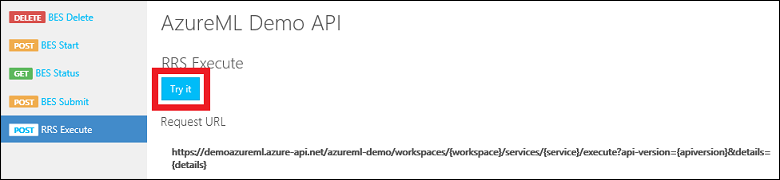
Select RRS Execute for the operation. Click Try It.
For Request parameters, type your workspace and service, type "2.0 for the apiversion, and "true" for the details. You can find your workspace and service in the AzureML web service dashboard (see Test the web service in Appendix A).
For Request headers, click Add header and type "Content-Type" and "application/json". Click Add header again and type "Authorization" and "Bearer <your service API-KEY>". You can find your API-KEY in the AzureML web service dashboard (see Test the web service in Appendix A).
For Request body, type
{"Inputs": {"input1": {"ColumnNames": ["Col2"], "Values": [["This is a good day"]]}}, "GlobalParameters": {}}.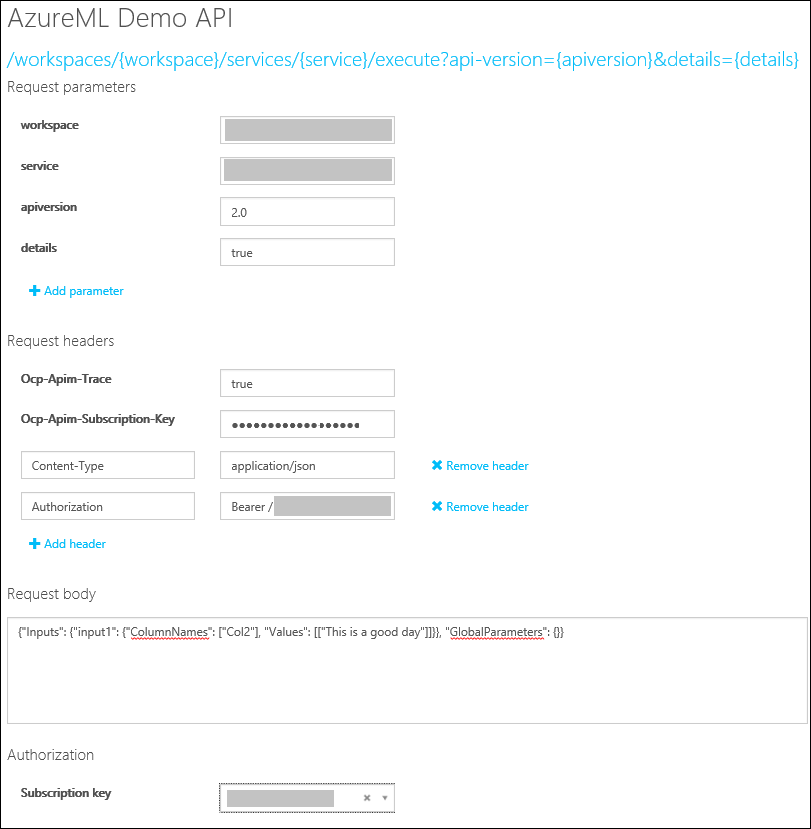
Click Send.

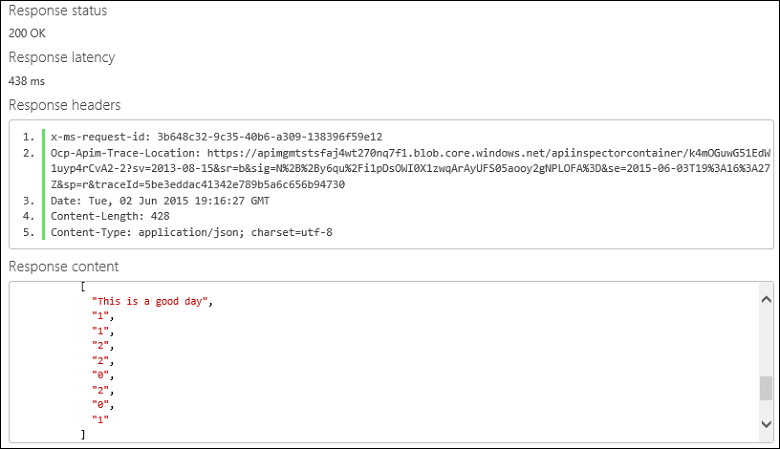
After an operation is invoked, the developer portal displays the Requested URL from the back-end service, the Response status, the Response headers, and any Response content.
Appendix A - Creating and testing a simple AzureML web service
Creating the experiment
Below are the steps for creating a simple AzureML experiment and deploying it as a web service. The web service takes as input a column of arbitrary text and returns a set of features represented as integers. For example:
| Text | Hashed Text |
|---|---|
| This is a good day | 1 1 2 2 0 2 0 1 |
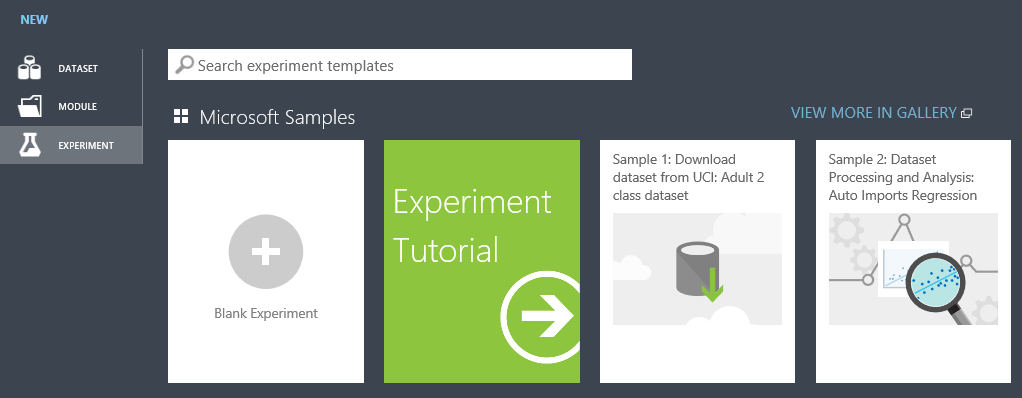
First, using a browser of your choice, navigate to: https://studio.azureml.net/ and enter your credentials to log in. Next, create a new blank experiment.
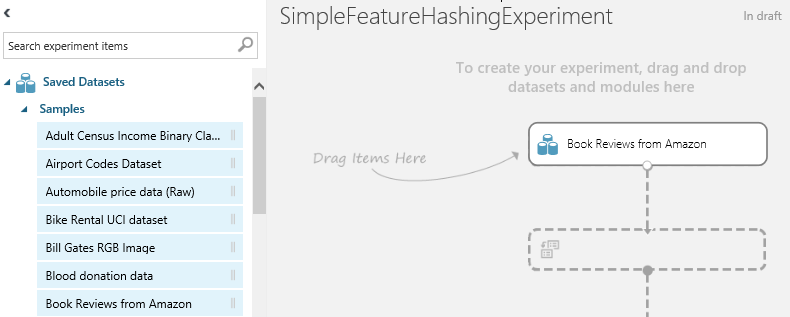
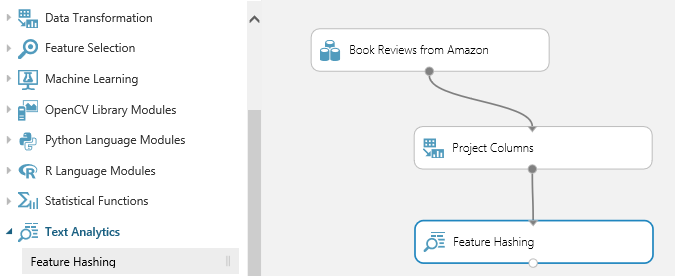
Rename it to SimpleFeatureHashingExperiment. Expand Saved Datasets and drag Book Reviews from Amazon onto your experiment.
Expand Data Transformation and Manipulation and drag Select Columns in Dataset onto your experiment. Connect Book Reviews from Amazon to Select Columns in Dataset.
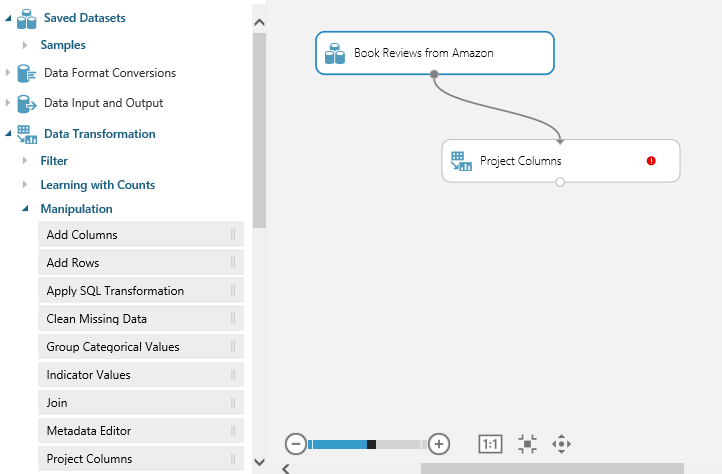
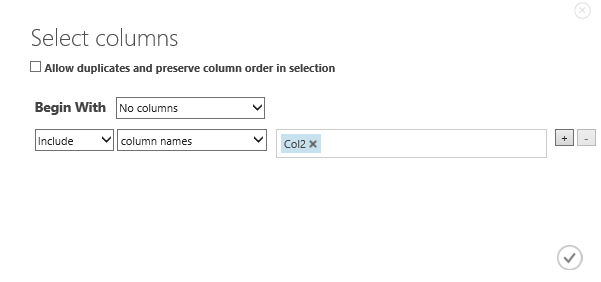
Click Select Columns in Dataset and then click Launch column selector and select Col2. Click the checkmark to apply these changes.
Expand Text Analytics and drag Feature Hashing onto the experiment. Connect Select Columns in Dataset to Feature Hashing.
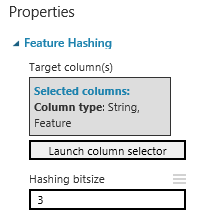
Type 3 for the Hashing bitsize. This will create 8 (23) columns.
At this point, you may want to click Run to test the experiment.

Create a web service
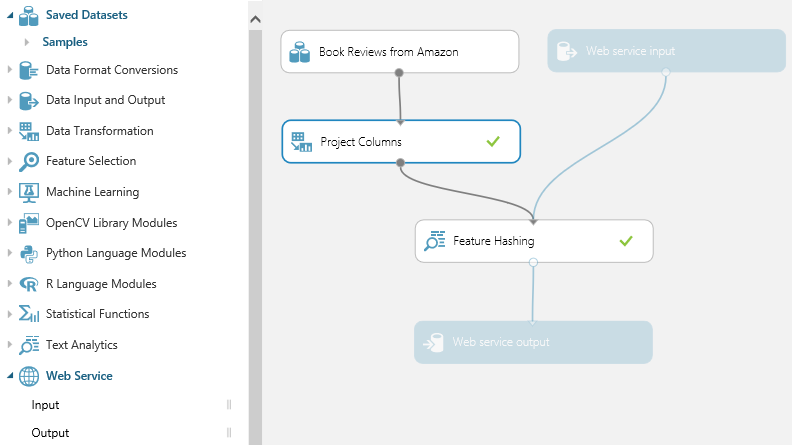
Now create a web service. Expand Web Service and drag Input onto your experiment. Connect Input to Feature Hashing. Also drag output onto your experiment. Connect Output to Feature Hashing.
Click Publish web service.

Click Yes to publish the experiment.

Test the web service
An AzureML web service consists of RSS (request/response service) and BES (batch execution service) endpoints. RSS is for synchronous execution. BES is for asynchronous job execution. To test your web service with the sample Python source below, you may need to download and install the Azure SDK for Python (see: How to install Python).
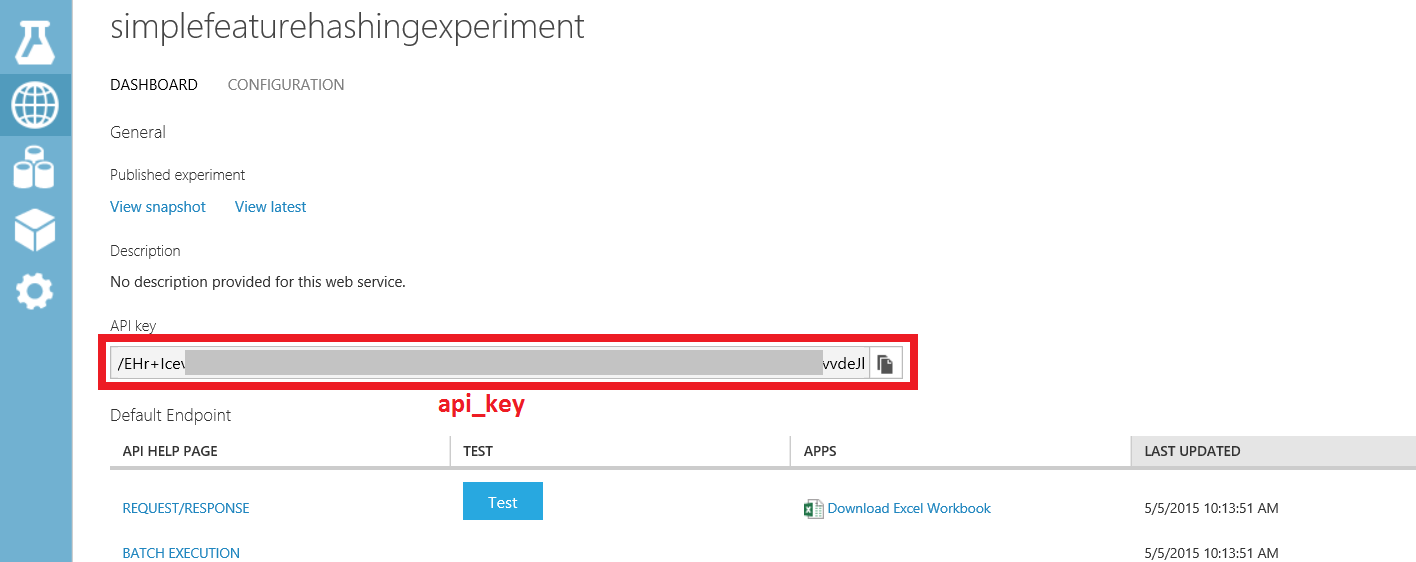
You will also need the workspace, service, and api_key of your experiment for the sample source below. You can find the workspace and service by clicking either Request/Response or Batch Execution for your experiment in the web service dashboard.

You can find the api_key by clicking your experiment in the web service dashboard.
Test RRS endpoint
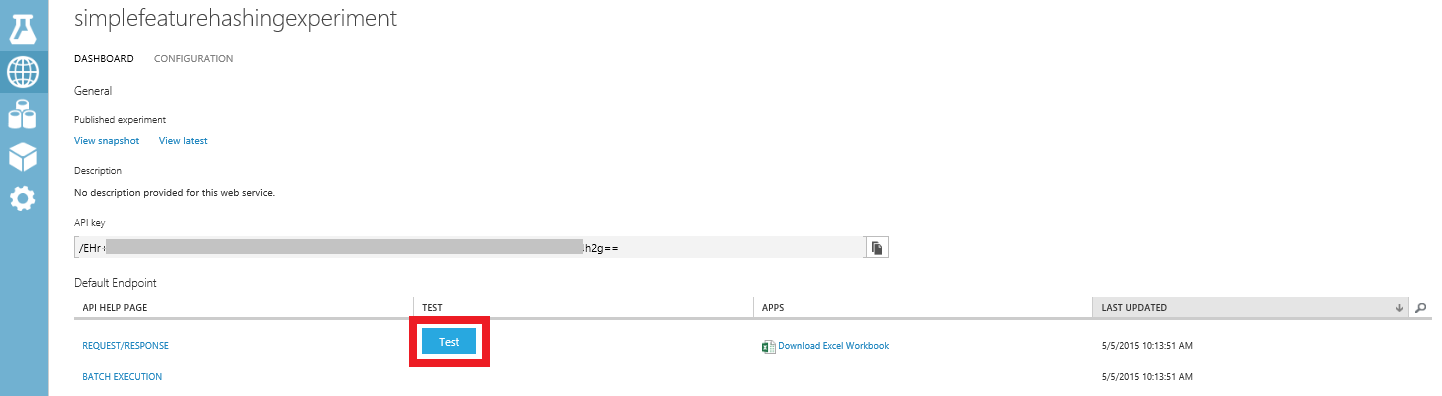
Test button
An easy way to test the RRS endpoint is to click Test on the web service dashboard.
Type This is a good day for col2. Click the checkmark.
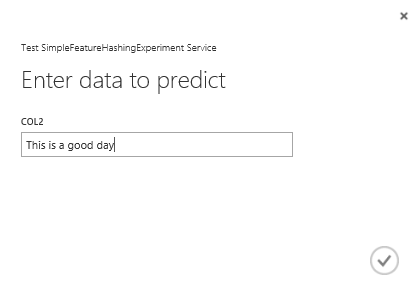
You will see something like

Sample Code
Another way to test your RRS is from your client code. If you click Request/response on the dashboard and scroll to the bottom, you will see sample code for C#, Python, and R. You will also see the syntax of the RRS request, including the request URI, headers, and body.
This guide shows a working Python example. You will need to modify it with the workspace, service, and api_key of your experiment.
import urllib2
import json
workspace = "<REPLACE WITH YOUR EXPERIMENT'S WEB SERVICE WORKSPACE ID>"
service = "<REPLACE WITH YOUR EXPERIMENT'S WEB SERVICE SERVICE ID>"
api_key = "<REPLACE WITH YOUR EXPERIMENT'S WEB SERVICE API KEY>"
data = {
"Inputs": {
    "input1": {
        "ColumnNames": ["Col2"],
        "Values": [ [ "This is a good day" ] ]
    },
},
"GlobalParameters": { }
}
url = "https://ussouthcentral.services.azureml.net/workspaces/" + workspace + "/services/" + service + "/execute?api-version=2.0&details=true"
headers = {'Content-Type':'application/json', 'Authorization':('Bearer '+ api_key)}
body = str.encode(json.dumps(data))
try:
    req = urllib2.Request(url, body, headers)
    response = urllib2.urlopen(req)
    result = response.read()
    print "result:" + result
        except urllib2.HTTPError, error:
    print("The request failed with status code: " + str(error.code))
    print(error.info())
    print(json.loads(error.read()))
Test BES endpoint
Click Batch execution on the dashboard and scroll to the bottom. You will see sample code for C#, Python, and R. You will also see the syntax of the BES requests to submit a job, start a job, get the status or results of a job, and delete a job.
This guide shows a working Python example. You need to modify it with the workspace, service, and api_key of your experiment. Additionally, you need to modify the storage account name, storage account key, and storage container name. Lastly, you will need to modify the location of the input file and the location of the output file.
import urllib2
import json
import time
from azure.storage import *
workspace = "<REPLACE WITH YOUR WORKSPACE ID>"
service = "<REPLACE WITH YOUR SERVICE ID>"
api_key = "<REPLACE WITH THE API KEY FOR YOUR WEB SERVICE>"
storage_account_name = "<REPLACE WITH YOUR AZURE STORAGE ACCOUNT NAME>"
storage_account_key = "<REPLACE WITH YOUR AZURE STORAGE KEY>"
storage_container_name = "<REPLACE WITH YOUR AZURE STORAGE CONTAINER NAME>"
input_file = "<REPLACE WITH THE LOCATION OF YOUR INPUT FILE>" # Example: C:\\mydata.csv
output_file = "<REPLACE WITH THE LOCATION OF YOUR OUTPUT FILE>" # Example: C:\\myresults.csv
input_blob_name = "mydatablob.csv"
output_blob_name = "myresultsblob.csv"
def printHttpError(httpError):
print("The request failed with status code: " + str(httpError.code))
print(httpError.info())
print(json.loads(httpError.read()))
return
def saveBlobToFile(blobUrl, resultsLabel):
print("Reading the result from " + blobUrl)
try:
    response = urllib2.urlopen(blobUrl)
except urllib2.HTTPError, error:
    printHttpError(error)
    return
with open(output_file, "wb+") as f:
    f.write(response.read())
print(resultsLabel + " have been written to the file " + output_file)
return
def processResults(result):
first = True
results = result["Results"]
for outputName in results:
    result_blob_location = results[outputName]
    sas_token = result_blob_location["SasBlobToken"]
    base_url = result_blob_location["BaseLocation"]
    relative_url = result_blob_location["RelativeLocation"]
    print("The results for " + outputName + " are available at the following Azure Storage location:")
    print("BaseLocation: " + base_url)
    print("RelativeLocation: " + relative_url)
    print("SasBlobToken: " + sas_token)
    if (first):
        first = False
        url3 = base_url + relative_url + sas_token
        saveBlobToFile(url3, "The results for " + outputName)
return

def invokeBatchExecutionService():
url = "https://ussouthcentral.services.azureml.net/workspaces/" + workspace +"/services/" + service +"/jobs"
blob_service = BlobService(account_name=storage_account_name, account_key=storage_account_key)
print("Uploading the input to blob storage...")
data_to_upload = open(input_file, "r").read()
blob_service.put_blob(storage_container_name, input_blob_name, data_to_upload, x_ms_blob_type="BlockBlob")
print "Uploaded the input to blob storage"
input_blob_path = "/" + storage_container_name + "/" + input_blob_name
connection_string = "DefaultEndpointsProtocol=https;AccountName=" + storage_account_name + ";AccountKey=" + storage_account_key
payload =  {
    "Input": {
        "ConnectionString": connection_string,
        "RelativeLocation": input_blob_path
    },
    "Outputs": {
        "output1": { "ConnectionString": connection_string, "RelativeLocation": "/" + storage_container_name + "/" + output_blob_name },
    },
    "GlobalParameters": {
    }
}
    body = str.encode(json.dumps(payload))
headers = { "Content-Type":"application/json", "Authorization":("Bearer " + api_key)}
print("Submitting the job...")
# submit the job
req = urllib2.Request(url + "?api-version=2.0", body, headers)
try:
    response = urllib2.urlopen(req)
except urllib2.HTTPError, error:
    printHttpError(error)
    return
result = response.read()
job_id = result[1:-1] # remove the enclosing double-quotes
print("Job ID: " + job_id)
# start the job
print("Starting the job...")
req = urllib2.Request(url + "/" + job_id + "/start?api-version=2.0", "", headers)
try:
    response = urllib2.urlopen(req)
except urllib2.HTTPError, error:
    printHttpError(error)
    return
url2 = url + "/" + job_id + "?api-version=2.0"

while True:
    print("Checking the job status...")
    # If you are using Python 3+, replace urllib2 with urllib.request in the following code
    req = urllib2.Request(url2, headers = { "Authorization":("Bearer " + api_key) })
    try:
        response = urllib2.urlopen(req)
    except urllib2.HTTPError, error:
        printHttpError(error)
        return
    result = json.loads(response.read())
    status = result["StatusCode"]
    print "status:" + status
    if (status == 0 or status == "NotStarted"):
        print("Job " + job_id + " not yet started...")
    elif (status == 1 or status == "Running"):
        print("Job " + job_id + " running...")
    elif (status == 2 or status == "Failed"):
        print("Job " + job_id + " failed!")
        print("Error details: " + result["Details"])
        break
    elif (status == 3 or status == "Cancelled"):
        print("Job " + job_id + " cancelled!")
        break
    elif (status == 4 or status == "Finished"):
        print("Job " + job_id + " finished!")
        processResults(result)
        break
    time.sleep(1) # wait one second
return
invokeBatchExecutionService()