Test migrate replicating virtual machines
This article helps you understand how to test replicating virtual machines. Test migration provides a way to test and validate migrations prior to the actual migration.
Prerequisites
Before you get started, perform the following steps:
- Create an Azure Migrate project.
- Deploy the appliance for your scenario and complete the discovery of virtual machines.
- Configure replication for one or more virtual machines that are to be migrated.
Important
You'll need at least one replicating virtual machine in the project before you can test the migration.
Review the following tutorials based on your environment:
- Migrating VMware VMs with agentless migration.
- Migrating Hyper-V VMs to Azure.
- Migrating machines as physical servers to Azure
Setting up your test environment
The requirements for a test environment can vary according to your needs. Azure Migrate provides customers complete flexibility to create their own test environment. An option to select the VNet is provided during test migration. You can customize the setting of this VNet to create a test environment according to your requirement.
Furthermore, you can create 1:1 mapping between subnets of the VNet and Network Interface Cards (NICs) on VM, which gives more flexibility in creating the test environment.
Note
Currently, the subnet selection feature is available only for agentless VMware migration scenario.
The following logic is used for subnet selection for other scenarios (Migration from Hyper-V environment and physical server migration).
If a target subnet (other than default) was specified as an input while enabling replication. Azure Migrate prioritizes using a subnet with the same name in the Virtual Network selected for the test migration.
If the subnet with the same name isn't found, then Azure Migrate selects the first subnet available alphabetically that isn't a Gateway/Application Gateway/Firewall/Bastion subnet. For example,
- Suppose the target VNet is VNet-alpha and target subnet is Subnet-alpha for a replicating VM. VNet-beta is selected during test migration for this VM, then -
- If VNet-beta has a subnet named Subnet-alpha, that subnet would be chosen for test migration.
- If VNet-beta doesn't have a Subnet-alpha, then the next alphabetically available subnet, suppose Subnet-beta, would be chosen if it isn't Gateway / Application Gateway / Firewall / Bastion subnet.
Precautions to take while selecting the test migration virtual network
The test environment boundaries would depend on the network setting of the VNet you selected. The tested VM would behave exactly like it's supposed to run after migration. Performing a test migration to a production virtual network is not recommended. If the VNet selected for test migration has connections open to the on-premises VNet, it may cause issues like duplication of VM or DNS entry changes.
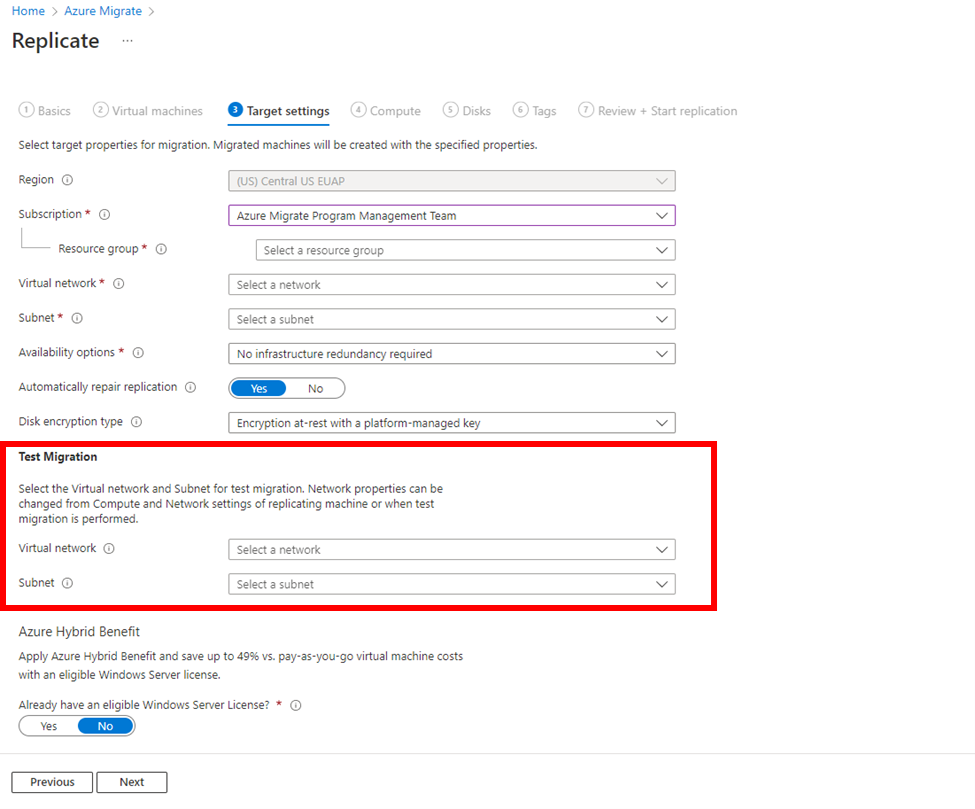
Selecting test migration VNet while enabling replication (Agentless VMware migration)
Select the VNet and subnet for test migration from the Target settings tab. These settings can be overridden later in the Compute and Network tab of the replicating VM or while starting test migration of the replicating VM.
Changing test migration virtual network and subnet of a replicating machine (Agentless VMware migration)
You can change the VNet and subnet of a replicating machine by following the steps below.
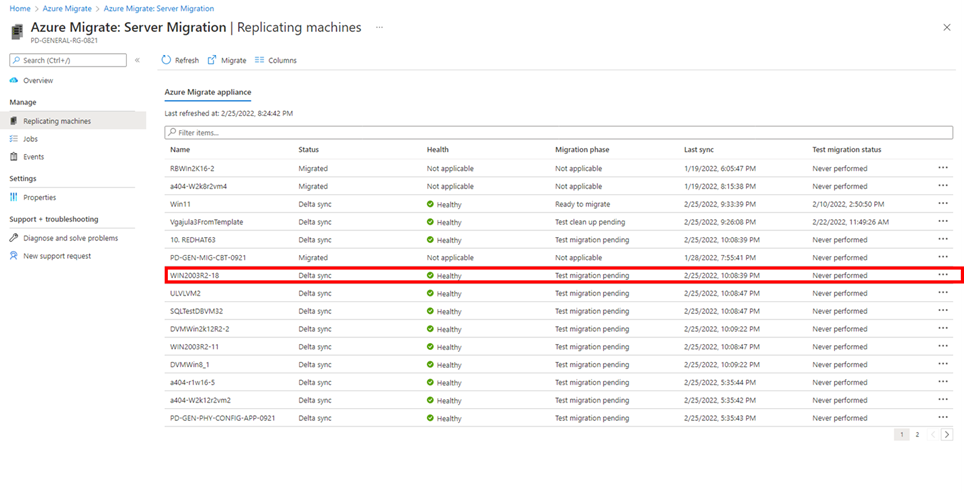
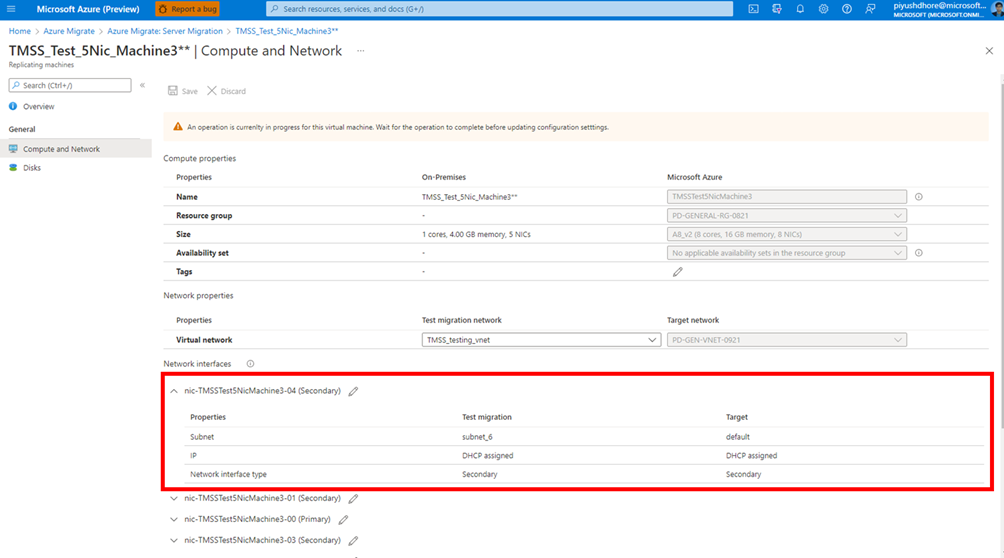
Select the virtual machine from the list of currently replicating virtual machines
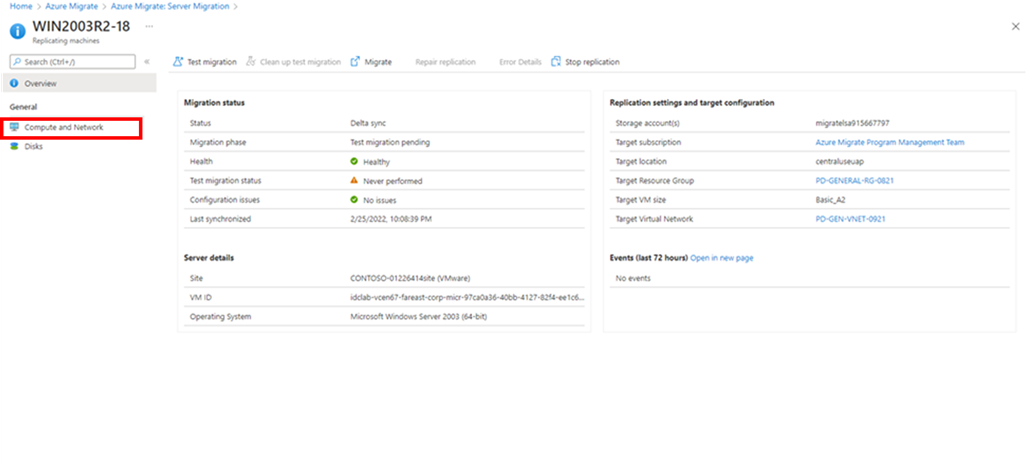
Select Compute and Network option under General.
Select the virtual network from the Test migration column. It's important to select the VNet in this drop down for test migration to be able to select subnet for each Network Interface Card (NIC) in the following steps.
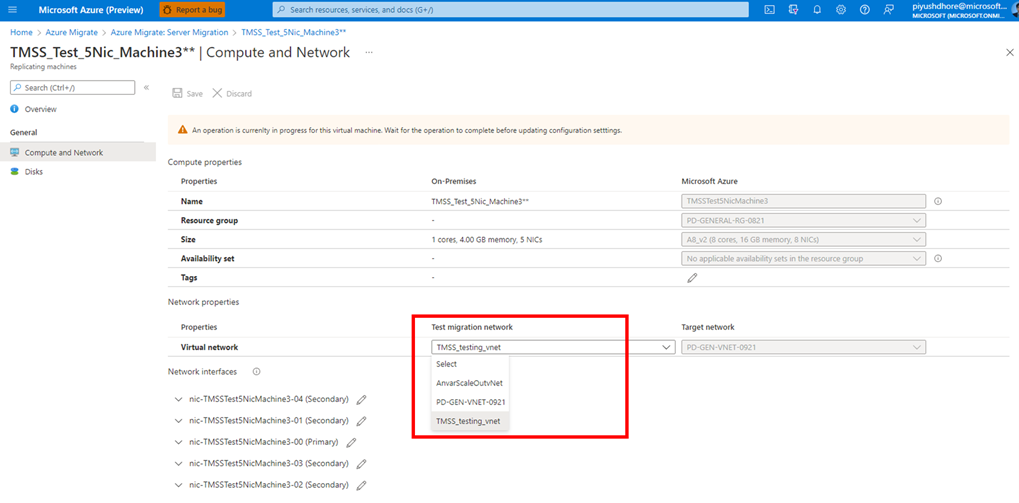
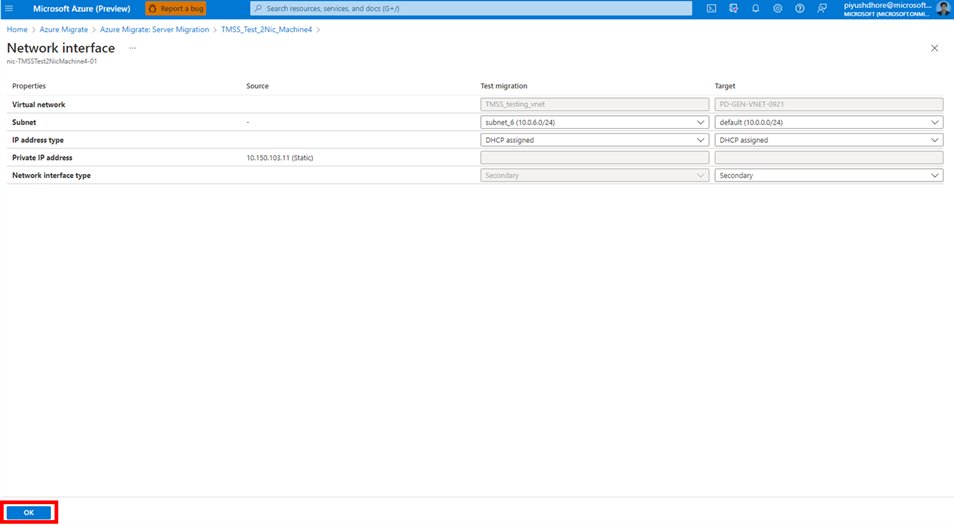
Select the NIC's name to check its settings. You can select the subnet for each of the NICs of the VM.
To change the settings, select edit. Change the setting for the NIC in the new form. Select OK.
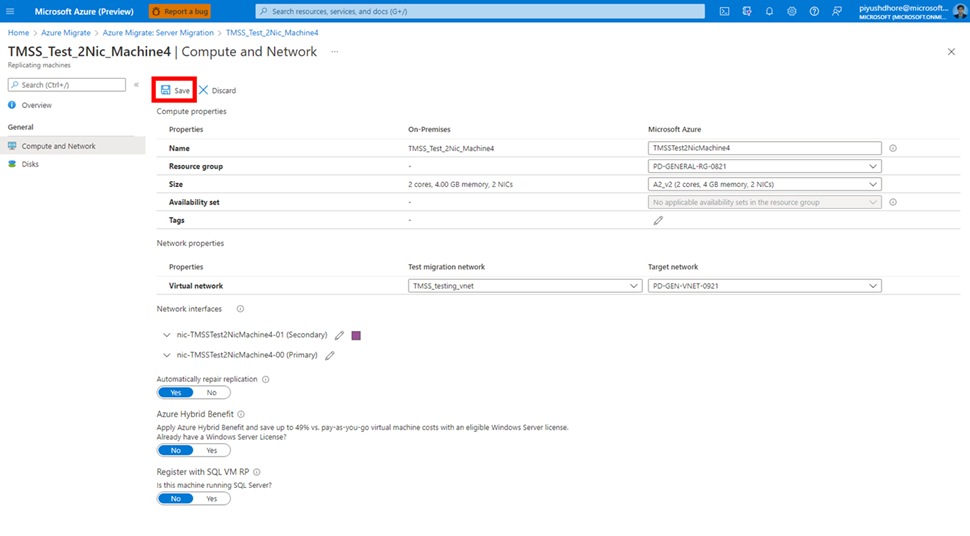
Select Save. Changes aren't saved until you can see the colored square next to the NIC's name.
Feedback
Coming soon: Throughout 2024 we will be phasing out GitHub Issues as the feedback mechanism for content and replacing it with a new feedback system. For more information see: https://aka.ms/ContentUserFeedback.
Submit and view feedback for