Azure Migrate Windows Server upgrade (Preview)
This article describes how to upgrade Windows Server OS while migrating to Azure. Azure Migrate OS upgrade allows you to move from an older operating system to a newer one while keeping your settings, server roles, and data intact. You can move your on-premises server to Azure with an upgraded OS version of Windows Server using Windows upgrade.
Note
- The upgrade feature only works for Windows Server Standard, Datacenter, and Enterprise editions.
- The upgrade feature does not work for non en-US language servers.
- This feature does not work for a Windows Server with an evaluation license and needs a full license. If you have any server with an evaluation license, upgrade to full edition before starting migration to Azure.
Prerequisites
- Ensure you have an existing Migrate project or create a project.
- Ensure you have discovered the servers according to your VMware, Hyper-V, or physical server environments and replicated the servers as described in Migrate VMware VMs, Migrate Hyper-V VMs, or Migrate Physical servers based on your environment.
- Verify the operating system disk has enough free space to perform the in-place upgrade. The minimum disk space requirement is 32 GB.
- If you are upgrading from Windows Server 2008 or 2008 R2, ensure you have PowerShell 3.0 installed.
- To upgrade from Windows Server 2008 or 2008 R2, ensure you have Microsoft .NET Framework 4 installed on your machine. This is available by default in Windows Server 2008 SP2 and Windows Server 2008 R2 SP1.
- Disable antivirus and anti-spyware software and firewalls. These types of software can conflict with the upgrade process. Re-enable antivirus and anti-spyware software and firewalls after the upgrade is completed.
- Ensure that your VM has the capability of adding another data disk as this feature requires the addition of an extra data disk temporarily for a seamless upgrade experience.
- For Private Endpoint enabled Azure Migrate projects, follow these steps before initiating any Test migration/Migration with OS upgrade.
Note
In case of OS upgrade failure, Azure Migrate may download the Windows SetupDiag for error details. Ensure the VM created in Azure post the migration has access to SetupDiag. In case there is no access to SetupDiag, you may not be able to get detailed OS upgrade failure error codes but the upgrade can still proceed.
Overview
The Windows OS upgrade capability helps you move from an older operating system to a newer one while keeping your settings, server roles, and data intact. Since both upgrade and migration operations are completed at once, this reduces duplicate planning, downtime, and test efforts. The upgrade capability also reduces the risk, as customers can first test their OS upgrade in an isolated environment in Azure using test migration without any impact on their on-premises server.
You can upgrade to up to two versions from the current version.
Note
After you migrate and upgrade to Windows Server 2012 in Azure, you will get 3 years of free Extended Security Updates in Azure. Learn more.
| Source | Supported target versions |
|---|---|
| Windows Server 2008 SP2 | Windows Server 2012 |
| Windows Server 2008 R2 SP1 | Windows Server 2012 |
| Windows Server 2012 | Windows Server 2016 |
| Windows Server 2012 R2 | Windows Server 2016, Windows Server 2019 |
| Windows Server 2016 | Windows Server 2019, Windows Server 2022 |
| Windows Server 2019 | Windows Server 2022 |
Upgrade Windows OS during test migration
To upgrade Windows during the test migration, follow these steps:
Go to Get started > Servers, databases and web apps, select Replicate.
A Start Replication job begins. When the Start Replication job finishes successfully, the machines begin their initial replication to Azure.
Select Replicating servers in Migration and modernization to monitor the replication status.
In Migration goals > Servers, databases and webapps > Migration and modernization, select Replicated servers under Replications.
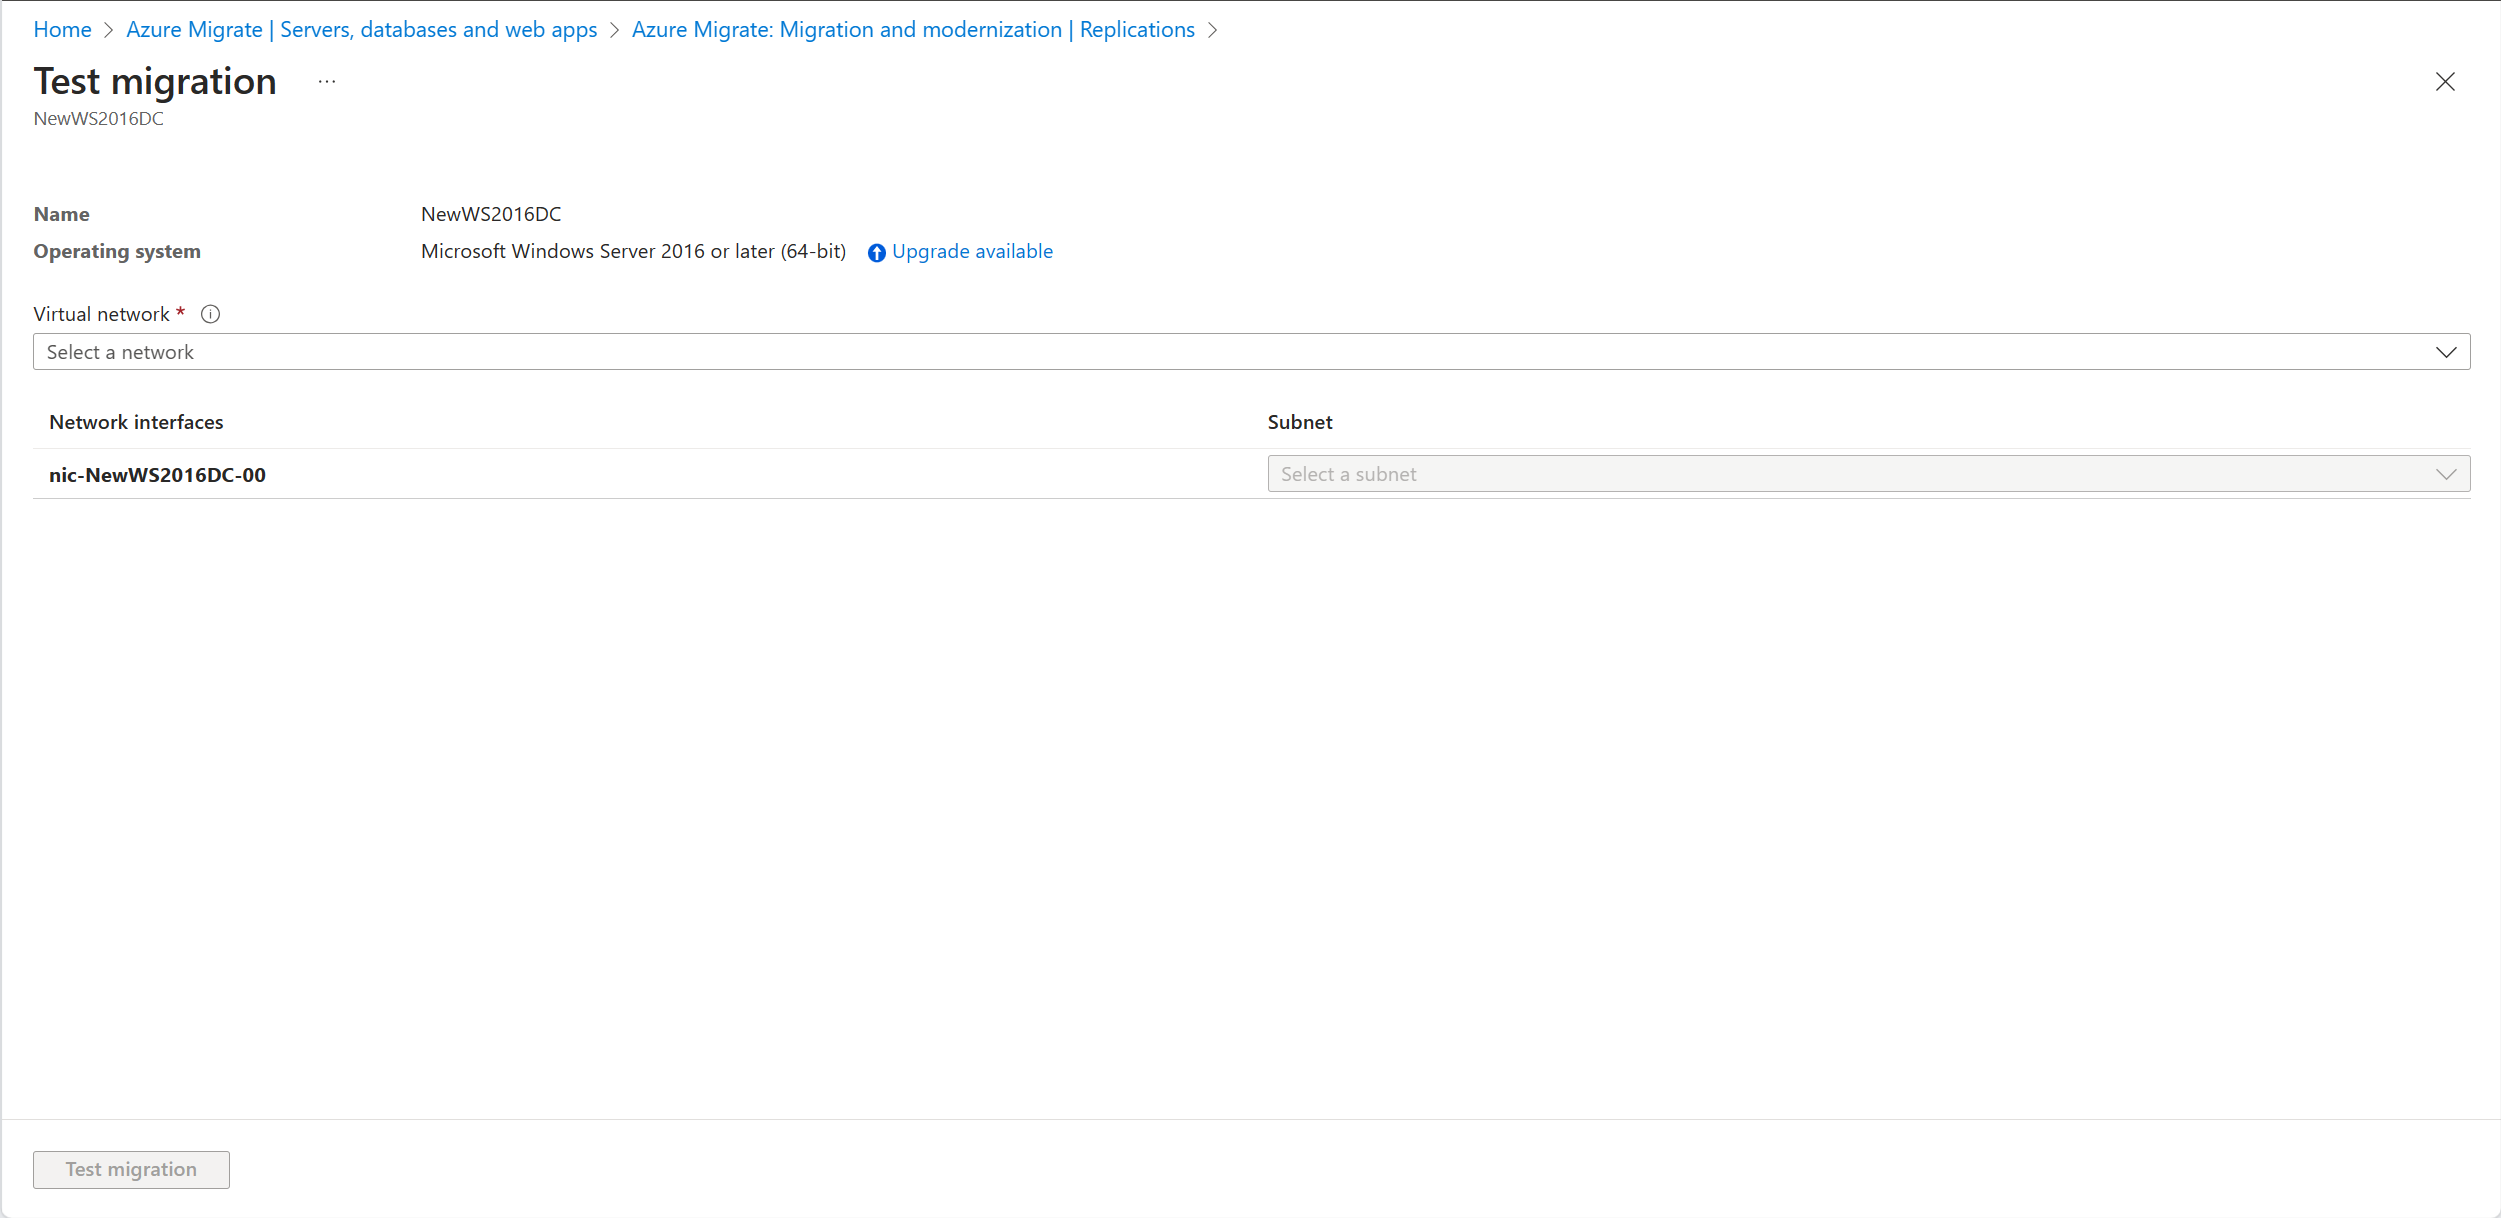
In the Replicating machines tab, right-click the VM to test and select Test migrate.
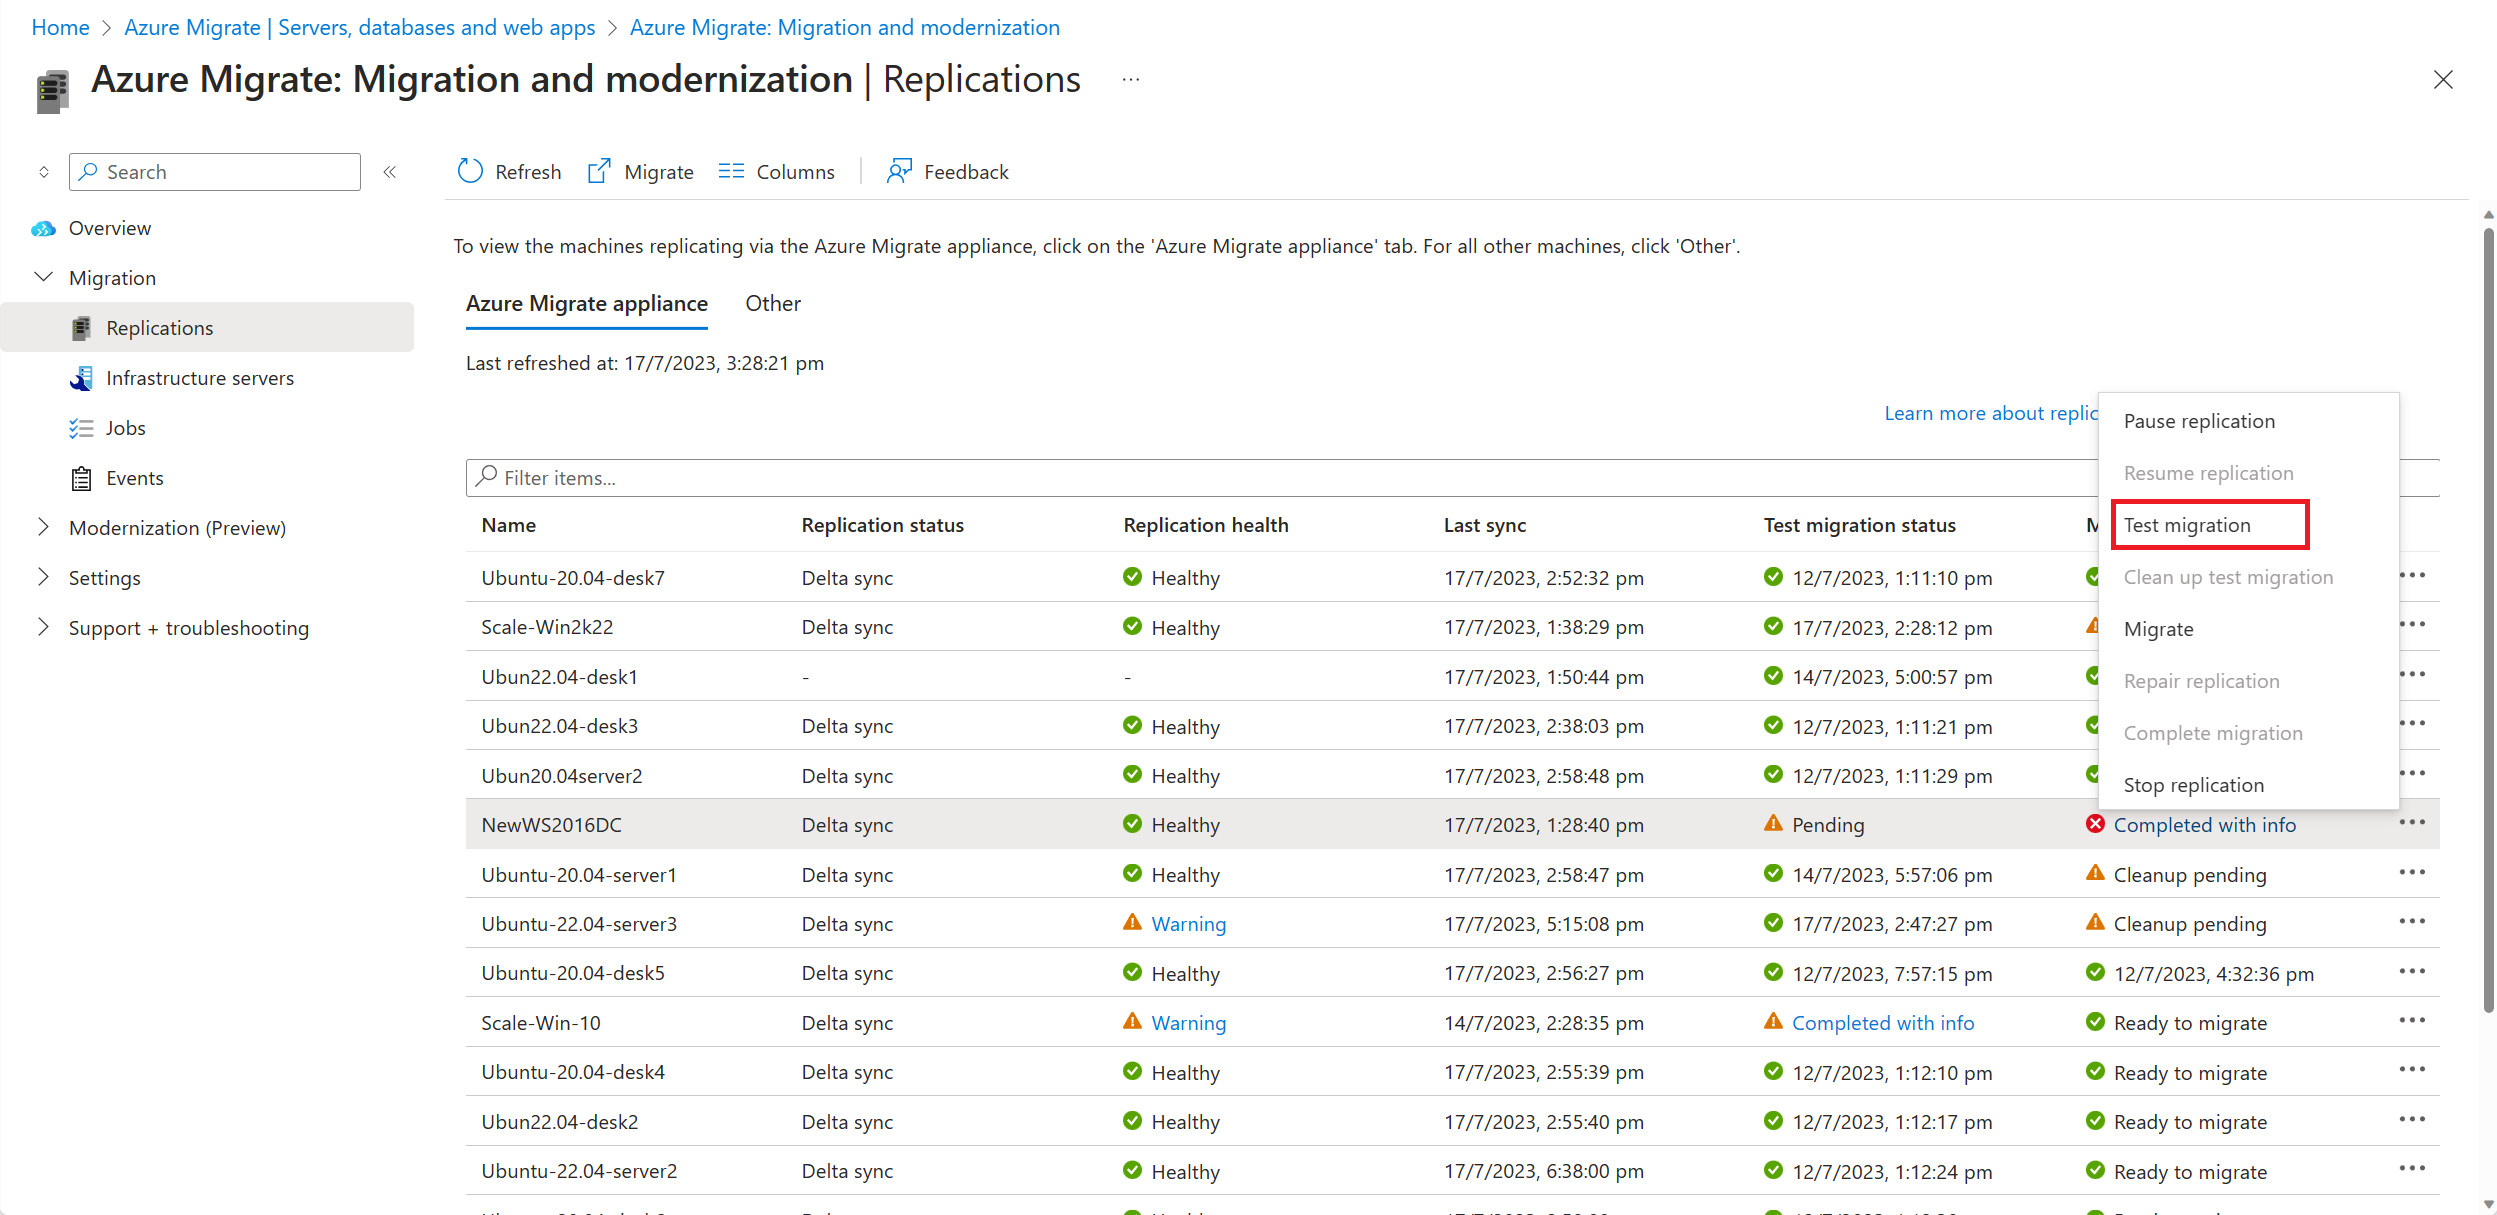
Select the Upgrade available option.
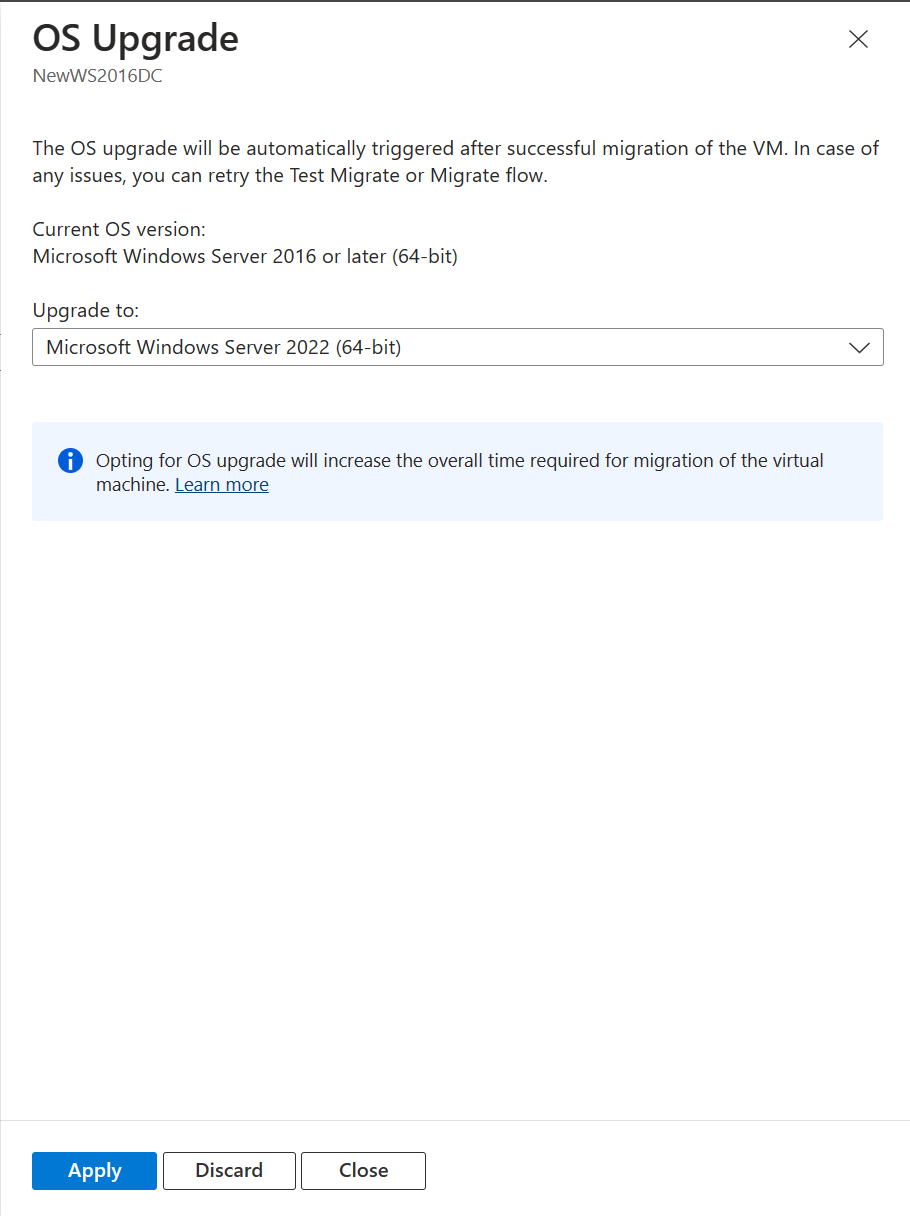
In the pane that appears, select the target OS version that you want to upgrade to and select Apply.
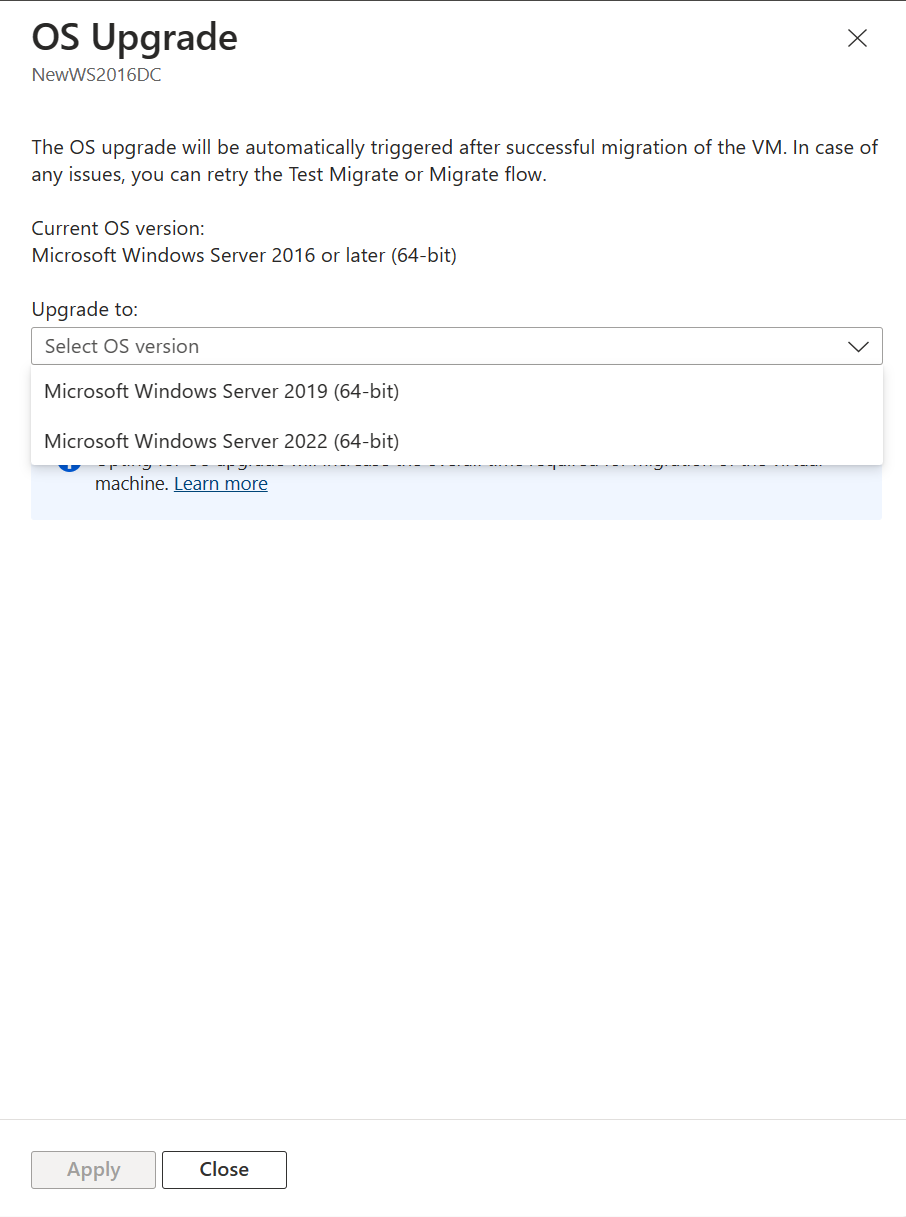
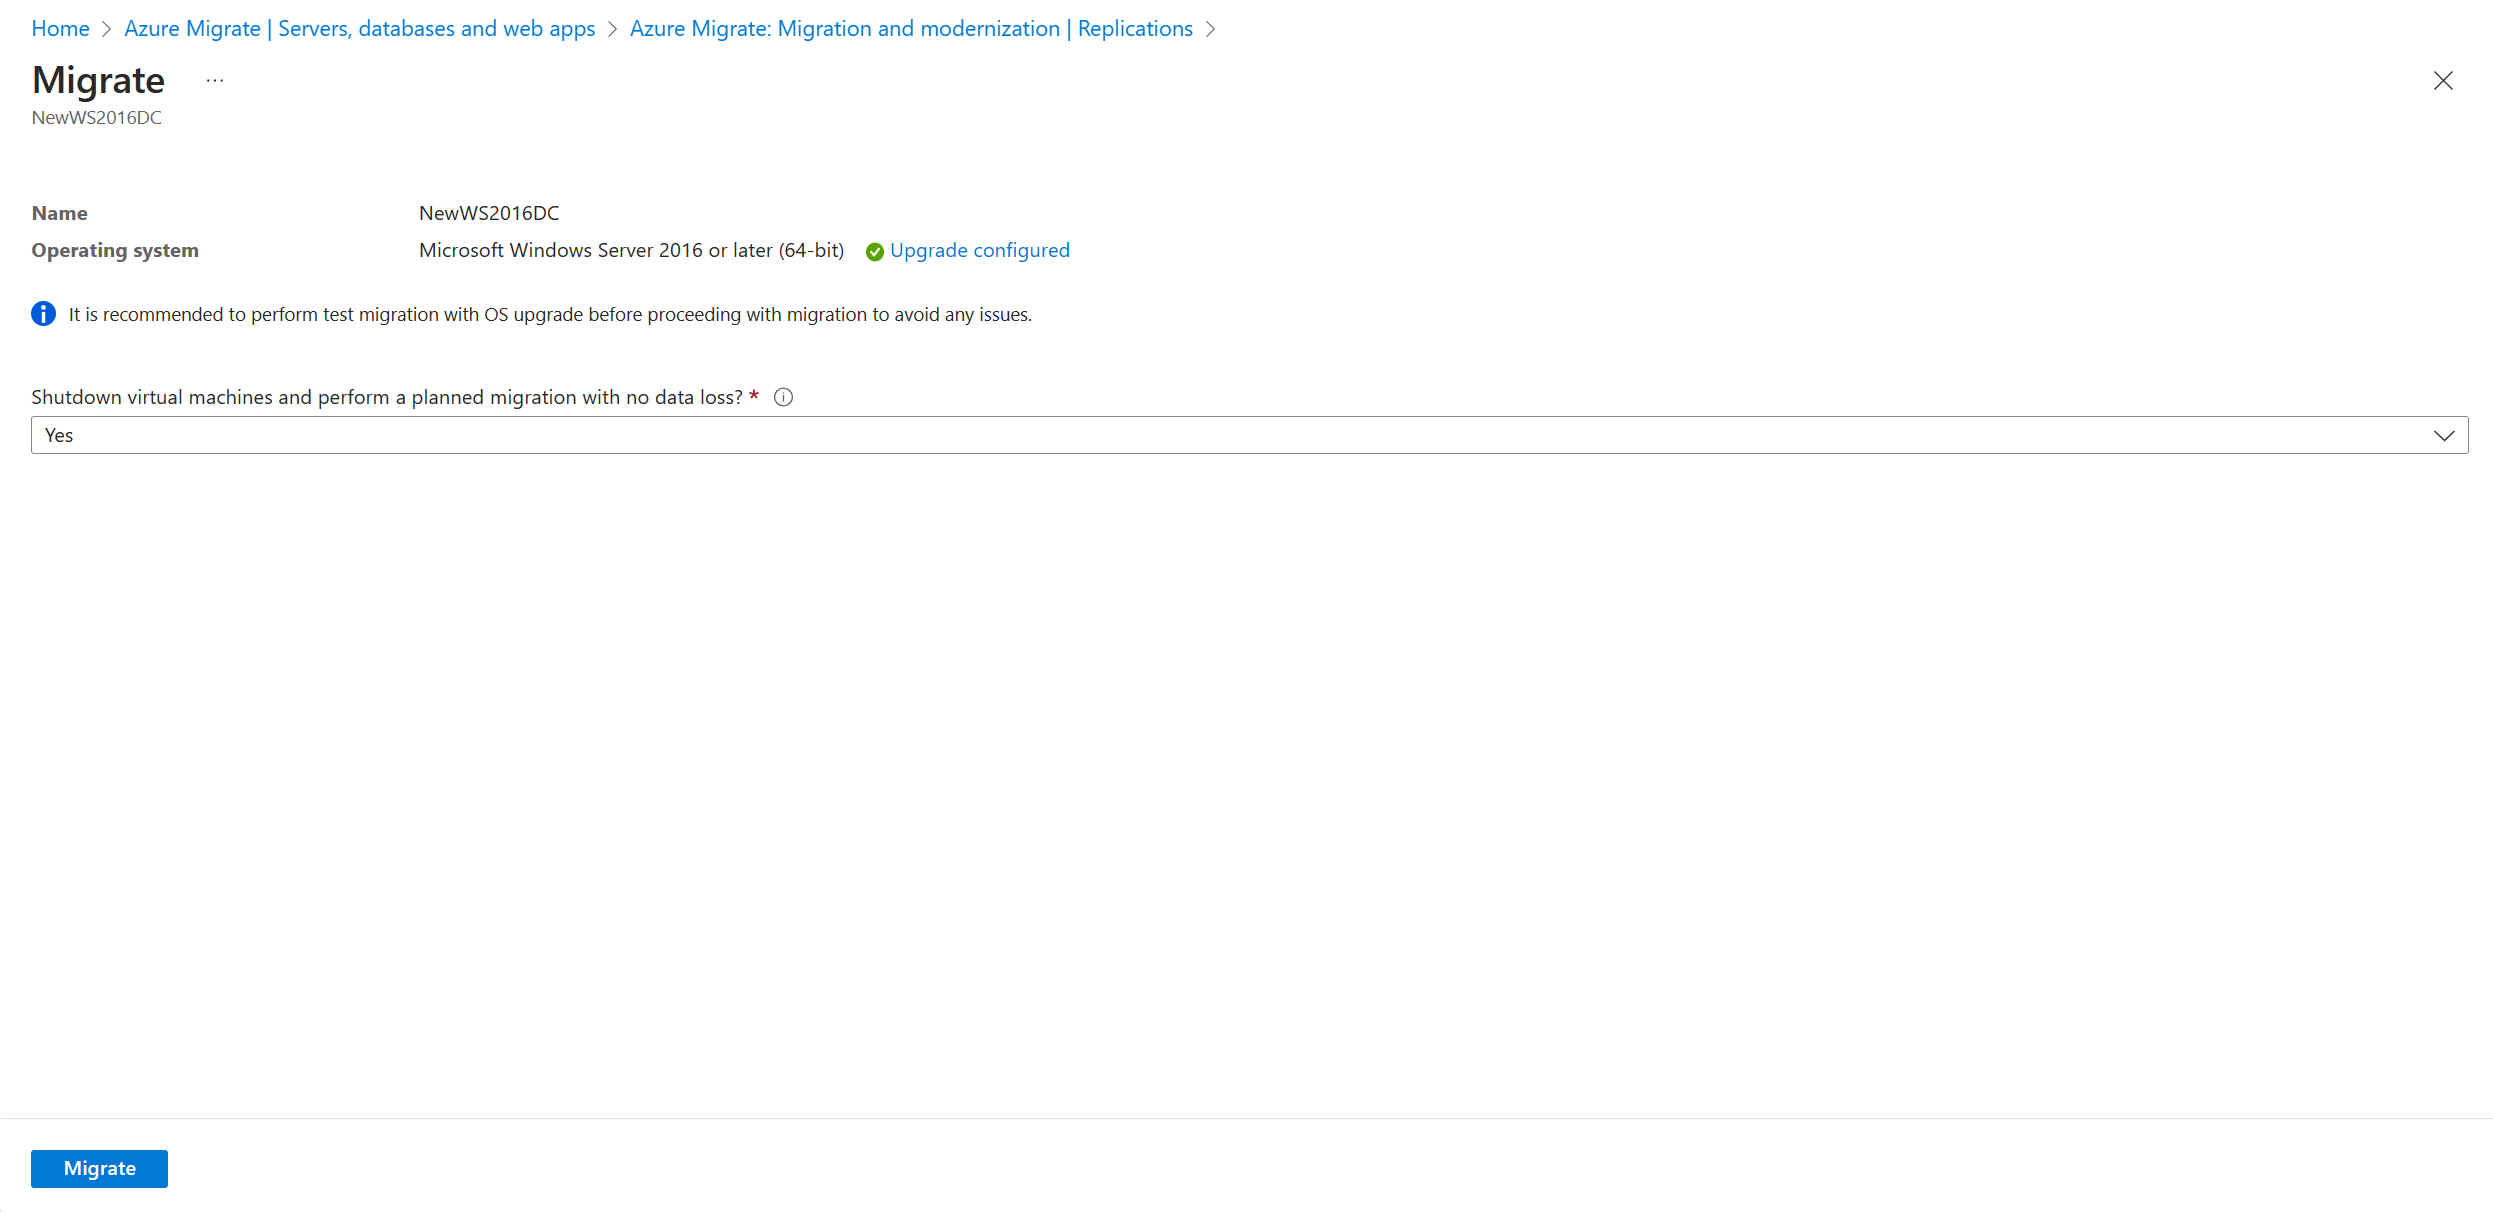
The Upgrade available option changes to Upgrade configured.
Select Test migration to initiate the test migration followed by the OS upgrade.
After the migration job is successful, view the migrated Azure VM in Virtual Machines in the Azure portal. The machine name has the suffix -Test.
You can now use this server with upgraded OS to complete any application testing. The original server continues running on-premises without any impact while you test the newly upgraded server in an isolated environment.
After the test is done, right-click the Azure VM in Replicating machines, and select Clean up test migration. This deletes the test VM and any resources associated with it.

Upgrade Windows OS during migration
After you've verified that the test migration works as expected, you can migrate the on-premises machines. To upgrade Windows during the migration, follow these steps:
On the Get started page, in Servers, databases and web apps, select Replicate. A Start Replication job begins.
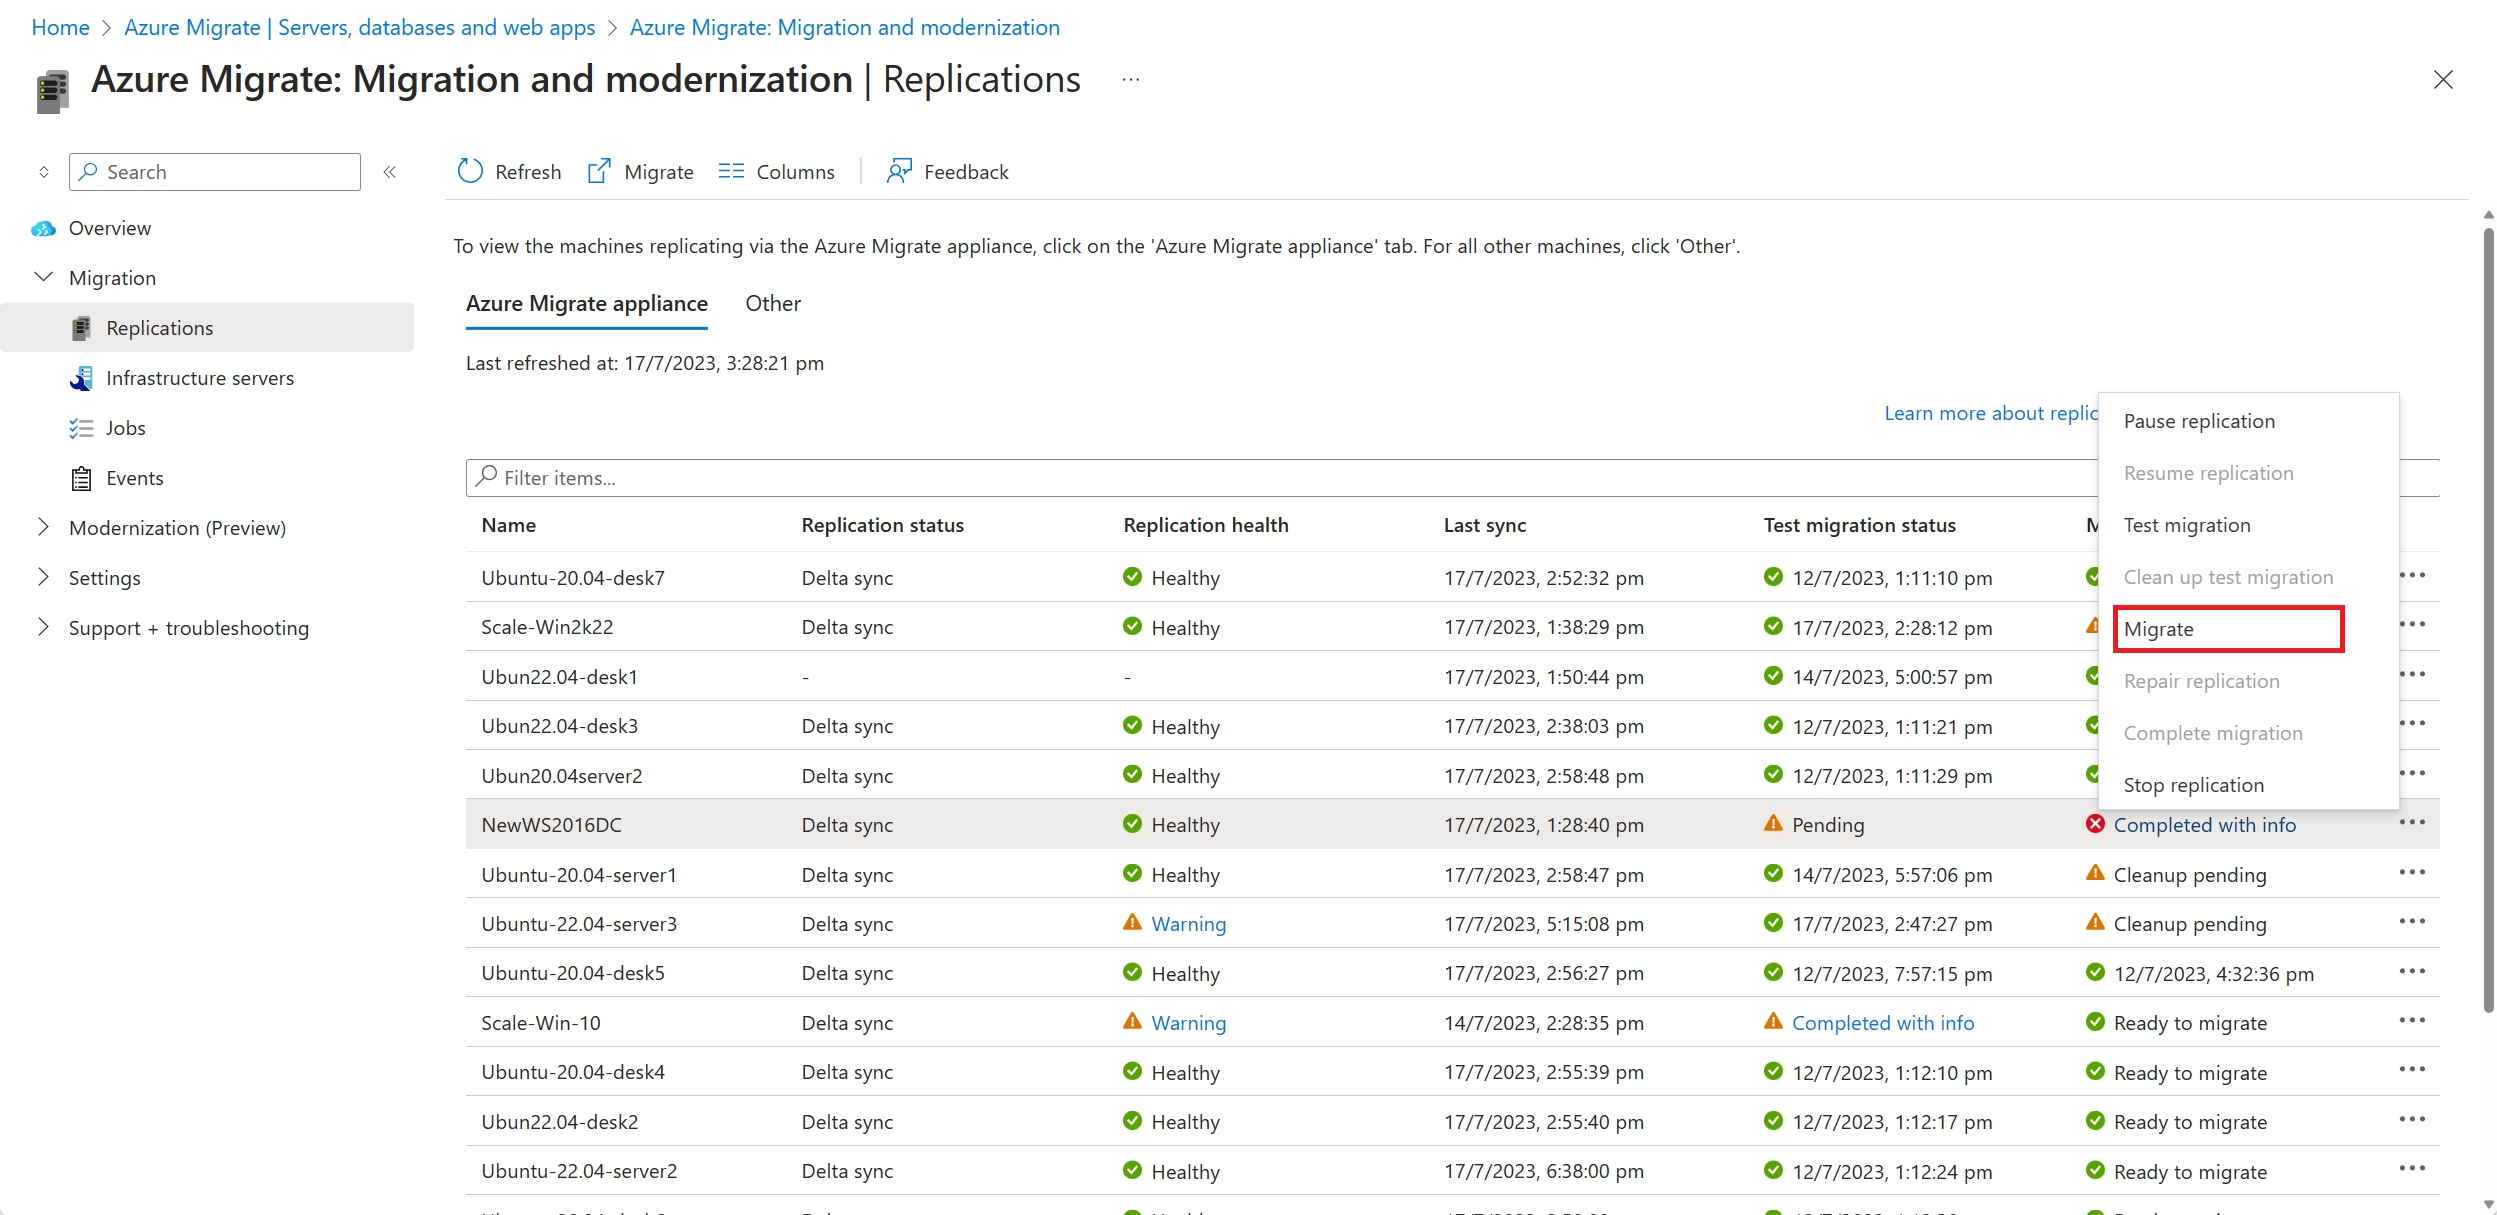
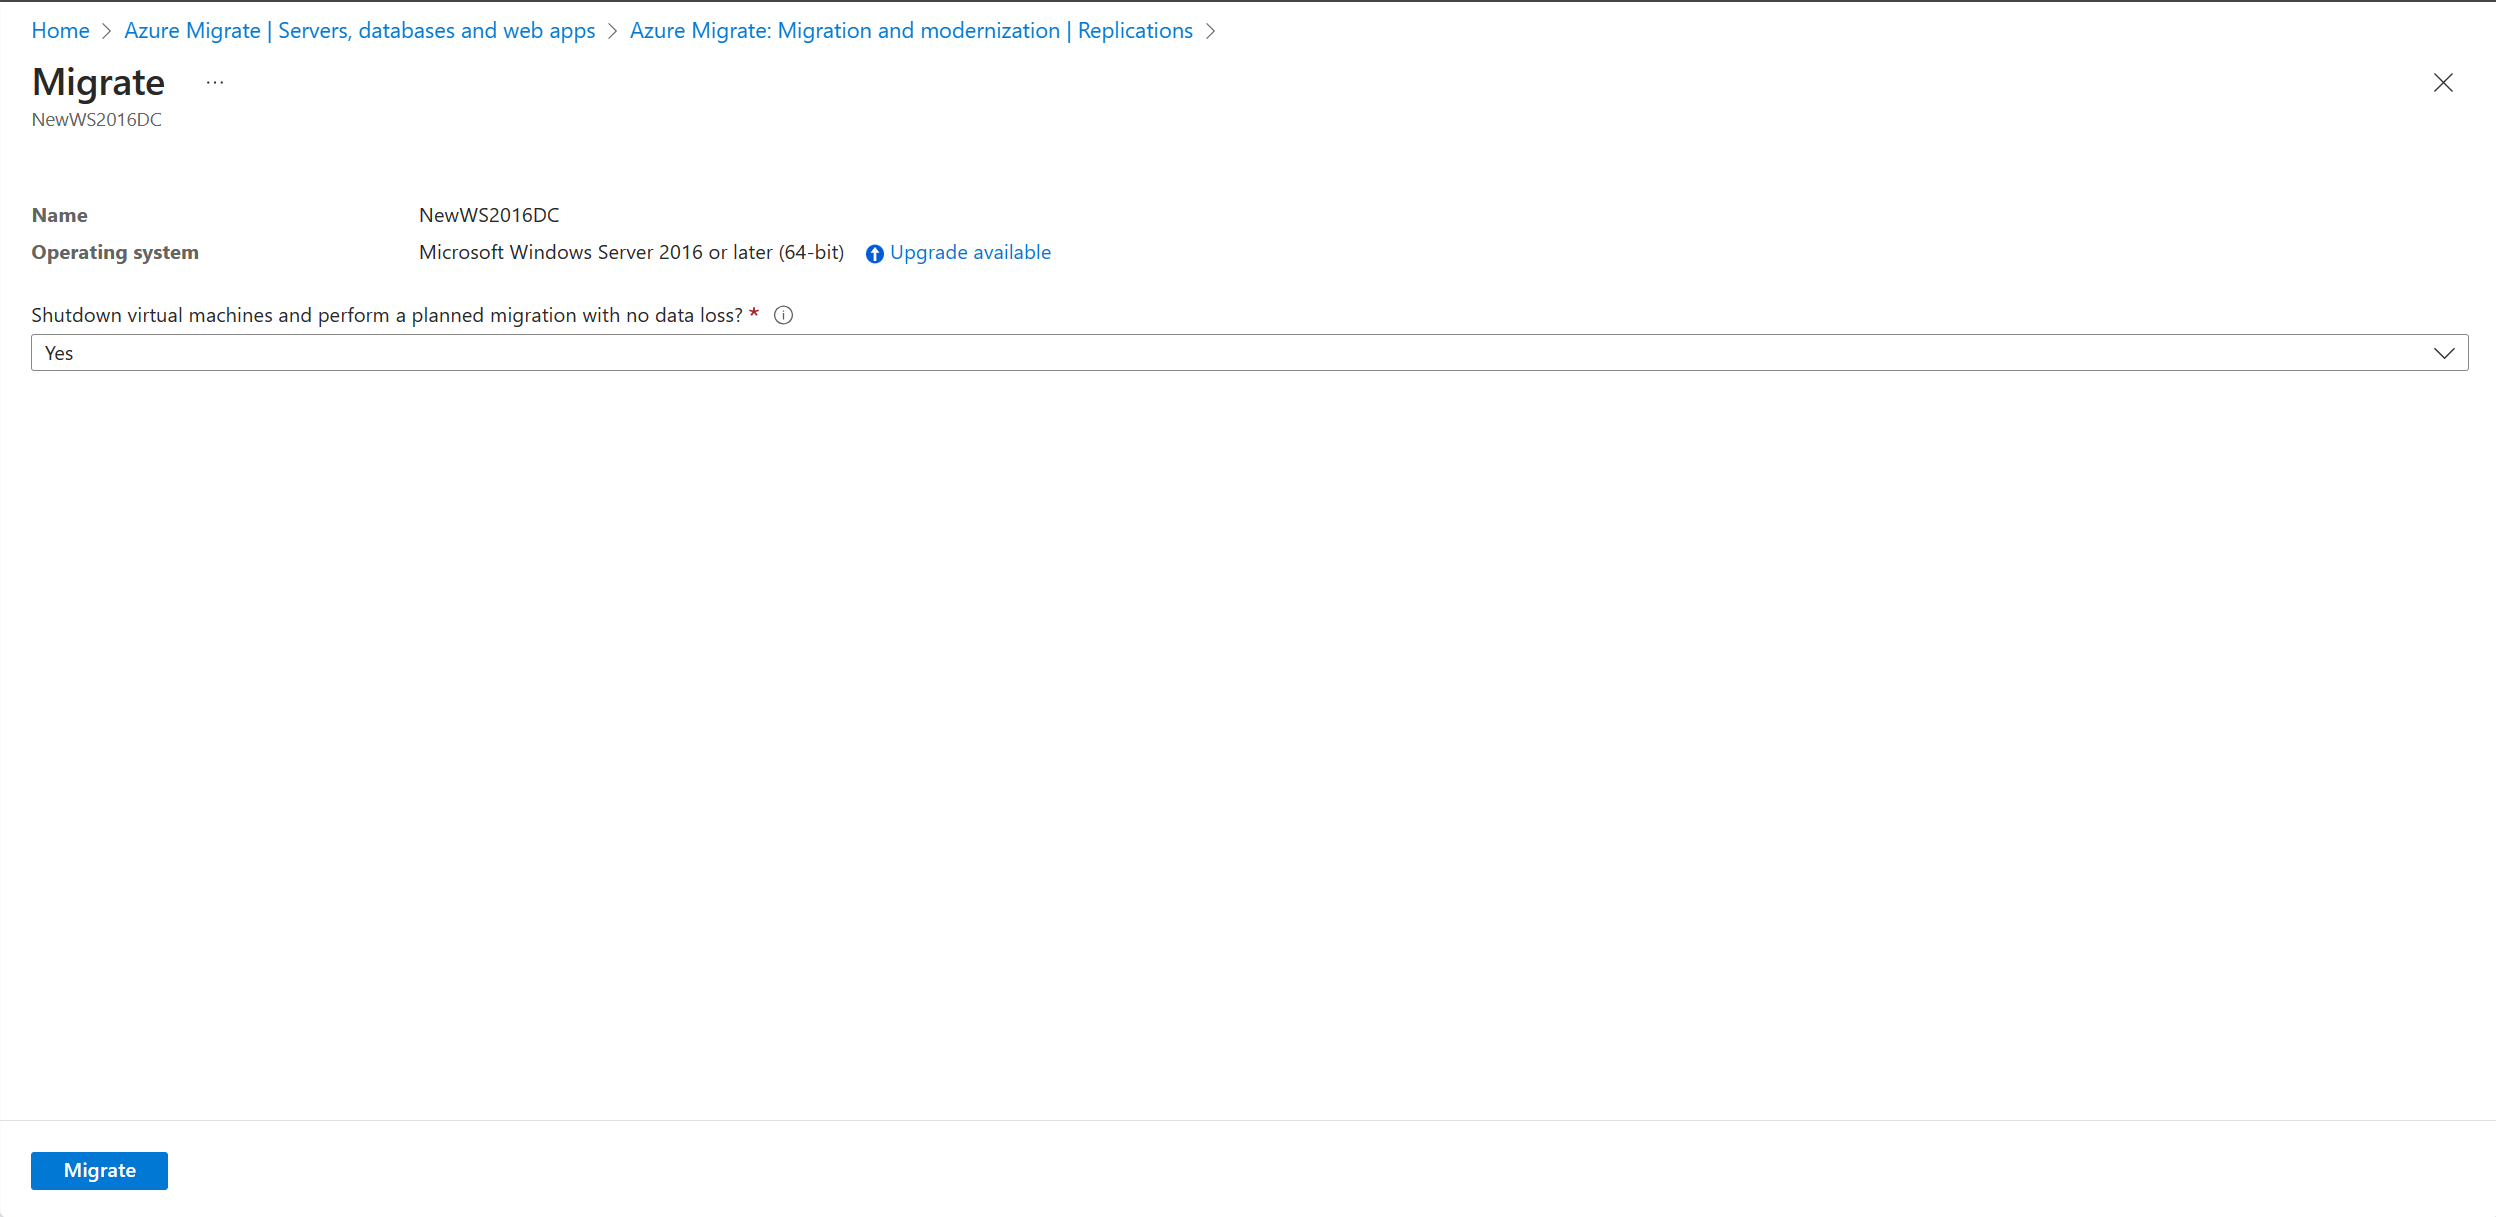
In Replicating machines, right-click the VM and select Migrate.
In Migrate > Shut down virtual machines and perform a planned migration with no data loss, select Yes > OK.
- By default, Azure Migrate shuts down the on-premises VM to ensure minimum data loss.
- If you don't want to shut down the VM, select No.
Select the Upgrade available option.
In the pane that appears, select the target OS version that you want to upgrade to and select Apply.
The Upgrade available option changes to Upgrade configured.
Select Migrate to start the migration and the upgrade.


Next steps
Investigate the cloud migration journey in the Azure Cloud Adoption Framework.
Feedback
Coming soon: Throughout 2024 we will be phasing out GitHub Issues as the feedback mechanism for content and replacing it with a new feedback system. For more information see: https://aka.ms/ContentUserFeedback.
Submit and view feedback for