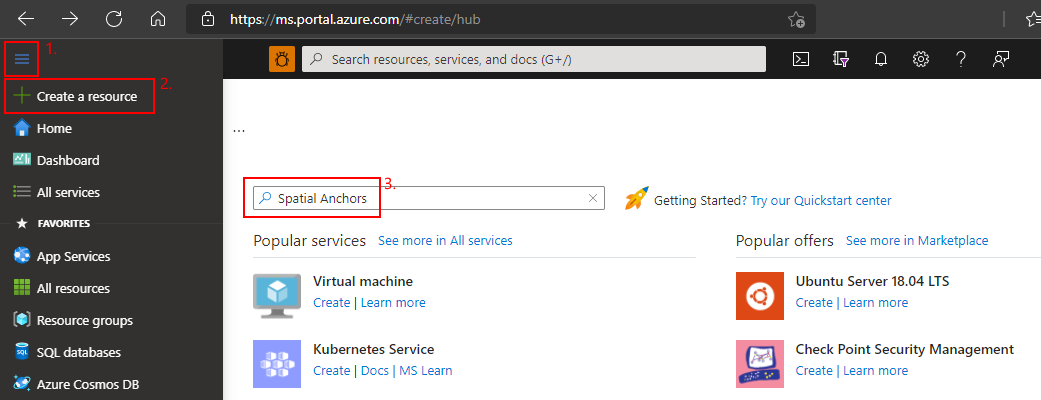
Go to the Azure portal.
On the left pane, select Create a resource.
Use the search box to search for Spatial Anchors.
Select Spatial Anchors, and then select Create.
On the Spatial Anchors Account pane, do the following:
Enter a unique resource name by using regular alphanumeric characters.
Select the subscription that you want to attach the resource to.
Create a resource group by selecting Create new. Name it myResourceGroup, and then select OK.
A resource group is a logical container into which Azure resources, such as web apps, databases, and storage accounts, are deployed and managed. For example, you can choose to delete the entire resource group in one simple step later.
Select a location (region) in which to place the resource.
Select Create to begin creating the resource.

After the resource is created, the Azure portal shows that your deployment is complete.
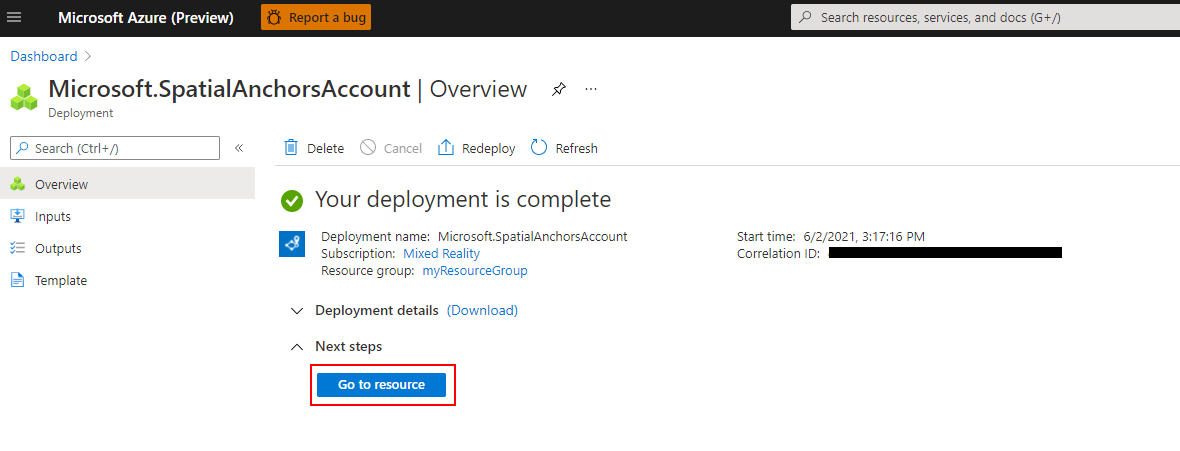
Select Go to resource. You can now view the resource properties.
Copy the resource's Account ID value into a text editor for later use.
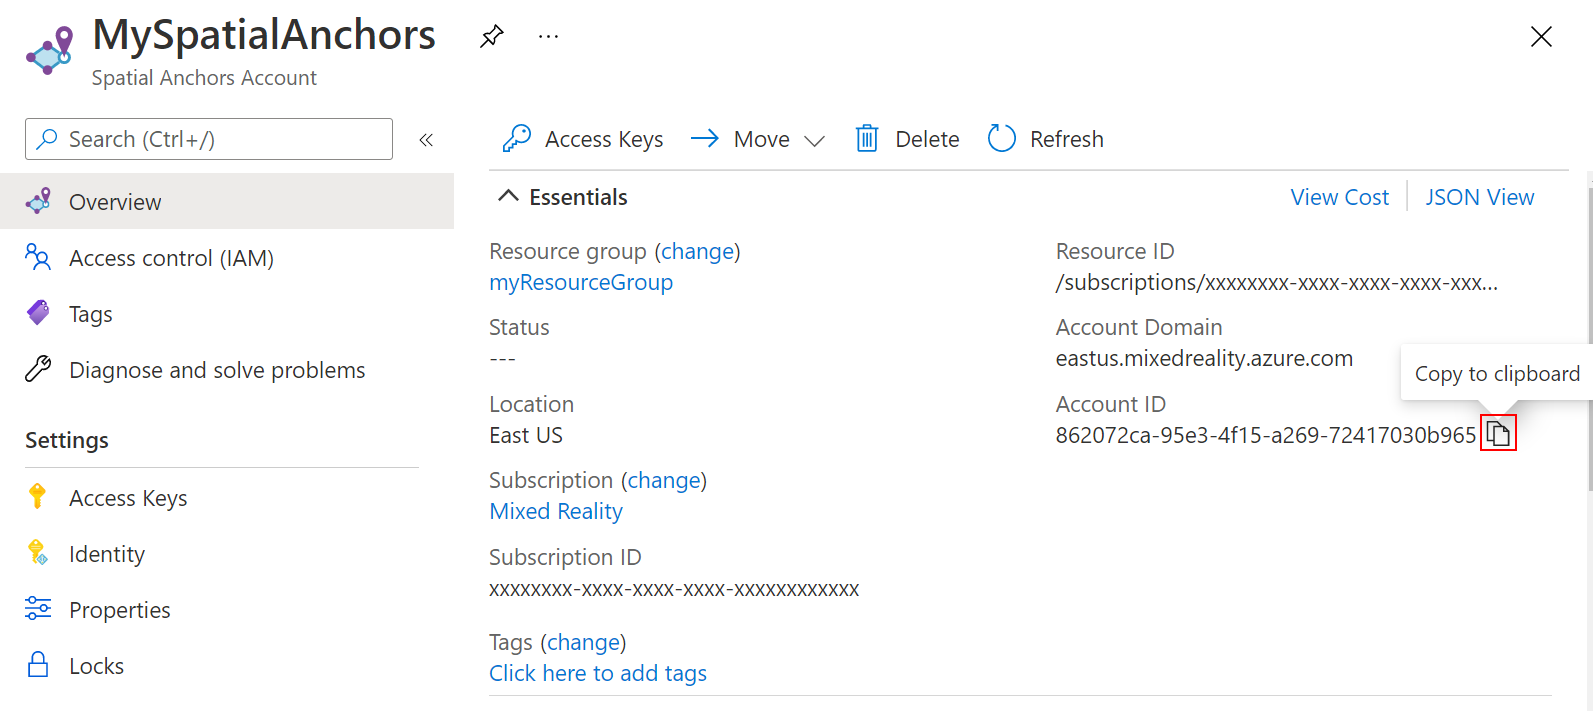
Also copy the resource's Account Domain value into a text editor for later use.
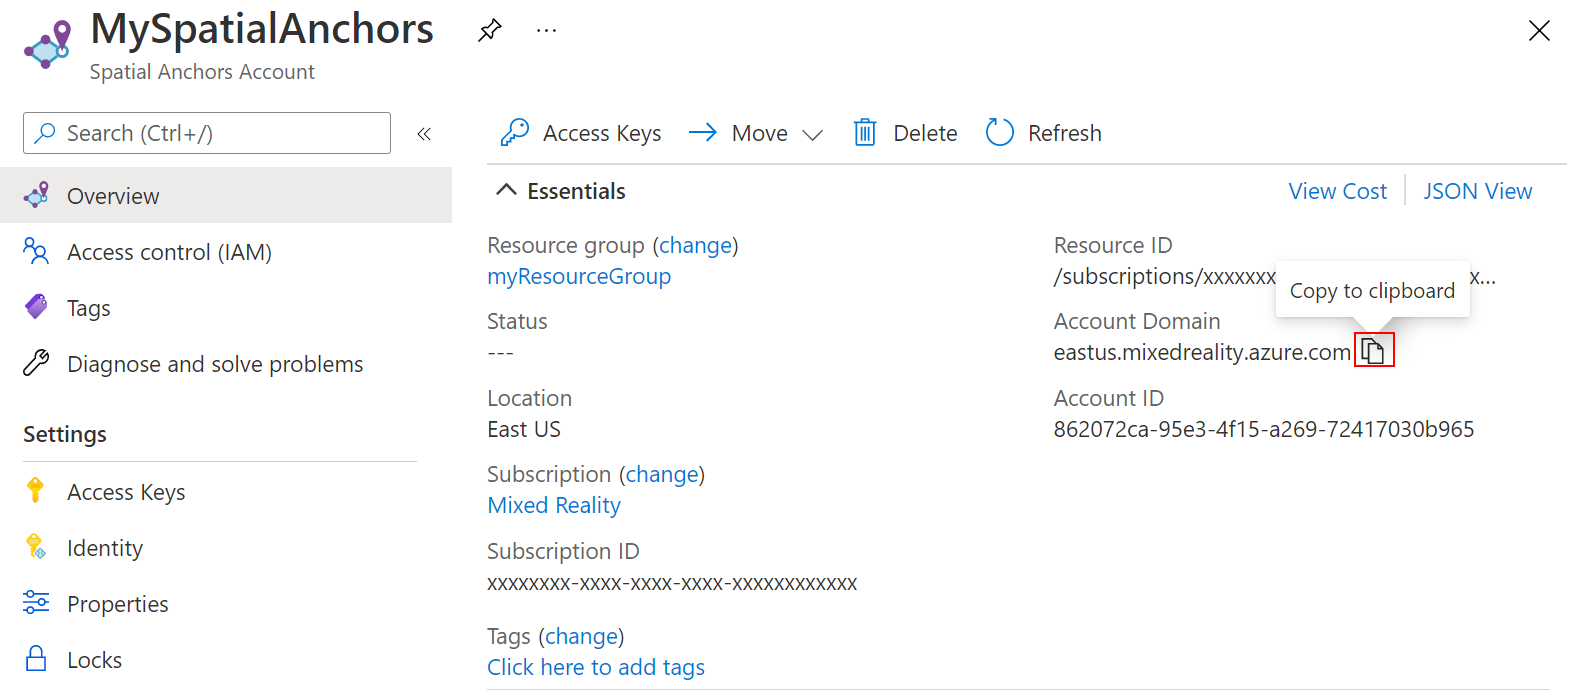
Under Settings, select Access Key. Copy the Primary key value, Account Key, into a text editor for later use.

Start by preparing your environment for Azure PowerShell:
- If you choose to use Azure PowerShell locally:
- If you choose to use Azure Cloud Shell:
Important
While the Az.MixedReality PowerShell module is in preview, you must install it separately using
the Install-Module cmdlet. After this PowerShell module becomes generally available, it will be
part of future Az PowerShell module releases and available by default from within Azure Cloud
Shell.
Install-Module -Name Az.MixedReality
After you sign in, use the Set-AzContext cmdlet to select the subscription in which to set up the spatial anchors account:
Set-AzContext -SubscriptionId 00000000-0000-0000-0000-000000000000
Run the New-AzResourceGroup cmdlet to create a resource group, or use an existing resource group:
New-AzResourceGroup -Name myResourceGroup -Location eastus2
A resource group is a logical container into which Azure resources, such as web apps, databases, and storage accounts, are deployed and managed. For example, you can choose to delete the entire resource group in one simple step later.
You can view your current spatial anchors accounts for a resource group by using the Get-AzSpatialAnchorsAccount cmdlet:
Get-AzSpatialAnchorsAccount -ResourceGroup myResourceGroup
You can also view the spatial anchors accounts for your subscription:
Get-AzSpatialAnchorsAccount
Run the New-AzSpatialAnchorsAccount cmdlet to create your spatial anchors account:
New-AzSpatialAnchorsAccount -ResourceGroup myResourceGroup -Name MySpatialAnchorsQuickStart -Location eastus2
View the resource properties by using the Get-AzSpatialAnchorsAccount cmdlet:
Get-AzSpatialAnchorsAccount -ResourceGroup myResourceGroup -Name MySpatialAnchorsQuickStart
Copy the property accountId value and the property accountDomain value into a text editor for later use.
Run the Get-AzSpatialAnchorsAccountKey cmdlet to get your primary and secondary keys:
Get-AzSpatialAnchorsAccountKey -ResourceGroup myResourceGroup -Name MySpatialAnchorsQuickStart
Copy the key values into a text editor for later use.
If you need to regenerate keys, use the New-AzSpatialAnchorsAccountKey cmdlet:
New-AzSpatialAnchorsAccountKey -ResourceGroupName myResourceGroup -Name MySpatialAnchorsQuickStart -Primary
New-AzSpatialAnchorsAccountKey -ResourceGroupName myResourceGroup -Name MySpatialAnchorsQuickStart -Secondary
You can delete an account by using the Remove-AzSpatialAnchorsAccount cmdlet:
Remove-AzSpatialAnchorsAccount -ResourceGroup myResourceGroup -Name MySpatialAnchorsQuickStart
