Map DNS names to applications in multiple Azure Spring Apps service instances in the same virtual network
Note
Azure Spring Apps is the new name for the Azure Spring Cloud service. Although the service has a new name, you'll see the old name in some places for a while as we work to update assets such as screenshots, videos, and diagrams.
This article applies to: ✔️ Basic/Standard ✔️ Enterprise
This article shows how to map Domain Name System (DNS) names to applications to access multiple Azure Spring Apps service instances in the same virtual network.
Prerequisites
- An Azure subscription. If you don't have a subscription, create a free account before you begin.
- Azure CLI version 2.45.0 or higher. Use the following command to install the Azure Spring Apps extension:
az extension add --name spring - A virtual network deployed in an instance of Azure Spring Apps. For more information, see Deploy Azure Spring Apps in your Azure virtual network (VNet injection).
Overview
This article describes the following two approaches for mapping DNS names to applications:
Using the Microsoft-provided fully qualified domain name (FQDN).
This approach is a relatively simple and lightweight way to map DNS names compared to the custom domain approach. This approach is recommended if you don't need a wildcard approach in your DNS zone.
This approach requires a DNS record for each application.
Using a custom domain.
If you already have a custom domain or you want a wildcard approach to work in a multi-instance scenario, use this approach.
This approach requires a DNS record for each Azure Spring Apps service instance, and a custom domain configured for each application.
As an example, this article uses azure-spring-apps-1 and azure-spring-apps-2 as the names of two Azure Spring Apps instances in the same virtual network.
Begin with the Preliminary steps for DNS mapping section and then proceed with your preferred approach:
End by testing the mapping as described in the Access private FQDN URLs for private applications section.
Preliminary steps for DNS mapping
Complete the steps in this section for both the FQDN and the custom domain approaches to mapping DNS names.
Find application IP addresses
Both approaches require the IP address for each application in the Azure Spring Apps instance you want to map. Use the following steps to find the IP addresses:
Navigate to the virtual network you created for an Azure Spring Apps instance, and then select Connected devices in the navigation pane.
On the Connected devices page, search for kubernetes-internal.
In the search results, find each Device connected to a service runtime Subnet of an Azure Spring Apps service instance, and copy its IP Address. In the following screenshot example, the IP address of
azure-spring-apps-1is10.1.0.6, and the IP address ofazure-spring-apps-2is10.1.2.6.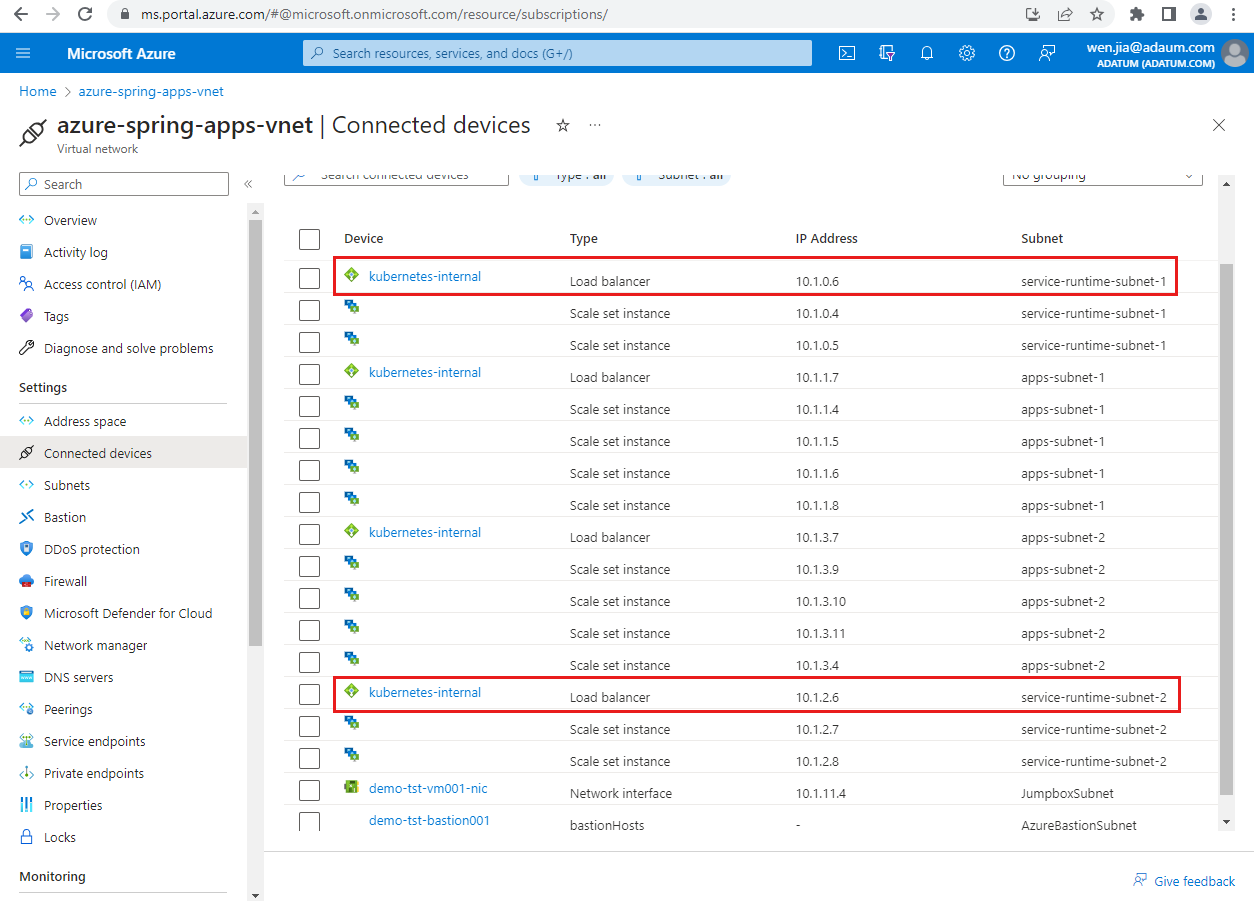

Create a private DNS zone
Use the following steps to create a private DNS zone for an application in the private network.
Note
If you're using Microsoft Azure operated by 21Vianet, replace private.azuremicroservices.io with private.microservices.azure.cn in this article. For more information, see Check Endpoints in Azure.
On the Azure Home page, search for Private DNS zones.
On the Private DNS zones page, select Create.
Fill out the form on the Create Private DNS zone page. In Instance details for Name, specify
private.azuremicroservices.ioas the name of the private DNS zone.Select Review create.
Select Create.
It may take a few minutes to create the zone.
Link the virtual network
To link the private DNS zone you created to the virtual network, you must create a virtual network link.
Use the following steps to create this link:
Navigate to the private DNS zone you created named
private.azuremicroservices.io. There might be several with that name, so determine the correct one by its resource group and subscription.On the navigation pane, select Virtual network links, then select Add.
For the Link name, enter azure-spring-apps-dns-link.
For Virtual network, select the virtual network you created for Prerequisites.
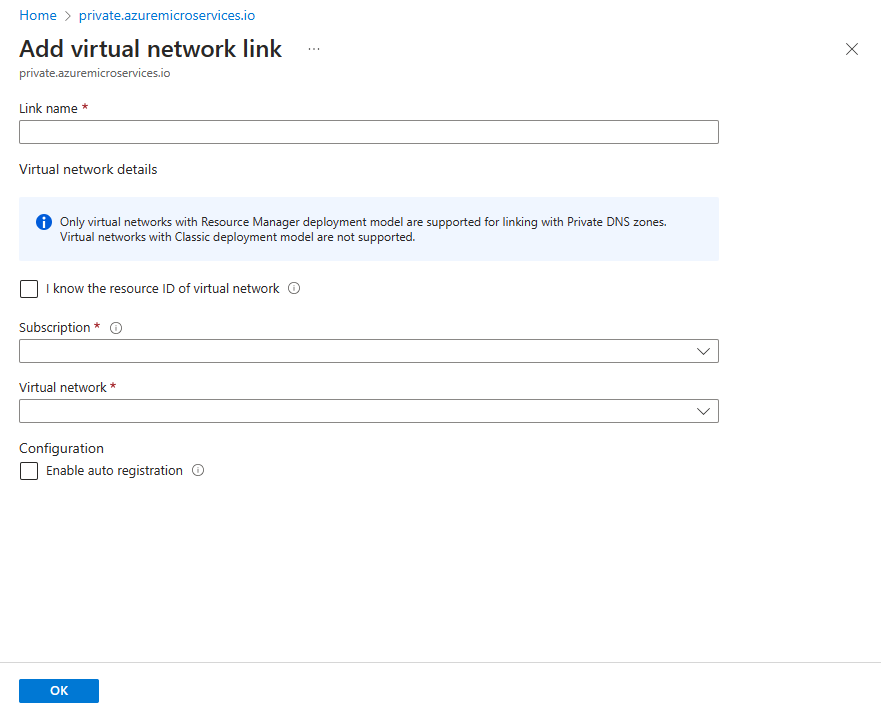
Select OK.

Assign a private FQDN for your applications
Assign a private FQDN for your application.
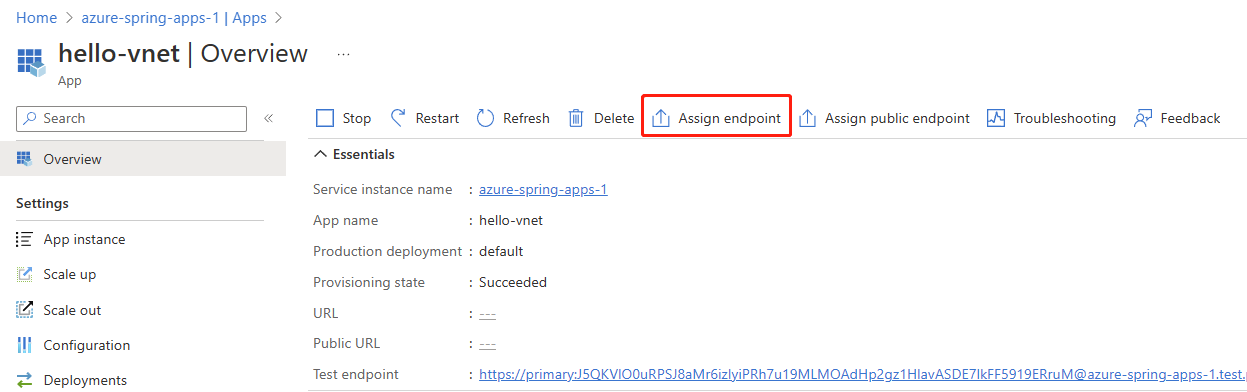
Use the following steps to update your app with an assigned endpoint:
Navigate to the Azure Spring Apps instance deployed in your virtual network, and then select Apps in the navigation pane.
Select an application.
Select Assign Endpoint to assign a private FQDN to your application. Assigning an FQDN can take a few minutes.
Repeat these steps for each application you want to map.

DNS mapping with a Microsoft-provided FQDN
Using this approach, you must create a DNS record for each application as a requirement when using the Microsoft-provided fully qualified domain name (FQDN). For a core understanding of this process, see Access your application in a private network.
When an application in an Azure Spring Apps service instance with assigned endpoint is deployed in the virtual network, the endpoint is a private FQDN. By default, the fully qualified domain name is unique for each app across service instances. The FQDN format is <service-name>-<app-name>.private.azuremicroservices.io.
Create DNS records for all the applications
To use the private DNS zone to translate and resolve DNS names, you must create an "A" type record in the zone for each of your applications. In this example, the app name is hello-vnet and the Azure Springs Apps service instance name is azure-spring-apps-1.
You need the IP address for each application. Copy it as described in the Find the IP for your application section of Access your application in a private network. In this example, the IP address is 10.1.0.6.
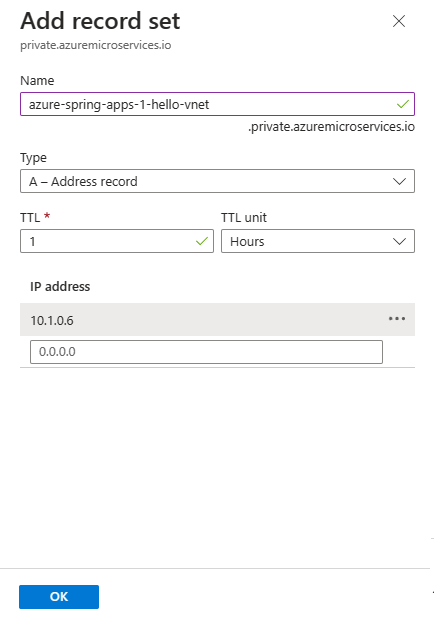
Use the following steps to create a DNS record:
Navigate to the private DNS zone you created earlier:
private.azuremicroservices.ioSelect Record set.
In the Add record set pane, enter the values from the following table.
Setting Value Name azure-spring-apps-1-hello-vnet Type A TTL 1 TTL unit Hours IP address (paste from the clipboard) Select OK.

Repeat these steps as needed to add a DNS record for other applications.
DNS mapping with a custom domain
Using this approach, you only need to add a DNS record for each Azure Spring Apps instance, but you must configure the custom domain for each application. For a core understanding of this process, see Map an existing custom domain to Azure Spring Apps.
This example reuses the private DNS zone private.azuremicroservices.io to add a custom domain related DNS record. The private FQDN has the format <app-name>.<service-name>.private.azuremicroservices.io.
Technically, you can use any private fully qualified domain name you want. In that case, you have to create a new private DNS zone corresponding to the fully qualified domain name you choose.
Map your custom domain to an app in an Azure Spring Apps instance
Use the following steps to map your custom domain to each of the applications in the Azure Spring Apps instance:
Open the Azure Spring Apps instance and select Apps in the navigation pane.
On the Apps page, select an application.
Select Custom domain in the navigation pane.
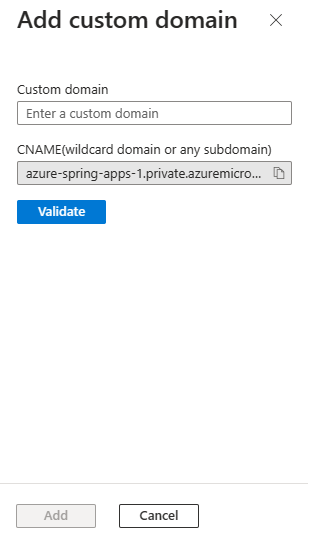
Select Add Custom domain.
On the Add custom domain pane, enter the FQDN you want to use and make sure it corresponds to the certificate to use for TLS/SSL binding later. This example uses
hello-vnet.azure-spring-apps-1.private.azuremicroservices.io. You can disregard the CNAME part.Select Validate.
If validated, select Add.

When the custom domain is successfully mapped to the app, it appears in the custom domain table.

Note
A TLS/SSL state value of Not Secure for your custom domain means that it's not yet bound to a TLS/SSL certificate. Any HTTPS request from a browser to your custom domain will receive an error or warning.
Add TLS/SSL binding
Before doing this step, make sure you've prepared your certificates and imported them into Azure Spring Apps. For more information, see Map an existing custom domain to Azure Spring Apps.
Use the following steps to update the custom domain of an app with a certificate:
Open the Azure Spring Apps instance and select Apps in the navigation pane.
On the Apps page, select an application.
Select Custom domain in the navigation pane.
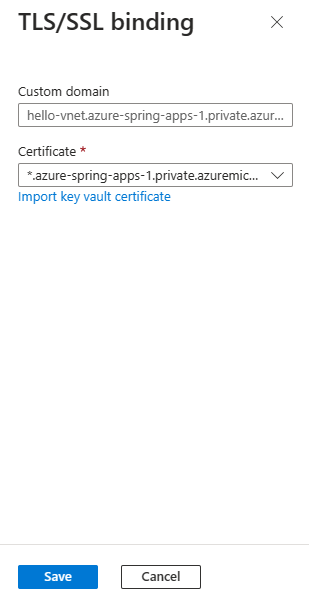
Select the ellipsis (...) button for a custom domain and then select Bind TLS/SSL.
On the TLS/SSL binding pane, select Certificate and then select or import the certificate.
Select Save.

After you successfully add TLS/SSL binding, the domain state will be secure, as shown by a TLS/SSL state value of Healthy.

Configure the custom domain for all applications
To use the private DNS zone to translate and resolve DNS names, you must create an "A" type record in the zone for each of your Azure Spring Apps service instances. In this example, the app name is hello-vnet and the Azure Springs Apps service instance name is azure-spring-apps-1.
You need the IP address for each application. Copy it as described in the Find the IP for your application section of Access your application in a private network. In this example, the IP address is 10.1.0.6.
Use the following steps to create the A record in your DNS zone:
Navigate to the private DNS zone you created earlier:
private.azuremicroservices.ioSelect Record set.
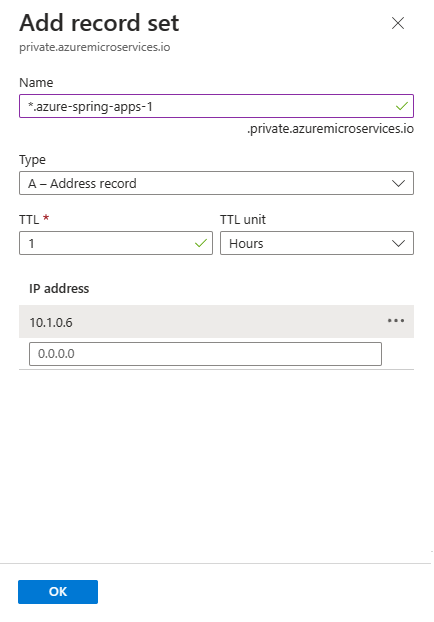
In the Add record set pane, enter the values from the following table.
Setting Value Name *.azure-spring-apps-1 Type A TTL 1 TTL unit Hours IP address (paste from the clipboard) Select OK.

Repeat as needed to configure the custom domain for other applications.
Access private FQDN for applications
After the FQDN assignments and DNS mappings for both approaches, you can access all the applications' private FQDN in the private network. For example, you can create a jumpbox or virtual machine in the same virtual network or in a peered virtual network and have access to all the private FQDNs of the applications.
The following examples show the FQDN approach:
https://hello-vnet.azure-spring-apps-1.private.azuremicroservices.iohttps://hello-vnet.azure-spring-apps-2.private.azuremicroservices.io
The following examples show the custom domain approach:
https://azure-spring-apps-1-hello-vnet.private.azuremicroservices.iohttps://azure-spring-apps-2-hello-vnet.private.azuremicroservices.io
The following screenshot shows the URL for a Spring application using an FQDN:

The following screenshot shows the URL for a Spring application using a custom domain:

Clean up resources
If you plan to continue working with subsequent articles, you might want to leave these resources in place. When no longer needed, delete the resource group, which deletes the resources in the resource group. To delete the resource group by using Azure CLI, use the following command:
az group delete --name $RESOURCE_GROUP
Next steps
Feedback
Coming soon: Throughout 2024 we will be phasing out GitHub Issues as the feedback mechanism for content and replacing it with a new feedback system. For more information see: https://aka.ms/ContentUserFeedback.
Submit and view feedback for