Mount SMB Azure file share on Windows
Azure Files is Microsoft's easy-to-use cloud file system. Azure file shares can be seamlessly used in Windows and Windows Server. This article shows you how to use an Azure file share with Windows and Windows Server.
Applies to
| File share type | SMB | NFS |
|---|---|---|
| Standard file shares (GPv2), LRS/ZRS | ||
| Standard file shares (GPv2), GRS/GZRS | ||
| Premium file shares (FileStorage), LRS/ZRS |
This video shows you how to mount an SMB Azure file share on Windows.
The steps in the video are also described in the following sections.
In order to use an Azure file share via the public endpoint outside of the Azure region it's hosted in, such as on-premises or in a different Azure region, the OS must support SMB 3.x. Older versions of Windows that support only SMB 2.1 can't mount Azure file shares via the public endpoint.
| Windows version | SMB version | Azure Files SMB Multichannel | Maximum SMB channel encryption |
|---|---|---|---|
| Windows 11, version 22H2 | SMB 3.1.1 | Yes | AES-256-GCM |
| Windows 10, version 22H2 | SMB 3.1.1 | Yes | AES-128-GCM |
| Windows Server 2022 | SMB 3.1.1 | Yes | AES-256-GCM |
| Windows 11, version 21H2 | SMB 3.1.1 | Yes | AES-256-GCM |
| Windows 10, version 21H2 | SMB 3.1.1 | Yes | AES-128-GCM |
| Windows 10, version 21H1 | SMB 3.1.1 | Yes, with KB5003690 or newer | AES-128-GCM |
| Windows Server, version 20H2 | SMB 3.1.1 | Yes, with KB5003690 or newer | AES-128-GCM |
| Windows 10, version 20H2 | SMB 3.1.1 | Yes, with KB5003690 or newer | AES-128-GCM |
| Windows Server, version 2004 | SMB 3.1.1 | Yes, with KB5003690 or newer | AES-128-GCM |
| Windows 10, version 2004 | SMB 3.1.1 | Yes, with KB5003690 or newer | AES-128-GCM |
| Windows Server 2019 | SMB 3.1.1 | Yes, with KB5003703 or newer | AES-128-GCM |
| Windows 10, version 1809 | SMB 3.1.1 | Yes, with KB5003703 or newer | AES-128-GCM |
| Windows Server 2016 | SMB 3.1.1 | Yes, with KB5004238 or newer and applied registry key | AES-128-GCM |
| Windows 10, version 1607 | SMB 3.1.1 | Yes, with KB5004238 or newer and applied registry key | AES-128-GCM |
| Windows 10, version 1507 | SMB 3.1.1 | Yes, with KB5004249 or newer and applied registry key | AES-128-GCM |
| Windows Server 2012 R2 | SMB 3.0 | No | AES-128-CCM |
| Windows 8.1 | SMB 3.0 | No | AES-128-CCM |
| Windows Server 2012 | SMB 3.0 | No | AES-128-CCM |
| Windows Server 2008 R21 | SMB 2.1 | No | Not supported |
| Windows 71 | SMB 2.1 | No | Not supported |
1Regular Microsoft support for Windows 7 and Windows Server 2008 R2 has ended. It's possible to purchase additional support for security updates only through the Extended Security Update (ESU) program. We strongly recommend migrating off of these operating systems.
Note
We recommend taking the most recent KB for your version of Windows.
Prerequisites
Ensure port 445 is open: The SMB protocol requires TCP port 445 to be open. Connections will fail if port 445 is blocked. You can check if your firewall or ISP is blocking port 445 by using the Test-NetConnection cmdlet. See Port 445 is blocked.
Using an Azure file share with Windows
To use an Azure file share with Windows, you must either mount it, which means assigning it a drive letter or mount point path, or access it via its UNC path.
This article uses the storage account key to access the file share. A storage account key is an administrator key for a storage account, including administrator permissions to all files and folders within the file share you're accessing, and for all file shares and other storage resources (blobs, queues, tables, etc.) contained within your storage account. If this isn't sufficient for your workload, you can use Azure File Sync or identity-based authentication over SMB. Shared access signature (SAS) tokens aren't currently supported for mounting Azure file shares.
A common pattern for lifting and shifting line-of-business (LOB) applications that expect an SMB file share to Azure is to use an Azure file share as an alternative for running a dedicated Windows file server in an Azure VM. One important consideration for successfully migrating an LOB application to use an Azure file share is that many applications run under the context of a dedicated service account with limited system permissions rather than the VM's administrative account. Therefore, you must ensure that you mount/save the credentials for the Azure file share from the context of the service account rather than your administrative account.
Mount the Azure file share
The Azure portal provides a PowerShell script that you can use to mount your file share directly to a host using the storage account key. Unless you're mounting the file share using identity-based authentication, we recommend using this provided script.
To get this script:
Sign in to the Azure portal.
Navigate to the storage account that contains the file share you'd like to mount.
Select File shares.
Select the file share you'd like to mount.
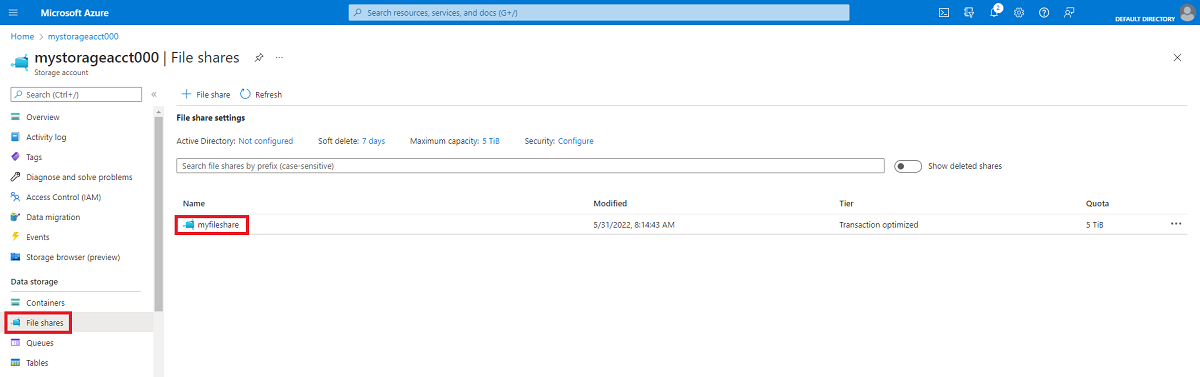
Select Connect.

Select the drive letter to mount the share to.
Copy the provided script.
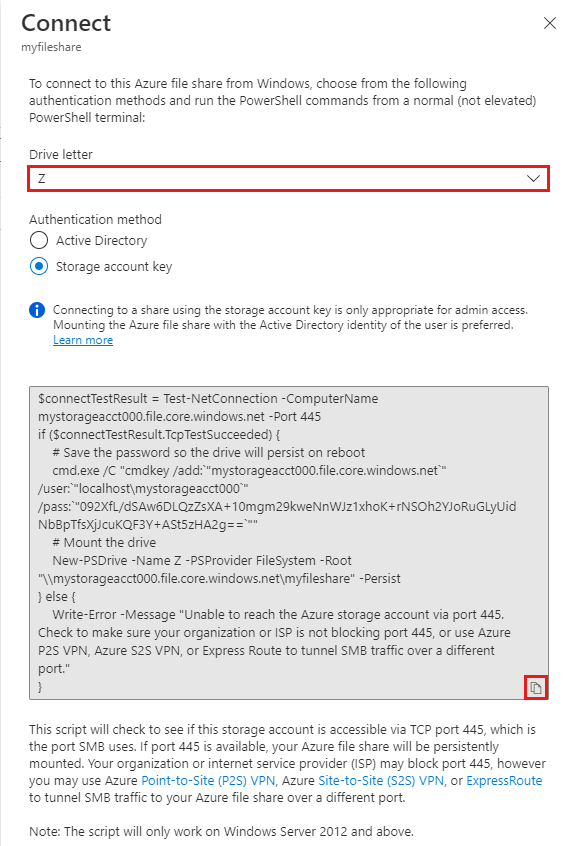
Paste the script into a shell on the host you'd like to mount the file share to, and run it.

You have now mounted your Azure file share.
Mount the Azure file share with File Explorer
Note
Note that the following instructions are shown on Windows 10 and may differ slightly on older releases.
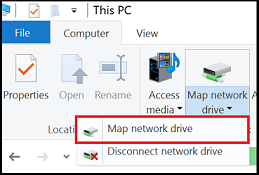
Open File Explorer by opening it from the Start Menu, or by pressing the Win+E shortcut.
Navigate to This PC on the left-hand side of the window. This will change the menus available in the ribbon. Under the Computer menu, select Map network drive.
Select the drive letter and enter the UNC path to your Azure file share. The UNC path format is
\\<storageAccountName>.file.core.windows.net\<fileShareName>. For example:\\anexampleaccountname.file.core.windows.net\file-share-name. Check the Connect using different credentials checkbox. Select Finish.
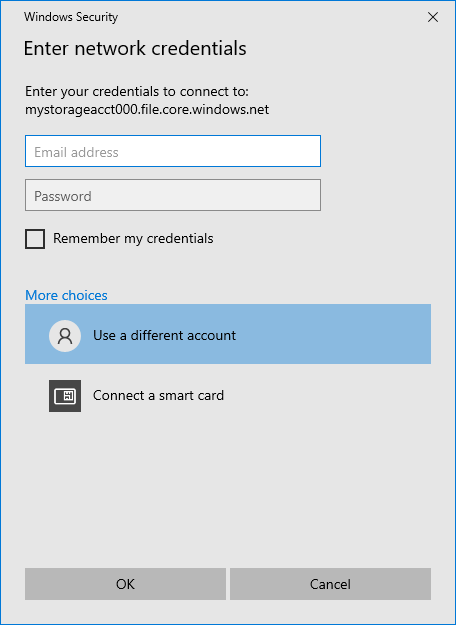
Select More choices > Use a different account. Under Email address, use the storage account name, and use a storage account key as the password. Select OK.
Use Azure file share as desired.
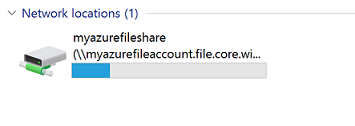
When you're ready to dismount the Azure file share, right-click on the entry for the share under the Network locations in File Explorer and select Disconnect.
Access an Azure file share via its UNC path
You don't need to mount the Azure file share to a drive letter to use it. You can directly access your Azure file share using the UNC path by entering the following into File Explorer. Be sure to replace storageaccountname with your storage account name and myfileshare with your file share name:
\\storageaccountname.file.core.windows.net\myfileshare
You'll be asked to sign in with your network credentials. Sign in with the Azure subscription under which you've created the storage account and file share. If you don't get prompted for credentials, you can add the credentials using the following command:
cmdkey /add:StorageAccountName.file.core.windows.net /user:localhost\StorageAccountName /pass:StorageAccountKey
For Azure Government Cloud, change the servername to:
\\storageaccountname.file.core.usgovcloudapi.net\myfileshare
Accessing share snapshots from Windows
If you've taken a share snapshot, either manually or automatically through a script or service like Azure Backup, you can view previous versions of a share, a directory, or a particular file from a file share on Windows. You can take a share snapshot using the Azure portal, Azure PowerShell, or Azure CLI.
List previous versions
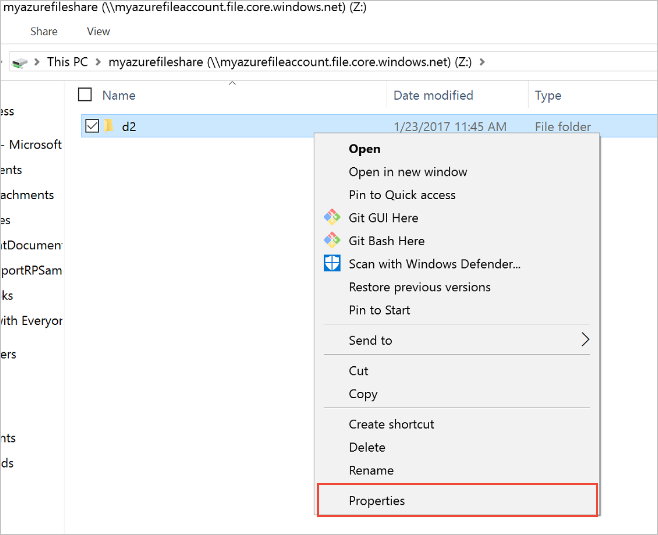
Browse to the item or parent item that needs to be restored. Double-click to go to the desired directory. Right-click and select Properties from the menu.
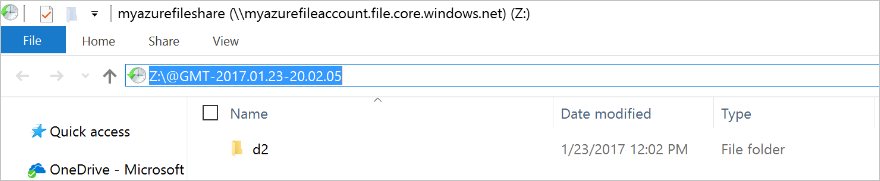
Select Previous Versions to see the list of share snapshots for this directory. The list might take a few seconds to load, depending on the network speed and the number of share snapshots in the directory.

You can select Open to open a particular snapshot.
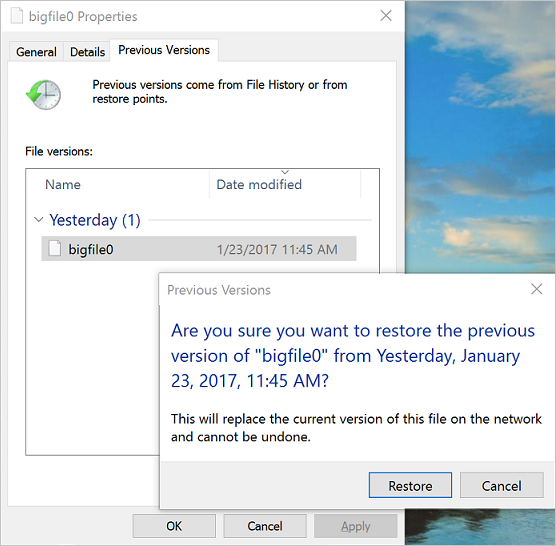
Restore from a previous version
Select Restore to copy the contents of the entire directory recursively at the share snapshot creation time to the original location.
Enable SMB Multichannel
Support for SMB Multichannel in Azure Files requires ensuring Windows has all the relevant patches applied. Several older Windows versions, including Windows Server 2016, Windows 10 version 1607, and Windows 10 version 1507, require additional registry keys to be set for all relevant SMB Multichannel fixes to be applied on fully patched installations. If you're running a version of Windows that's newer than these three versions, no additional action is required.
Windows Server 2016 and Windows 10 version 1607
To enable all SMB Multichannel fixes for Windows Server 2016 and Windows 10 version 1607, run the following PowerShell command:
Set-ItemProperty `
    -Path "HKLM:SYSTEM\CurrentControlSet\Policies\Microsoft\FeatureManagement\Overrides" `
    -Name "2291605642" `
    -Value 1 `
    -Force
Windows 10 version 1507
To enable all SMB Multichannel fixes for Windows 10 version 1507, run the following PowerShell command:
Set-ItemProperty `
    -Path "HKLM:\SYSTEM\CurrentControlSet\Services\MRxSmb\KBSwitch" `
    -Name "{FFC376AE-A5D2-47DC-A36F-FE9A46D53D75}" `
    -Value 1 `
    -Force
Next steps
See these links for more information about Azure Files:
Feedback
Coming soon: Throughout 2024 we will be phasing out GitHub Issues as the feedback mechanism for content and replacing it with a new feedback system. For more information see: https://aka.ms/ContentUserFeedback.
Submit and view feedback for