Ingest blobs into Azure Synapse Data Explorer by subscribing to Event Grid notifications (Preview)
Azure Synapse Data Explorer is a fast and highly scalable data exploration service for log and telemetry data. Azure Synapse Data Explorer offers ingestion (data loading) from Event Hubs, IoT Hubs, and blobs written to blob containers.
In this article, you learn how to ingest blobs from your storage account into Azure Synapse Data Explorer using an Event Grid data connection. You'll create an Event Grid data connection that sets an Azure Event Grid subscription. The Event Grid subscription routes events from your storage account to Data Explorer via an Azure Event Hub. Then you'll see an example of the data flow throughout the system.
For general information about ingesting into Data Explorer from Event Grid, see Connect to Event Grid.
Prerequisites
An Azure subscription. Create a free Azure account.
Create a Data Explorer pool using Synapse Studio or the Azure portal
Create a Data Explorer database.
In Synapse Studio, on the left-side pane, select Data.
Select + (Add new resource) > Data Explorer pool, and use the following information:
Setting Suggested value Description Pool name contosodataexplorer The name of the Data Explorer pool to use Name TestDatabase The database name must be unique within the cluster. Default retention period 365 The time span (in days) for which it's guaranteed that the data is kept available to query. The time span is measured from the time that data is ingested. Default cache period 31 The time span (in days) for which to keep frequently queried data available in SSD storage or RAM, rather than in longer-term storage. Select Create to create the database. Creation typically takes less than a minute.
- Create a target table to which Event Hubs will send data
In Synapse Studio, on the left-side pane, select Develop.
Under KQL scripts, Select + (Add new resource) > KQL script. On the right-side pane, you can name your script.
In the Connect to menu, select contosodataexplorer.
In the Use database menu, select TestDatabase.
Paste in the following command, and select Run to create the table.
.create table TestTable (TimeStamp: datetime, Value: string, Source:string)Tip
Verify that the table was successfully created. On the left-side pane, select Data, select the contosodataexplorer more menu, and then select Refresh. Under contosodataexplorer, expand Tables and make sure that the TestTable table appears in the list.
Copy the following command into the window and select Run to map the incoming JSON data to the column names and data types of the table (TestTable).
.create table TestTable ingestion json mapping 'TestMapping' '[{"column":"TimeStamp","path":"$.TimeStamp"},{"column":"Value","path":"$.Value"},{"column":"Source","path":"$.Source"}]'
- Create a storage account.
- Event Grid notification subscription can be set on Azure Storage accounts for
BlobStorage,StorageV2, or Data Lake Storage Gen2.
Sign in to the Azure portal
Sign in to the Azure portal.
Create an Event Grid data connection
Now connect the storage account to Data Explorer, so that data flowing into the storage is streamed to the test table. This connection can be created in the Azure portal under Data Explorer.
Under the Data Explorer pool you created, select Databases > TestDatabase.

Select Data connections and Add data connection.

Data connection - Basics tab
Select the connection type: Blob storage.
Fill out the form with the following information:

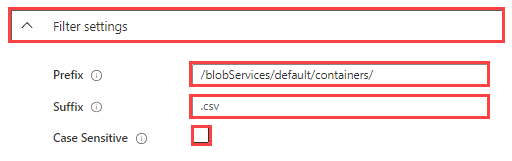
Setting Suggested value Field description Data connection name test-grid-connection The name of the connection that you want to create in Data Explorer. Storage account subscription Your subscription ID The subscription ID where your storage account is. Storage account gridteststorage1 The name of the storage account that you created previously. Event type Blob created or Blob renamed The type of event that triggers ingestion. Blob renamed is supported only for ADLSv2 storage. Supported types are: Microsoft.Storage.BlobCreated or Microsoft.Storage.BlobRenamed. Resources creation Automatic Define whether you want Data Explorer to create an Event Grid Subscription, an Event Hub namespace, and an Event Hub for you. Select Filter settings if you want to track specific subjects. Set the filters for the notifications as follows:
- Prefix field is the literal prefix of the subject. As the pattern applied is startswith, it can span multiple containers, folders, or blobs. No wildcards are allowed.
- To define a filter on the blob container, the field must be set as follows:
/blobServices/default/containers/[container prefix]. - To define a filter on a blob prefix (or a folder in Azure Data Lake Gen2), the field must be set as follows:
/blobServices/default/containers/[container name]/blobs/[folder/blob prefix].
- To define a filter on the blob container, the field must be set as follows:
- Suffix field is the literal suffix of the blob. No wildcards are allowed.
- Case-Sensitive field indicates whether the prefix and suffix filters are case-sensitive
- For more information about filtering events, see Blob storage events.
- Prefix field is the literal prefix of the subject. As the pattern applied is startswith, it can span multiple containers, folders, or blobs. No wildcards are allowed.
Select Next: Ingest properties.
Note
We recommend updating the data connection to use managed identities to access the storage account as soon as soon as the option becomes available for your cluster.
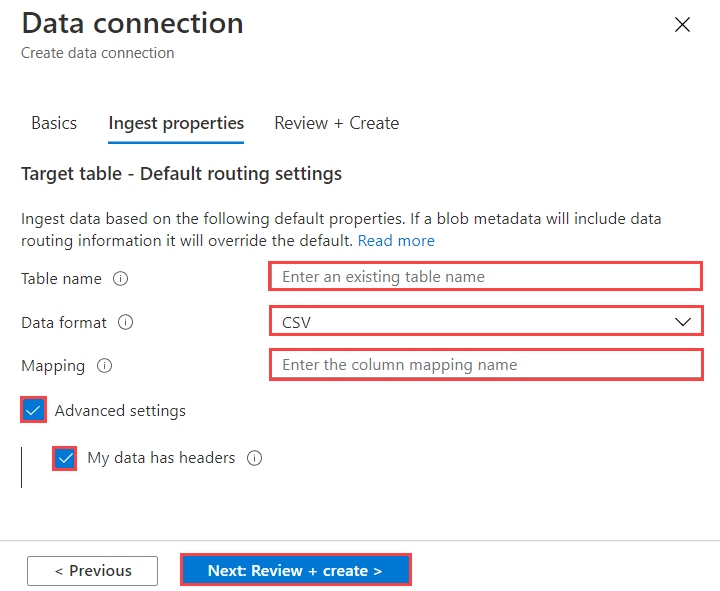
Data connection - Ingest properties tab
Fill out the form with the following information. Table and mapping names are case-sensitive:
Ingest properties:
Setting Suggested value Field description Table name TestTable The table you created in TestDatabase. Data format JSON Supported formats are Avro, CSV, JSON, MULTILINE JSON, ORC, PARQUET, PSV, SCSV, SOHSV, TSV, TXT, TSVE, APACHEAVRO, RAW, and W3CLOG. Supported compression options are Zip and Gzip. Mapping TestMapping The mapping you created in TestDatabase, which maps incoming JSON data to the column names and data types of TestTable. Advanced settings My data has headers Ignores headers. Supported for *SV type files. Note
You don't have to specify all Default routing settings. Partial settings are also accepted.
Select Next: Review + Create
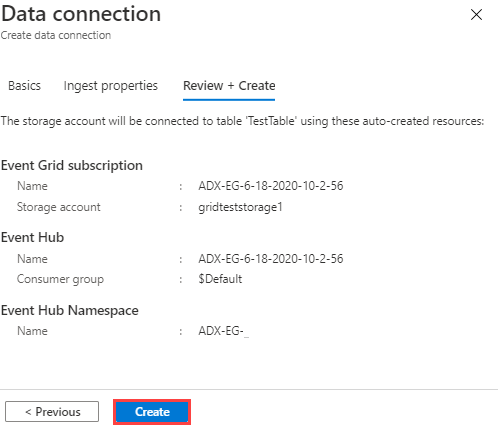
Data connection - Review + Create tab
Review the resources that were auto created for you and select Create.
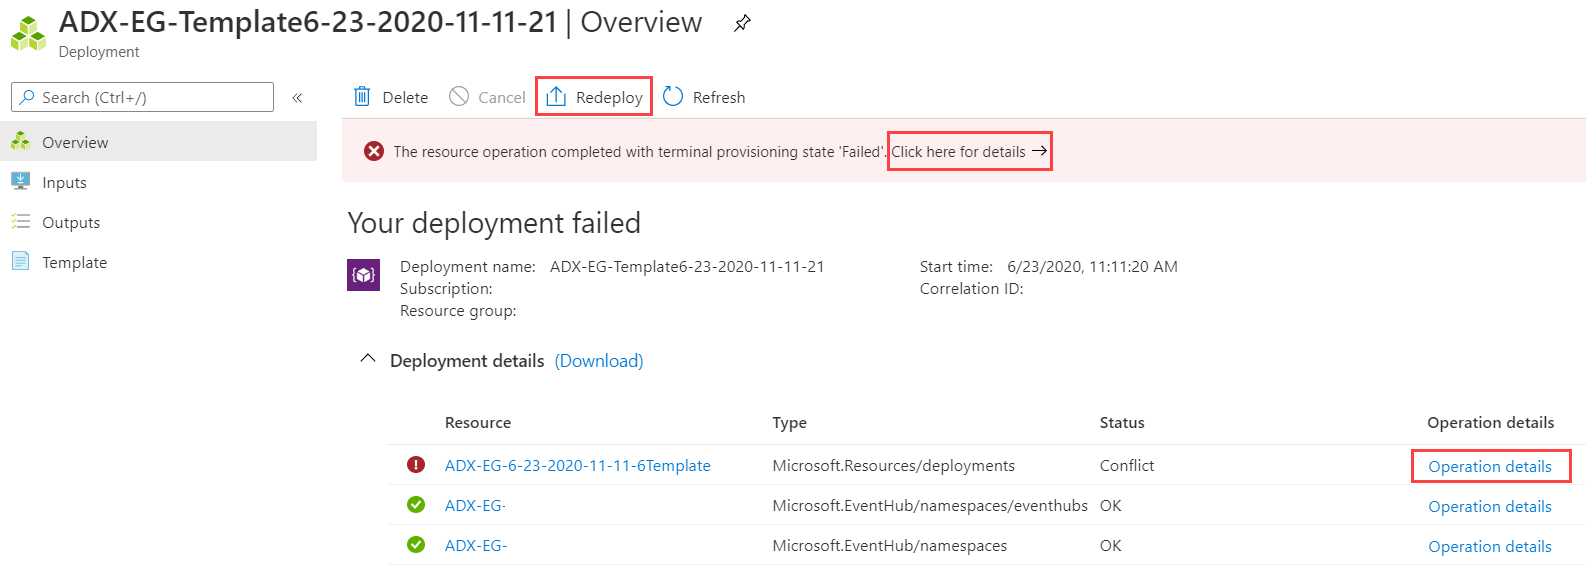
Deployment
Wait until the deployment is completed. If your deployment failed, select Operation details next to the failed stage to get more information for the failure reason. Select Redeploy to try to deploy the resources again. You can alter the parameters before deployment.
Generate sample data
Now that Data Explorer and the storage account are connected, you can create sample data.
Upload blob to the storage container
We'll work with a small shell script that issues a few basic Azure CLI commands to interact with Azure Storage resources. This script does the following actions:
- Creates a new container in your storage account.
- Uploads an existing file (as a blob) to that container.
- Lists the blobs in the container.
You can use Azure Cloud Shell to execute the script directly in the portal.
Save the data into a file and upload it with this script:
{"TimeStamp": "1987-11-16 12:00","Value": "Hello World","Source": "TestSource"}
    #!/bin/bash
    ### A simple Azure Storage example script

    export AZURE_STORAGE_ACCOUNT=<storage_account_name>
    export AZURE_STORAGE_KEY=<storage_account_key>

    export container_name=<container_name>
    export blob_name=<blob_name>
    export file_to_upload=<file_to_upload>
    export destination_file=<destination_file>

    echo "Creating the container..."
    az storage container create --name $container_name

    echo "Uploading the file..."
    az storage blob upload --container-name $container_name --file $file_to_upload --name $blob_name --metadata "rawSizeBytes=1024"

    echo "Listing the blobs..."
    az storage blob list --container-name $container_name --output table

    echo "Done"
Note
To achieve the best ingestion performance, the uncompressed size of the compressed blobs submitted for ingestion must be communicated. Because Event Grid notifications contain only basic details, the size information must be explicitly communicated. The uncompressed size information can be provided by setting the rawSizeBytes property on the blob metadata with the uncompressed data size in bytes.
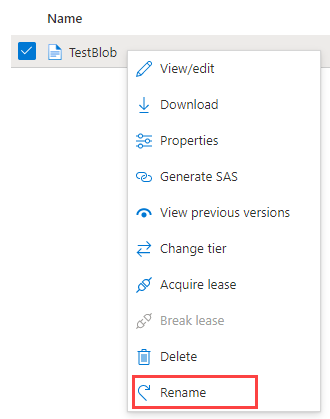
Rename blob
If you're ingesting data from ADLSv2 storage and have defined Blob renamed as the event type for the data connection, the trigger for blob ingestion is blob renaming. To rename a blob, navigate to the blob in Azure portal, right-click on the blob and select Rename:
Ingestion properties
You can specify the ingestion properties of the blob ingestion via the blob metadata.
Note
Data Explorer won't delete the blobs post ingestion. Retain the blobs for three to five days. Use Azure Blob storage lifecycle to manage blob deletion.
Review the data flow
Note
Data Explorer has an aggregation (batching) policy for data ingestion designed to optimize the ingestion process. By default, the policy is configured to 5 minutes. You'll be able to alter the policy at a later time if needed. In this article you can expect a latency of a few minutes.
In the Azure portal, under your Event Grid, you see the spike in activity while the app is running.

To check how many messages have made it to the database so far, run the following query in your test database.
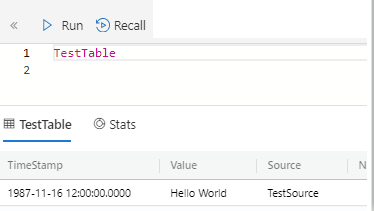
TestTable
| count
To see the content of the messages, run the following query in your test database.
TestTableThe result set should look like the following image:
Clean up resources
If you don't plan to use your Event Grid again, clean up the Event Grid Subscription, Event Hub namespace, and Event Hub that were autocreated for you, to avoid incurring costs.
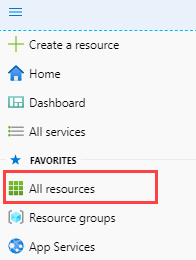
In Azure portal, go to the left menu and select All resources.
Search for your Event Hub Namespace and select Delete to delete it:

In the Delete resources form, confirm the deletion to delete the Event Hub Namespace and Event Hub resources.
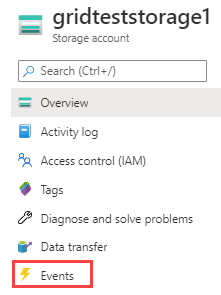
Go to your storage account. In the left menu, select Events:
Below the graph, Select your Event Grid Subscription and then select Delete to delete it:

To delete your Event Grid data connection, go to your Data Explorer cluster. On the left menu, select Databases.
Select your database TestDatabase:
On the left menu, select Data ingestion:

Select your data connection test-grid-connection and then select Delete to delete it.
Next steps
Feedback
Coming soon: Throughout 2024 we will be phasing out GitHub Issues as the feedback mechanism for content and replacing it with a new feedback system. For more information see: https://aka.ms/ContentUserFeedback.
Submit and view feedback for