Enable private access for TSI with Private Link (preview)
Note
The Time Series Insights (TSI) service will no longer be supported after March 2025. Consider migrating existing TSI environments to alternative solutions as soon as possible. For more information on the deprecation and migration, visit our documentation.
This article describes how to enable Private Link with a private endpoint for an Azure Time Series Insights Gen2 environment (currently in preview). Configuring a private endpoint for your Azure Time Series Insights Gen2 environment enables you to secure your Azure Time Series Insights environment and eliminate public exposure, as well as avoid data exfiltration from your Azure Virtual Network (VNet).
This article walks through the process using the Azure portal.
Here are the steps that are covered in this article:
- Turn on Private Link and configure a private endpoint for a Time Series Insights Gen2 environment.
- Disable or enable public network access flags, to restrict access to Private Link connections only.
Note
Please note that Private Link for an event source is not supported. Do not restrict Public Internet access to a hub or event source used by Time Series Insights.
Prerequisites
Before you can set up a private endpoint, you'll need an Azure Virtual Network (VNet) where the endpoint can be deployed. If you don't have a VNet already, you can follow one of the Azure Virtual Network quickstarts to set this up.
Add a private endpoint for an Azure Time Series Insights Gen2 environment
When using the Azure portal, you can choose to turn on Private Link with a private endpoint for an Azure Time Series Insights Gen2 environment as part of the environment's initial setup, or enable it later on an environment that already exists.
Either of these creation methods will give the same configuration options and the same end result for your environment. This section describes how to do each one.
Tip
You can also set up a Private Link endpoint through the Private Link service, instead of through your Azure Time Series Insights Gen2 environment. This also gives the same configuration options and the same end result.
For more details about setting up Private Link resources, see Private Link documentation for the Azure portal, Azure CLI, ARM, or PowerShell.
Add a private endpoint during environment creation
In this section, you'll enable Private Link with a private endpoint on an Azure Time Series Insights Gen2 environment that is currently being created. This section focuses on the networking step of the creation process; for a complete walkthrough of creating a new Azure Time Series Insights Gen2 environment, see How-to: Set up an environment.
The Private Link options are located in the Networking tab of environment setup.
In this tab, you can enable private endpoints by selecting the Private endpoint option for the Connectivity method.
This will add a section called Private endpoint connections where you can configure the details of your private endpoint. Select the + Add button to continue.

This will open a page to enter the details of a new private endpoint.

Fill in selections for your Subscription and Resource group. Set the Location to the same location as the VNet you'll be using. Choose a Name for the endpoint, and for Target sub-resources select environment or tsiExplorer.
Next, select the Virtual network and Subnet you'd like to use to deploy the endpoint.
Lastly, select whether to Integrate with private DNS zone. You can use the default of Yes or, for help with this option, you can follow the link in the portal to learn more about private DNS integration.
After filling out the configuration options, Hit OK to finish.
This will return you to the Networking tab of the Azure Time Series Insights Gen2 environment setup, where your new endpoint should be visible under Private endpoint connections.
You can then use the bottom navigation buttons to continue with the rest of environment setup.
Add a private endpoint to an existing environment
In this section, you'll enable Private Link with a private endpoint for an Azure Time Series Insights Gen2 environment that already exists.
First, navigate to the Azure portal in a browser. Bring up your Azure Time Series Insights Gen2 environment by searching for its name in the portal search bar.
Select Networking (preview) in the left-hand menu.
Switch to the Private endpoint connections tab.
Select + Private endpoint to open the Create a private endpoint setup.

In the Basics tab, enter or select the Subscription and Resource group of your project, and a Name and Region for your endpoint. The region needs to be the same as the region for the VNet you're using.
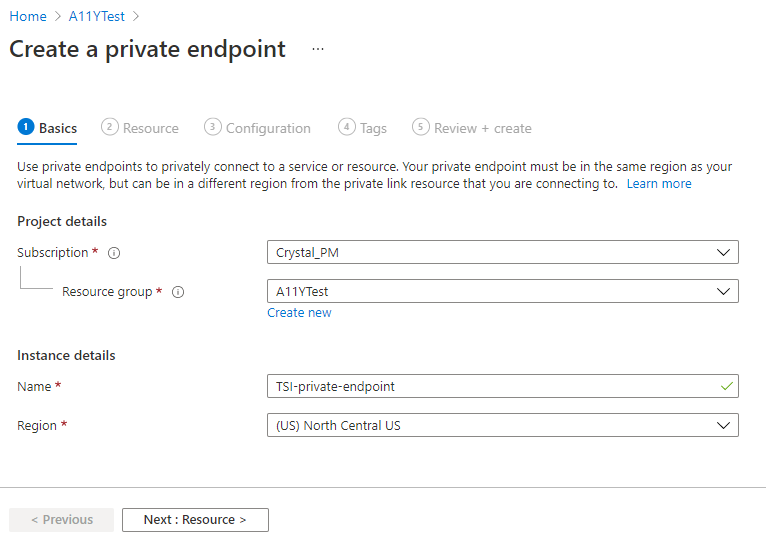
When you're finished, select the Next : Resource > button to go to the next tab.
In the Resource tab, enter or select this information:
- Connection method: Select Connect to an Azure resource in my directory to search for your Azure Time Series Insights Gen2 environment.
- Subscription: Enter your subscription.
- Resource type: Select Microsoft.TimeSeriesInsights/environments
- Resource: Select the name of your Azure Time Series Insights Gen2 environment.
- Target sub-resource: Select environment or tsiExplorer.
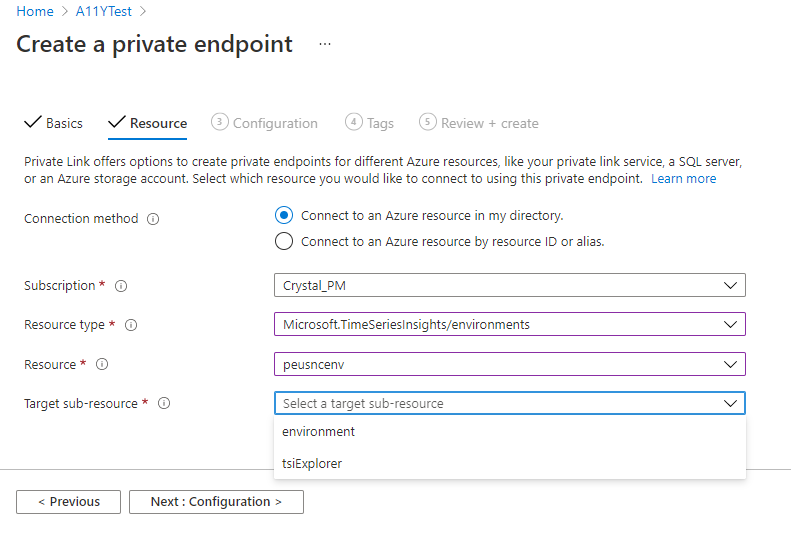
When you're finished, select the Next : Configuration > button to go to the next tab.
In the Configuration tab, enter or select this information:
- Virtual network: Select your virtual network.
- Subnet: Choose a subnet from your virtual network.
- Integrate with private DNS zone: Select whether to Integrate with private DNS zone. You can use the default of Yes or, for help with this option, you can follow the link in the portal to learn more about private DNS integration. If you select Yes, you can leave the default configuration information.
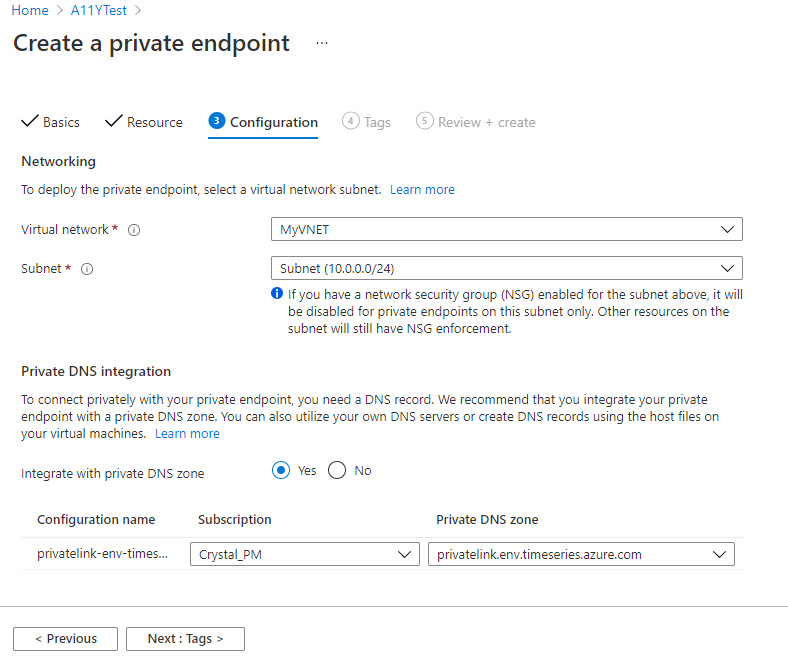
When you're finished, you can select the Review + create button to finish setup.
In the Review + create tab, review your selections and select the Create button.

When the endpoint is finished deploying, it should show up in the private endpoint connections for your Azure Time Series Insights Gen2 environment.
Tip
The endpoint can also be viewed from the Private Link Center in the Azure portal.
Disable / enable public network access flags
You can configure your Azure Time Series Insights Gen2 environment to deny all public connections and allow only connections through private endpoints to enhance the network security. This action is done with a public network access flag.
This policy allows you to restrict access to Private Link connections only. When the public network access flag is set to disabled, all REST API calls to the Azure Time Series Insights Gen2 environment data plane from the public cloud will return 403, Unauthorized. Alternatively, when the policy is set to disabled and a request is made through a private endpoint, the API call will succeed.
To disable or enable public network access in the Azure portal, open the portal and navigate to your Azure Time Series Insights Gen2 environment.
Select Networking (preview) in the left-hand menu.
In the Public access tab, set Allow public network access to either Disabled or All networks.

Select Save.

Next steps
Learn more about Private Link for Azure:
Feedback
Coming soon: Throughout 2024 we will be phasing out GitHub Issues as the feedback mechanism for content and replacing it with a new feedback system. For more information see: https://aka.ms/ContentUserFeedback.
Submit and view feedback for