Add Custom Domain to Azure VM or resource
Applies to: ✔️ Linux VMs ✔️ Windows VMs ✔️ Flexible scale sets
In Azure there are multiple ways to connect a custom domain to your VM or resource. For any resource with a public IP (Virtual Machine, Load Balancer, Application Gateway) the most straight-forward way is to create an A record set in your corresponding domain registrar.
Prerequisites
You need a VM with a web server running. You can use the Quickstart to create a VM and add NGINX.
The VM must be accessible to the web (open port 80, or 443). For a more secure deployment place your VM behind a load balancer or Application Gateway first. For more information, see Quickstart: Load Balancer.
Have an existing domain and access to DNS settings. For more information, see Buy a custom domain for Azure App Service.
Add custom domain to VM public IP address
When you create a virtual machine in the Azure portal, a public IP resource for the virtual machine is automatically created. Your public IP address is shown in VM overview page.

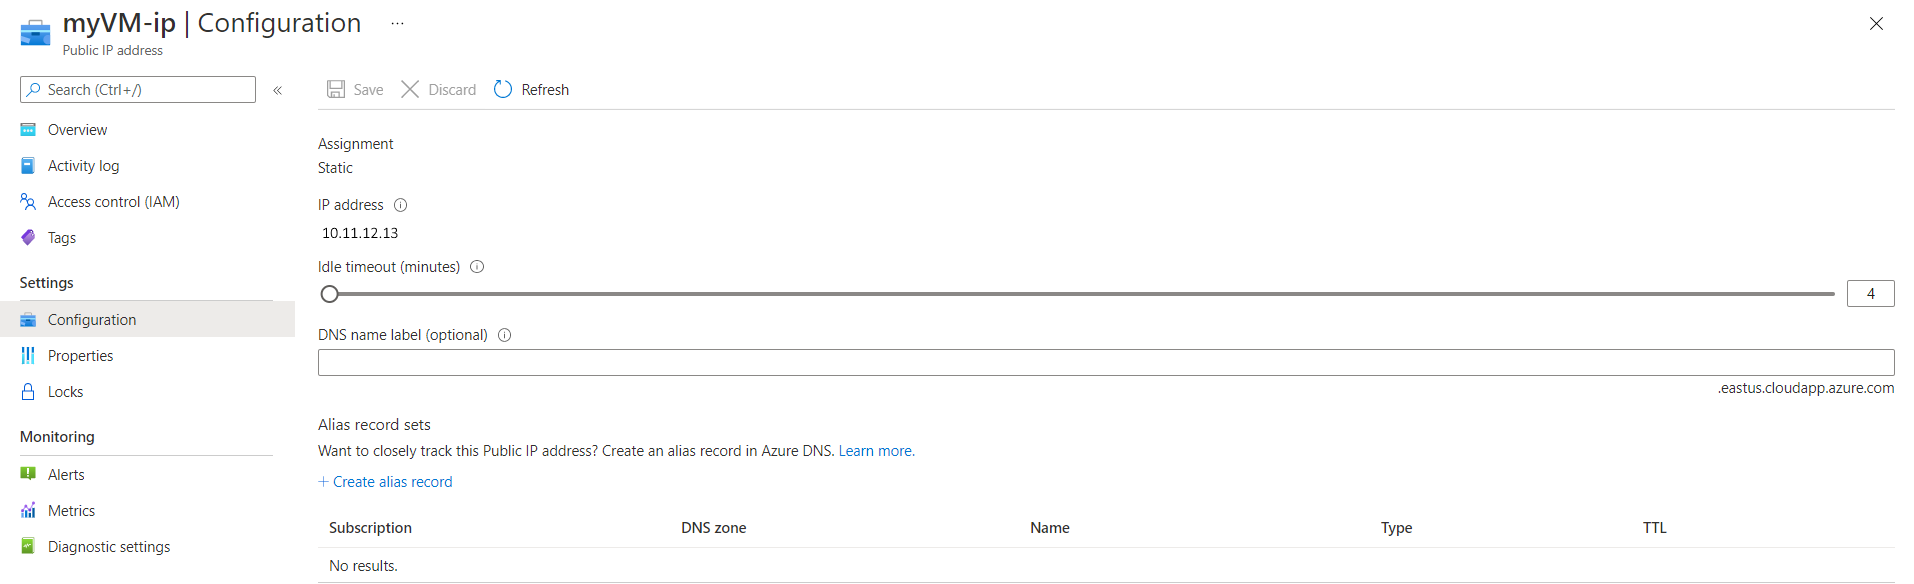
If you select the IP address you can see more information on it. Check to make sure your IP Assignment is set to Static. A static IP address will not change if the VM or resource reboots or shuts down.
If your IP Address is not static, you will need to create an FQDN.
- Select your VM in the portal.
- In the left menu, select Properties
- Under Public IP address\DNS name label, select your IP address. The Configuration page will open.
- Under DNS name label, enter the prefix you want to use.
- Select Save at the top of the page.
- Select Overview in the left menu to return to the VM overview blade.
- Verify that the DNS name appears correctly.
Open a browser and enter your IP address or FQDN and verify that it shows the web content running on your VM.
After verifying your static IP or FQDN, go to your domain provider and navigate to DNS settings. Add an A record pointing to your Public IP Address or FQDN. For example, the procedure for the GoDaddy domain registrar is as follows:
- Sign in and select the custom domain you want to use.
- In the Domains section, select Manage All, then select DNS | Manage Zones.
- For Domain Name, enter your custom domain, then select Search.
- From the DNS Management page, select Add, then select A in the Type list.
- Complete the fields of the A entry:
- Type: Leave A selected.
- Host: Enter @
- Points to: Enter the Public IP Address or FQDN of your VM.
- TTL: Leave one hour selected.
- Select Save.
The A record entry is added to the DNS records table.
After the record is created it usually takes about an hour for DNS propagate, but it can sometimes take up to 48 hours.
Next steps
Overview of TLS termination and end to end TLS with Application Gateway.
Feedback
Coming soon: Throughout 2024 we will be phasing out GitHub Issues as the feedback mechanism for content and replacing it with a new feedback system. For more information see: https://aka.ms/ContentUserFeedback.
Submit and view feedback for