Create a Virtual WAN hub route table for NVAs: Azure portal
This article shows you how to steer traffic from a branch (on-premises site) connected to the Virtual WAN hub to a Spoke virtual network (VNet) via a Network Virtual Appliance (NVA).
Before you begin
Verify that you have met the following criteria:
You have a Network Virtual Appliance (NVA). A Network Virtual Appliance is a third-party software of your choice that is typically provisioned from Azure Marketplace in a virtual network.
A private IP address must be assigned to the NVA network interface.
The NVA isn't deployed in the virtual hub. It must be deployed in a separate virtual network.
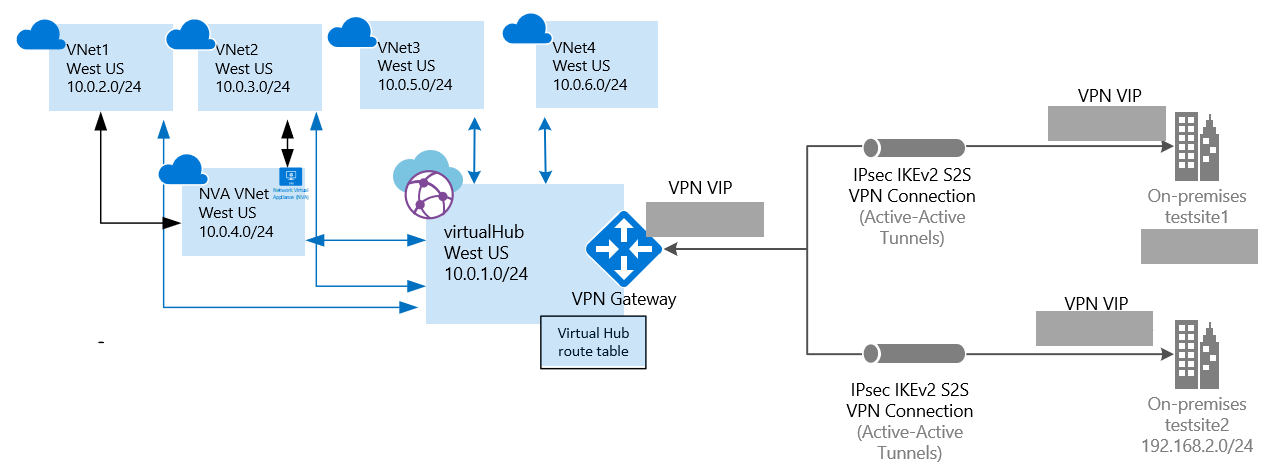
The NVA virtual network may have one or many virtual networks connected to it. In this article, we refer to the NVA virtual network as an 'indirect spoke VNet'. These virtual networks can be connected to the NVA VNet by using VNet peering. The VNet Peering links are depicted by black arrows in the above figure between VNet 1, VNet 2, and NVA VNet.
You have created two virtual networks. They will be used as spoke VNets.
The VNet spoke address spaces are: VNet1: 10.0.2.0/24 and VNet2: 10.0.3.0/24. If you need information on how to create a virtual network, see Create a virtual network.
Ensure there are no virtual network gateways in any of the VNets.
The VNets don't require a gateway subnet.
1. Sign in
From a browser, navigate to the Azure portal and sign in with your Azure account.
2. Create a virtual WAN
Create a virtual WAN. You can use the following example values, or replace with your own.
- Virtual WAN name: myVirtualWAN
- Resource group: testRG
- Location: West US
Navigate to the Virtual WAN page. In the portal, click +Create a resource. Type Virtual WAN into the search box and select Enter.
Select Virtual WAN from the results. On the Virtual WAN page, click Create.
On the Create WAN page, fill in the following fields:
- Name - Type the Name that you want to call your WAN.
- Subscription - Select the subscription that you want to use.
- Resource Group - Create new or use existing.
- Resource Location - Choose a resource location from the dropdown. A WAN is a global resource and does not live in a particular region. However, you must select a region in order to more easily manage and locate the WAN resource that you create.
After you finish filling out the fields, click Create.
3. Create a hub
Create the hub. You can use the following example values, or replace with your own.
- Location: West US
- Name: westushub
- Hub private address space: 10.0.1.0/24
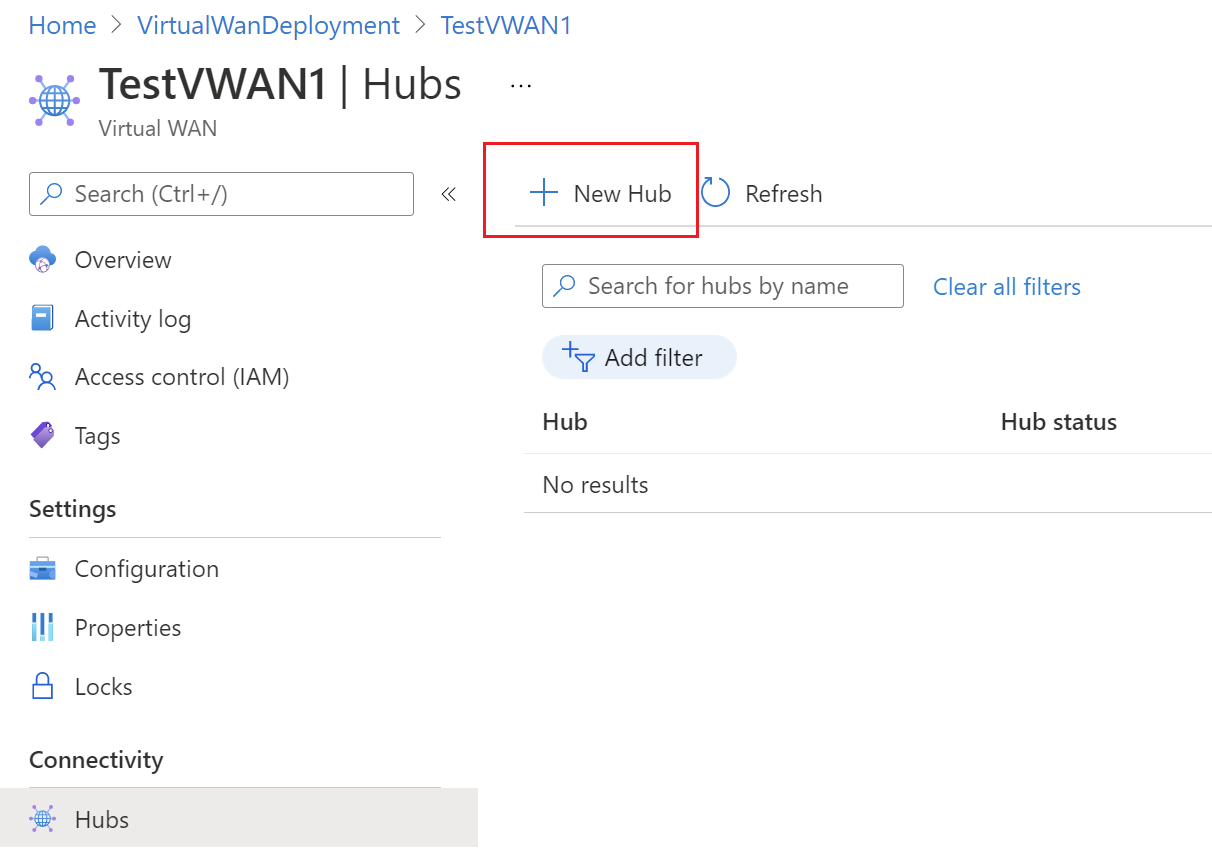
Go to the virtual WAN that you created. On the virtual WAN page left pane, under the Connectivity, select Hubs.
On the Hubs page, select +New Hub to open the Create virtual hub page.
On the Basics tab, fill in the values.
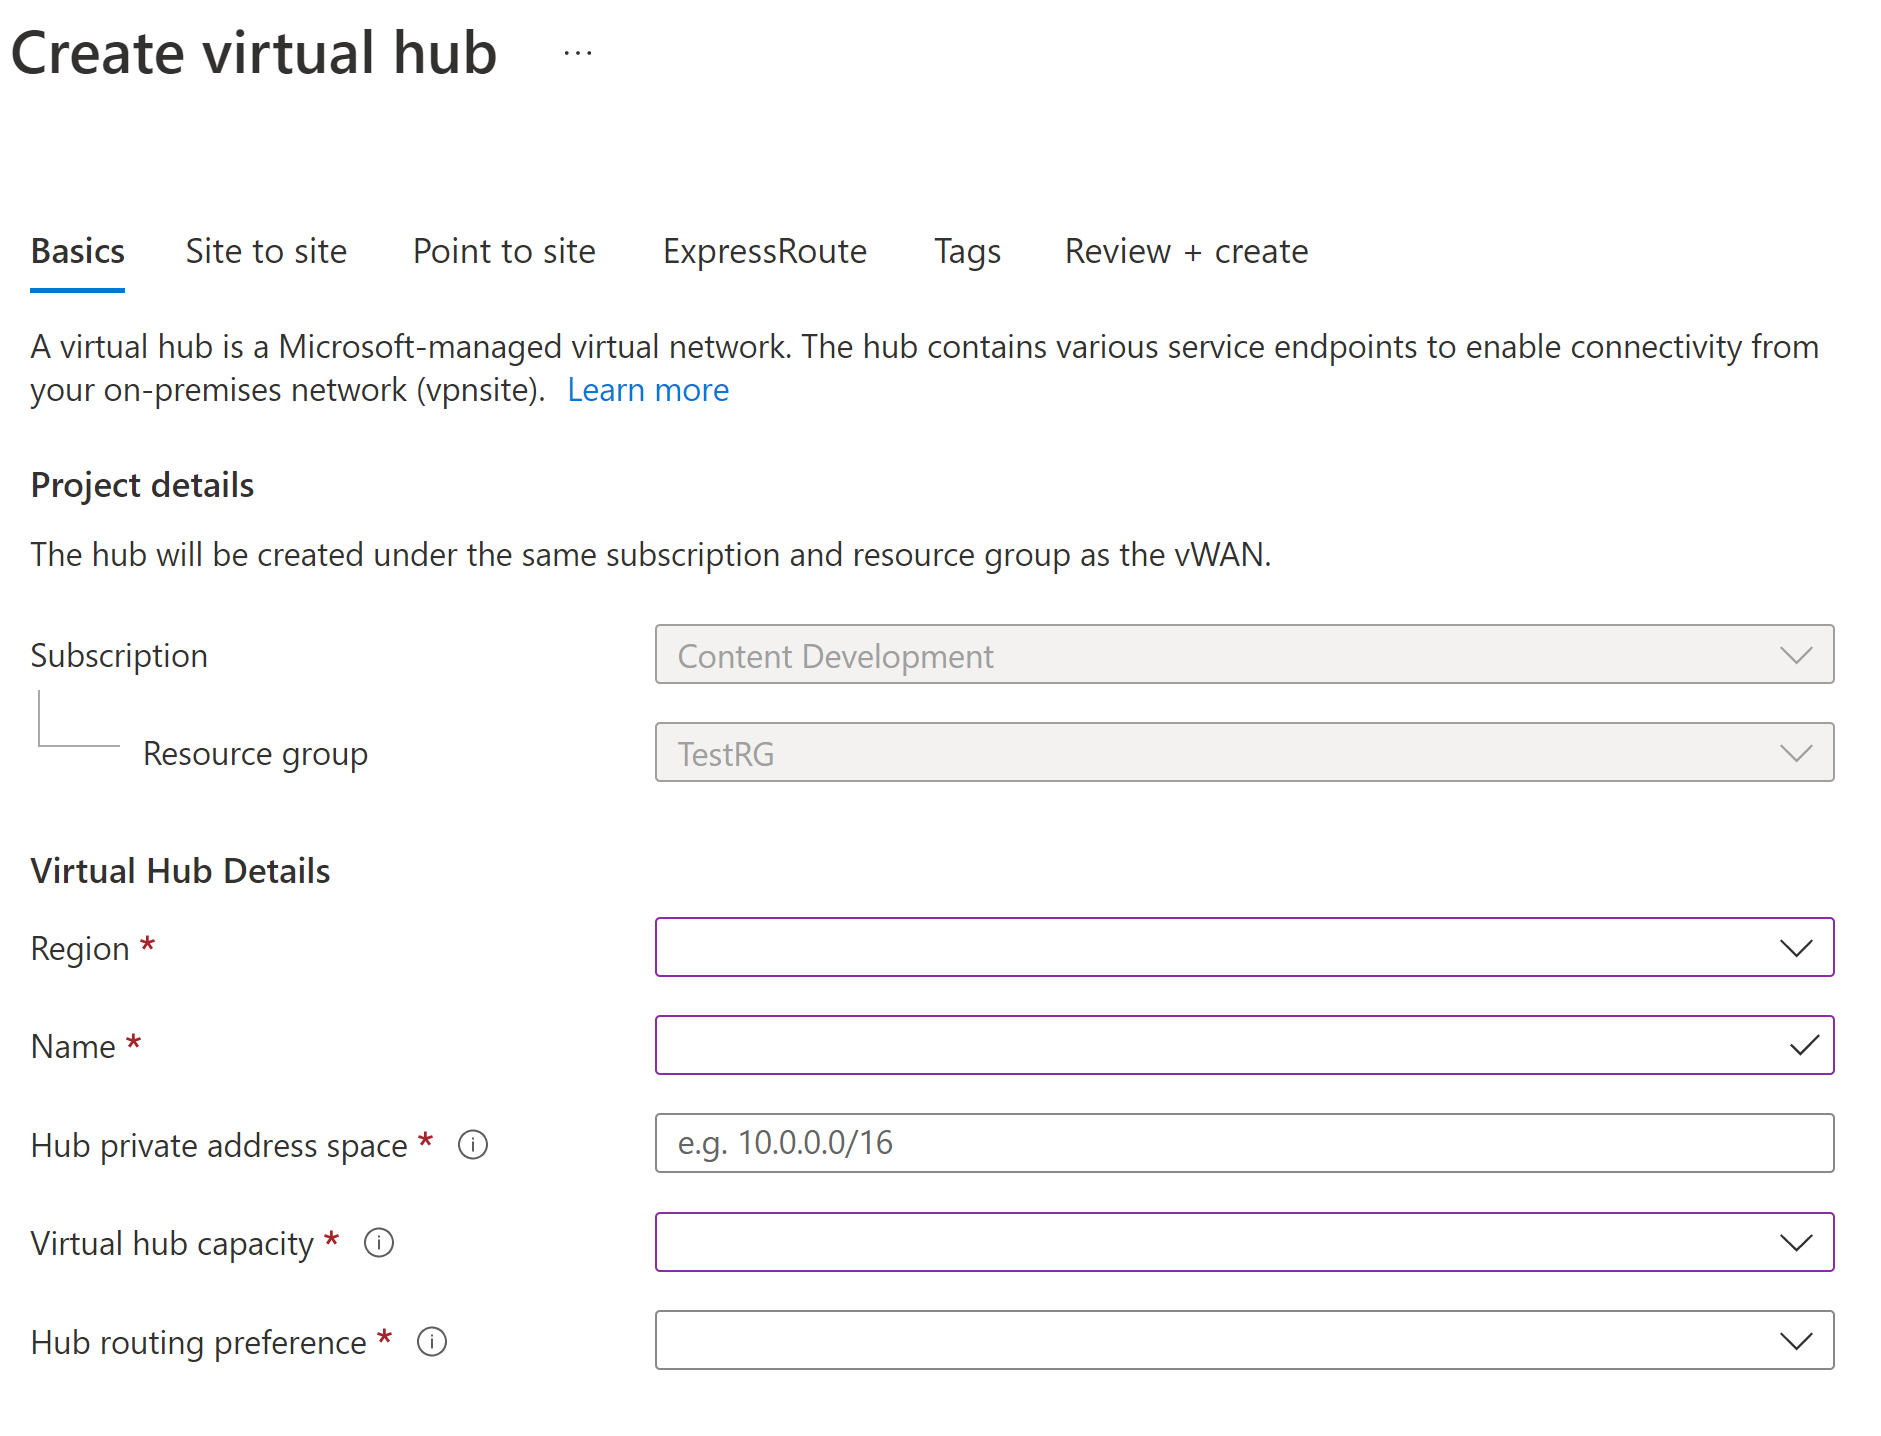
- Region: This setting was previously referred to as location. It's the region in which you want to create your virtual hub.
- Name: The name by which you want the virtual hub to be known.
- Hub private address space: The hub's address range in CIDR notation. The minimum address space is /24 to create a hub.
- Virtual hub capacity: Select from the dropdown. For more information, see Virtual hub settings.
- Hub routing preference: Select from the dropdown. See Virtual hub routing preference for more information.
Click Review + create.
On the Validation passed page, click Create.
4. Create and apply a hub route table
Update the hub with a hub route table. Use the following example values:
- Spoke VNet address spaces: (VNet1 and VNet2) 10.0.2.0/24 and 10.0.3.0/24
- DMZ NVA network interface private IP address: 10.0.4.5
Navigate to your virtual WAN.
Click the hub for which you want to create a route table.
Click the ..., and then click Edit virtual hub.
On the Edit virtual hub page, scroll down and select the checkbox Use table for routing.
In the If destination prefix is column, add the address spaces. In the Send to next hop column, add the DMZ NVA network interface private IP address.
Note
The DMZ NVA network is applicable to the local hub.
Click Confirm to update the hub resource with the route table settings.
5. Create the VNet connections
Create a virtual network connection from each indirect spoke VNet (VNet1 and VNet2) to the hub. These virtual network connections are depicted by the blue arrows in the above figure. Then, create a VNet connection from the NVA VNet to the hub (black arrow in the figure).
For this step, you can use the following values:
| Virtual network name | Connection name |
|---|---|
| VNet1 | testconnection1 |
| VNet2 | testconnection2 |
| NVAVNet | testconnection3 |
Repeat the following procedure for each virtual network that you want to connect.
On the page for your virtual WAN, click Virtual network connections.
On the virtual network connection page, click +Add connection.
On the Add connection page, fill in the following fields:
- Connection name - Name your connection.
- Hubs - Select the hub you want to associate with this connection.
- Subscription - Verify the subscription.
- Virtual network - Select the virtual network you want to connect to this hub. The virtual network can't have an already existing virtual network gateway.
Click OK to create the connection.
Next steps
To learn more about Virtual WAN, see the Virtual WAN Overview page.
Feedback
Coming soon: Throughout 2024 we will be phasing out GitHub Issues as the feedback mechanism for content and replacing it with a new feedback system. For more information see: https://aka.ms/ContentUserFeedback.
Submit and view feedback for