Protect Azure OpenAI using Azure Web Application Firewall on Azure Front Door
There are a growing number of enterprises using Azure OpenAI APIs, and the number and complexity of security attacks against web applications is constantly evolving. A strong security strategy is necessary to protect Azure OpenAI APIs from various web application attacks.
Azure Web Application Firewall (WAF) is an Azure Networking product that protects web applications and APIs from various OWASP top 10 web attacks, Common Vulnerabilities and Exposures (CVEs), and malicious bot attacks.
This article describes how to use Azure Web Application Firewall (WAF) on Azure Front Door to protect Azure OpenAI endpoints.
Prerequisites
If you don't have an Azure subscription, create a free account before you begin.
Create Azure OpenAI instance using the gpt-35-turbo model
First, create an OpenAI instance.
Create an Azure OpenAI instance and deploy a gpt-35-turbo model using Create and deploy an Azure OpenAI Service resource.
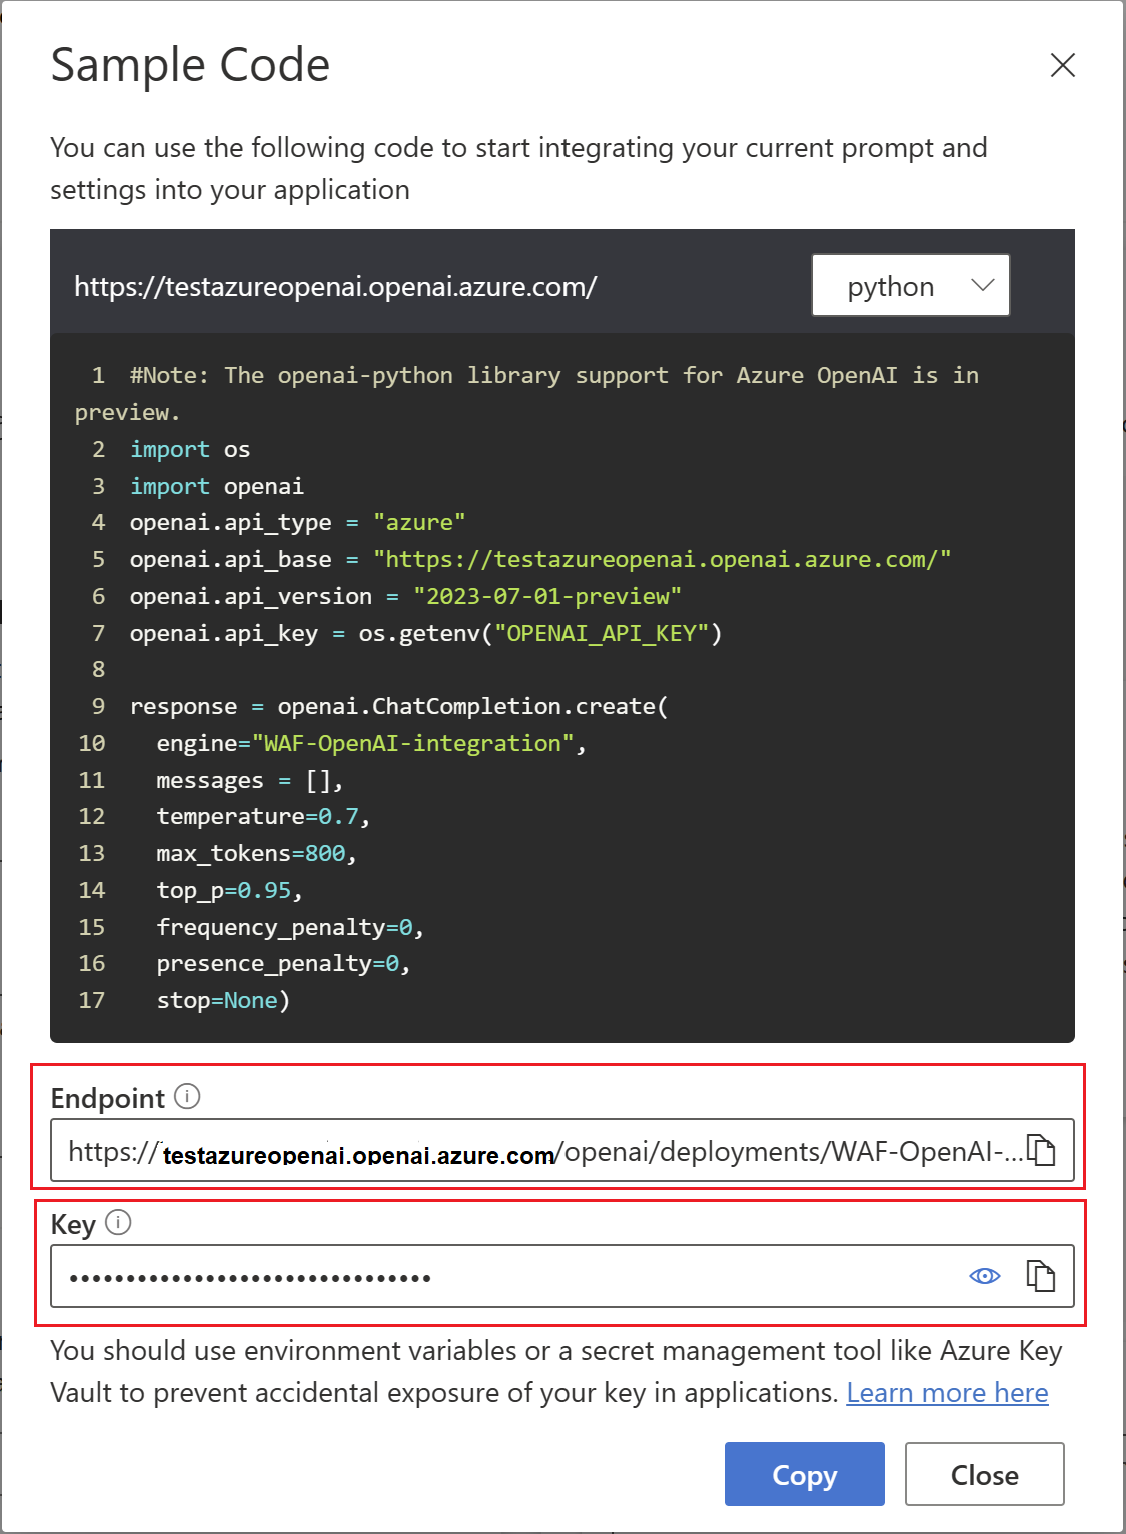
Identify the Azure OpenAI endpoint and the API key.
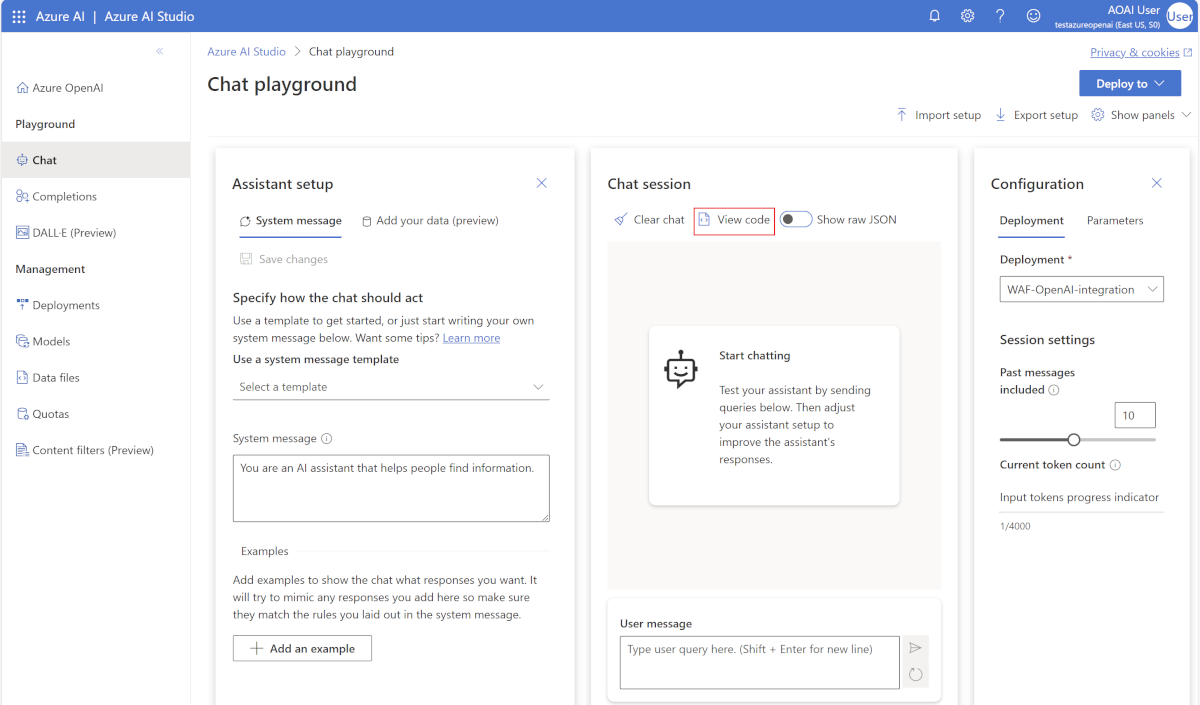
Open the Azure OpenAI studio and open the Chat option under Playground. Use the View code option to display the endpoint and the API key.
Validate Azure OpenAI call using Postman. Use the Azure OpenAPI endpoint and api-key values found in the earlier steps. Use these lines of code in the POST body:
{
"model":"gpt-35-turbo",
"messages": [
{
"role": "user",
"content": "What is Azure OpenAI?"
}
]
}
In response to the POST, you should receive a 200 OK:

The Azure OpenAI also generates a response using the GPT model.


Create an Azure Front Door instance with Azure WAF
Now use the Azure portal to create an Azure Front Door instance with Azure WAF.
Create an Azure Front Door premium optimized tier with an associated WAF security policy in the same resource group. Use the Custom create option.
Add endpoints and routes.
Add the origin hostname: The origin hostname is
testazureopenai.openai.azure.com.Add the WAF policy.
Configure a WAF policy to protect against web application and API vulnerabilities
Enable the WAF policy in prevention mode and ensure Microsoft_DefaultRuleSet_2.1 and Microsoft_BotManagerRuleSet_1.0 are enabled.

Verify access to Azure OpenAI via Azure Front Door endpoint
Now verify your Azure Front Door endpoint.
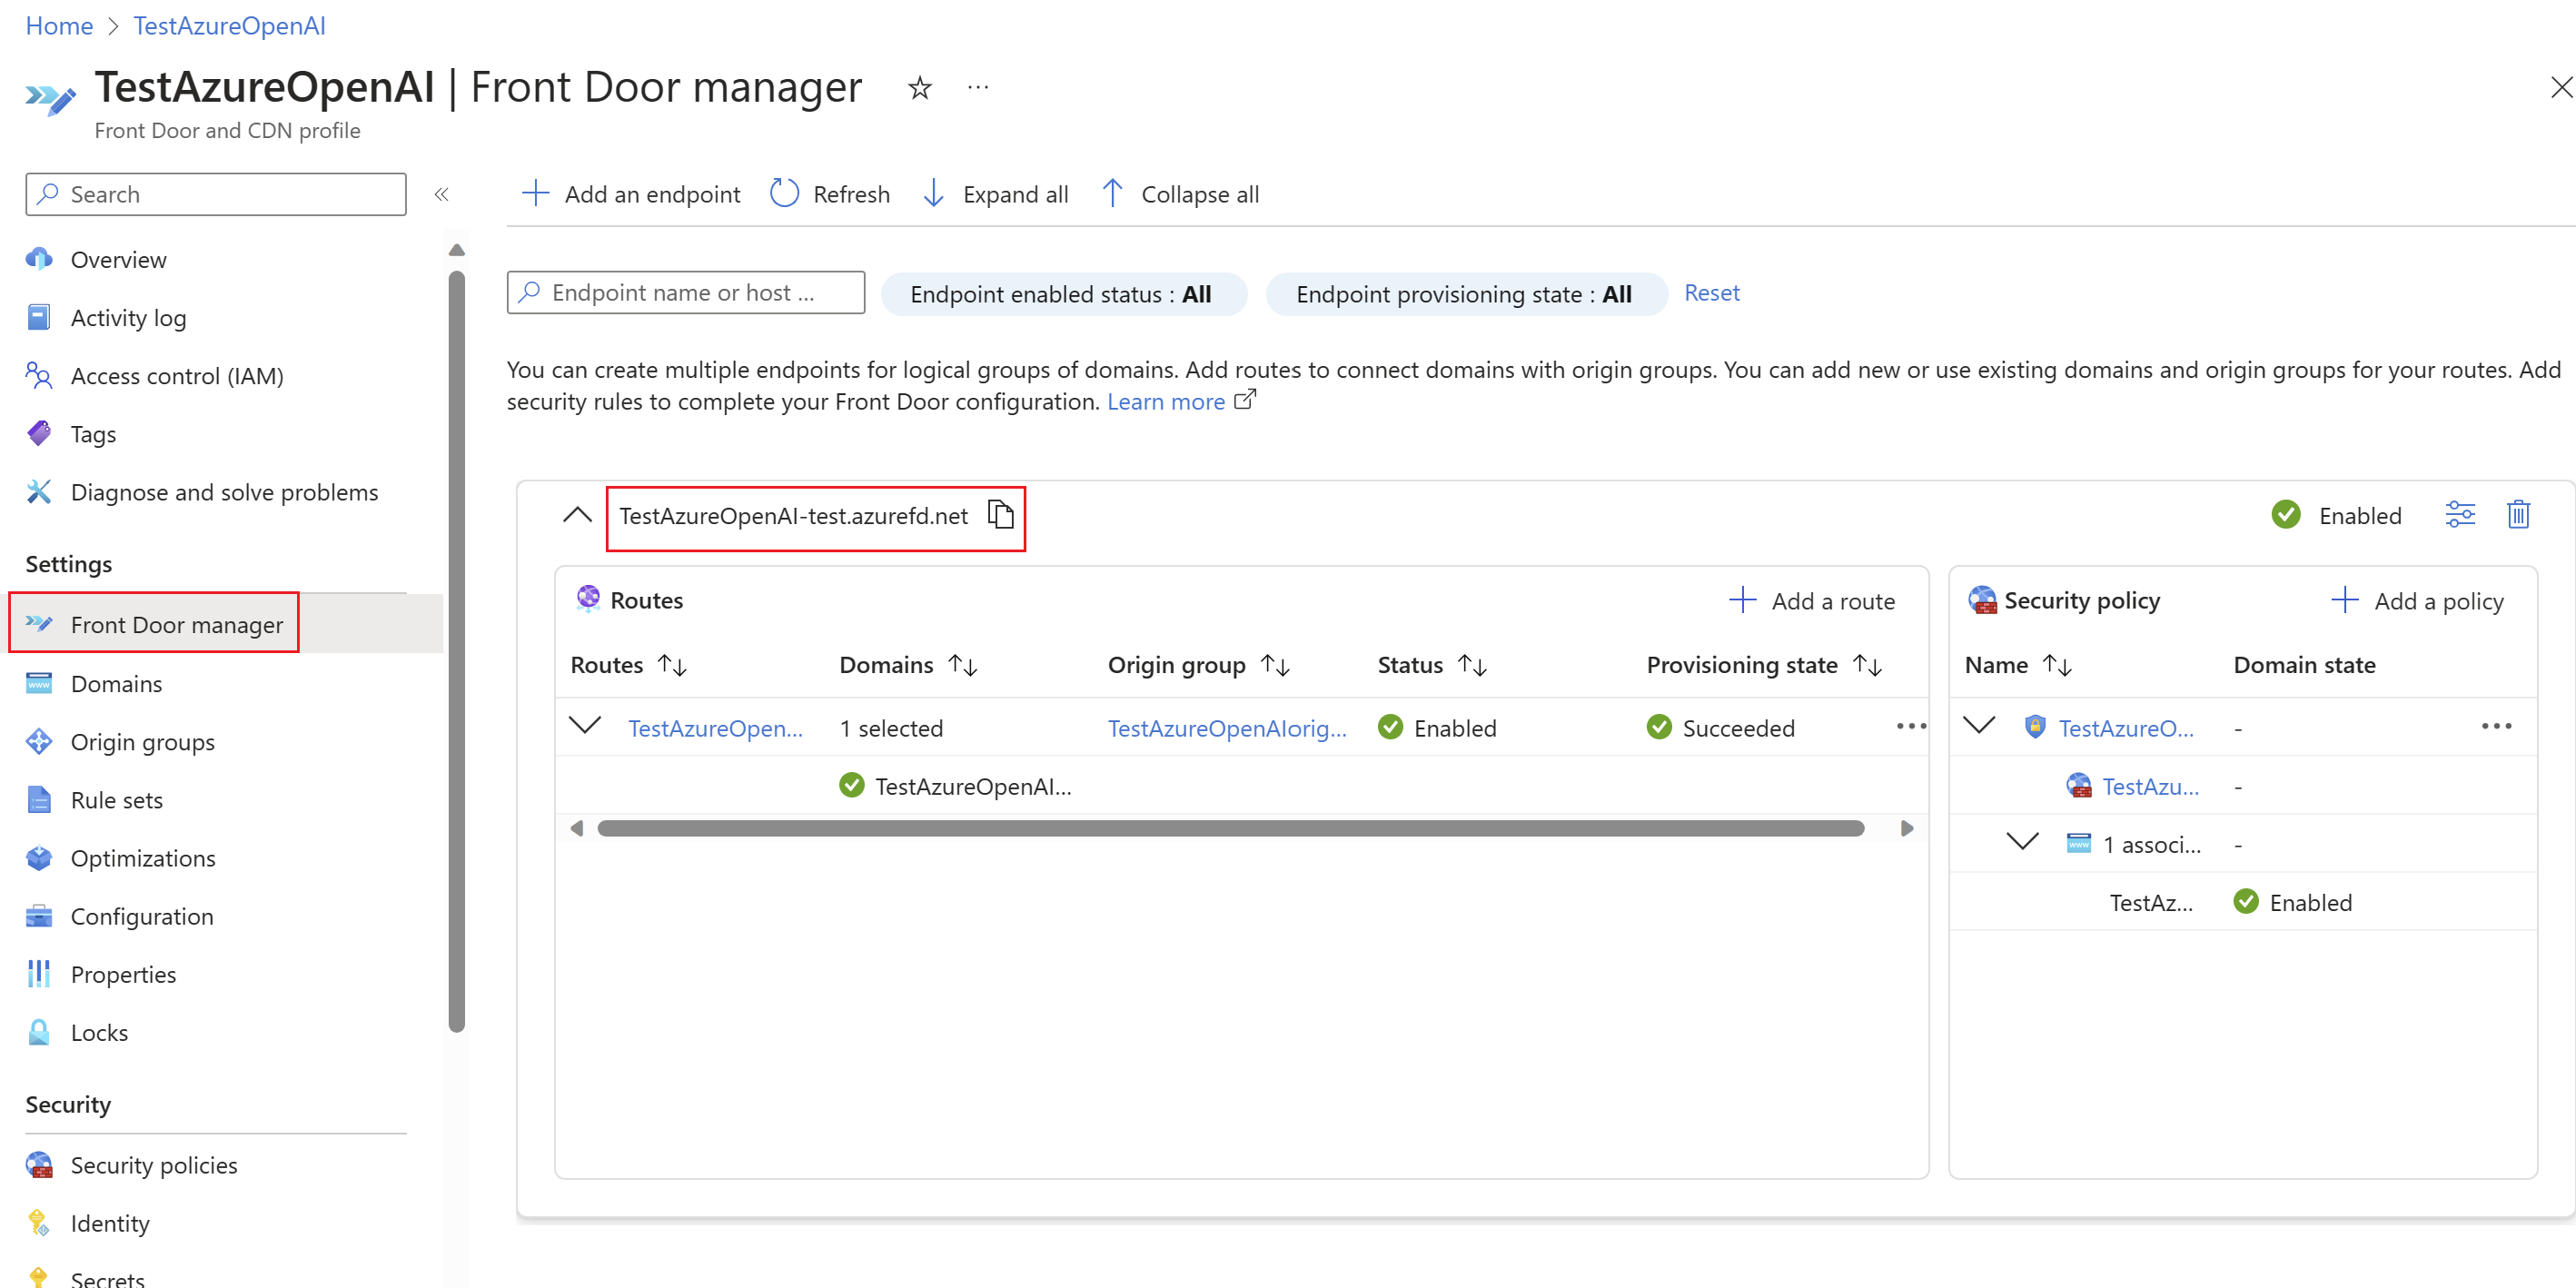
Retrieve the Azure Front Door endpoint from the Front Door Manager.
Use Postman to send a POST request to the Azure Front Door endpoint.
- Replace the Azure OpenAI endpoint with the AFD endpoint in Postman POST request.
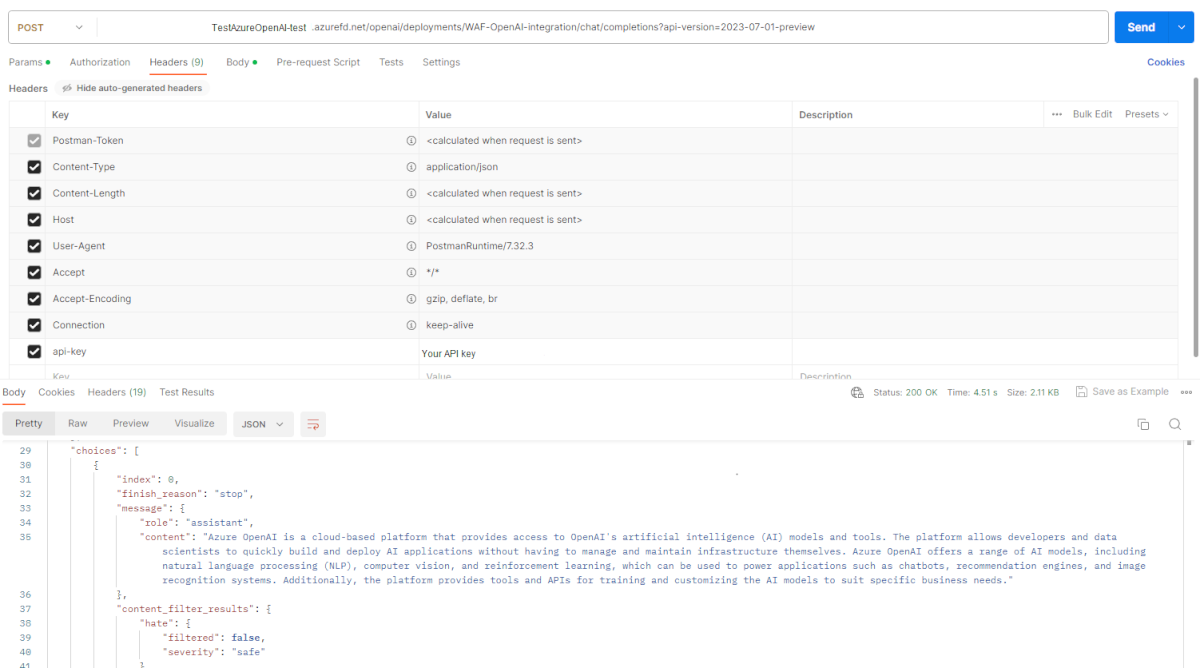
Azure OpenAI also generates a response using the GPT model.
- Replace the Azure OpenAI endpoint with the AFD endpoint in Postman POST request.


Validate WAF blocks an OWASP attack
Send a POST request simulating an OWASP attack on the Azure OpenAI endpoint. WAF blocks the call with a 403 Forbidden response code.
Configure IP restriction rules using WAF
To restrict access to the Azure OpenAI endpoint to the required IP addresses, see Configure an IP restriction rule with a WAF for Azure Front Door.
Common issues
The following items are common issues you may encounter when using Azure OpenAI with Azure Front Door and Azure WAF.
You get a 401: Access Denied message when you send a POST request to your Azure OpenAI endpoint.
If you attempt to send a POST request to your Azure OpenAI endpoint immediately after you create it, you may receive a 401: Access Denied message even if you have the correct API key in your request. This issue will usually resolve itself after some time without any direct intervention.
You get a 415: Unsupported Media Type message when you send a POST request to your Azure OpenAI endpoint.
If you attempt to send a POST request to your Azure OpenAI endpoint with the Content-Type header
text/plain, you get this message. Make sure to update your Content-Type header toapplication/jsonin the header section in Postman.
Feedback
Coming soon: Throughout 2024 we will be phasing out GitHub Issues as the feedback mechanism for content and replacing it with a new feedback system. For more information see: https://aka.ms/ContentUserFeedback.
Submit and view feedback for