Task 5: How to Configure the Transform Shape
Use the following procedure to configure the Transform shape.
To configure the Transform shape
Drag a Construct Message shape after ReceiveBeginDocResponse.
Messages Constructed: EditLineMsg
Name: ConstructEditLineMessageWithData
Right-click in the middle, select Insert Shape, and then select Transform.
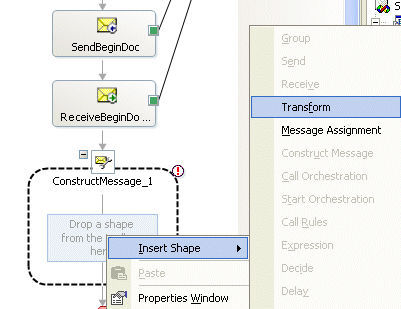
Using Transform, map data from the data you are sending to the data that is sent.
For your work environment you would send a document (instead of BeginDoc) with all values possible allowing you to construct all possible messages, BeginDoc, EditLine, and EndDoc. For this example, however, there is only hard coded data.
Double-click Transform_1 to open.
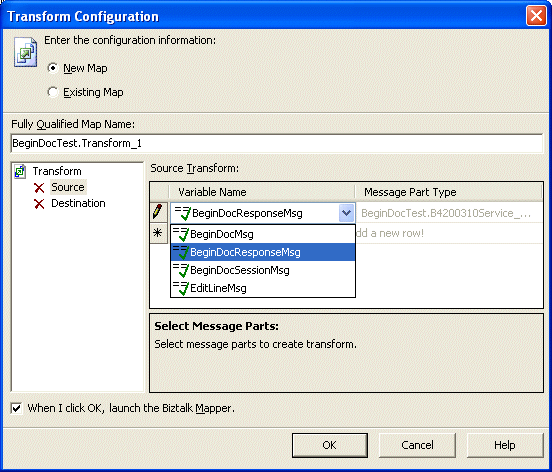
Select Source and click in the Add row under Variable Name and select BeginDocResponseMsg.
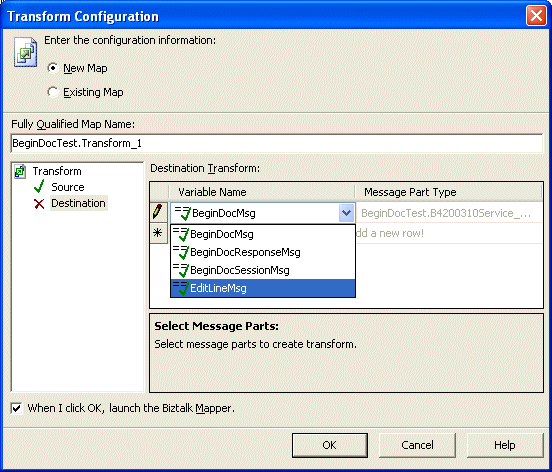
Select Destination and click in the Add row under Variable Name, select EditLineMsg, and click OK.
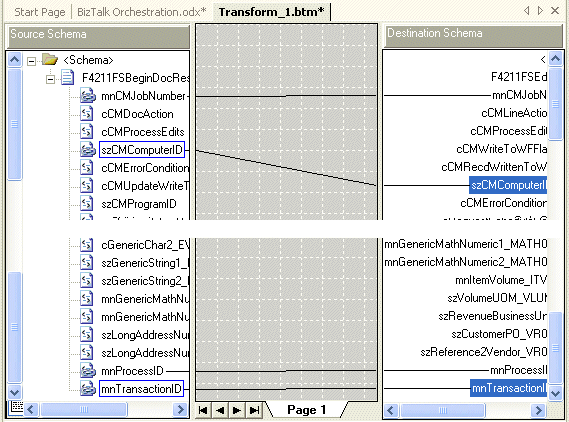
In the Solution Explorer, double-click Transform_1.btm to open the mapping tool. Link the following four items:
mnCMJobNo
szCMComputerID
mnProcessID
mnTransactionID
For ease of use, this example has hardcoded values. Click the item in the Destination Schema and set the following Value.
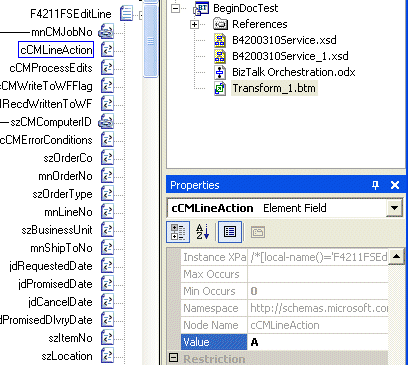
<?xml version="1.0" encoding="utf-8"?>
<ns0:F4211FSEditLine xmlns:ns0="http://schemas.microsoft.com/
      [JDE://CSALES/B4200310]">
   <ns0:cCMLineAction>A</ns0:cCMLineAction>
   <ns0:cCMProcessEdits>1</ns0:cCMProcessEdits>
   <ns0:cCMWriteToWFFlag>2</ns0:cCMWriteToWFFlag>
   <ns0:szItemNo>210</ns0:szItemNo>
   <ns0:mnQtyOrdered>1</ns0:mnQtyOrdered>
   <ns0:cSalesTaxableYN>N</ns0:cSalesTaxableYN>
   <ns0:szTransactionUOM>EA</ns0:szTransactionUOM>
   <ns0:szCMProgramID>XMLInterop</ns0:szCMProgramID>
   <ns0:szCMVersion>ZJDE0001</ns0:szCMVersion>
</ns0:F4211FSEditLine>
Drag a Construct Message after ReceiveEditLine.
Messages Constructed: EndDocMsg
Name: ConstructEndDocMessageWithData
Right-click in the middle and select Insert Shape, and then select Transform.
Double-click Transform_2 to open.
Select Source and click in the Add row under Variable Name and select BeginDocResponseMsg.
Select Destination and click in the Add row under Variable Name, select EndDocMsg, and click OK.
In the Solution Explorer, double-click Transform_2.btm to open the mapping tool. Link the following four items:
mnCMJobNo
szCMComputerID
mnProcessID
mnTransactionID
For ease of use, this example has hardcoded values. Click the item in the Destination Schema and set the following Value.
<?xml version="1.0" encoding="utf-8"?>
<ns0:F4211FSEndDoc xmlns:ns0="http://schemas.microsoft.com/
    [JDE://CSALES/B4200310]">
   <ns0:szCMProgramID>XMLInterop</ns0:szCMProgramID>
   <ns0:szCMVersion>ZJDE0001</ns0:szCMVersion>
   <ns0:cCMUseWorkFiles>2</ns0:cCMUseWorkFiles>
</ns0:F4211FSEndDoc>
See Also
Task 1: Create the Ports
Task 2: Create the Messages
Task 3: Configure the Send and Receive Shapes
Task 4: Configure the Construct Message Shape
Feedback
Coming soon: Throughout 2024 we will be phasing out GitHub Issues as the feedback mechanism for content and replacing it with a new feedback system. For more information see: https://aka.ms/ContentUserFeedback.
Submit and view feedback for