Released version 20190121
Introduction
Version 20190121 for Power Automate portal is now available in all regions. This article describes the updates, including the new features, and the fixes to existing functionality, which are included in this update. This version was first made available in preview on January 25, 2019, and completed worldwide rollout on February 6, 2019.
Advanced condition builder
It's now easier than ever to write conditional logic in Microsoft Flow by using the new advanced condition builder. Previously, you could write complex conditions using expressions, but now it's possible to build conditions with the Microsoft Flow designer's simple point-and-click UI.
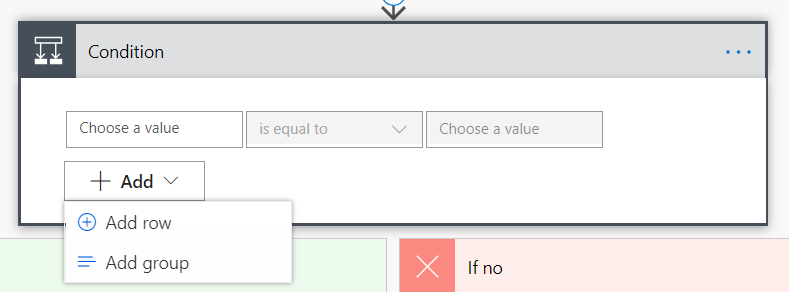
You can add a condition to your flow by selecting New step and then the first action available to you: Condition. There is a new Add button that you can select that presents two options:
- Add row: Each individual condition you check for (such as the value is greater than 10, or the list does not contain
Test) creates a new row in the condition builder. - Add group: You can combine one or more rows together in a group—each group is combined by either an And or an Or. If you select And, then all the rows must be true. If you select Or, then only one of the rows needs to be true.
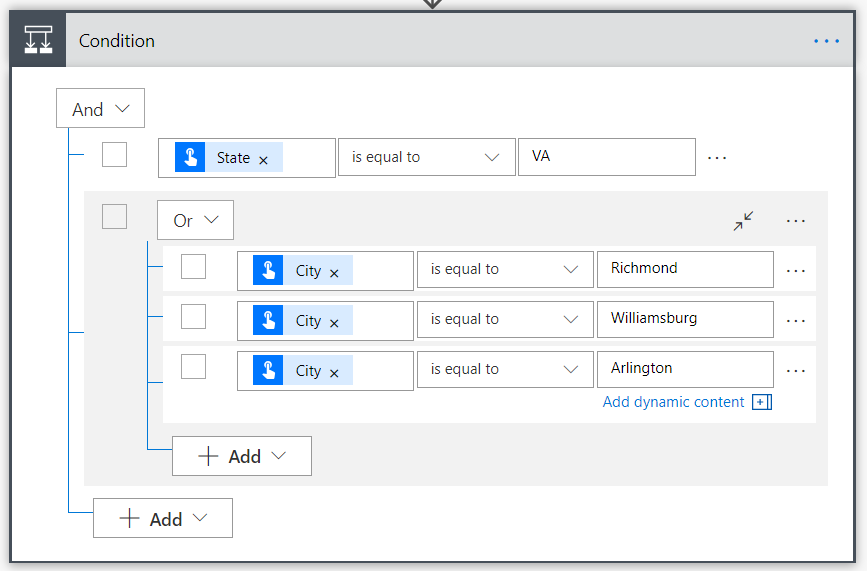
You can have however many rows or groups you need to build out your logic, and can continue adding rows (or groups) both at the top level of the condition, and inside groups using their Add buttons. If you want a simplified view of the condition, there is a button at the top-right of each group to collapse it.
Additionally, there is a ... menu at the right side of each row and group. This contains options for moving rows up or down (which can move them in and out of groups), and an option to Delete a row or group. Also, there are check boxes on the left side of each row or group. This allows you to select several different rows, and then select Group from the ... menu at the right to combine the rows into a single group.
Sometimes, there might be an expression that is more complex than what you want to model in even the advanced condition builder. Previously, you could select Edit in advanced mode and then enter the expressions in a text box. However, this old mode was difficult to work with because it did not give you access to IntelliSense for expressions or Dynamic content. There is no longer an Edit in advanced mode. Instead, if you want a very complex expression, you can use the regular Dynamic Content expression builder to enter your expression on the left side of the row. Then, select Equals to and enter true in the right side.

The advanced condition builder is available for all new conditions that you add to your flows. It's not enabled for existing conditions, so if you want to use it with existing flows, add a new step and then drag the actions from the old condition to the new condition.
Peek code in the Microsoft Flow designer
If you have a large action with many different inputs, sometimes it can be difficult to understand exactly what will be sent to the Connector from your flow. We have added a new Peek code option in the ... menu of all triggers and actions in the Flow designer.
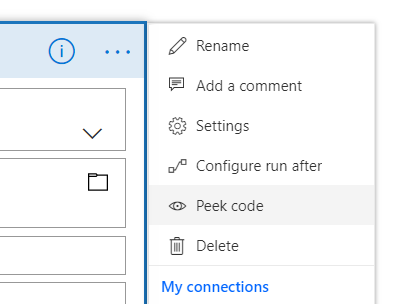
When you select this option, you will see the full JSON representation of an action. This includes all of the inputs to the action, such as the text you entered directly, and expressions used. For example, you can select expressions here and paste them into the Dynamic Content expression editor. This can also give you a way to verify that exactly the data you expect is present in the flow.
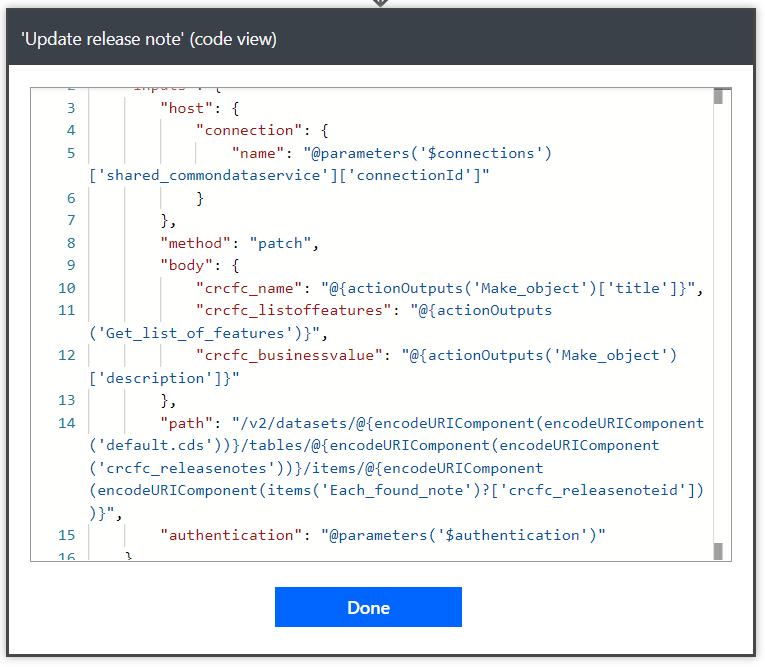
Select Done at the bottom of the action to return to the normal action view.
SharePoint Remind Me
Personal productivity is essential to teamwork. SharePoint lists and libraries have long allowed you to define custom metadata columns to track dates. We now are releasing a new capability that lets you set reminders for any of these dates. You’ll be able to receive a personal email alert x days in advance of a date on any document or item in SharePoint.
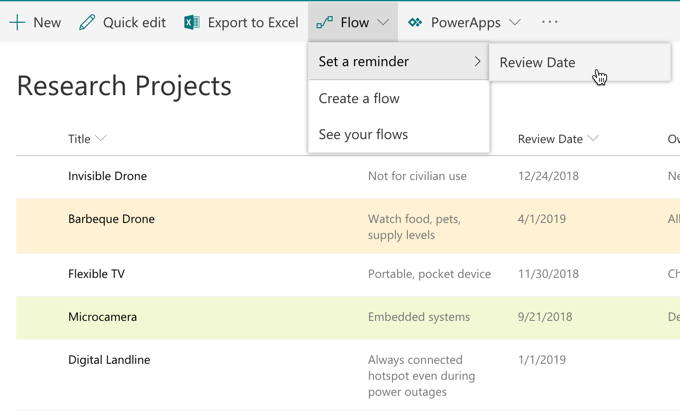
To create the reminder flow, your list or library should have at least one date/time column in the current view. You’ll then be able to create a reminder by selecting the Flow > Set a reminder menu item.
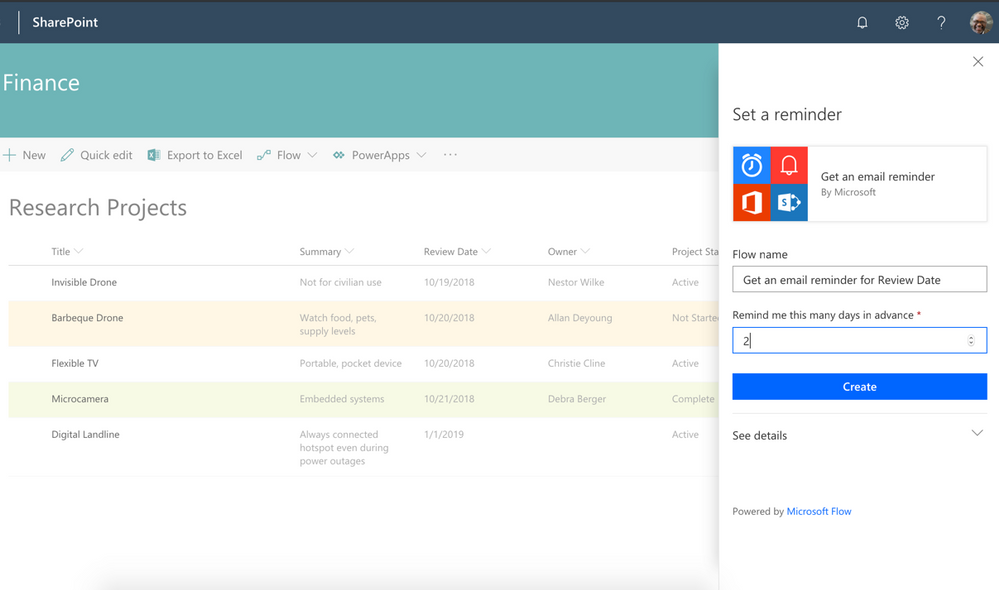
You can enter the number of days in advance for the reminder, based on the selected date column.
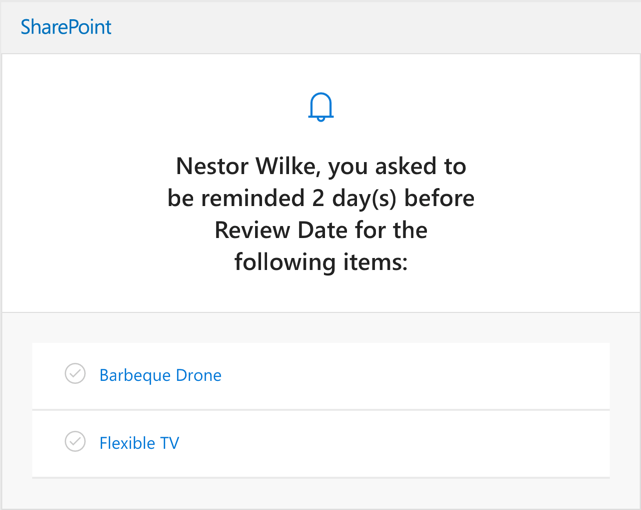
Based on your selection, you’ll get an email from Microsoft Flow for any items or documents x days in advance of the selected data column value.
Once the flow is created, it can be edited from the Microsoft Flow portal. You can modify days in advance, or add additional actions. Read more about this feature in the SharePoint documentation.
Fixes and improvements
Note
No specific fixes or improvements have been publicly disclosed as a part of this released version