Walkthrough: Build and debug C++ with WSL 2 and Visual Studio 2022
Visual Studio 2022 introduces a native C++ toolset for Windows Subsystem for Linux version 2 (WSL 2) development. This toolset is available now in Visual Studio 2022 version 17.0 or higher.
WSL 2 is the new, recommended version of the Windows Subsystem for Linux (WSL). It provides better Linux file system performance, GUI support, and full system call compatibility. Visual Studio's WSL 2 toolset allows you to use Visual Studio to build and debug C++ code on WSL 2 distros without adding an SSH connection. You can already build and debug C++ code on WSL 1 distros using the native WSL 1 toolset introduced in Visual Studio 2019 version 16.1.
Visual Studio's WSL 2 toolset supports both CMake and MSBuild-based Linux projects. CMake is our recommendation for all C++ cross-platform development with Visual Studio. We recommend CMake because it build and debug the same project on Windows, WSL, and remote systems.
For a video presentation of the information in this topic, see Video: Debug C++ with WSL 2 Distributions and Visual Studio 2022.
WSL 2 toolset background
C++ cross-platform support in Visual Studio assumes all source files originate in the Windows file system. When targeting a WSL 2 distro, Visual Studio executes a local rsync command to copy files from the Windows file system to the WSL file system. The local rsync copy doesn't require any user intervention. It occurs automatically when Visual Studio detects you're using a WSL 2 distro. To learn more about the differences between WSL 1 and WSL 2, see Comparing WSL 1 and WSL 2.
CMake Presets integration in Visual Studio supports the WSL 2 toolset. To learn more, see CMake Presets integration in Visual Studio and Visual Studio Code and Configure and build with CMake Presets in Visual Studio. There's also more advanced information in this article under Advanced WSL 2 and CMake projects considerations.
Install the build tools
Install the tools necessary to build and debug on WSL 2. You'll install a recent version of CMake using Visual Studio's CMake binary deployment in a later step.
Install WSL and a WSL 2 distro by following the instructions at Install WSL.
Assuming your distro uses
apt(this walkthrough uses Ubuntu), use the following commands to install the required build tools on your WSL 2 distro:sudo apt update sudo apt install g++ gdb make ninja-build rsync zipThe
aptcommands above install:- A C++ compiler
gdbCMakersynczip- An underlying build system generator
Cross-platform CMake development with a WSL 2 distro
This walkthrough uses GCC and Ninja on Ubuntu. And Visual Studio 2022 version 17.0 Preview 2 or later.
Visual Studio defines a CMake project as a folder with a CMakeLists.txt file at the project root. In this walkthrough, you create a new CMake project by using the Visual Studio CMake Project template:
From the Visual Studio Get started screen, select Create a new project.
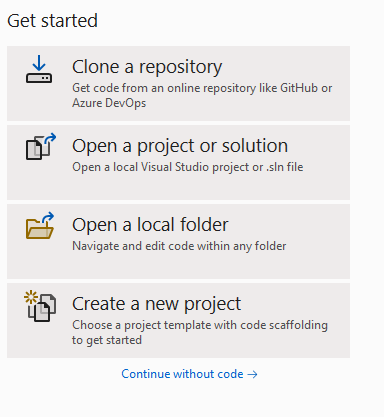 The available options are: Clone a repository, Open a project or solution, Open a local folder, Create a new project, or Continue without code.":::
In the Search for templates textbox, type "cmake". Choose the CMake Project type and select Next. Give the project a name and location, and then select Create.
Enable Visual Studio's CMake Presets integration. Select Tools > Options > CMake > General. Select Prefer using CMake Presets for configure, build, and test, then select OK. Instead, you could have added a
CMakePresets.jsonfile to the root of the project. For more information, see Enable CMake Presets integration.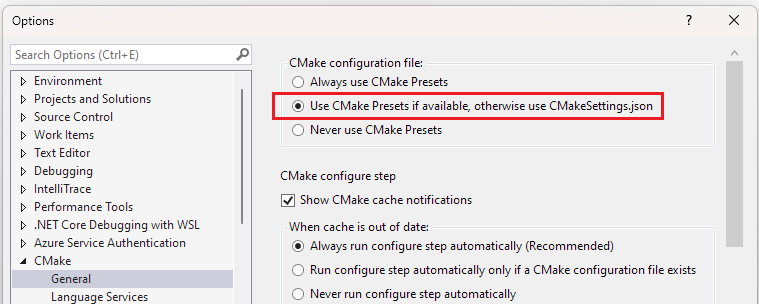
In the CMake configuration file group, 'Use CMake Presets if available, otherwise use CMakeSettings.json' is called out and is selected.
To activate the integration: from the main menu, select File > Close Folder. The Get started page appears. Under Open recent, select the folder you just closed to reopen the folder.
There are three dropdowns across the Visual Studio main menu bar. Use the dropdown on the left to select your active target system. This is the system where CMake is invoked to configure and build the project. Visual Studio queries for WSL installations with
wsl -l -v. In the following image, WSL2: Ubuntu-20.04 is shown selected as the Target System.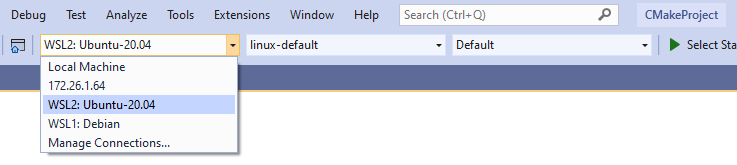
Note
If Visual Studio starts to configure your project automatically, read step 11 to manage CMake binary deployment, and then continue to the step below. To customize this behavior, see Modify automatic configuration and cache notifications.
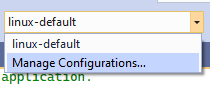
Use the dropdown in the middle to select your active Configure Preset. Configure Presets tell Visual Studio how to invoke CMake and generate the underlying build system. In step 7, the active Configure Preset is the linux-default Preset created by Visual Studio. To create a custom Configure Preset, select Manage Configurations… For more information about Configure Presets, see Select a Configure Preset and Edit Presets.
Use the dropdown on the right to select your active Build Preset. Build Presets tell Visual Studio how to invoke build. In the illustration for step 7, the active Build Preset is the Default Build Preset created by Visual Studio. For more information about Build Presets, see Select a Build Preset.
Configure the project on WSL 2. If project generation doesn't start automatically, then manually invoke configure with Project > Configure project-name

If you don't have a supported version of CMake installed on your WSL 2 distro, then Visual Studio prompts you beneath the main menu ribbon to deploy a recent version of CMake. Select Yes to deploy CMake binaries to your WSL 2 distro.

The user is prompted whether to install the latest C Make binaries from C make . org because the supported C Make version isn't installed."
Confirm that the configure step completed and that you can see the CMake generation finished message in the Output window under the CMake pane. Build files are written to a directory in the WSL 2 distro's file system.

Select the active debug target. The debug dropdown menu lists all the CMake targets available to the project.
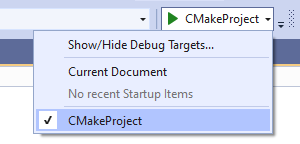
Expand the project subfolder in the Solution Explorer. In the
CMakeProject.cppfile, set a breakpoint inmain(). You can also navigate to CMake targets view by selecting the View Picker button in the Solution Explorer, highlighted in following screenshot:
Select Debug > Start, or press F5. Your project builds, the executable launches on your WSL 2 distro, and Visual Studio halts execution at the breakpoint. The output of your program (in this case,
"Hello CMake.") is visible in the Linux Console Window: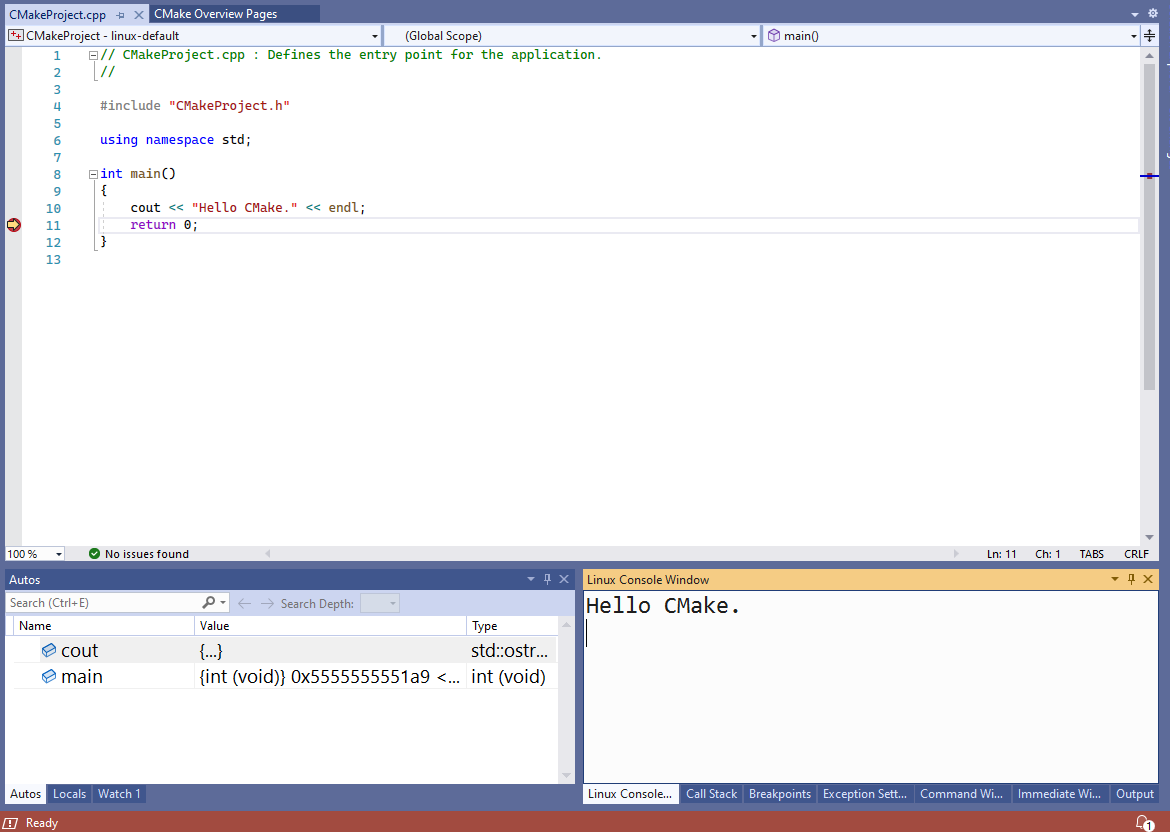
The Visual Studio Linux console window displays the output of the program: 'Hello C Make.' The editor window shows the hello world program. Execution stopped at a breakpoint on the line that says return 0;."
You've now built and debugged a C++ app with WSL 2 and Visual Studio 2022.
Advanced WSL 2 and CMake projects considerations
Visual Studio only provides native support for WSL 2 for CMake projects that use CMakePresets.json as the active configuration file. To migrate from CMakeSettings.json to CMakePresets.json, see Enable CMake Presets integration in Visual Studio.
If you're targeting a WSL 2 distribution and you don't want to use the WSL 2 toolset, then in the Visual Studio Remote Settings vendor map in CMakePresets.json, set forceWSL1Toolset to true . For more information, see Visual Studio Remote Settings vendor map.
If forceWSL1Tooslet is set to true, then Visual Studio doesn't maintain a copy of your source files in the WSL file system. Instead, it accesses source files in the mounted Windows drive (/mnt/…).
In most cases, it's best to use the WSL 2 toolset with WSL 2 distributions because WSL 2 is slower when project files are instead stored in the Windows file system. To learn more about file system performance in WSL 2, see Comparing WSL 1 and WSL 2.
Specify advanced settings such as the path to the directory on WSL 2 where the project is copied, copy source options, and rsync command arguments, in the Visual Studio Remote Settings vendor map in CMakePresets.json. For more information, see Visual Studio Remote Settings vendor map.
System headers are still automatically copied to the Windows file system to supply the native IntelliSense experience. You can customize the headers that are included or excluded from this copy in the Visual Studio Remote Settings vendor map in CMakePresets.json.
You can change the IntelliSense mode, or specify other IntelliSense options, in the Visual Studio Settings vendor map in CMakePresets.json. For details about the vendor map, see Visual Studio Remote Settings vendor map.
WSL 2 and MSBuild-based Linux projects
CMake is recommended for all C++ cross-platform development with Visual Studio because it allows you to build and debug the same project on Windows, WSL, and remote systems.
But you may have a MSBuild-based Linux project.
If you have a MSBuild-based Linux project, then you can upgrade to the WSL 2 toolset in Visual Studio. Right-click the project in the solution explorer, then choose Properties > General > Platform Toolset:
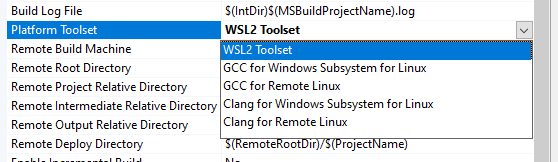
If you're targeting a WSL 2 distribution and you don't want to use the WSL 2 toolset, then in the Platform Toolset dropdown, select the GCC for Windows Subsystem for Linux or Clang for Windows Subsystem for Linux toolset. If either of these toolsets are selected, Visual Studio doesn't maintain a copy of your source files in the WSL file system and instead accesses source files over the mounted Windows drive (/mnt/…). System headers are still automatically copied to the Windows file system to provide a native IntelliSense experience. Customize the headers that are included or excluded from this copy in Property Pages > General.
In most cases, it's best to use the WSL 2 toolset with WSL 2 distributions because WSL 2 is slower when project files are stored in the Windows file system. To learn more, see Comparing WSL 1 and WSL 2.
See also
Video: Debug C++ with WSL 2 Distributions and Visual Studio 2022
Download Visual Studio 2022
Create a CMake Linux project in Visual Studio
Tutorial: Debug a CMake project on a remote Windows machine
Feedback
Coming soon: Throughout 2024 we will be phasing out GitHub Issues as the feedback mechanism for content and replacing it with a new feedback system. For more information see: https://aka.ms/ContentUserFeedback.
Submit and view feedback for