Self-host Microsoft Edge extensions
This article provides basic guidance for packaging an extension to host on your own webstore. It also includes instructions on how to deploy extensions to devices and users in your organization.
Note
The Microsoft Edge management service, a dedicated and simplified management tool in the Microsoft 365 admin center, is rolling out now. Learn more.
Prerequisites
To self-host your own extensions, you need to provide your own web hosting services for the extensions and their manifest files.
To install a self-hosted extension that's not listed in the Microsoft Edge Add-ons website, Windows instances must be joined to a Microsoft Active Directory domain. Self-hosted extensions won't work for Microsoft Entra joined devices unless they're Microsoft Entra hybrid joined.
The following steps assume that you've already created your extension, have some experience with XML files, have a working knowledge of configuring group policy, and know how to use the Windows registry.
Publish an extension
Before you publish an extension, it needs to be packed into a CRX (Chrome extension) file. Use the following steps as a guide to packing an extension as a CRX file.
In the Microsoft Edge address bar, go to
edge://extensionsand turn on Developer mode if it's not already enabled.Under Installed extensions, click Pack Extension to create the CRX file.
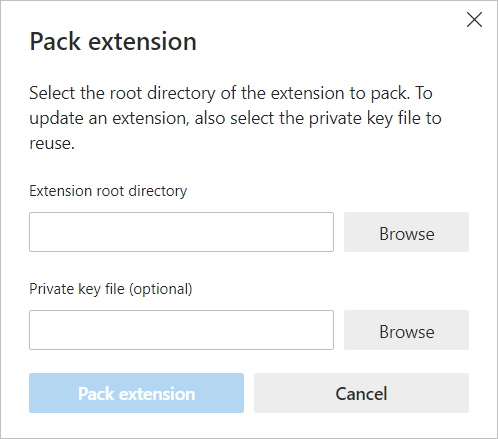
Use the Pack extension dialog to find the directory that has the source for the extension. Select the directory and then click Pack extension. This creates your CRX file, along with a PEM file. Save the PEM file because it's needed for making version updates to the extension. The next screenshot shows the Pack extension dialog for locating the root directory of the extension.
Important
Store the PEM file in a safe location because it's the key for the extension and it's needed for future updates.
Drag the CRX file into your extensions window and make sure that it loads.
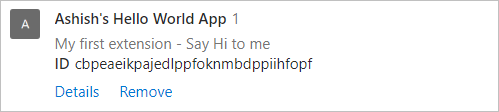
Test the extension and take note of the ID field (this is the CRX ID) and version number. You'll need this information later. The next screenshot shows a test extension with its CRX ID.
Upload the the CRX file to the host and note the URL of the location it will be downloaded from. This information is needed for the XML manifest file.
To create a manifest XML file with the app/extension ID, download URL, and version, define the following fields:
- appid - The extension ID from step 5
- codebase - The download location for the CRX file from step 6
- version - The version of the app/extension, which should match the version specified in the manifest of the extension.
The next code snippet shows an example of an XML manifest file.
<?xml version='1.0' encoding='UTF-8'?>
<gupdate xmlns='http://www.google.com/update2/response' protocol='2.0'>
  <app appid='ekilpdeokbpjmminmhfcgkncmmohmfeb'>
  <updatecheck codebase='https://app.somecompany.com/extensionfolder/helloworld.crx' version='1.0' />
  </app>
</gupdate>
For more information, see Auto-update extensions in Microsoft Edge - Microsoft Edge Development.
Upload the completed XML file to a location where it can be downloaded from, noting the URL. This URL is needed when you install the extension using a group policy. See Distribute a privately hosted extension.
Important
The hosting location for the extension doesn't need authentication. It needs to be accessible by user devices wherever they might be used.
Publish updates to an extension
After you change and test the updated extension you can publish it. Use the following steps as a guide for publishing an update.
Change the version number in your extension's manifest.JSON file to a higher number using the following syntax:
"version":"versionString". If the "version":"1.0", then you can update to "version":"1.1" or any number higher than "1.0".Update the "version" of
<updatecheck>in the XML file to match the number that you put in the manifest file in the previous step. For example:<updatecheck codebase='https://app.somecompany.com/extensionfolder/helloworld.crx' version='1.1' />Create a CRX file that includes the new changes. Go to
edge://extensionsand enable Developer mode.Click Pack extension and go to the directory for the extension source.
Important
Use the same PEM file that was generated and saved the first time the CRX file was created. If you don't use the same PEM file, the app ID of the extension changes and the update will be treated as a new extension.
Drag and drop the CRX file into the extensions window and verify that it loads. The extension is disabled after this operation. To enable it add the CRX ID of the extension to the ExtensionInstallAllowList policy.
Test the updated extension.
Replace the old CRX file and XML file with the new files for the updated extension.
The extension's changes will be picked up during the next policy sync cycle. For more information about updating extensions, see: Update URL and Update manifest.
Distribute a privately hosted extension
You can share the link of the location where the CRX file is hosted, and as soon as users enter the URL in their browser the extension will be downloaded and installed. Users can enable the extension from the edge://extensions page. To allow users to install self-hosted extensions, you need to add the extension CRX IDs to the ExtensionInstallAllowList policy and add the URL of the location where the CRX file is hosted to the ExtensionInstallSources policy.
Alternatively, you can use group policy ExtensionInstallForceList to Force-install an extension on your users' devices.
You can apply these policies to your selected users, devices, or both. Remember though, that policy updates aren't instantaneous, and it takes time for the policy settings to take effect.
See also
Feedback
Coming soon: Throughout 2024 we will be phasing out GitHub Issues as the feedback mechanism for content and replacing it with a new feedback system. For more information see: https://aka.ms/ContentUserFeedback.
Submit and view feedback for