Work with data
Tip
This content is an excerpt from the eBook, Blazor for ASP NET Web Forms Developers for Azure, available on .NET Docs or as a free downloadable PDF that can be read offline.
Data access is the backbone of an ASP.NET Web Forms app. If you're building forms for the web, what happens to that data? With Web Forms, there were multiple data access techniques you could use to interact with a database:
- Data Sources
- ADO.NET
- Entity Framework
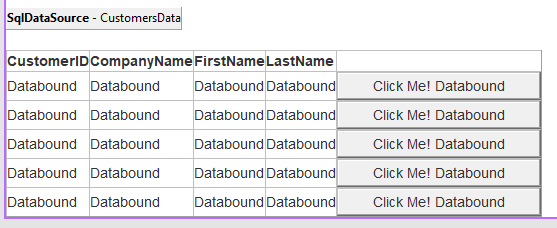
Data Sources were controls that you could place on a Web Forms page and configure like other controls. Visual Studio provided a friendly set of dialogs to configure and bind the controls to your Web Forms pages. Developers who enjoy a "low code" or "no code" approach preferred this technique when Web Forms was first released.
ADO.NET is the low-level approach to interacting with a database. Your apps could create a connection to the database with Commands, Datatables, and Datasets for interacting. The results could then be bound to fields on screen without much code. The drawback of this approach was that each set of ADO.NET objects (Connection, Command, and DataTable) was bound to libraries provided by a database vendor. Use of these components made the code rigid and difficult to migrate to a different database.
Entity Framework
Entity Framework (EF) is the open source object-relational mapping framework maintained by the .NET Foundation. Initially released with .NET Framework, EF allows for generating code for the database connections, storage schemas, and interactions. With this abstraction, you can focus on your app's business rules and allow the database to be managed by a trusted database administrator. In .NET, you can use an updated version of EF called EF Core. EF Core helps generate and maintain the interactions between your code and the database with a series of commands that are available for you using the dotnet ef command-line tool. Let's take a look at a few samples to get you working with a database.
EF Code First
A quick way to get started building your database interactions is to start with the class objects you want to work with. EF provides a tool to help generate the appropriate database code for your classes. This approach is called "Code First" development. Consider the following Product class for a sample storefront app that we want to store in a relational database like Microsoft SQL Server.
public class Product
{
    public int Id { get; set; }

    [Required]
    public string Name { get; set; }

    [MaxLength(4000)]
    public string Description { get; set; }

    [Range(0, 99999,99)]
    [DataType(DataType.Currency)]
    public decimal Price { get; set; }
}
Product has a primary key and three additional fields that would be created in our database:
- EF will identify the
Idproperty as a primary key by convention. Namewill be stored in a column configured for text storage. The[Required]attribute decorating this property will add anot nullconstraint to help enforce this declared behavior of the property.Descriptionwill be stored in a column configured for text storage, and have a maximum length configured of 4000 characters as dictated by the[MaxLength]attribute. The database schema will be configured with a column namedMaxLengthusing data typevarchar(4000).- The
Priceproperty will be stored as currency. The[Range]attribute will generate appropriate constraints to prevent data storage outside of the minimum and maximum values declared.
We need to add this Product class to a database context class that defines the connection and translation operations with our database.
public class MyDbContext : DbContext
{
    public DbSet<Product> Products { get; set; }
}
The MyDbContext class provides the one property that defines the access and translation for the Product class. Your application configures this class for interaction with the database using the following entries in the Startup class's ConfigureServices method (or appropriate location in Program.cs using the builder.Services property instead of services):
services.AddDbContext<MyDbContext>(options =>
    options.UseSqlServer("MY DATABASE CONNECTION STRING"));
The preceding code will connect to a SQL Server database with the specified connection string. You can place the connection string in your appsettings.json file, environment variables, or other configuration storage locations and replace this embedded string appropriately.
You can then generate the database table appropriate for this class using the following commands:
dotnet ef migrations add 'Create Product table'
dotnet ef database update
The first command defines the changes you're making to the database schema as a new EF Migration called Create Product table. A Migration defines how to apply and remove your new database changes.
Once applied, you have a simple Product table in your database and some new classes added to the project that help manage the database schema. You can find these generated classes, by default, in a new folder called Migrations. When you make changes to the Product class or add more related classes you would like interacting with your database, you need to run the command-line commands again with a new name of the migration. This command will generate another set of migration classes to update your database schema.
EF Database First
For existing databases, you can generate the classes for EF Core by using the .NET command-line tools. To scaffold the classes, use a variation of the following command:
dotnet ef dbcontext scaffold "CONNECTION STRING" Microsoft.EntityFrameworkCore.SqlServer -c MyDbContext -t Product -t Customer
The preceding command connects to the database using the specified connection string and the Microsoft.EntityFrameworkCore.SqlServer provider. Once connected, a database context class named MyDbContext is created. Additionally, supporting classes are created for the Product and Customer tables that were specified with the -t options. There are many configuration options for this command to generate the class hierarchy appropriate for your database. For a complete reference, see the command's documentation.
More information about EF Core can be found on the Microsoft Docs site.
Interact with web services
When ASP.NET was first released, SOAP services were the preferred way for web servers and clients to exchange data. Much has changed since that time, and the preferred interactions with services have shifted to direct HTTP client interactions. With ASP.NET Core and Blazor, you can register the configuration of your HttpClient in Program.cs or in the Startup class's ConfigureServices method. Use that configuration when you need to interact with the HTTP endpoint. Consider the following configuration code:
// in Program.cs
builder.Services.AddHttpClient("github", client =>
{
    client.BaseAddress = new Uri("http://api.github.com/");
    // Github API versioning
    client.DefaultRequestHeaders.Add("Accept", "application/vnd.github.v3+json");
    // Github requires a user-agent
    client.DefaultRequestHeaders.Add("User-Agent", "BlazorWebForms-Sample");
});
Whenever you need to access data from GitHub, create a client with a name of github. The client is configured with the base address, and the request headers are set appropriately. Inject the IHttpClientFactory into your Blazor components with the @inject directive or an [Inject] attribute on a property. Create your named client and interact with services using the following syntax:
@inject IHttpClientFactory factory

...

@code {
    protected override async Task OnInitializedAsync()
    {
        var client = factory.CreateClient("github");
        var response = await client.GetAsync("repos/dotnet/docs/issues");
        response.EnsureStatusCode();
        var content = await response.Content.ReadAsStringAsync();
    }
}
This method returns the string describing the collection of issues in the dotnet/docs GitHub repository. It returns content in JSON format and is deserialized into appropriate GitHub issue objects. There are many ways that you can configure the HttpClientFactory to deliver preconfigured HttpClient objects. Try configuring multiple HttpClient instances with different names and endpoints for the various web services you work with. This approach will make your interactions with those services easier to work with on each page. For more information, see Make HTTP requests using IHttpClientFactory.
Feedback
Coming soon: Throughout 2024 we will be phasing out GitHub Issues as the feedback mechanism for content and replacing it with a new feedback system. For more information see: https://aka.ms/ContentUserFeedback.
Submit and view feedback for