Virtual entity walkthrough using the OData v4 Data Provider
Imagine that you want to access, create, update, and delete some personal information about a contact from an external data source within your custom business app. Because the data source used for this walkthrough has an OData v4 web service, you can use the OData v4 Data Provider included with your version of Dynamics 365 Customer Engagement. More information: Virtual table walkthrough using the OData v4 Data Provider
This topic applies to Dynamics 365 Customer Engagement (on-premises). For the Power Apps version of this topic, see: Virtual table walkthrough
About this virtual entity walkthrough
Imagine that you want to access ticket information from an external data source within your custom business app or the Service area of Customer Engagement. In this simple walkthrough, you'll model a virtual entity with fields mapped to the external schema that retrieves ticket data at runtime from an OData web service.
Data source details
Because the data source used for this walkthrough has an OData v4 web service, we can use the OData v4 Data Provider included with your environment.
Web service url: https://contosowebservice.azurewebsites.net/odata/
Important
The web service url used for this walkthrough isn't a functioning web service.
For this walkthrough, a single virtual entity that contains the following three fields is needed.
| External field name | External data type | Virtual entity data type | Purpose |
|---|---|---|---|
| TicketID | Edm.Guid | Primary key | Primary key for the entity |
| Title | Edm.String | Single Line of Text | Title of the ticket |
| Severity | Edm.Int32 | Whole Number | Number value of 0-4 indicating the severity of the ticket |
The OData metadata of the external data source Ticket entity as viewed from a web browser.

Create the Data Source
Create the data source for the OData v4 data provider that uses the OASIS Open Data Protocol (OData) sample web service.
Go to Settings > Administration > Virtual Entity Data Sources.
Select NEW, select OData v4 Data Provider, and then select OK.
Enter or select the following information.
- Name: Contoso Sample Data Source
- URL:
https://contosowebservice.azurewebsites.net/odata - Timeout: 30
- Return Inline Count: True
Leave the other fields as-is, and select SAVE & CLOSE.
Tip
When using your own web service, verify that the URL is valid by pasting it in to your web browser.
Create the virtual entity
Go to Settings > Customizations > Customize the System.
In the left navigation pane, select Entities, and then select New from the main pane.
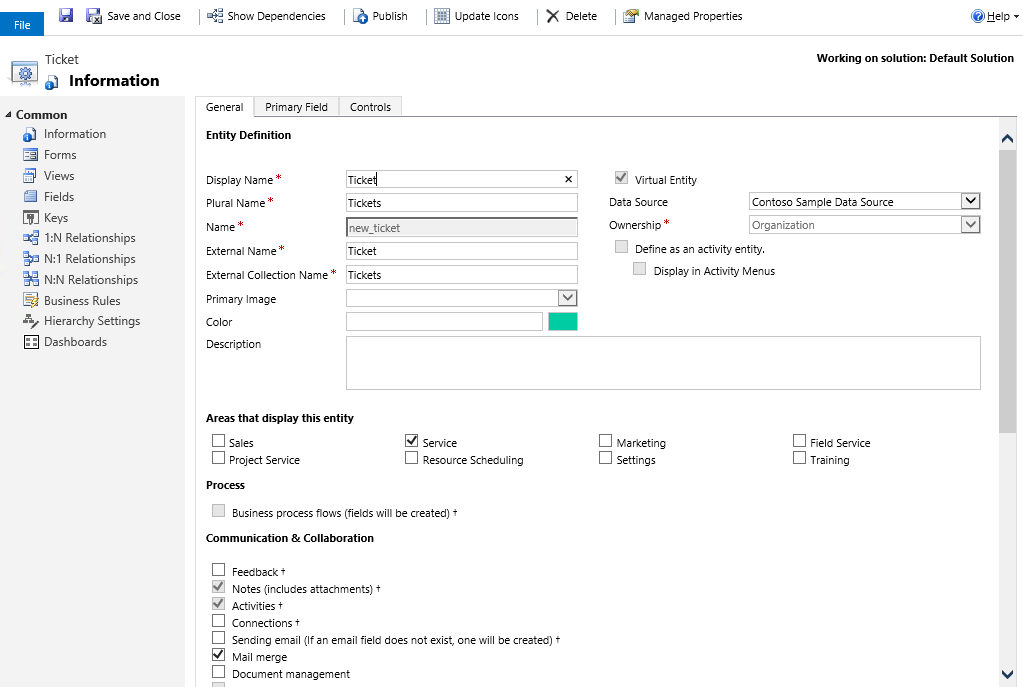
On the Entity: New form, select the Virtual Entity option, and then enter the following information:
- Data Source: Contoso Sample Data Source
- Display Name: Ticket
- Plural Name: Tickets
- Name: new_ticket
- External Name: Ticket
- External Collection Name: Tickets
- Select to enable the following Communication & Collaboration options:
- Notes (includes attachments)
- Activities
Next to Areas that display this entity, select Service, and then select Save (but don’t close the entity form).
Create the fields for the virtual entity
On the left navigation pane of the Entity: Ticket page, select Fields. As part of this walkthrough you will edit two existing fields and add a third field.
Important
External names are case sensitive. Refer to your web service metadata to make sure you use the correct name.
A Nullable value of false indicates that the attribute is required. Notice that primary key fields are always system required.
Open the new_ticketid field, and change the following attribute with the value indicated here:
External Name: TicketID

Select Save and Close.
Open the new_name field, and change the following attributes to have the values indicated here:
- Display Name: Title
- External Name: Title
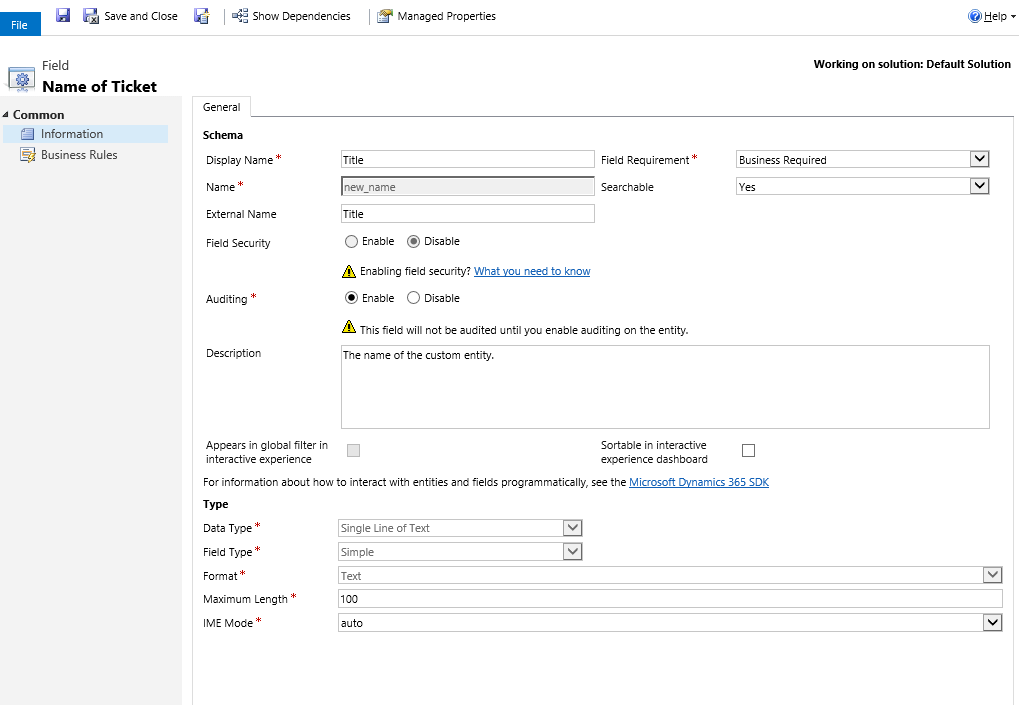
Select Save and Close.
Select New, and on the Field: New for Ticket page enter the following information:
- Display Name: Severity
- Name: new_severity
- External Name: Severity
- Field Requirement: Business Required
- Data Type: Whole Number
- Minimum Value: 0
- Maximum Value: 4
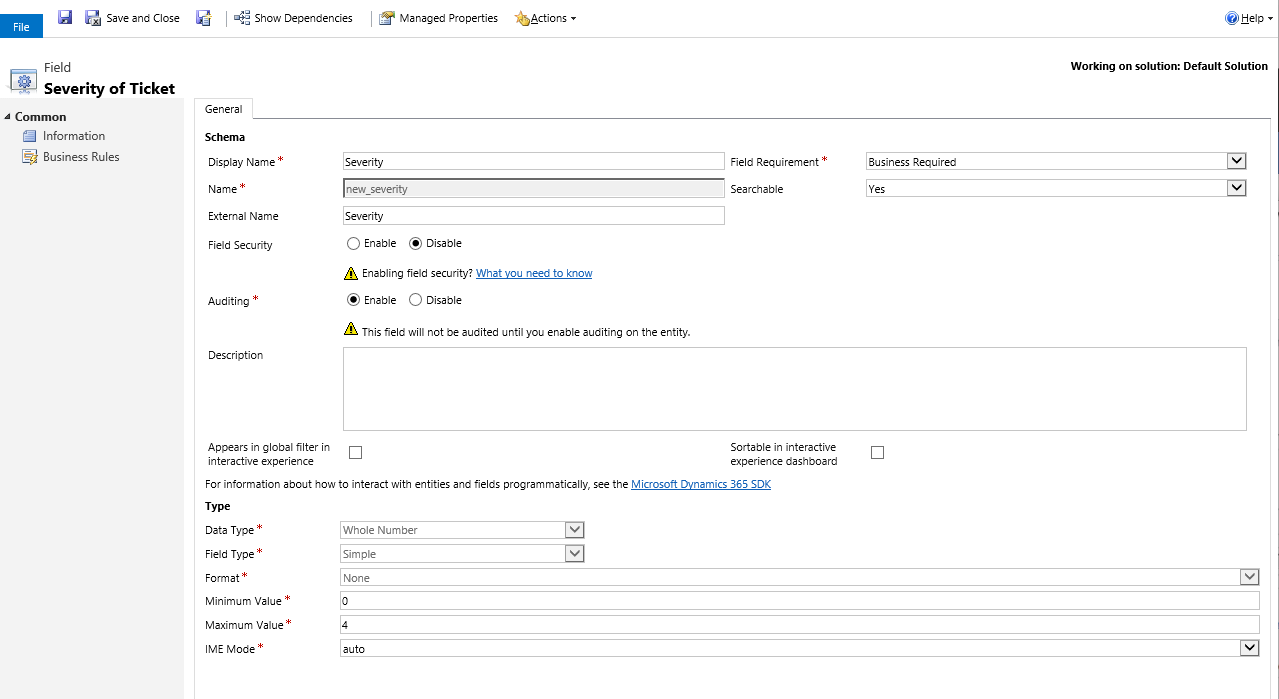
Select Save and Close.
Add the fields to the Main form
On the Ticket entity window, select Forms.
Open the main form, drag and drop the Severity field from the right pane onto the form in the General section under the Title field.

On the Ticket entity window select Save and Close.
Configure the default view
On the left pane of the Solution Explorer, under the Ticket entity, select Views.
Open the All Tickets view.
In the Common Tasks pane select Add Columns.
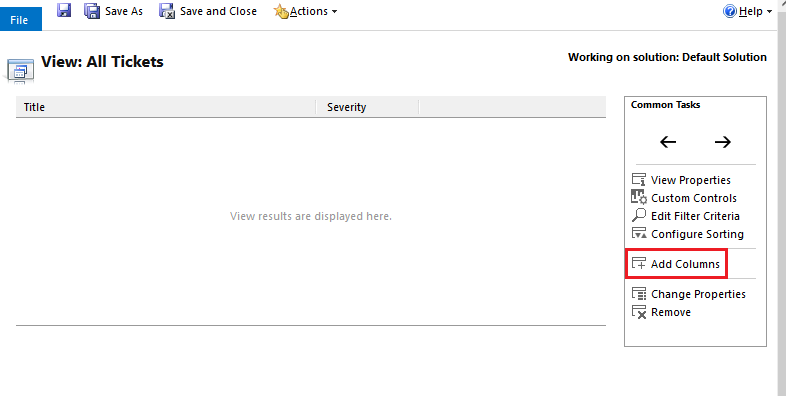
Select Severity, and then select OK.
On the View: All Tickets window select Save and Close.
On the Solution Explorer window select Publish All Customizations.
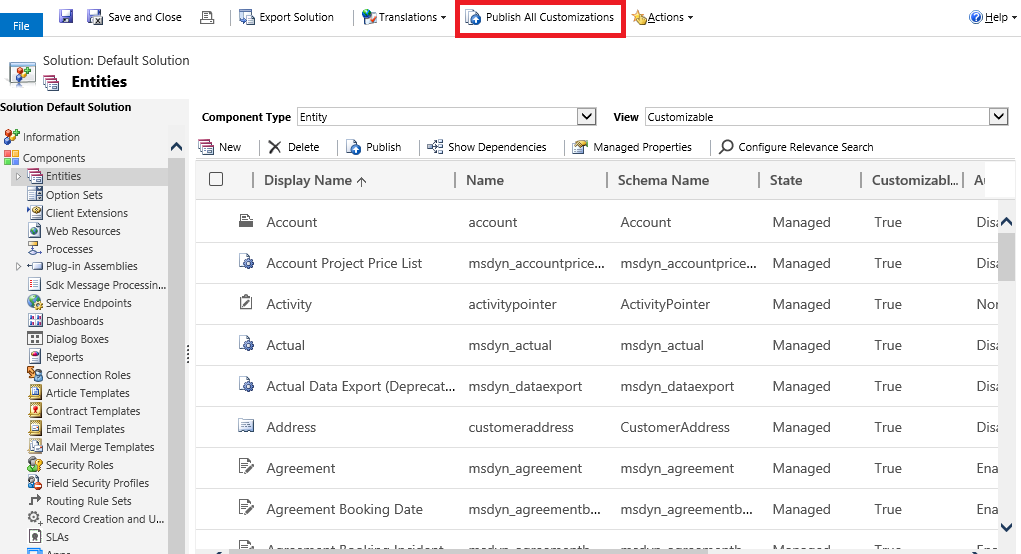
After all customizations are published, close the Solution Explorer window.
View the virtual entity in action with Dynamics 365 Customer Engagement (on-premises)
Go to Service > Extensions > Tickets.
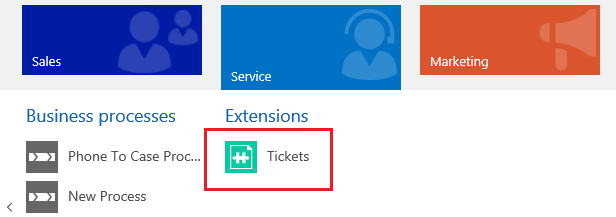
The All Tickets view displays. Notice that you may need to refresh your browser to view the entity from the Service area.
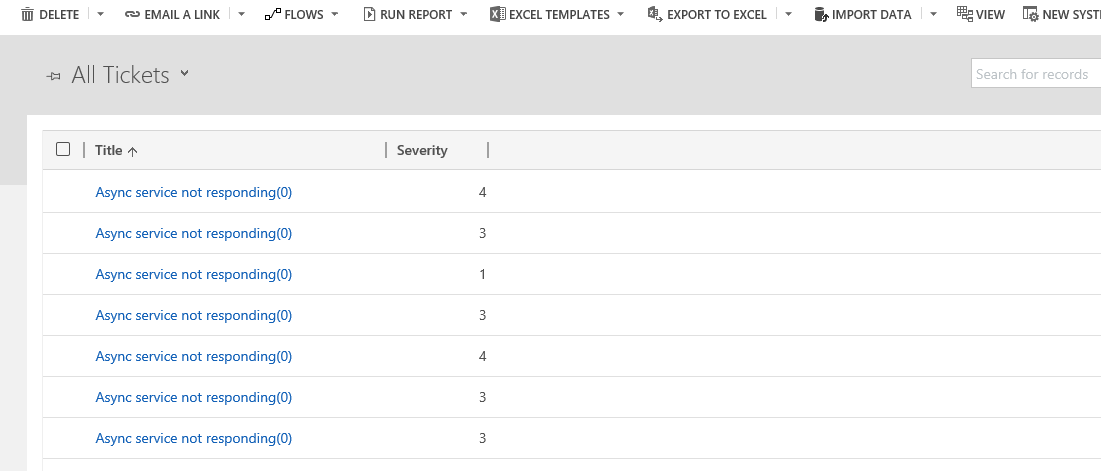
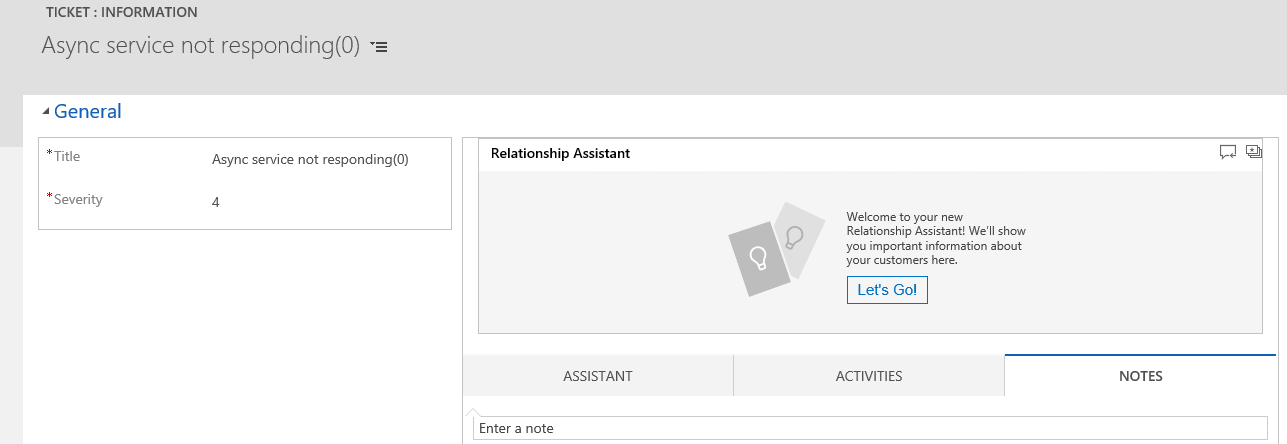
Open a Ticket record to view the form that includes the Title and Severity fields for the given record.
See also
OData v4 Data Provider configuration, requirements, and best practices
Create and edit virtual entities that contain data from an external data source
Feedback
Coming soon: Throughout 2024 we will be phasing out GitHub Issues as the feedback mechanism for content and replacing it with a new feedback system. For more information see: https://aka.ms/ContentUserFeedback.
Submit and view feedback for