Create measures with measure builder
Measure builder lets you define calculations using math operators, aggregation functions, and filters. Define measures using attributes from tables that are related to the unified Customer table.
Customer attribute: Generates output as a new attribute, which gets saved as a new column in the system-generated table named Customer_Measure. When refreshing a customer attribute, all the other customer attributes in the Customer_Measure table refresh simultaneously. In addition, customer attributes are shown in the customer profile card. Once run or saved, you can't change a customer attribute to a customer measure. Customer attribute measures have a direct relationship to the unified customer profile.
Customer measure: Generates output as its own table named after the name of the measure you define. You can't change it to a customer attribute once run or saved. Customer measures don't show in the customer profile card. Customer measures have a direct relationship to the unified customer profile.
Business measure: Generates output as its own table and shows on the home page of your Dynamics 365 Customer Insights - Data environment. Business measures don't have a direct relationship to individual customer profiles. Business measures look across all customer profiles or are grouped by another attribute. For example, a calculation for all customers in a specific state.
Go to Insights > Measures.
Select New > Build your own.

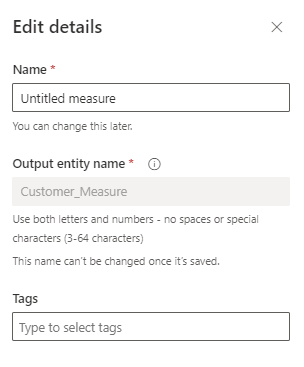
Select Edit details next to Untitled measure. Provide a name for the measure. Optionally, add tags to the measure.
Select Done.
To track business-level performance, toggle Measure type to Business level. Customer level is selected by default. Customer level automatically adds the CustomerId attribute to Dimensions while Business level automatically removes it.
In the configuration area, choose the aggregation function from the Select function dropdown menu. Aggregation functions include:
- Sum
- Average
- Count
- Count Unique
- Max
- Min
- First: takes the first value of the data record
- Last: takes the last value that was added to the data record
- ArgMax: finds the data record giving the maximum value from a target function
- ArgMin: finds the data record giving the minimum value from a target function
Select Add attribute to select the data to create this measure.
- Select the Attributes tab.
- Data table: Choose the table that includes the attribute you want to measure.
- Data attribute: Choose the attribute you want to use in the aggregation function to calculate the measure. You can only select one attribute at a time.
- Optionally, choose a data attribute from an existing measure by selecting the Measures tab, or search for a table or measure name.
- Select Add.
To build more complex measures, add more attributes or use math operators on your measure function.
To add filters, select the Filter in the configuration area. Applying filters will only use the records that match the filters to calculate the measure.
- In the Add attribute section of the Filters pane, select the attribute you want to use to create filters.
- Set the filter operators to define the filter for every selected attribute.
- Select Apply.
Select Dimension to choose more fields to add as columns to the measure output table.
- Select Edit dimensions to add data attributes you want to group the measure values by. For example, city or gender.
Tip
If you selected Customer level as the Measure type the CustomerId attribute is already added. If you remove the attribute, Measure type toggles to Business level.
- Select Done.
- Select Edit dimensions to add data attributes you want to group the measure values by. For example, city or gender.
If there are values in your data that must be replaced with an integer, select Rules. Configure the rule and make sure that you choose only whole numbers as replacements. For example, replace null with 0.
If there are multiple paths between the data table you mapped and the Customer table, choose one of the identified table relationship paths. Measure results can vary depending on the selected path.
- Select Relationship path and choose the table path that should be used to identify your measure. If there's only a single path to the Customer table, this control won't show.
- Select Done.
To add more calculations for the measure, select New calculation. Only use tables on the same path for new calculations. More calculations will show as new columns in the measure output table. Optionally, select Edit name to create a name for the calculation.
Select the vertical ellipsis (⋮) on the calculation to Duplicate or Remove a calculation from a measure.
In the Preview area, you'll see the data schema of the measure output table, including filters and dimensions. The preview reacts dynamically to changes in the configuration.
Select Run to calculate results for the configured measure. Select Save and close if you want to keep the current configuration and run the measure later. The Measures page displays.

Next steps
- Schedule a measure.
- Use existing measures to create a customer segment.