Create deployable packages of models
An AOT package is a deployment and compilation unit of one or more models that can be applied to an environment. It includes model metadata, binaries, reports and other associated resources. One or more AOT packages can be packaged into a deployable package, which is the vehicle used for deployment of code (and customizations) on demo, sandbox, and production environments. This article guides you through the process of creating and applying a deployable package.
Overview of the process
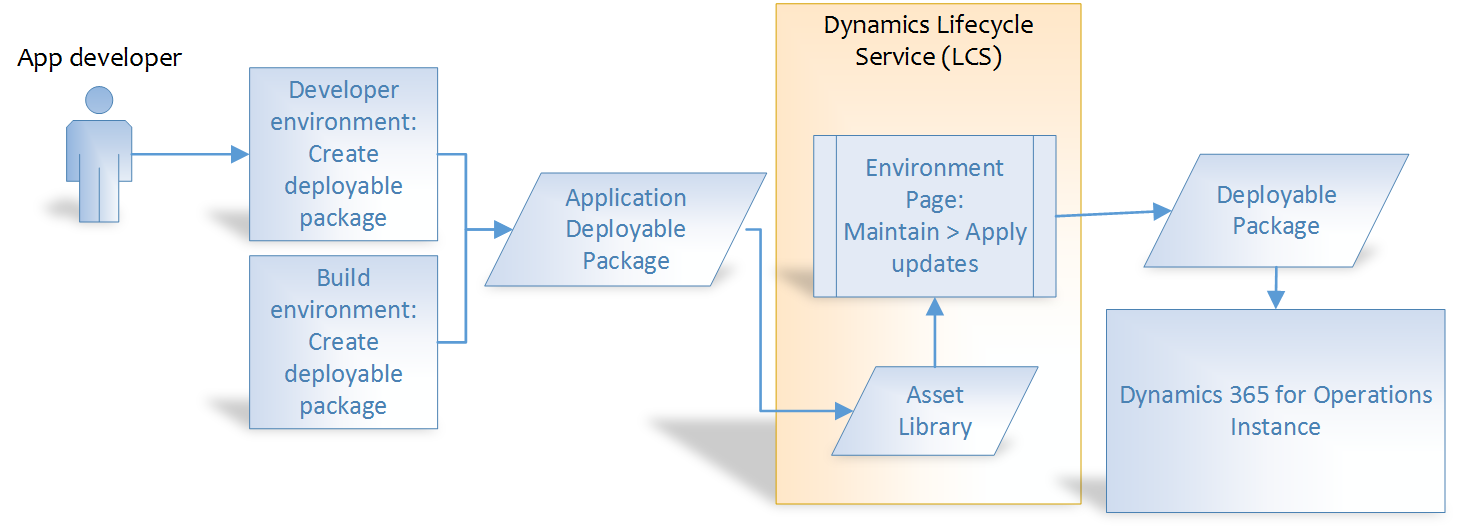
In order to deploy your code and customizations to a runtime environment (demo, sandbox, or production), you must create deployable packages of your solution or implementation. Deployable packages can be created by using Visual Studio dev tools or by using the build automation process that is available on build environments. These deployable packages are referred to as Application Deployable Packages or AOT Deployable Packages. The following image shows an overview of the process. After a deployable package is created, it must be uploaded to the Lifecycle Services (LCS) project's asset library. An administrator can then go to the LCS environment page and apply the package to a runtime environment using the Maintain > Apply updates tool.
Note
Custom payment connector for Commerce needs to be packaged using a combined AOT deployable package. For more information, see Create payment packaging for Application Explorer in Service Fabric deployments.
Note
Application Deployable Packages do not contain source code.
It is always recommended to use a build environment to create deployable packages that are intended to go to production.
Create a deployable package
We recommend using a build environment to create deployable packages. You can also create a deployable package on a development environment.
On a development environment, after you have completed development and testing, follow these steps to create a deployable package in Visual Studio.
In Microsoft Visual Studio, select Dynamics 365 > Deploy > Create Deployment Package.
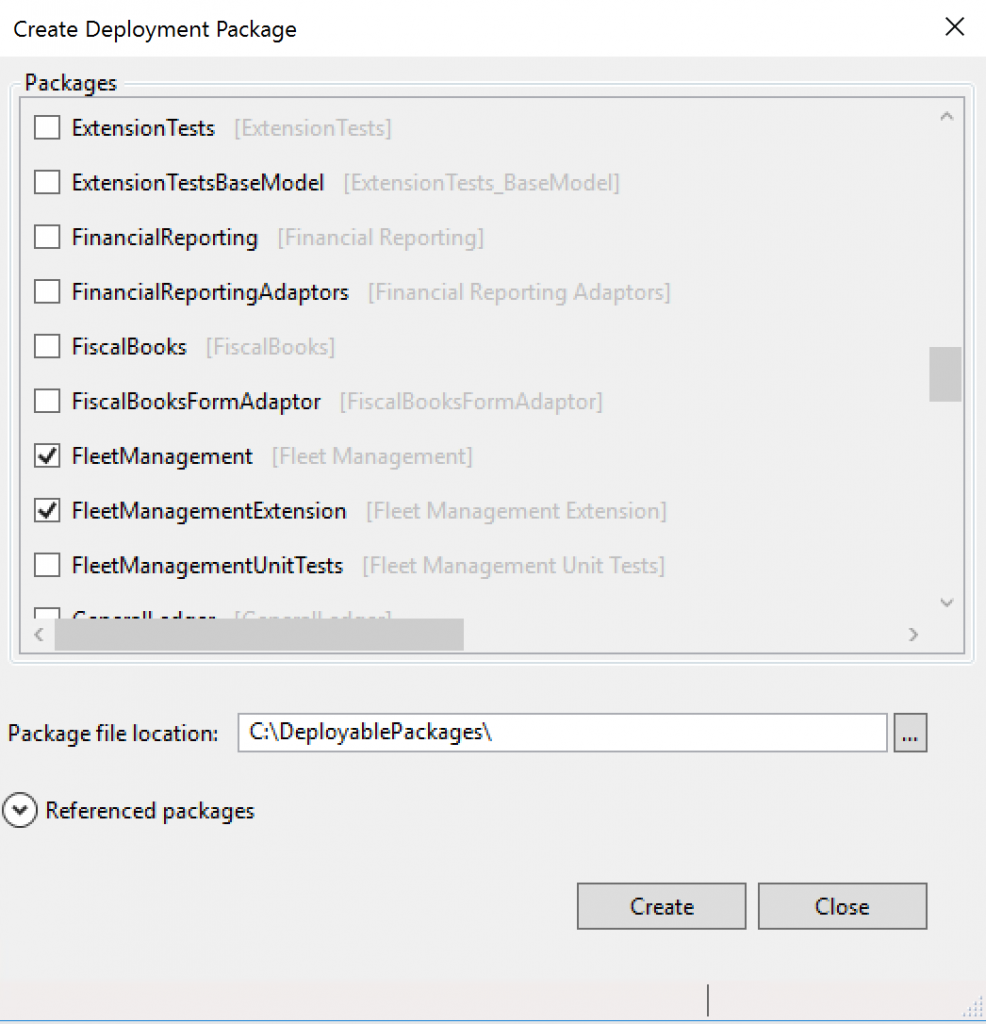
Select the packages that contain your models, and then select a location in which to create the deployable package.
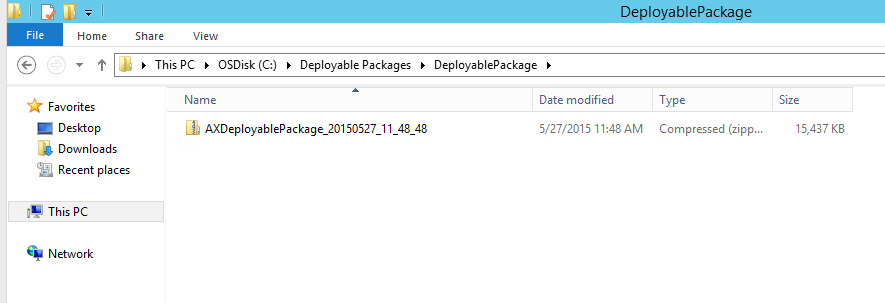
After a deployable package is created, sign in to Lifecycle Services, and then, in your LCS project, click the Asset Library tile.
Upload the deployable package that you created earlier.
Apply a deployable package
To apply a deployable package to an environment, see Apply updates to cloud environments.
Remove a deployable package
To uninstall or remove a deployable package from an environment, see Uninstall a package.
Feedback
Coming soon: Throughout 2024 we will be phasing out GitHub Issues as the feedback mechanism for content and replacing it with a new feedback system. For more information see: https://aka.ms/ContentUserFeedback.
Submit and view feedback for