Add a branch in a guide in Dynamics 365 Guides to create a nonlinear workflow
You can add a branch to a guide in Microsoft Dynamics 365 Guides if your use case requires a nonlinear workflow. Branching points in the flow of the guide allows operators to make selections. Create workflows based on what the operator observes, the operator’s skill level, or different machinery objects.
For example, you can create a guide that includes:
One response that an operator can follow if they observe temperatures over 100 degrees, and a different response if they observe temperatures less than 100 degrees.
Beginner, intermediate, and advanced responses. Consolidating data in a single guide reduces the maintenance required to keep three separate guides up-to-date.
An assessment to ensure that the instructed work was completed or was completed correctly.
Understand nonlinear guide terminology
Branching in Dynamics 365 Guides uses the following terms:
Responses: the choices that authors provide for operators.
Completion: the “end state” of a guide. When an operator reaches the completion step, a guide-complete telemetry event is triggered.
Navigation: the act of moving forward or backward in a guide by using the Next and Back buttons or response buttons.
Create a branch point in a guide
To create a branch point in a guide, add a question step that includes responses. Each response can lead to any other step within the same guide. Operators select one of the responses, which determines their next step in the guide.
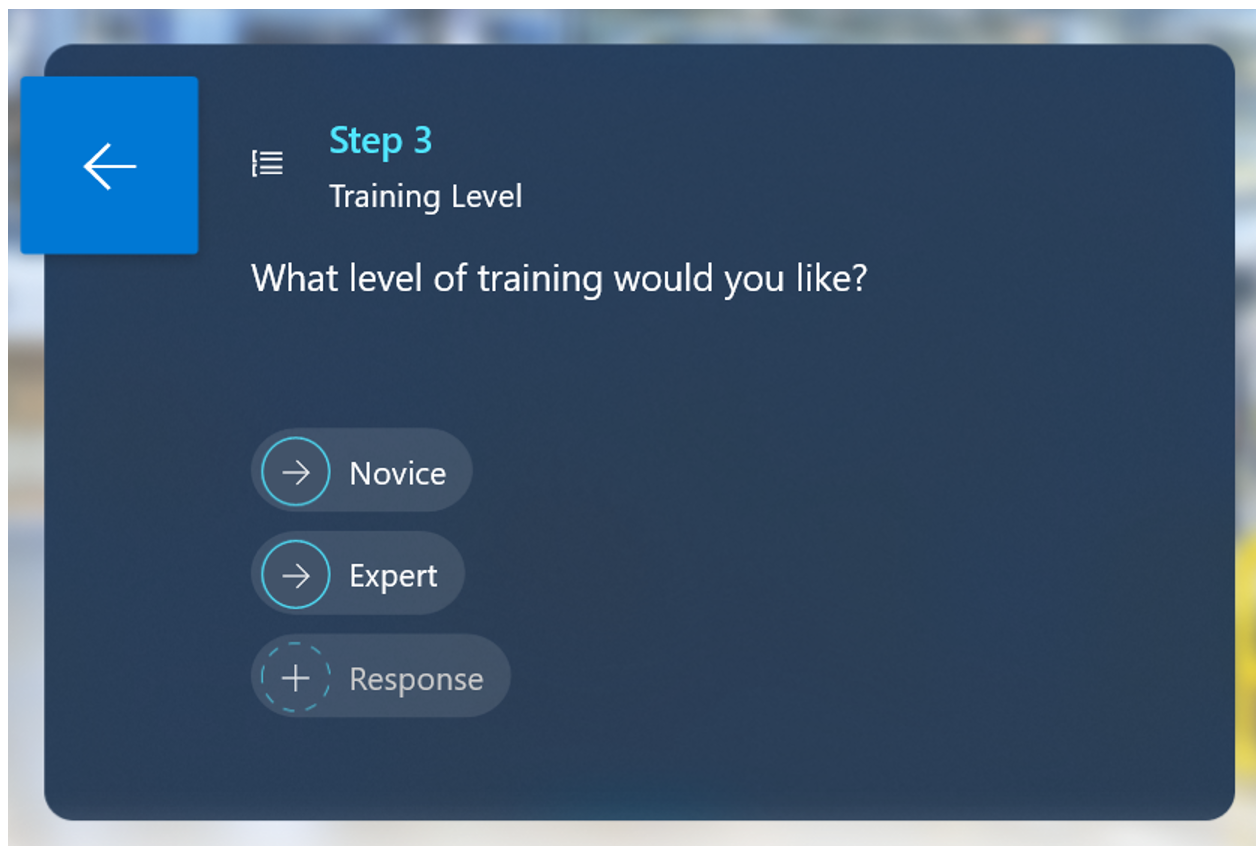
Tip
Before inserting question steps, author all the steps in the guide so you have the appropriate steps to link to.
Add a question step
Open an existing guide or create a new guide.
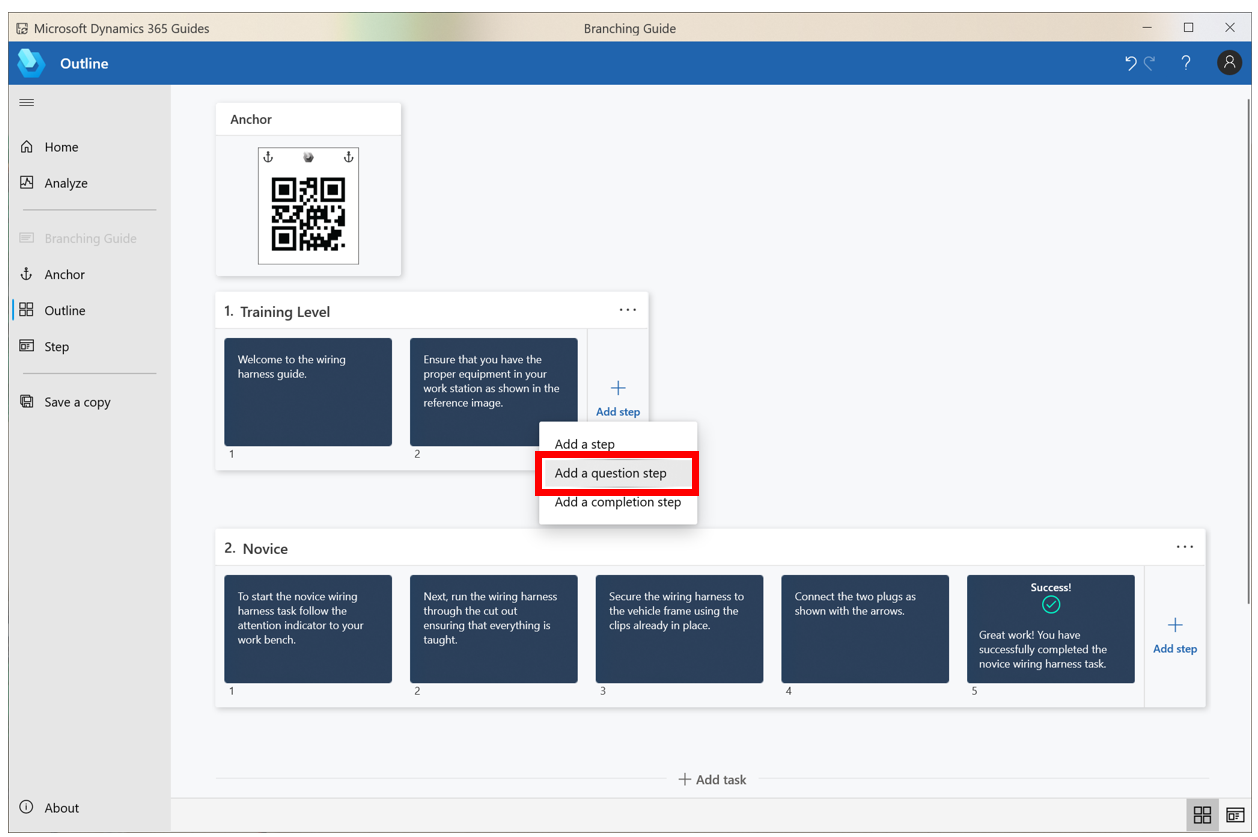
In the Outline page, select Add step, and then in the context menu, select Add a question step.
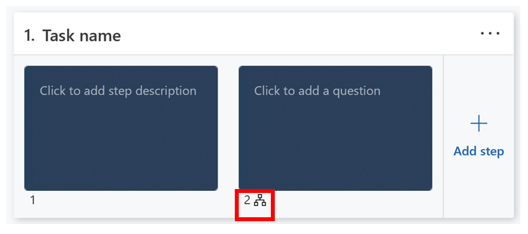
A small icon below the step shows that it's a question step.
Note
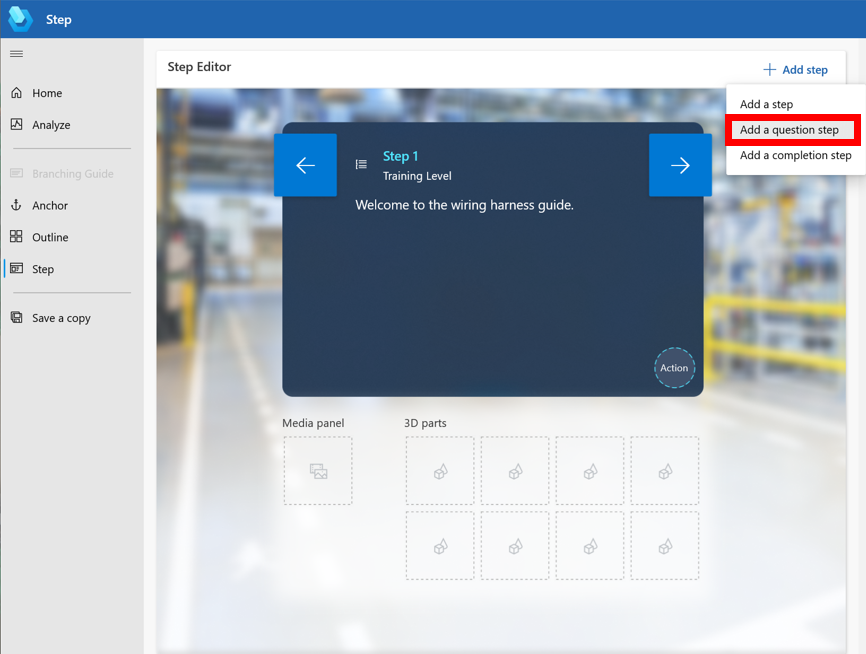
You can also add a question step by selecting Add step in the top-right corner of the Step Editor.
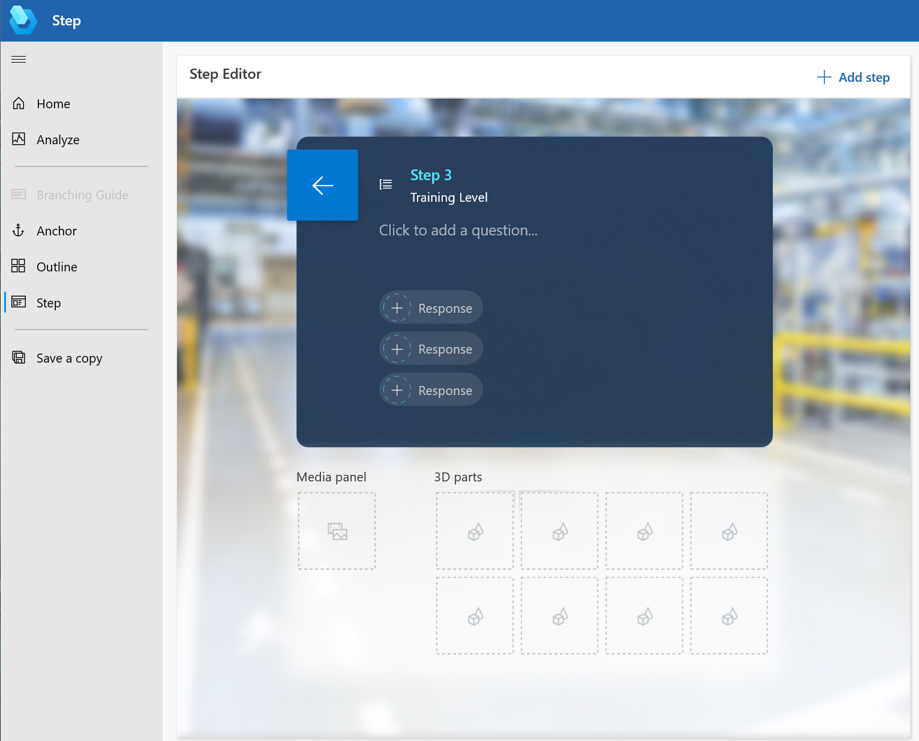
Place your cursor (you can use the Tab key if you're using the keyboard) where it says Click to add a question, and then enter a question for the operator.
Note
You can add up to three lines of text per question. If you exceed this limit, a warning appears.
Select a response, and then in the Properties tab on the right side of the screen, enter the following information:
In the Button label field, enter the text for the response button.
In the Destination list, select the step that the operator goes to when they select the response button. Steps are organized by task.
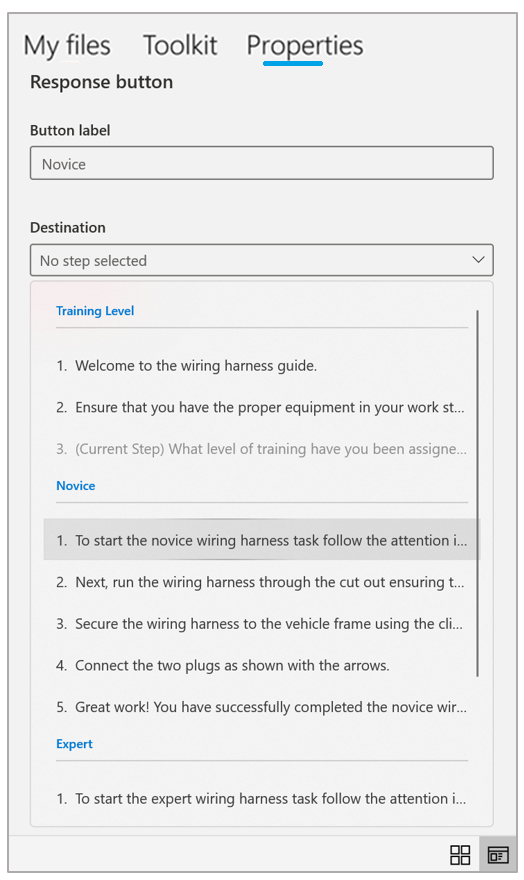
Create the rest of your responses for that step. You can have up to three responses per step. Keep in mind that you can link one question step to another question step, and you can link to any step in the same guide.
Tip
To clear a response, right-click the response, and then select Remove. If you're using the keyboard, tab to the response, select the Menu button on the keyboard, and then select Remove.
Add a completion step
The completion step is the final step in a guide. Create a completion step for each path to let the operator know when they’re done. For example, if you’re creating a guide with different skill levels, add a completion step at the end of the Novice task and at the end of the Expert task. When an operator finishes a completion step, it triggers a guide-complete event used for business intelligence dashboards and for overall time-tracking telemetry.
Note
If you want to create a scenario where a user can either complete the guide or move to a different task, create a question step before the completion step and link the responses to the completion step and the next step in the process.
You can create a completion step from the Outline page or the Step Editor.
In the Outline page, select Add step, and then in the context menu, selection Completion. The completion step is added at the end of the task.
In the Step Editor, select Add, and then in the context menu, selection Completion. The completion step is added to the next step.
Note
The completion step does not have a Next button because it’s intended to be the final step in a guide. The operator can restart the guide from the completion step, choose to open a new guide, or go back by choosing the Back button.
Try out your flow
Try out your branching flow and verify that all responses are configured.
In the Outline page, open the first step of the first task. By default, operators start a guide from Step 1 in the first task.
Use the Next button to move forward until you reach a question step.
On a question step, select the circular button for a configured response. If you're using a keyboard, tab to a response, tab to the circular button, and then press Enter to go to that response destination.

Note
Selecting the Back button returns you to the last step you were on. If a step or task that was part of the user’s path is deleted, the Back button goes to the next available item in the history. If all the previous steps are deleted, an error message appears and the user stays on the current step.
To verify that all responses are fully configured, go to the Outline page. If one of the responses is missing information for that step, a warning message appears.
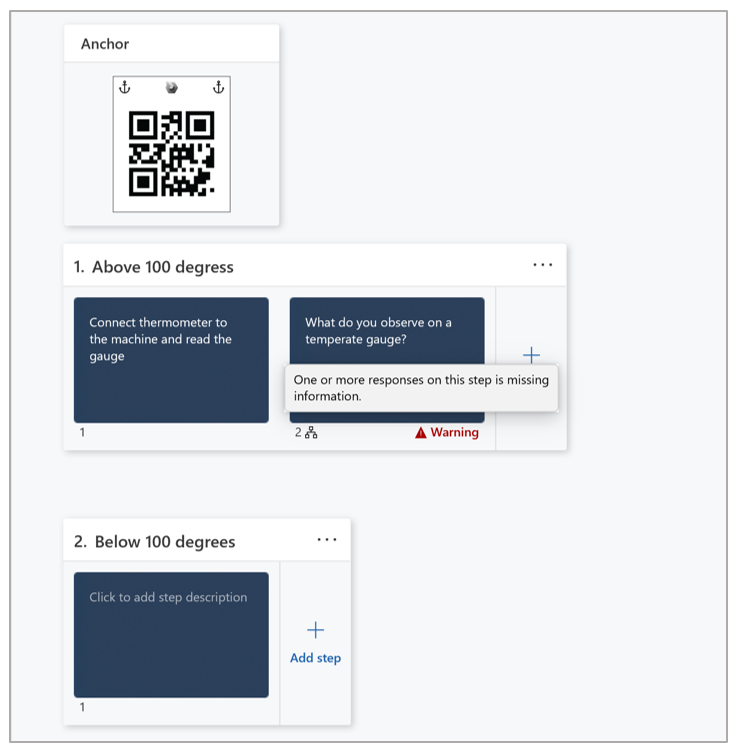
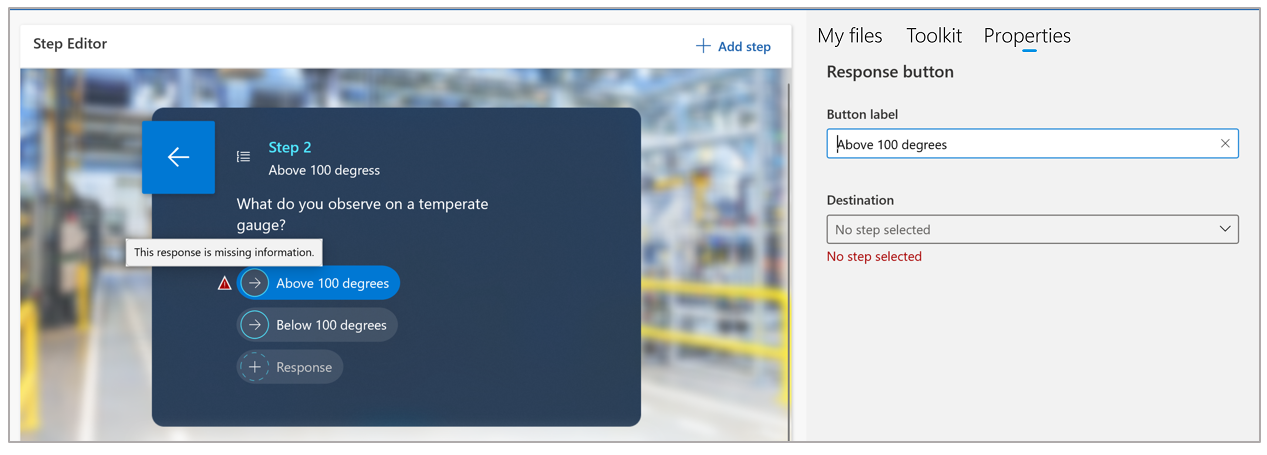
If you see a warning message, open the question step in the Step Editor. The property with missing information is highlighted to make it easy to find.
Next steps
Feedback
Coming soon: Throughout 2024 we will be phasing out GitHub Issues as the feedback mechanism for content and replacing it with a new feedback system. For more information see: https://aka.ms/ContentUserFeedback.
Submit and view feedback for