Manage tags for sequences
Tags help you quickly filter and identify sequences from a list by categories that you define.
License and role requirements
| Requirement type | You must have |
|---|---|
| License | Dynamics 365 Sales Enterprise, Dynamics 365 Sales Premium, or Microsoft Relationship Sales More information: Dynamics 365 Sales pricing |
| Security roles | System Administrator, Sequence manager, or Sales Manager More information: Predefined security roles for Sales |
Permission requirements to manage tags
The following table shows the permissions required for a user role to perform tasks on tags.
| Task related to tags | Permissions required |
|---|---|
| Create, edit, and delete | In the Security roles page, under the Custom Entities tab, provide Create, Read, Write, and Delete permissions for Sales Tag entity. More information: Security roles and privileges Note: By default, these permissions are available for System Administrator, Sequence manager, and Sales Manager security roles. |
| Apply and remove | In the Security roles page, under the Custom Entities tab, provide permissions for following entities: - Sales Tag: Read, Append, and Append To - Sequence: Read, Append, and Append To More information: Security roles and privileges Note: By default, these permissions are available for System Administrator, Sequence manager, Sales Manager, and Salesperson security roles. |
What are tags?
A tag is a label that's used to identify a sequence. The tag works as metadata to help you filter and find sequences. By tagging sequences, you can distinguish one sequence from another and easily choose a specific sequence from a huge list.
You can perform the following activities on tags:
- Create tags
- Edit a tag
- Delete a tag
- Apply a tag to a sequence
- Filter sequences based on tags
- Remove tags from a sequence
Who can manage tags?
By default, the users with sales manager and sequence manager roles can use the tag manager and assign tags to sequences. For other roles to use the feature, you need access to the Sequences page. Contact your administrator to get the following privileges:
- Read, append, and append to access at the user level for the Sales tag (msdyn_salestag) table to assign tags to a sequence.
- Create, read, write, and delete access at the user level for the Sales tag (msdyn_salestag) table to use tag manager.
More information: Security roles and privileges
Create tags
Create tags to categorize sequences into a logical order. For example, you want to categorize leads based on their city of origin. You create tags with city names, such as Seattle and Hyderabad, and apply them to leads according to their city of origin.
In the Sales Hub app, go to Change area in the lower-left corner of the page, and select Sales Insights settings.
Under Sales accelerator, select Sequence.
On the Sequences page, select Tag manager.

On the Tag manager page, select New tag.
In the Create new tags dialog, enter the following details.
Field Description Tag name Enter the name of the tag.
Note: Forward slash (/) isn't supported in tag names.Nest tag under Select a tag name under which you want to create the tag. When None is selected, the tag is created at level 1 and you can add tags under it. To add multiple tags, select Enter after adding each tag.
You can also create nested tags. More information: Create nested tags.Select Save.
Repeat the procedure to add more tags.
Create nested tags
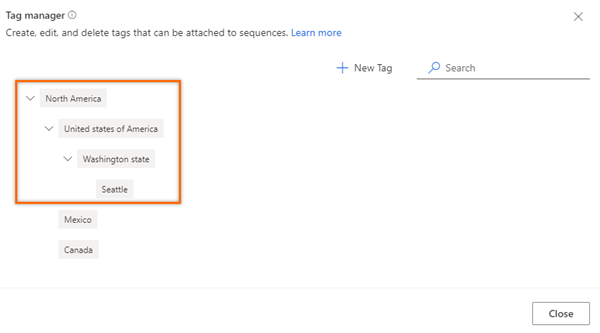
Nested tags allow you to group tags together so that it's easy to identify tags while applying them to a sequence. For example, you want to create tags based on regions and go down levels to countries, states (if applicable), and cities. You create North America (at level 1), United States of America (level 2), Washington state (level 3), and then Seattle (level 4).
Important
- You can create nested tags for up to four levels.
- There's no limit to adding tags at level 1. For other levels, you can only add up to 100 tags.
Create a tag at the root node. In this example, we're creating the North America tag.
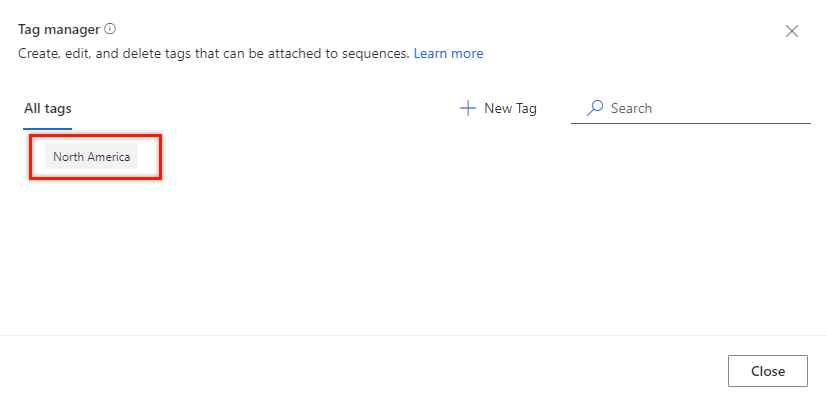
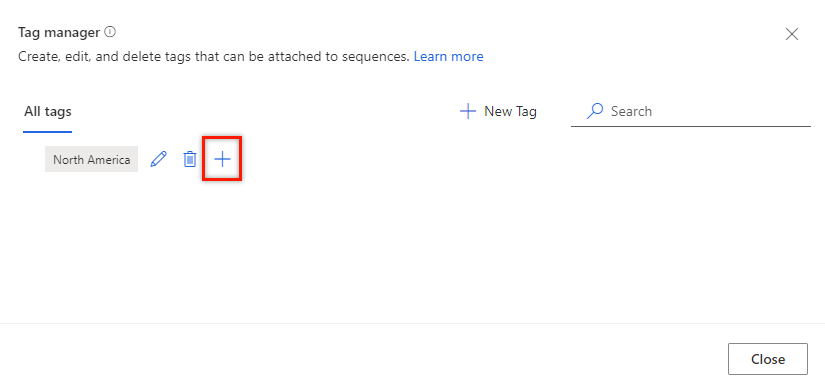
Create a node at a level below the root node of North America.
Hover over the root node tag of North America, and then select Add (+).
Note
You can also use New Tag to add a node below the root node.
In the Create new tags dialog, enter the Tag names. Add multiple tags by selecting Enter after each tag.
In the Nest tag under field, select the parent tag. Currently, only four levels of hierarchy are supported, and each level can have up to 100 tags. For example, level 1 > level 2 > level 3 > level 4. If you try to add another node below the level 4 node, an error message is displayed.
In this example, we're adding United States of America, Canada, and Mexico under the parent node North America.
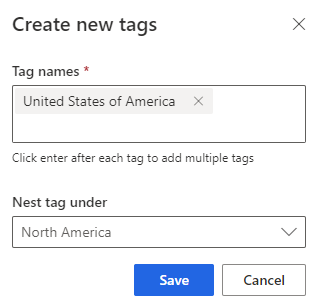
Select Save.
Under the North America node, you can see that United States of America, Canada, and Mexico have been added to the next level as child nodes.
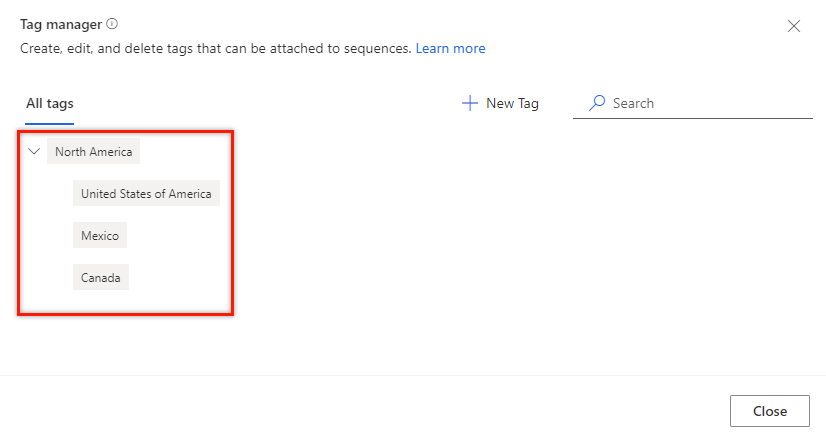
Similarly, repeat step 2 to add:
- A node below United States of America as Washington State.
- A node below Washington State as Seattle.
Edit a tag
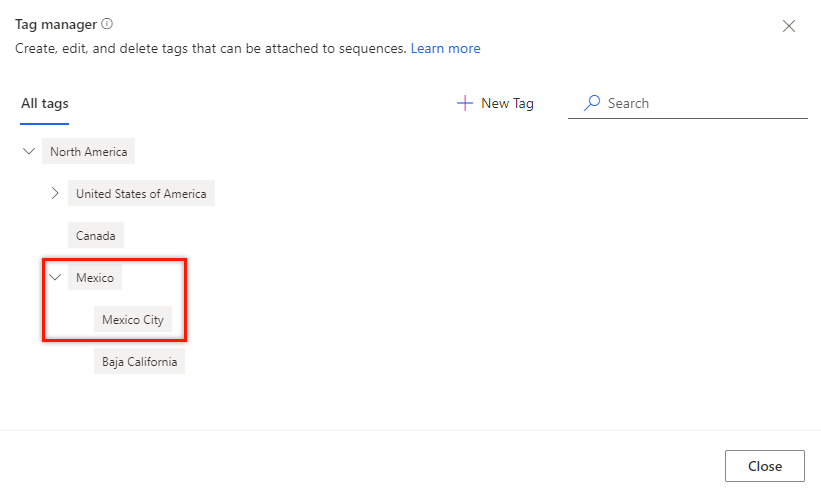
You can edit a tag if you want to change its name or hierarchy level. In this example, we're editing the tag Mexico City (which is under North America) to move it under Mexico without changing its name.
Open the tag manager.
Hover over a tag, and select the Edit icon.
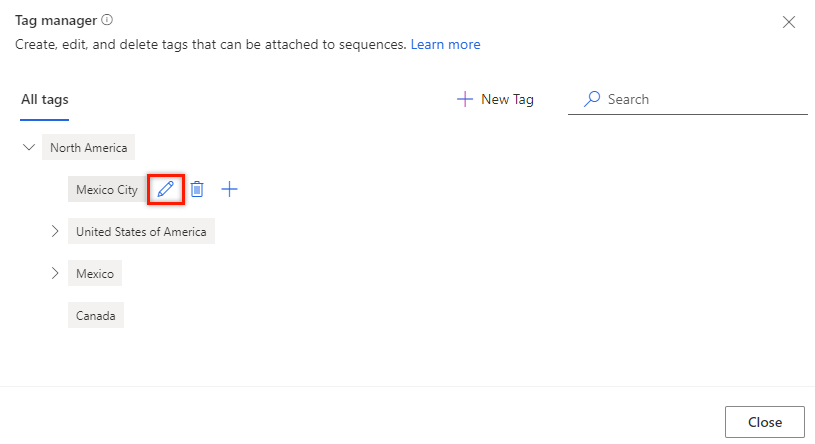
The Edit tag dialog opens.
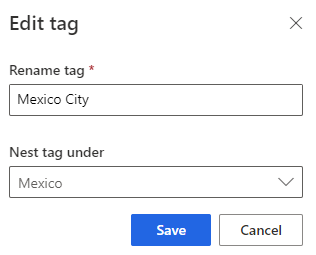
Update the information as necessary, and then select Save. In this example, we're changing the Nest tag under value to Mexico.
Delete a tag
You can remove the tags that your organization no longer requires to be associated with a sequence. If a sequence is associated with the deleted tag, the tag is automatically removed from the sequence. More information: Filter sequence based on tags
Open the tag manager.
Hover over a tag, and select the Delete icon.
A confirmation message is displayed.
Select Delete permanently.
If the tag being deleted has child tags, the child tags will move up a level in hierarchy and will be nested under the parent of the deleted tag.
For example, there are three levels of tags in the hierarchy. You delete a tag at level 2 that has child tags. The child tags (level 3) move up a level (level 2) and are nested under the hierarchy parent (level 1). When you delete Mexico (parent), which is at level 2, the cities under it move a level up to North America and become level 2 in the hierarchy.

Apply a tag to a sequence
In the Sales Hub app, go to Change area in the lower-left corner of the page, and select Sales Insights settings.
Under Sales accelerator, select Sequence.
Select a sequence for which you want to apply tags, and then select Edit tags.
Note
You can also select the Edit tags option by opening the sequence.
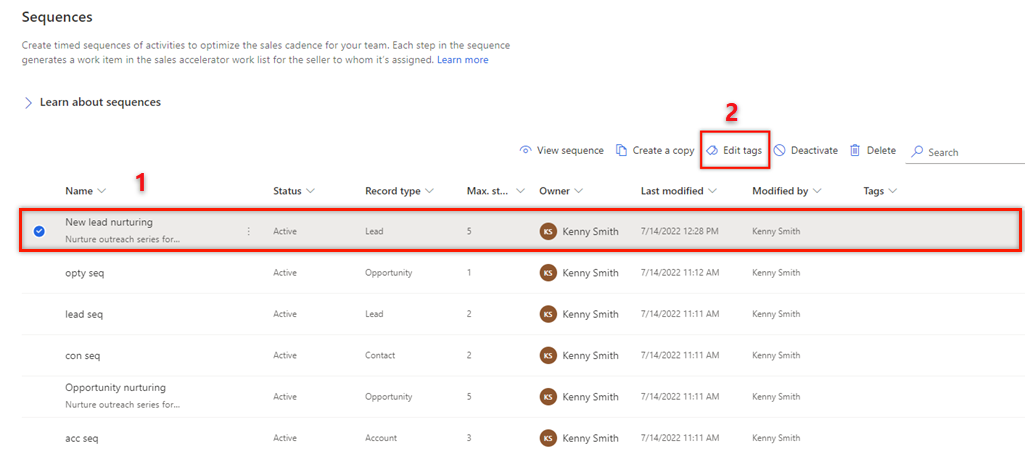
On the Edit sequence tags pane, select Add tags to sequence.
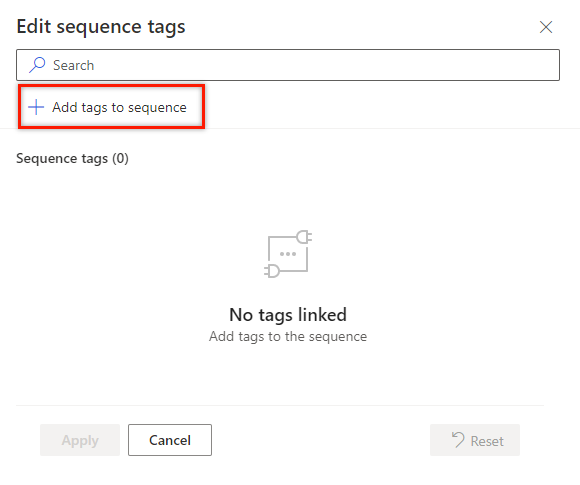
Select the tags that you want to apply to the sequence.
The selected tags are highlighted in blue and are listed in the Selected tags section with the hierarchy path.
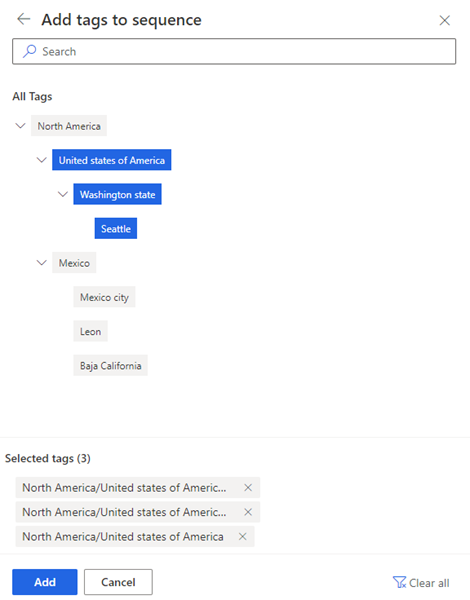
Select Add.
The tags, including the hierarchy, are listed in the sequence. Hover over the added tag to view the full path for the tag.
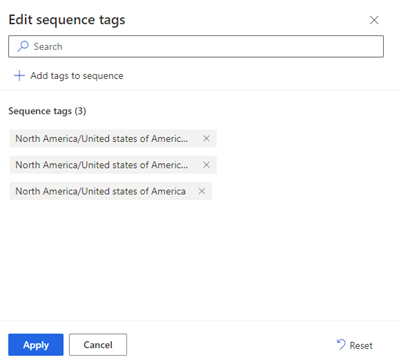
Select Apply.
The tags are applied to the sequence.
Filter sequences based on tags
In the Sales Hub app, go to Change area in the lower-left corner of the page, and select Sales Insights settings.
Under Sales accelerator, select Sequence.
Select the Tags column.
The Filter by option opens.
Search for the tags to filter the sequence.
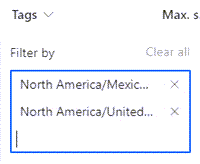
The sequences are filtered and listed on the Sequences page. The list displays all the sequences that match the filter criteria, regardless of their status.

Remove tags from a sequence
In the Sales Hub app, go to Change area in the lower-left corner of the page, and select Sales Insights settings.
Under Sales accelerator, select Sequence.
Select a sequence for which you want to remove tags, and then select Edit tags.
In the Sequence tags section, select the Cross icon (X) corresponding to the tag, and then select Apply.
The tag is removed from the sequence.
Can't find the options in your app?
There are three possibilities:
- You don't have the necessary license or role.
- Your administrator hasn't turned on the feature.
- Your organization is using a custom app. Check with your administrator for exact steps. The steps described in this article are specific to the out-of-the-box Sales Hub and Sales Professional apps.
See also
Feedback
Coming soon: Throughout 2024 we will be phasing out GitHub Issues as the feedback mechanism for content and replacing it with a new feedback system. For more information see: https://aka.ms/ContentUserFeedback.
Submit and view feedback for