Map directory extensions in cross-tenant synchronization
Directory extensions enable you to extend the schema in Microsoft Entra ID with your own attributes. You can map these directory extensions when provisioning users in cross-tenant synchronization. Custom security attributes are different and aren't supported in cross-tenant synchronization.
This article describes how to map directory extensions in cross-tenant synchronization.
Prerequisites
- Hybrid Identity Administrator role to configure cross-tenant synchronization.
- Cloud Application Administrator or Application Administrator role to assign users to a configuration and to delete a configuration.
Create directory extensions
If you don't already have directory extensions, you must create one or more directory extensions in the source or target tenant. You can create extensions using Microsoft Entra Connect or Microsoft Graph API. For information on how to create directory extensions, see Syncing extension attributes for Microsoft Entra Application Provisioning.
Map directory extensions
![]()
Source tenant
Once you have one or more directory extensions, you can use them when mapping attributes in cross-tenant synchronization.
Sign in to the Microsoft Entra admin center of the source tenant.
Browse to Identity > External Identities > Cross-tenant synchronization.
Select Configurations and then select your configuration.
Select Provisioning and expand the Mappings section.
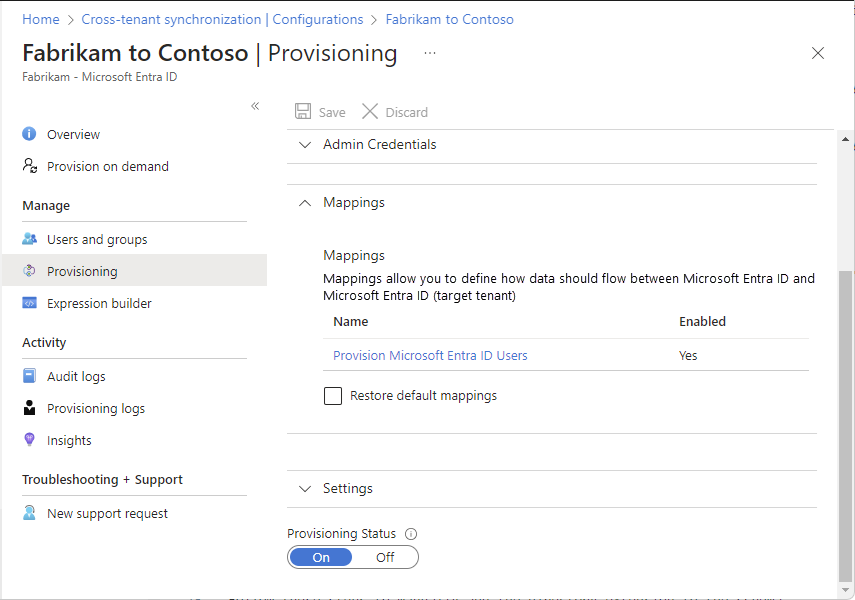
Select Provision Microsoft Entra ID Users to open the Attribute Mapping page.
Scroll to the bottom of the page and select Add new mapping.

In the Source attribute drop-down list, select a source attribute.
If you created a directory extension in the source tenant, select the directory extension.

If the directory extension isn't listed, make sure that the directory extension was created successfully. You can also try to manually add the directory extension to the attribute list as described in the next section.
In the Target attribute drop-down list, select a target attribute.
If you created a directory extension in the target tenant, select the directory extension.
Select Ok to save the mapping.


Manually add directory extensions to the attribute list
![]()
Source tenant
If your directory extension wasn't automatically discovered, you can try the following steps to manually add the directory extension to the attribute list.
Sign in to the Microsoft Entra admin center of the source tenant using the following link:
https://entra.microsoft.com/?Microsoft_AAD_Connect_Provisioning_forceSchemaEditorEnabled=true
Browse to Identity > External Identities > Cross-tenant synchronization.
Select Configurations and then select your configuration.
Select Provisioning and expand the Mappings section.
Select Provision Microsoft Entra ID Users to open the Attribute Mapping page.
Scroll to the bottom and select the Show advanced settings check box.

Tip
If you don't see the Edit attribute list links, be sure that you are signed in to the Microsoft Entra admin center using the link in Step 1.
If you created a directory extension in the source tenant, select the Edit attribute list for Microsoft Entra ID link.
If you created an extension in the target tenant, select the Edit attribute list for Azure Active Directory (target tenant) link.
Add the directory extension and select the appropriate options.

Select Save.
Refresh the browser.
Browse to the Attribute mappings page and try to map the directory extension as described earlier in this article.


Manually add directory extensions by editing the schema
![]()
Source tenant
Follow these steps to manually add directory extensions to the schema by using the schema editor.
Sign in to the Microsoft Entra admin center of the source tenant.
Browse to Identity > External Identities > Cross-tenant synchronization.
Select Configurations and then select your configuration.
Select Provisioning and expand the Mappings section.
Select Provision Microsoft Entra ID Users to open the Attribute Mapping page.
Scroll to the bottom and select the Show advanced settings check box.
Select the Review your schema here link to open the Schema editor page.

Download an original copy of the schema as a backup.
Modify the schema following your required configuration.
Select Save.
Refresh the browser.
Browse to the Attribute mappings page and try to map the directory extension as described earlier in this article.

Next steps
Feedback
Coming soon: Throughout 2024 we will be phasing out GitHub Issues as the feedback mechanism for content and replacing it with a new feedback system. For more information see: https://aka.ms/ContentUserFeedback.
Submit and view feedback for