Google Workspace migration prerequisites in Exchange Online
Note
Before you start the migration to Microsoft 365, ensure that as an administrator, as minimum privileges, you have the "Recipient Management" role group assigned. For more information, see Exchange Admin Center > Roles > Admin Roles.
The following procedures must be performed (in the order mentioned) before you start the process of Google Workspace migration:
- Make sure you have read and understood Perform a Google Workspace migration as it gives you an overview of the Google Workspace migration process and its limitations
- Create a subdomain for mail routing to Microsoft 365 or Office 365
- Create a subdomain for mail routing to your Google Workspace domain
- Provision users in Microsoft 365 or Office 365
Create a subdomain for mail routing to Microsoft 365 or Office 365
Go to the Google Workspace Admin page and sign in as a Google Workspace administrator for your tenant.
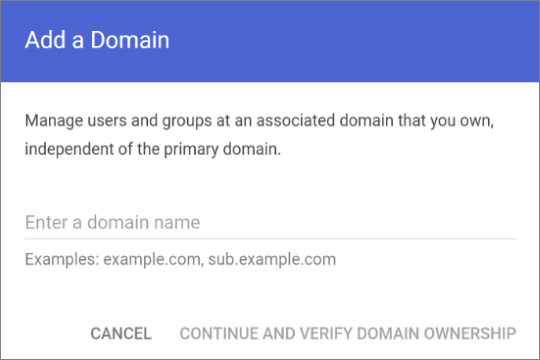
Select Add a domain.
Note
The option Add a domain won't be available if using the legacy free edition of G Suite.
Enter the domain that you'll use for routing mails to Microsoft 365 or Office 365, select User alias domain, and then select ADD DOMAIN & START VERIFICATION. A subdomain of your primary domain is recommended (for example, "o365.fabrikaminc.net", when "fabrikaminc.net" is your primary domain) so that it will be automatically verified. If another domain (such as "fabrikaminc.onmicrosoft.com") is set, Google will send emails to each individual address with a link to verify the permission to route mail. Migration won't complete until the verification is completed.
Keep track of the name of the domain you enter because you'll need it for the subsequent steps, and for using it as the Target Delivery Domain in the process of Creating a migration batch in Microsoft 365 or Office 365.
Note
If you see an error GmailForwardingAddressRequiresVerificationException has occurred during the batch, skip this step of creating a subdomain for forwarding emails from the gmail side.
Follow any subsequent steps that are then required to verify your domain till the status is shown as Active. If you chose a subdomain of your primary domain (created in step 3), your new domain may have been verified automatically.
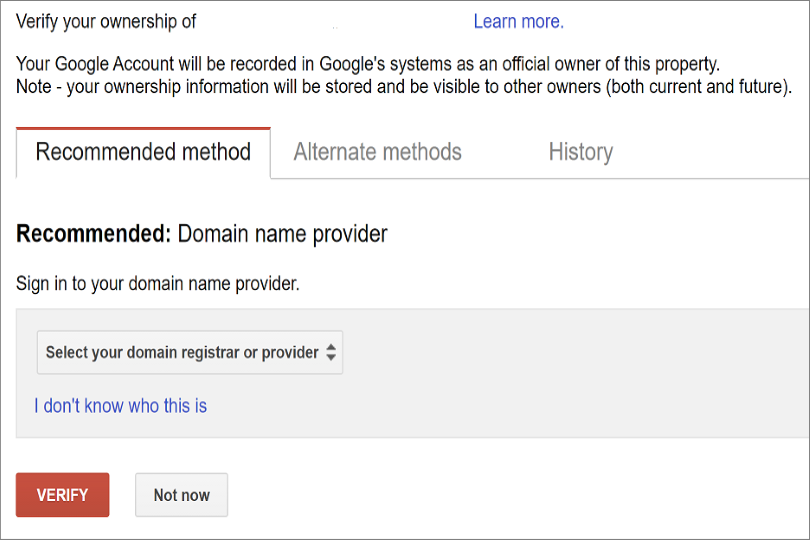
Sign in to your DNS provider and update your DNS records so that you have an MX record at the domain you created (in step 3), pointing to Microsoft 365 or Office 365. Ensure that this domain (created in step 3) is an accepted domain in Microsoft 365 or Office 365. Follow the instructions in Add a domain to Microsoft 365 to add the Microsoft 365 or Office 365 routing domain ("o365.fabrikaminc.net") to your organization and to configure DNS to route mail to Microsoft 365 or Office 365.
Note
The migration process won't be able to complete if an unverified routing domain is used. Choosing the built-in "tenantname.onmicrosoft.com" domain for routing mail to Office 365 instead of a subdomain of the primary Google Workspace domain occasionally causes issues that Microsoft is not able to assist with, besides causing Microsoft to recommend that the user manually verify the forwarding address or contact Google support.
Create a subdomain for mail routing to your Google Workspace domain
Go to the Google Workspace Admin page and sign in as a Google Workspace administrator for your tenant.
Select Add a domain.
Enter the domain that you'll use for routing mails to Google Workspace, select User alias domain, and then select ADD DOMAIN & START VERIFICATION. A subdomain of your primary domain is recommended (for example, "gsuite.fabrikaminc.net", when "fabrikaminc.net" is your primary domain) so that it will be automatically verified.

Follow any subsequent steps that are then required to verify your domain till your domain's status is shown as Active. If you chose a subdomain of your primary domain (created in step 3), your new domain may have been verified automatically.
Follow Google's instructions to Set up MX records for Google Workspace Gmail for this domain.
Note
It may take up to 24 hours for Google to propagate this setting to all the users in your organization.
Important
If you are using non-default Transport settings in your Microsoft 365 or Office 365 organization, you should check whether the mail flow will work from Office 365 to Google Workspace. Ensure that either your default Remote Domain ("*") has Automatic Forwarding enabled, or that there is a new Remote Domain for your Google Workspace routing domain (for example, "gsuite.fabrikaminc.net") that has Automatic Forwarding enabled.
Check Google Cloud platform permissions
An automated scenario requires the Google Migration administrator to be able to perform the following steps:
- Create a Google Workspace project.
- Create a Google Workspace service account in the project.
- Create a service key.
- Enable all APIs - Gmail, Calendar, and Contacts.
The Google Migration administrator needs the following permissions to complete these steps:
- resourcemanager.projects.create
- iam.ServiceAccounts.create
The most secure way to achieve completion of these four steps is to assign the following roles to the Google Migration administrator:
- Projector Creator
- Service Accounts Creator
Here's how you do it:
Navigate to https://console.developers.google.com.
Expand the hamburger menu in the upper right-hand corner.

Select IAM & Admin.
Select Manage Resources.
Select the appropriate resource and in the right-hand pane under the Permissions tab, select Add Principal.
Enter your Google Migration administrator credentials, enter Project Creator in the filter, and select Project Creator.
Select Add Another Role, enter Create Service Accounts in the filter, and select Create Service Accounts.
Select Save.
Note
It might take up to 15 minutes to propagate role assignment changes across the globe.
Provision users in Microsoft 365 or Office 365
Once your Google Workspace environment has been properly configured, you can complete your migration in the Exchange admin center or through the Exchange Online PowerShell.
Before proceeding with either method, ensure that Mail Users have been provisioned for every user in the organization who will be migrated (either now or eventually). If any users aren't provisioned, provision them using the instructions in Manage mail users.
For more advanced scenarios, you may be able to deploy Microsoft Entra Connect to provision your Mail Users. For more information, see Deploy Microsoft 365 Directory Synchronization in Microsoft Azure for an overview, and Set up directory synchronization for Microsoft 365 for setup instructions. Then, you need to deploy an Exchange server in your on-premises environment for user management, and mail-enable your users using this server. For more information, see How and when to decommission your on-premises Exchange servers in a hybrid deployment and Manage mail users. Once the Mail Users have been created in Microsoft 365, the Microsoft Entra Connect may need to be disabled to allow the migration process to convert these users into mailboxes. For more information, see Turn off directory synchronization for Microsoft 365.
We recommend that the primary address (sometimes referred to as the "User ID") for each user be at the primary domain (for example, "will@fabrikaminc.net"). Typically, this requirement means that the primary email address should match between Microsoft 365 or Office 365 and Google Workspace. If any user is provisioned with a different domain for their primary address, then that user should atleast have a proxy address at the primary domain. Each user should have their ExternalEmailAddress point to the user in their Google Workspace routing domain ("will@gsuite.fabrikaminc.net"). The users should also have a proxy address that will be used for routing to their Microsoft 365 or Office 365 routing domain (for example, "will@o365.fabrikaminc.net").
Note
We recommend that the Default MRM Policy and Archive policies be disabled for these users until their migration has been completed. When such features remain enabled during migration, there is a chance that some messages will end up being considered "missing" during the content verification process.