Create folders in workspaces (preview)
This article explains what folders in workspaces are and how to use them in workspaces in Microsoft Fabric. Folders are organizational units inside a workspace that enable users to efficiently organize and manage artifacts in the workspace. For more information about workspaces, see the Workspaces article.
Create a folder in a workspace
In a workspace, select New > Folder.

Enter a name for the folder in the New folder dialog box. See Folder name requirements for naming restrictions.

The folder is created successfully.

You can create nested subfolders in a folder in the same way. Maximum 10 level nested subfolders can be created.
Note
You can nest up to 10 folders within the root folder.
Folder name requirements
Folder names must follow certain naming conventions:
- The name can't include C0 and C1 control codes.
- The name can't contain leading or trailing spaces.
- The name can't contain these characters: ~"#.&*:<>?/{|}.
- The name can't contain system-reserved names, including: $recycle.bin, recycled, recycler.
- The name length can't exceed 255 characters.
- You can't have more than one folder with the same name in a folder or at the root level of the workspace.
Move items into a folder
Move a single item
Select the context menu (...) of the item you want to move, then select Move to.
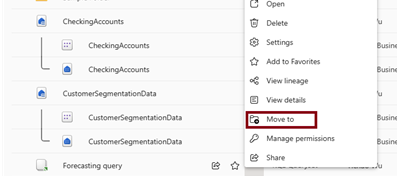
Select the destination folder where you want to move this item.

Select Move here.

By selecting Open folder in the notification or navigating to the folder directly, you can go to the destination folder to check if the item moved successfully.


Move multiple items
Select multiple items, then select Move from the command bar.

Select a destination where you want to move these items. You can also create a new folder if you need it.


Create an item in a folder
Go to a folder, select New, then select the item you want to create. The item is created in this folder.

Note
Currently, you can't create certain items in a folder:
- dataflow gen2
- streaming semantic model
- streaming dataflow
If you create items from the home page or the Create hub, items are created in the root level of the workspace.

Publish to folder (preview)
You can now publish your Power BI reports to specific folders in your workspace.
When you publish a report, you can choose the specific workspace and folder for your report, seen below.

To publish reports to specific folders in the service, make sure the Publish dialogs support folder selection setting is enabled in the Preview features tab in the options menu.

Rename a folder
Select the context (...) menu, then select Rename.

Give the folder a new name and select the Rename button.

Note
When renaming a folder, follow the same naming convention as when you're creating a folder. See Folder name requirements for naming restrictions.
Delete a folder
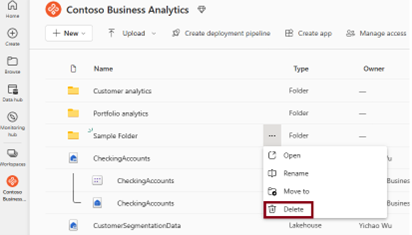
Make sure the folder is empty.
Select the context menu (...) and select Delete.
Note
Currently you can only delete empty folders.
Permission model
Workspace admins, members, and contributors can create, modify, and delete folders in the workspace. Viewers can only view folder hierarchy and navigate in the workspace.
Currently folders inherit the permissions of the workspace where they're located.
| Capability | Admin | Member | Contributor | Viewer |
|---|---|---|---|---|
| Create folder | ✅ | ✅ | ✅ | ❌ |
| Delete folder | ✅ | ✅ | ✅ | ❌ |
| Rename folder | ✅ | ✅ | ✅ | ❌ |
| Move folder and items | ✅ | ✅ | ✅ | ❌ |
| View folder in workspace list | ✅ | ✅ | ✅ | ✅ |
Considerations and limitations
- Currently dataflow gen2, streaming semantic model, and streaming dataflow can't be created in folders.
- If you trigger item creation from the home page, create hub and industry solution, items are created at the root level of workspaces.
- In a workspace page,
FilterandFilter by keywordsonly apply to items at the current level. - Git doesn't support workspace folders yet.
- If folders is enabled in the Power BI service but not enabled in Power BI Desktop, republishing a report that is in a nested folder will replace the report in the nested folder.
- If Power BI Desktop folders is enabled in Power BI Desktop, but not enabled in the Service and you publish to a nested folder, the report will be published to the general workspace.
- When publishing reports to folders, report names must be unique throughout an entire workspace, regardless of its location. Therefore, when publishing a report to a workspace that has another report with the same name in a different folder, the report will publish to the location of the already existing report. If you want to move the report to a new folder location in the workspace you will need to make this change in the Power BI Service.
Related content
Feedback
Coming soon: Throughout 2024 we will be phasing out GitHub Issues as the feedback mechanism for content and replacing it with a new feedback system. For more information see: https://aka.ms/ContentUserFeedback.
Submit and view feedback for