Use the Apply to each action to process a list of items periodically
Many triggers can immediately start a cloud flow based on an event such as when a new email arrives in your inbox. These triggers are great, but sometimes you want to run a cloud flow that queries a data source on a predefined schedule, taking certain actions based on the properties of the items in the data source. To do this, your flow can be started on a schedule (such as once per day) and use a loop action such as Apply to each to process a list of items. For example, you could use Apply to each to update records from a database or list of items from Microsoft SharePoint.
Watch this video for a demo of the Apply to each action.
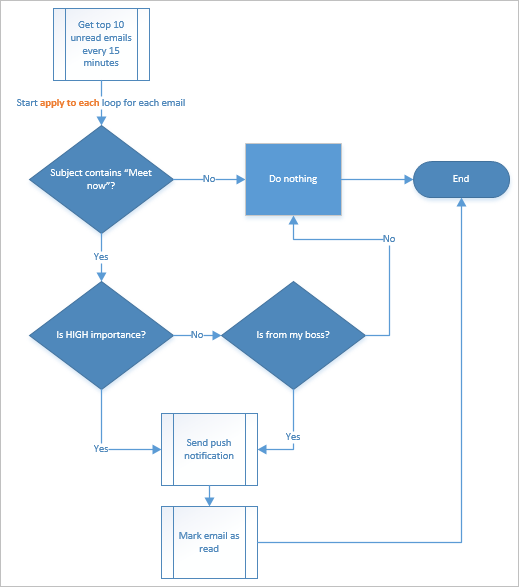
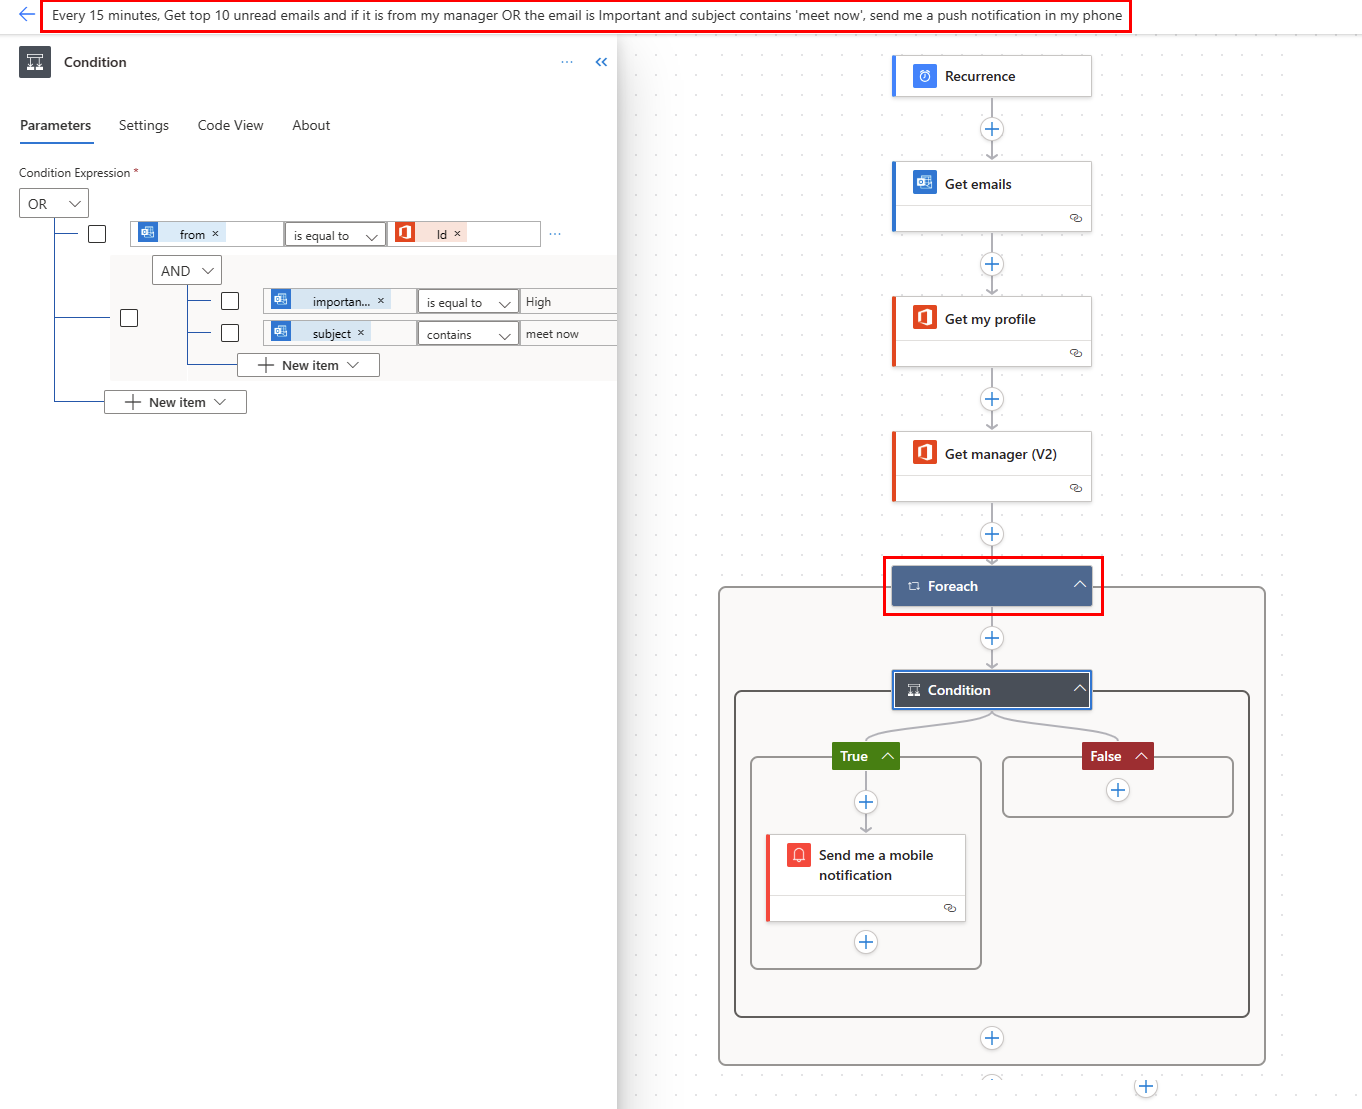
In this tutorial, we'll create a cloud flow that runs every 15 minutes and does the following:
Gets the last 10 unread messages in your Microsoft 365 Outlook Inbox.
Checks each of the 10 messages to confirm if any has meet now in the subject.
Checks if the email is from your boss or was sent with high importance.
Sends a push notification and marks as read, any email that has meet now in the subject and is either from your boss or was sent with high importance.
This diagram shows the details of the flow we'll create.
Prerequisites
Here are the requirements for successfully performing the steps in this tutorial.
- An account that's registered to use Power Automate.
- A Microsoft 365 Outlook account.
- The Power Automate mobile app for Android, iOS, or Windows Phone.
- Connections to Microsoft 365 Outlook and the push notification service.
For detailed information about using SharePoint with Power Automate, go to the SharePoint documentation.
Note
Power Automate uses either the classic cloud flows designer or the cloud flows designer with Copilot. To identify which designer you’re using, go to the Note section in Understand the cloud flows designer with copilot capabilities.
Create a cloud flow
Sign in to Power Automate.
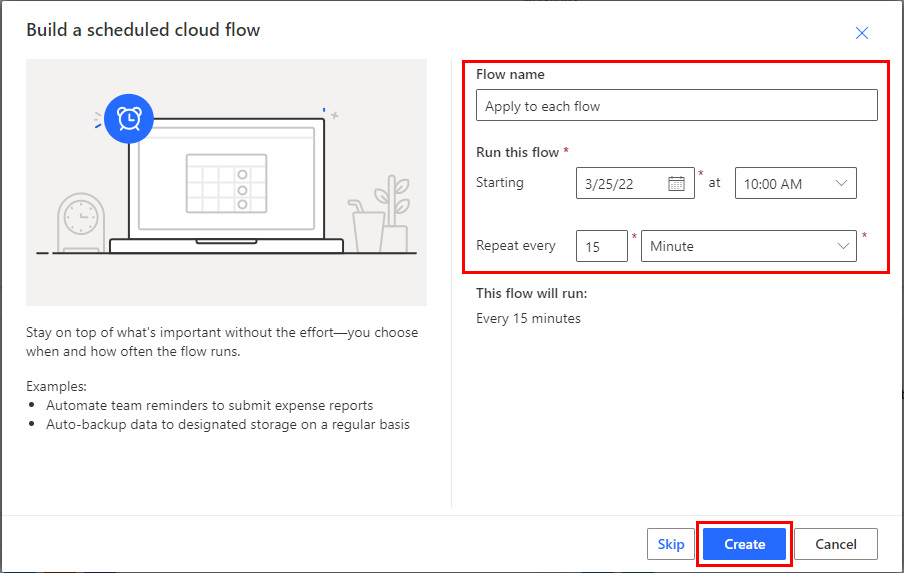
Select My flows > New flow > Scheduled cloud flow.
In the Flow name field, enter a name for your flow.
In the Starting fields, select the date and time to indicate when the flow should start running.
In the Repeat every fields, set the schedule to run the flow. In this example, type 15 and select Minute from the dropdown menu to run the flow every 15 minutes.
Select Create.
Select + New step.
In the Search field, type outlook to find all connectors and actions related to Microsoft Outlook.
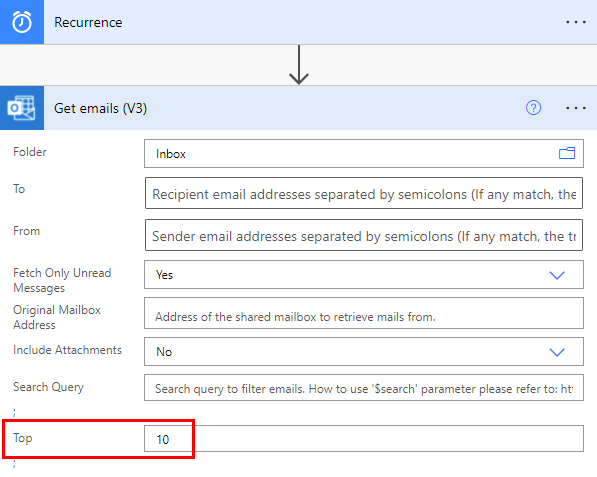
Select the Get emails (V3) action to open the Get emails (V3) card.
Configure the Get emails (V3) card to select the top 10 unread emails from the Inbox folder.
Don't include attachments because they won't be used in the flow.
So far, you've created a simple flow that gets some emails from your inbox. These emails will be returned in an array. The Apply to each action requires an array, so this is exactly what's needed.
Add actions and conditions
Select + New step > Built-in > Apply to each action.
Select the field and then select value from the Dynamic content list to place it in the Select an output from previous steps field on the Apply to each card. This pulls in the body of the emails to be used in the Apply to each action.
Select + New step > Control > Condition.
Configure the Condition card to search the subject of each email for the words "meet now".
- Select the first field and then select Subject in the Dynamic content list.
- In the dropdown list of operators in the second field, select contains.
- In the third field, enter meet now.
In the If yes branch, select Add an action > Condition. This opens the Condition 2 card.
Configure the Condition 2 card to search each email with "meet now" in the subject with high importance.
- Select the first field and then select Importance in the Dynamic content list.
- (If not already selected) In the dropdown list of operators in the second field, select is equal to.
- In the third field, enter high.
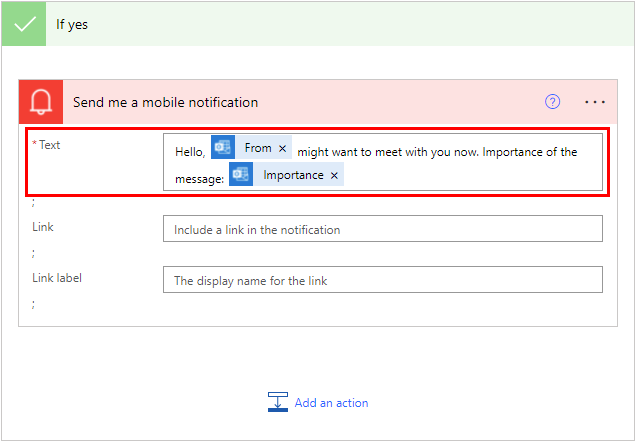
In the If yes branch, select Add an action. This opens the Choose an action card, where you'll define what happens if the search condition (the meet now email was sent with high importance) is true.
Search for notification, and then select the Send me a mobile notification action.
On the Send me a mobile notification card in the Text field, enter the details for the push notification that will be sent if the subject of an email contains "meet now" and the Importance is high.
Select the If no branch to select the recipients.
- Select Add an action, and then type get manager in the search field.
- In the Actions list, select Get manager (V2).
- In the Get Manager (V2) card, select the User (UPN) field.
- In the Dynamic content list, select To.
In the If no branch, select Add an action.
From the Actions list, select Condition. This opens the Condition 3 card.
Configure the card to check if the email sender's email address (the From token) is the same as your boss' email address (the Email token).
- Select the first field and then select From in the Dynamic content list.
- In the dropdown list of operators in the second field, select contains.
- In the third field, enter mail.
Under the If yes section of the Condition 3 card, select Add an action.
Next, you'll define what should happen if the search condition (the email was sent from your boss) is true.
Search for notification, and then select the Send me a mobile notification action.
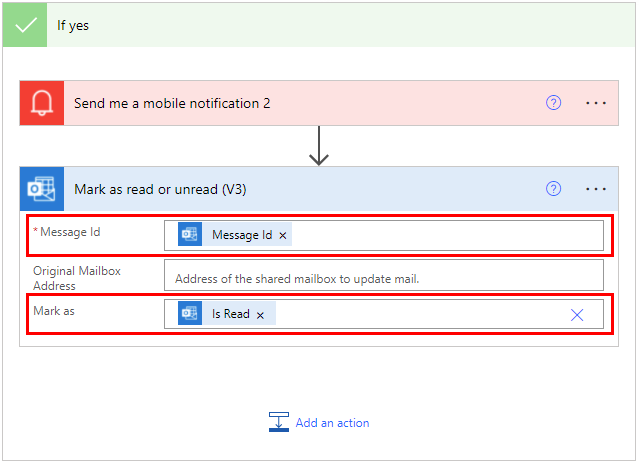
On the Send me a mobile notification 2 card, provide the details for the push notification that will be sent if the email is from your boss.
Select Add an action.
Add the Mark as read or unread (V3) action.
Add the Message Id token to the Mark as read or unread (V3) card. The Message Id is the Id of the message that will be marked as read.
Select Enter custom value from the Mark as list on the Mark as read or unread (V3) card.
In the Dynamic content list, select Is Read.
On the toolbar at the top, select Save to save your flow.
Run the flow
Send yourself a high-importance email that includes meet now in the subject. Alternatively, you can have someone in your organization send you such an email.
Confirm the email is in your inbox and it's unread.
Sign into Power Automate.
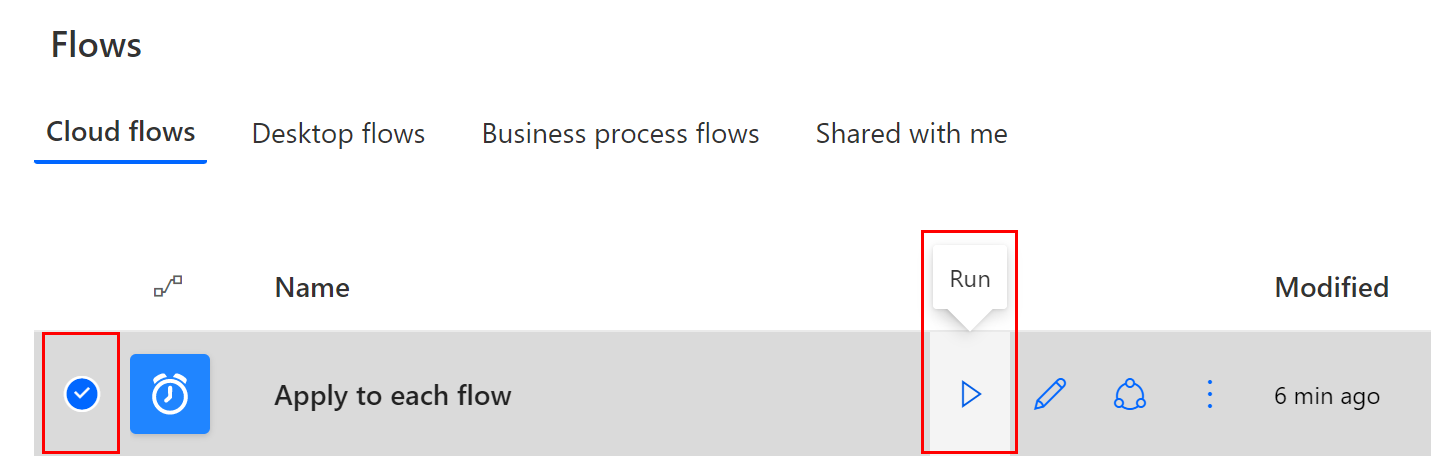
Select My flows. A list of your flows displays.
Place a check in the circle for the flow you just created to select it.
Select the Run icon to the right of the flow name.
On the panel to the right, select Run flow.
When the run flow has successfully started, select Done.
Select the flow run in which you're interested to view the results.
View results of the run
Now that you've run the flow successfully, you should receive the push notification on your mobile device.
Note
If you don't receive the push notification, confirm that your mobile device has a working data connection.
Feedback
Coming soon: Throughout 2024 we will be phasing out GitHub Issues as the feedback mechanism for content and replacing it with a new feedback system. For more information see: https://aka.ms/ContentUserFeedback.
Submit and view feedback for