Project Acoustics Advanced Usage and Debugging
This page describes debugging and advanced topics that apply across all versions of Project Acoustics.
Debug Tips
If you're finding that you're not hearing the effects of Project Acoustics correctly, see the following troubleshooting steps.
- Double check you followed the integration steps for Unreal Audio plugin integration or Unreal/Wwise plugin Integration.
- Check in-game output log for any error messages.
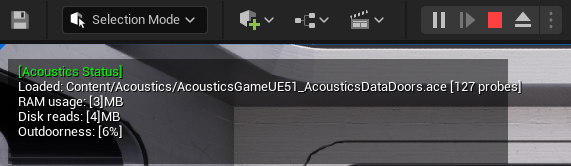
- Ensure your acoustics data file has loaded correctly. You should see no errors in the output log and a success message such as the following. Also, if you enable Draw Stats on the Acoustics Space actor, you should see an ACE file listed in the display at gametime.

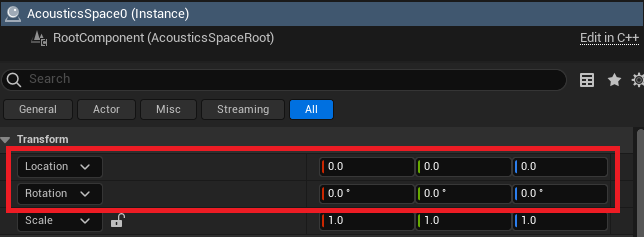
- Ensure your acoustics data file is set up correctly. If you turn on Draw Probes and Draw Voxels, do the probes and voxels line up with the geometry? If they're not aligning or not visible at all, double check that you loaded the correct acoustics data file and that your Acoustics Space actor has the Location and Rotation transforms set to zero.
- See Source Debug Visualizations for further tips on debugging individual sound sources.
Source Debug Visualizations
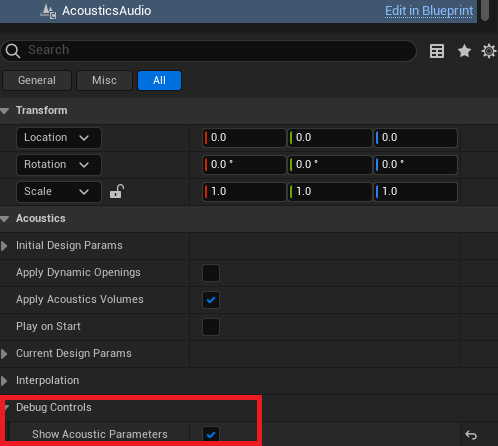
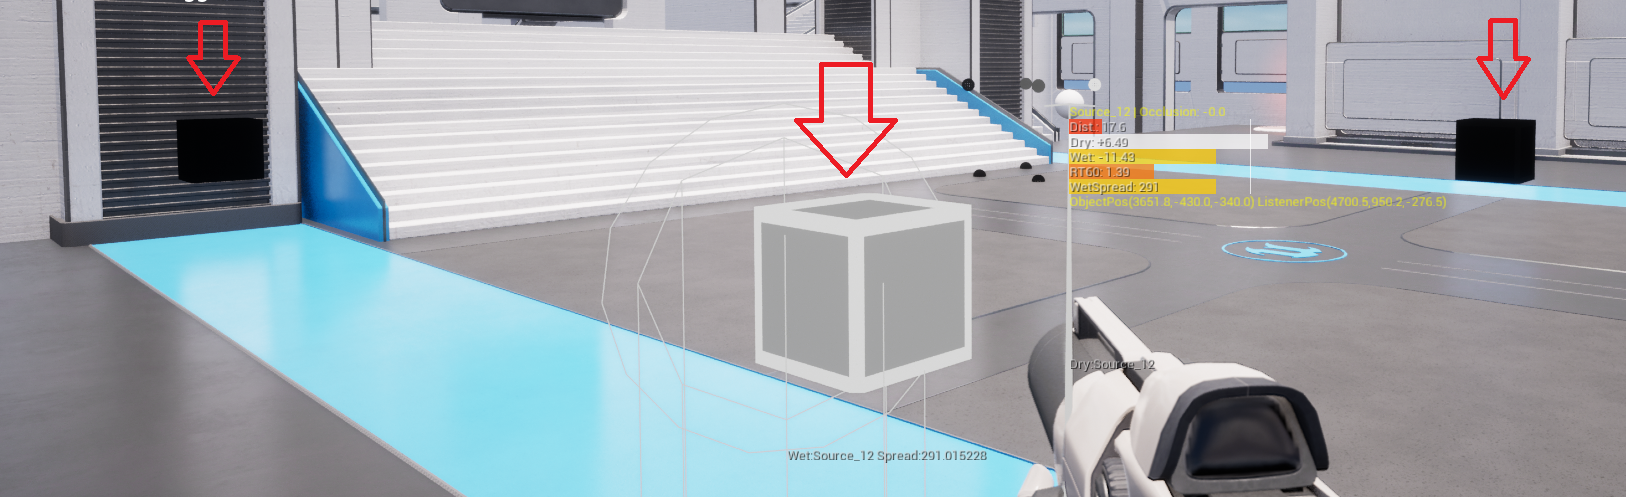
If you ever find that a sound source is not reacting as you expect, the first step is to turn on the debug display. Navigate to the Acoustics Audio component and select Show Acoustic Parameters from the Debug Controls section.
When you next enter play in editor, the results of the acoustic query for that audio component will be displayed in the viewport. If everything is working successfully, you will see acoustic values changing smoothly as you navigate around the space.
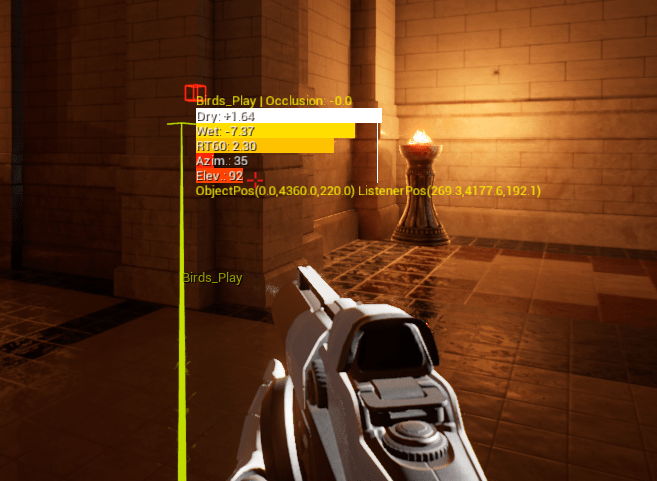
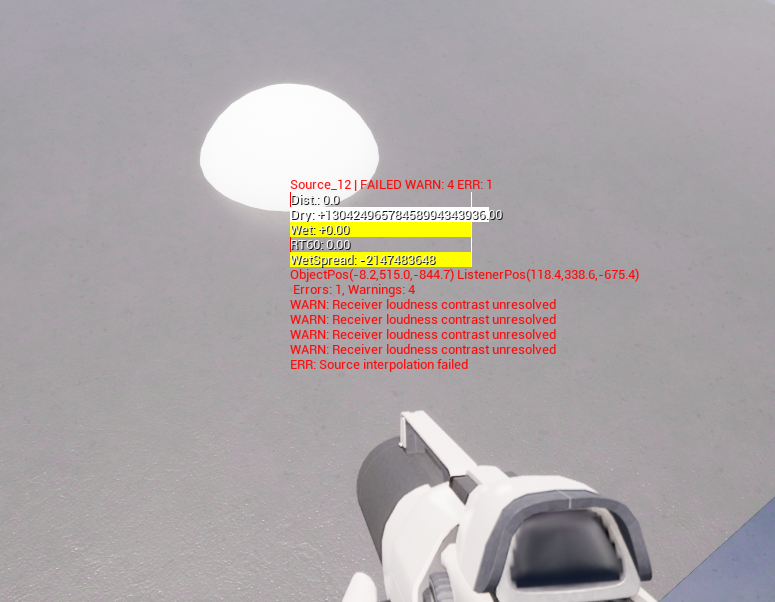
If there are any warnings or errors from the acoustic query, they will be displayed in yellow/red text underneath the parameters. For a full listing of messages and how to react to them, see the following section.
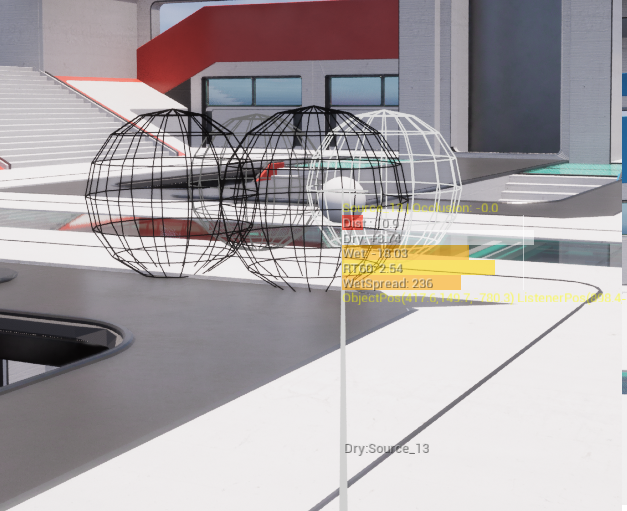
With the debug overlays enabled, you can see the probes that are used during listener interpolation as well as the samples used for source interpolation. The selected probes are displayed as cubes, with their colors representing the weight assigned to each probe. The color progresses from dark, representing small weights, to bright, representing large weights.
The receiver samples are displayed as spheres around the sound source. The spheres will change size depending on how close each sample is to the scene's geometry.
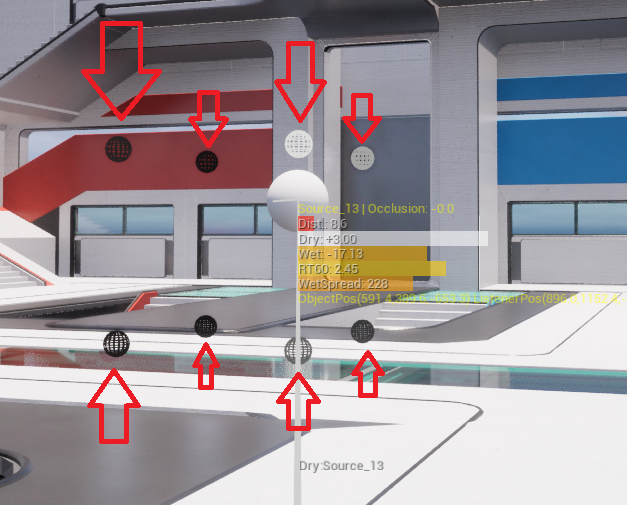
If the samples are far away from geometry, they are a small fixed size to help reduce clutter in the scene. As the samples approach geometry, they grow to the size that the acoustics bake has deemed "safe" to use those samples for interpolation.
Errors returned from acoustic queries
The following is a list of the possible errors and warnings that can be returned from an acoustic query. Acoustic queries happen in two phases. The first phase processes the listener location and the second phase processes the source location. Errors and warnings can arise from either phase.
Errors related to listener location
- Probe interpolation failed - No probe points could be found that will accurately represent the listener location. See accompanying warnings for more information.
Errors related to source location
- Source interpolation failed - No probes were able to produce a result for the sound source location. See accompanying warnings for more information.
Warnings related to listener location
- No probes found near listener location - The listener is too far away from all probe points. Consider re-baking your scene with additional probe points in this area, perhaps by using pinned probes or adding more nav meshes.
- All probes discarded during interpolation - The listener is in the vicinity of probes, but none of them are usable. This is usually because of the listener being too close to geometry. Try nudging the listener away from geometry and trying the query again, or adding more probes in this area and re-baking your scene.
Warnings related to source location
- Receiver loudness contrast unresolved - For the specified sound source location, the surrounding data contain highly dissimilar acoustic parameters. This most likely means the sound source is very near to a piece of geometry. Interpolation failed for the sound source location after applying the chosen interpolation resolution method. Try performing another query using a different interpolation resolver.
- Receiver weights too small - All candidate samples were rejected during the interpolation pass. Try re-baking your scene with a smaller value for receiver spacing.
Interpolation Configuration
Project Acoustics uses a geometry-aware interpolator to ensure both smooth and accurate results as sources and listeners move throughout the scene. Because Project Acoustics operates on a sparse data set, there arise cases where not all the samples surrounding a query location are valid for use during interpolation. In cases where the interpolator is unable to ensure accuracy of the returned result, the acoustic query fails. You should retry such queries with a different interpolation resolver selected. The following are the available interpolation resolvers:
- Default - Use the built-in resolution algorithm. It is tuned for a balance between safety (doesn't accidentally use results across geometric boundaries) and usability (doesn't fail too often).
- None - Do nothing. Fails the query when source locations are too close to geometry.
- Blend - Average all candidate samples. Use with caution - this will cause parameter blending across geometric boundaries which has a high probability of incorrectly (un-)occluding sound sources.
- Nearest - Use the sample closest to the query location.
- Loudest - Use the loudest candidate sample.
- Quietest - Use the quietest candidate sample.
- Push - Use the sample closest to the direction of a provided vector. Must provide the direction to push for each query.
Setting the Interpolation Configuration in Unreal
The interpolation configuration is available via the settings on the Acoustics Audio component. Choose the resolver that is most suited to the sound source's position in the scene.
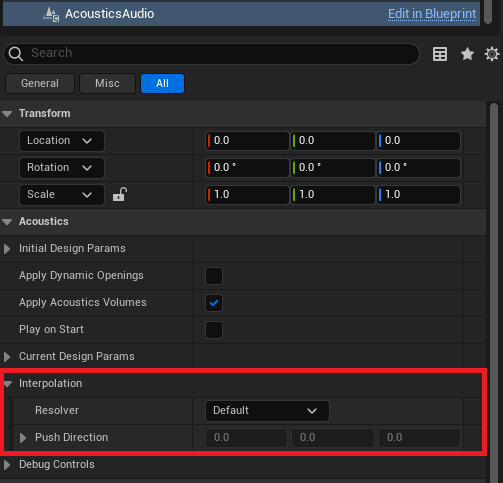
For most sound sources, the default resolver will be sufficient. If using the Push resolver, you must set the Push Direction as well. When using any other resolver, the Push Direction is ignored.