Project Acoustics Unity Sample
Use Project Acoustics sample content for Unity to experiment with simulation-backed design controls.
Software requirements:
- Unity for Windows
- Project Acoustics sample content package
What's included in the sample package?
- Unity scene with geometry, sound sources, and gameplay controls
- Project Acoustics plug-in
- Baked acoustics assets for the scene
Import the sample package
Import the sample package into a new Unity project.
In Unity, go to Assets > Import Package > Custom Package.
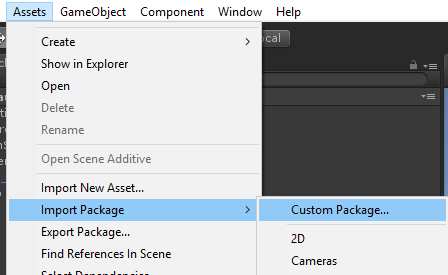
Choose ProjectAcoustics.unitypackage.
Select the Import button to integrate the Unity package into your project.

To import the package into an existing project, see Unity integration for additional steps and notes.
Open the Project Acoustics bake window
In Unity, select Acoustics on the Window menu.
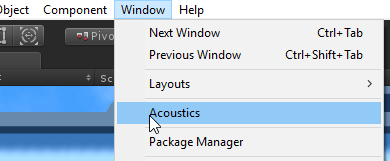
A floating Acoustics window will open. This window is where you set the properties of the acoustic simulation.
Experiment with the design controls
Open the sample scene in the ProjectAcousticsSample folder, and select the play button in the Unity editor. Use the W, A, S, and D keys and the mouse to move around. To compare how the scene sounds with and without acoustics, select the R key until the overlay text turns red and shows "Acoustics: Disabled." To see keyboard shortcuts for more controls, select F1. You can also right-click to select an action and then left-click to do that action.
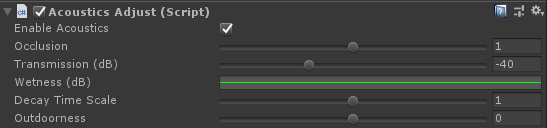
The AcousticsAdjust script is attached to the sound sources in the sample scene. It enables the per-source design parameters.
The following sections explore some of the effects that you can create by using the available controls. For detailed information about each control, see the Project Acoustics Unity Design Tutorial.
Modify distance-based attenuation
The audio digital signal processing in the Project Acoustics Unity spatializer plug-in respects the per-source distance-based attenuation that's built into the Unity editor. The controls for distance-based attenuation are in the Audio Source component, which is in the Inspector panel of sound sources under 3D Sound Settings:
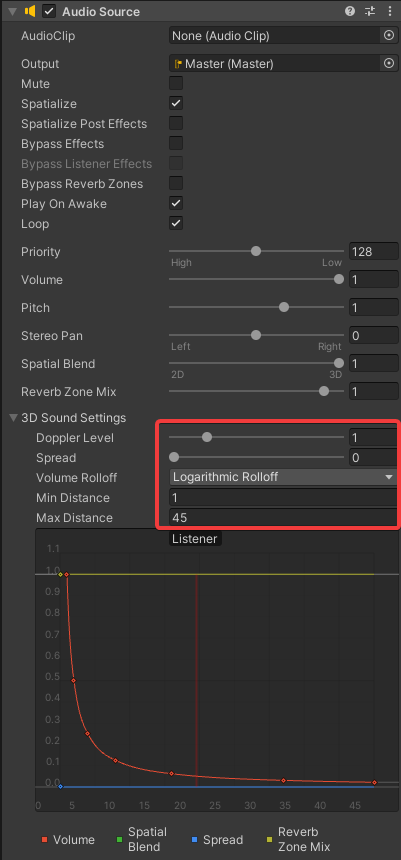
Project Acoustics computes in a "simulation region" box that's centered around the player location. The acoustics assets in the sample package were baked at a simulation region size of 45 meters around the player. So, the sound attenuation should be designed to fall to 0 at about 45 m.
Modify occlusion
- If the Occlusion multiplier is greater than 1 (the default is 1), occlusion is exaggerated. To make the occlusion effect more subtle, set it to less than 1.
Modify wetness for a source
To change how rapidly wetness changes with distance, use Perceptual Distance Warp. Through simulation, Project Acoustics computes wet levels, which provide perceptual distance cues and vary smoothly with distance. Increasing the distance warp exaggerates this effect by increasing distance-related wet levels. Warping values of less than 1 make the distance-based reverberation change more subtle.
To make finer adjustments to this effect, change the Wetness (dB) setting.
To increase the decay time throughout the space, adjust the Decay Time Scale. If the simulation result for a particular source-listener location pair is a decay time of 1.5 seconds and the Decay Time Scale is set to 2, the decay time that's applied to the source is 3 seconds.
Next steps
- Read details on the Unity-based Project Acoustics design controls.
- Further explore the concepts behind the design process.
- Create an Azure account to explore the pre-bake and bake processes.