Setting up PlayFab authentication using Twitch and HTML5
This tutorial has been designed to guide you through the process of PlayFab authentication, using Twitch and HTML5/JavaScript.
Requirements
Prior to beginning, you should have:
- A Twitch Account for testing.
- A Registered PlayFab title.
- Familiarity with Login basics and Best Practices.
- At the minimum, a server with a valid domain name to serve static HTML files.
Note
Consult the Running an HTTP server for testing tutorial for information on how to set up a server with a valid domain name.
Server and domain
This tutorial requires a web server, in order to follow the instructions. If you do not have a registered remote web server yet, please follow our Running an HTTP server for testing tutorial, for information on how to run a local web server.
Note
Throughout this tutorial, we will assume your domain is [http://localhost/](http://localhost/).
Registering a Twitch application
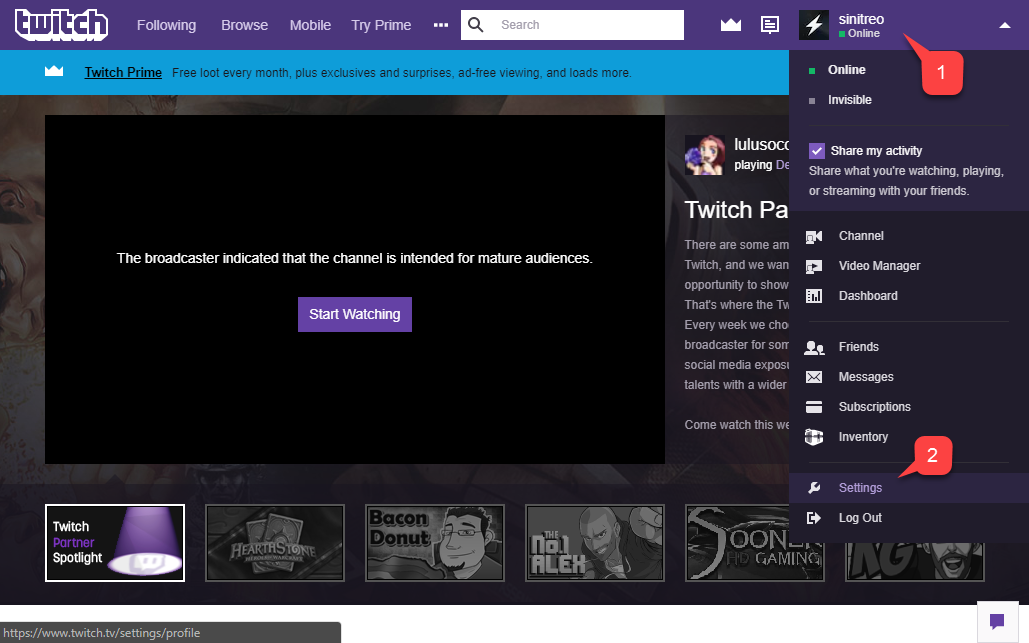
Start by navigating to the Twitch website, and verifying that you are logged in.
- Navigate to the Account drop-down.
- Select Settings from the menu provided.
On the Settings page, select Connections (1), as shown below.

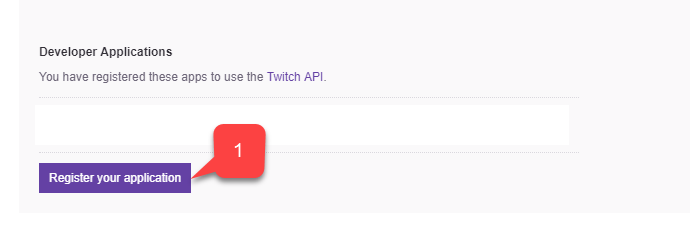
At the very bottom of the page, select the Register your application (1) button, as shown below.
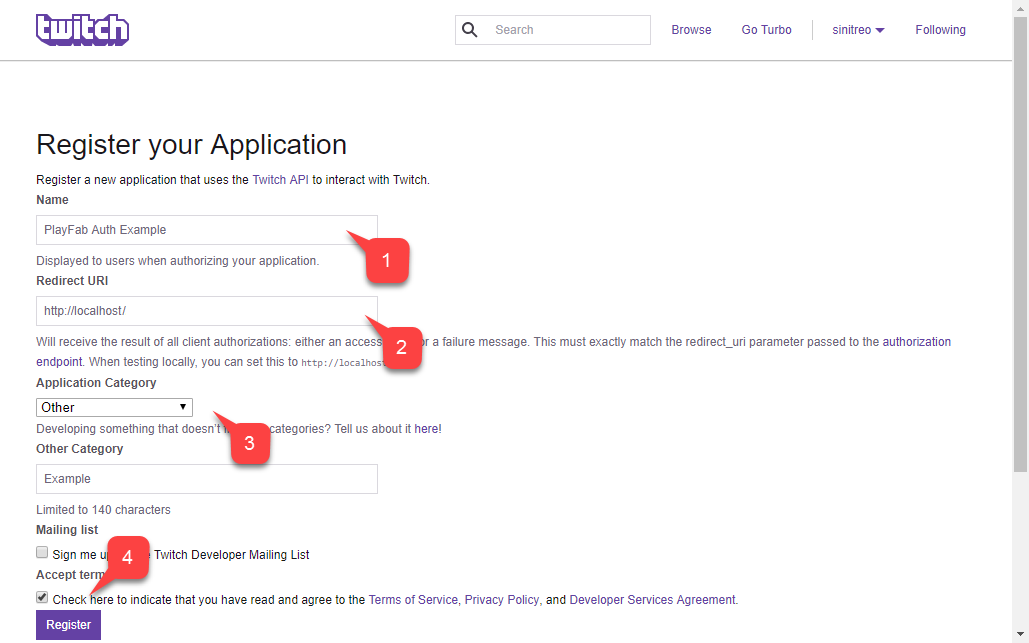
A page will open that lets you configure a new app.
- Fill in the Name of the Application.
- Enter the Redirect URL.
- Enter the Application Category.
- Then agree to the Twitch terms, and select the Register button.
Important
When testing using a local web server, Twitch allows you to use **<http://localhost>** as a redirect URL. Make sure to include the leading slash /. Without a leading slash, Twitch will fail to recognize the localhost URL.
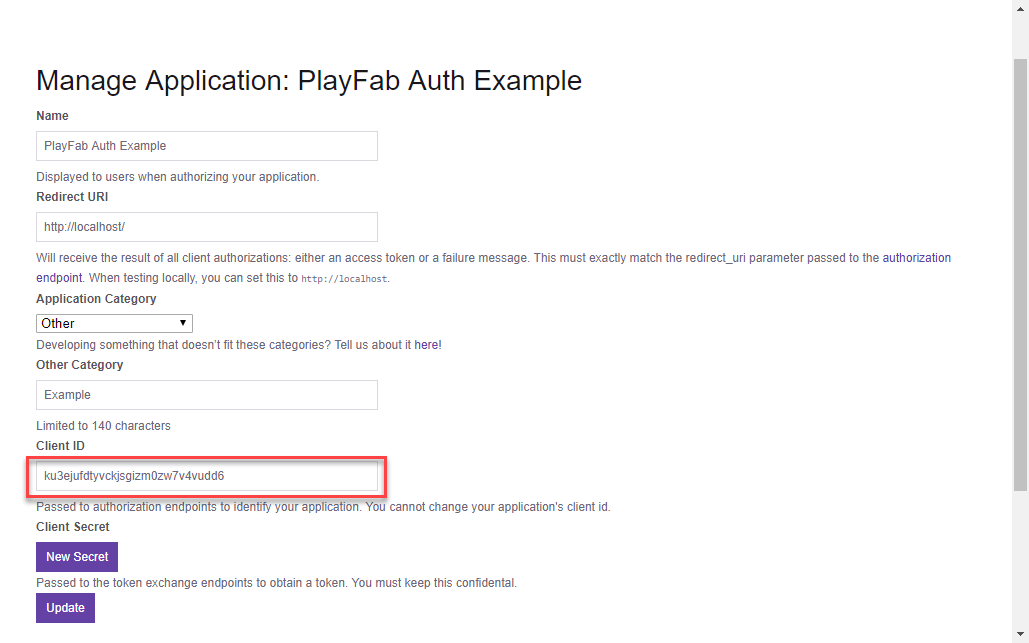
Once the application is registered, the page will be updated and reveal the Client ID for your application.
Note
Keep this Client ID in a safe and easily accessible place, as you will be using it later to configure your PlayFab title.
Configuring a PlayFab title
Once you acquire your Twitch Client ID, you may enable and configure a Twitch Add-on for your PlayFab title.
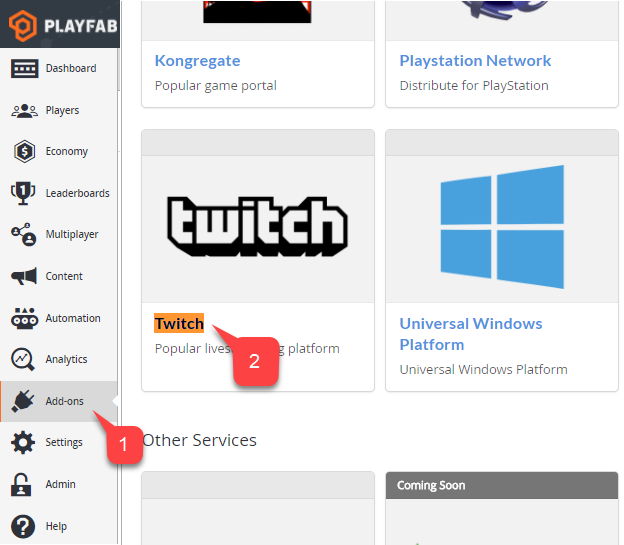
- On your PlayFab Title screen, go to the menu and select the Add-ons item.
- Then select the Twitch icon link.
On the Twitch page:
- A Settings page will open for the Twitch Add-on.
- Enter your Twitch Client ID.
- Select the Install Twitch button.
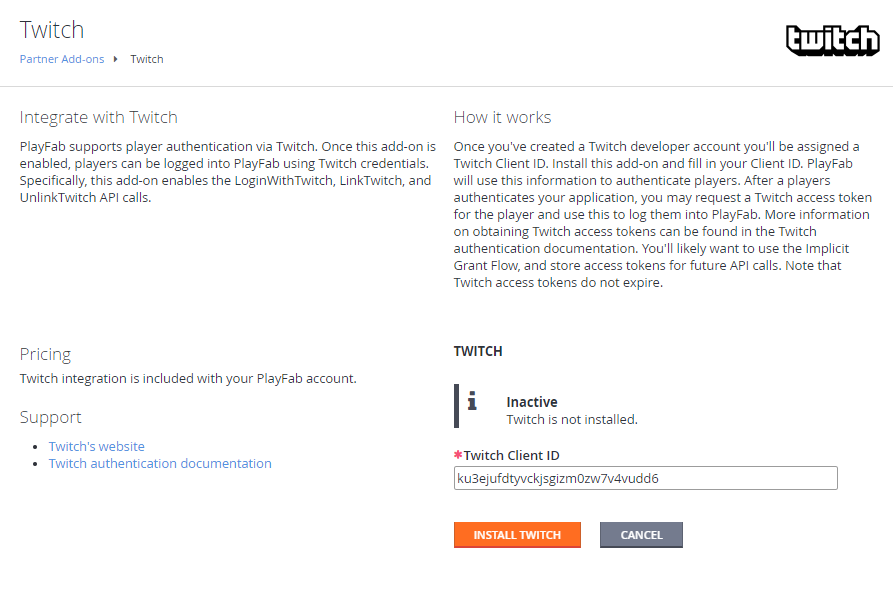
Take a moment to verify that the add-on was installed, and that no errors have occurred. This concludes configuring the PlayFab title.
Testing
Use the following HTML file to test PlayFab authentication using Twitch.
Make sure to replace TWITCH_CLIENT_ID_GOES_HERE and PLAYFAB_TITLE_ID_GOES_HERE with your own values.
<!DOCTYPE html>
<html>
<head>
    <!-- Include JQuery - dependency of Twitch JS SDK -->
    <script src="//code.jquery.com/jquery.min.js"></script>
    <!-- Include Twitch SDK -->
    <script src="https://ttv-api.s3.amazonaws.com/twitch.min.js"></script>
    <!-- Include PlayFab SDK -->
    <script src="https://download.playfab.com/PlayFabClientApi.js"></script>
</head>
<body>
    <p>Twitch Auth Example</p>
    <button onclick="login()">Login With Twitch</button>
    <script>
        // Establish Twitch Auth Callback (invoked when logged in with Twitch)
        Twitch.events.addListener('auth.login', function() {
            logLine("Logged in with Twitch!");
            // Invoke login with PlayFab code and pass the token
            loginWithPlayFab(Twitch.getToken());
        });

        // Run Twitch SDK initialization
        Twitch.init({clientId: 'TWITCH_CLIENT_ID_GOES_HERE'}, function(error, status) {
            logLine("Twitch SDK Initialized");
        });

        // This method is invoked when you press the button

        function login() {
            logLine("Logging in via Twitch...");
            Twitch.login({
                scope: ['user_read', 'channel_read']
            });
        }

        function loginWithPlayFab(accessToken){
            logLine("Logging in via PlayFab...");

            // When given accessToken, make call to LoginWithTwitch API Call
            // Make sure to use your own PlayFab Title ID
            PlayFabClientSDK.LoginWithTwitch({
                AccessToken: accessToken,
                TitleId: "PLAYFAB_TITLE_ID_GOES_HERE",
                CreateAccount: true
            }, onPlayFabResponse);
        }

        // Handles response from playfab.
        function onPlayFabResponse(response, error) {
            if (response)
                logLine("Response: " + JSON.stringify(response));
            if (error)
                logLine("Error: " + JSON.stringify(error));
        }

        function logLine(message) {
        console.log(message);
            var textnode = document.createTextNode(message);
            document.body.appendChild(textnode);
            var br = document.createElement("br");
            document.body.appendChild(br);
        }
    </script>
</body>
</html>
Request the following file from your server, using the domain you set up during the Twitch application configuration
<http://localhost>in our case.Once the page opens, wait for the message indicating that the Twitch SDK was initialized.
Then select the Login with Twitch button.
Follow any Twitch instructions in the pop-up window, and watch the output.
Important
If you already have a Twitch auth session going when reaching the page, it is possible for callbacks to fire in a different, unexpected order. This case is shown in the screenshot shown below. However, you should make sure that only Logging in via PlayFab follows after Logged in with Twitch. This indicates that the token was received or restored from the local storage, and we do not have to wait for the Twitch SDK to start signing in to PlayFab.
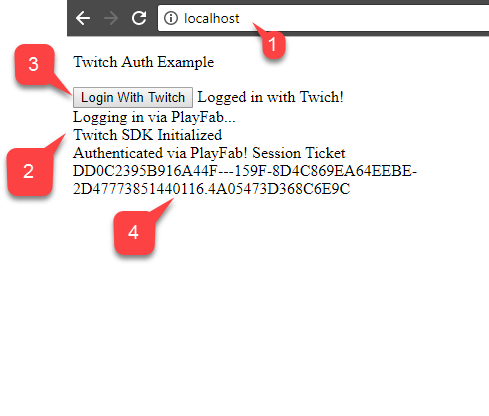
If PlayFab manages to acquire a SessionTicket, you have successfully integrated Twitch authentication with your PlayFab app.
Feedback
Coming soon: Throughout 2024 we will be phasing out GitHub Issues as the feedback mechanism for content and replacing it with a new feedback system. For more information see: https://aka.ms/ContentUserFeedback.
Submit and view feedback for