Extend your Azure AI Health Bot with Conversational Language Understanding
Conversational language understanding is the next generation of Language Understanding (LUIS). It comes with state-of-the-art language models that understand the utterance's meaning and capture word variations, synonyms, and misspellings while being multilingual. It also automatically orchestrates bots powered by conversational language understanding, question answering, and classic LUIS.
When creating a Conversational Language Understanding model, you'll need a Cognitive Service for Language account and the connection information for your Conversational Language Understanding endpoint.
Important
This tutorial gives you a high level overview on how to create your first Conversational Language Understanding project. For a full and extended tutorial you can find more info here
Create your first Conversational Language Understanding project
Sign in to the Language Studio with your Azure credentials.
Go to Understand questions and conversational language tab and select Open Conversational language understanding.
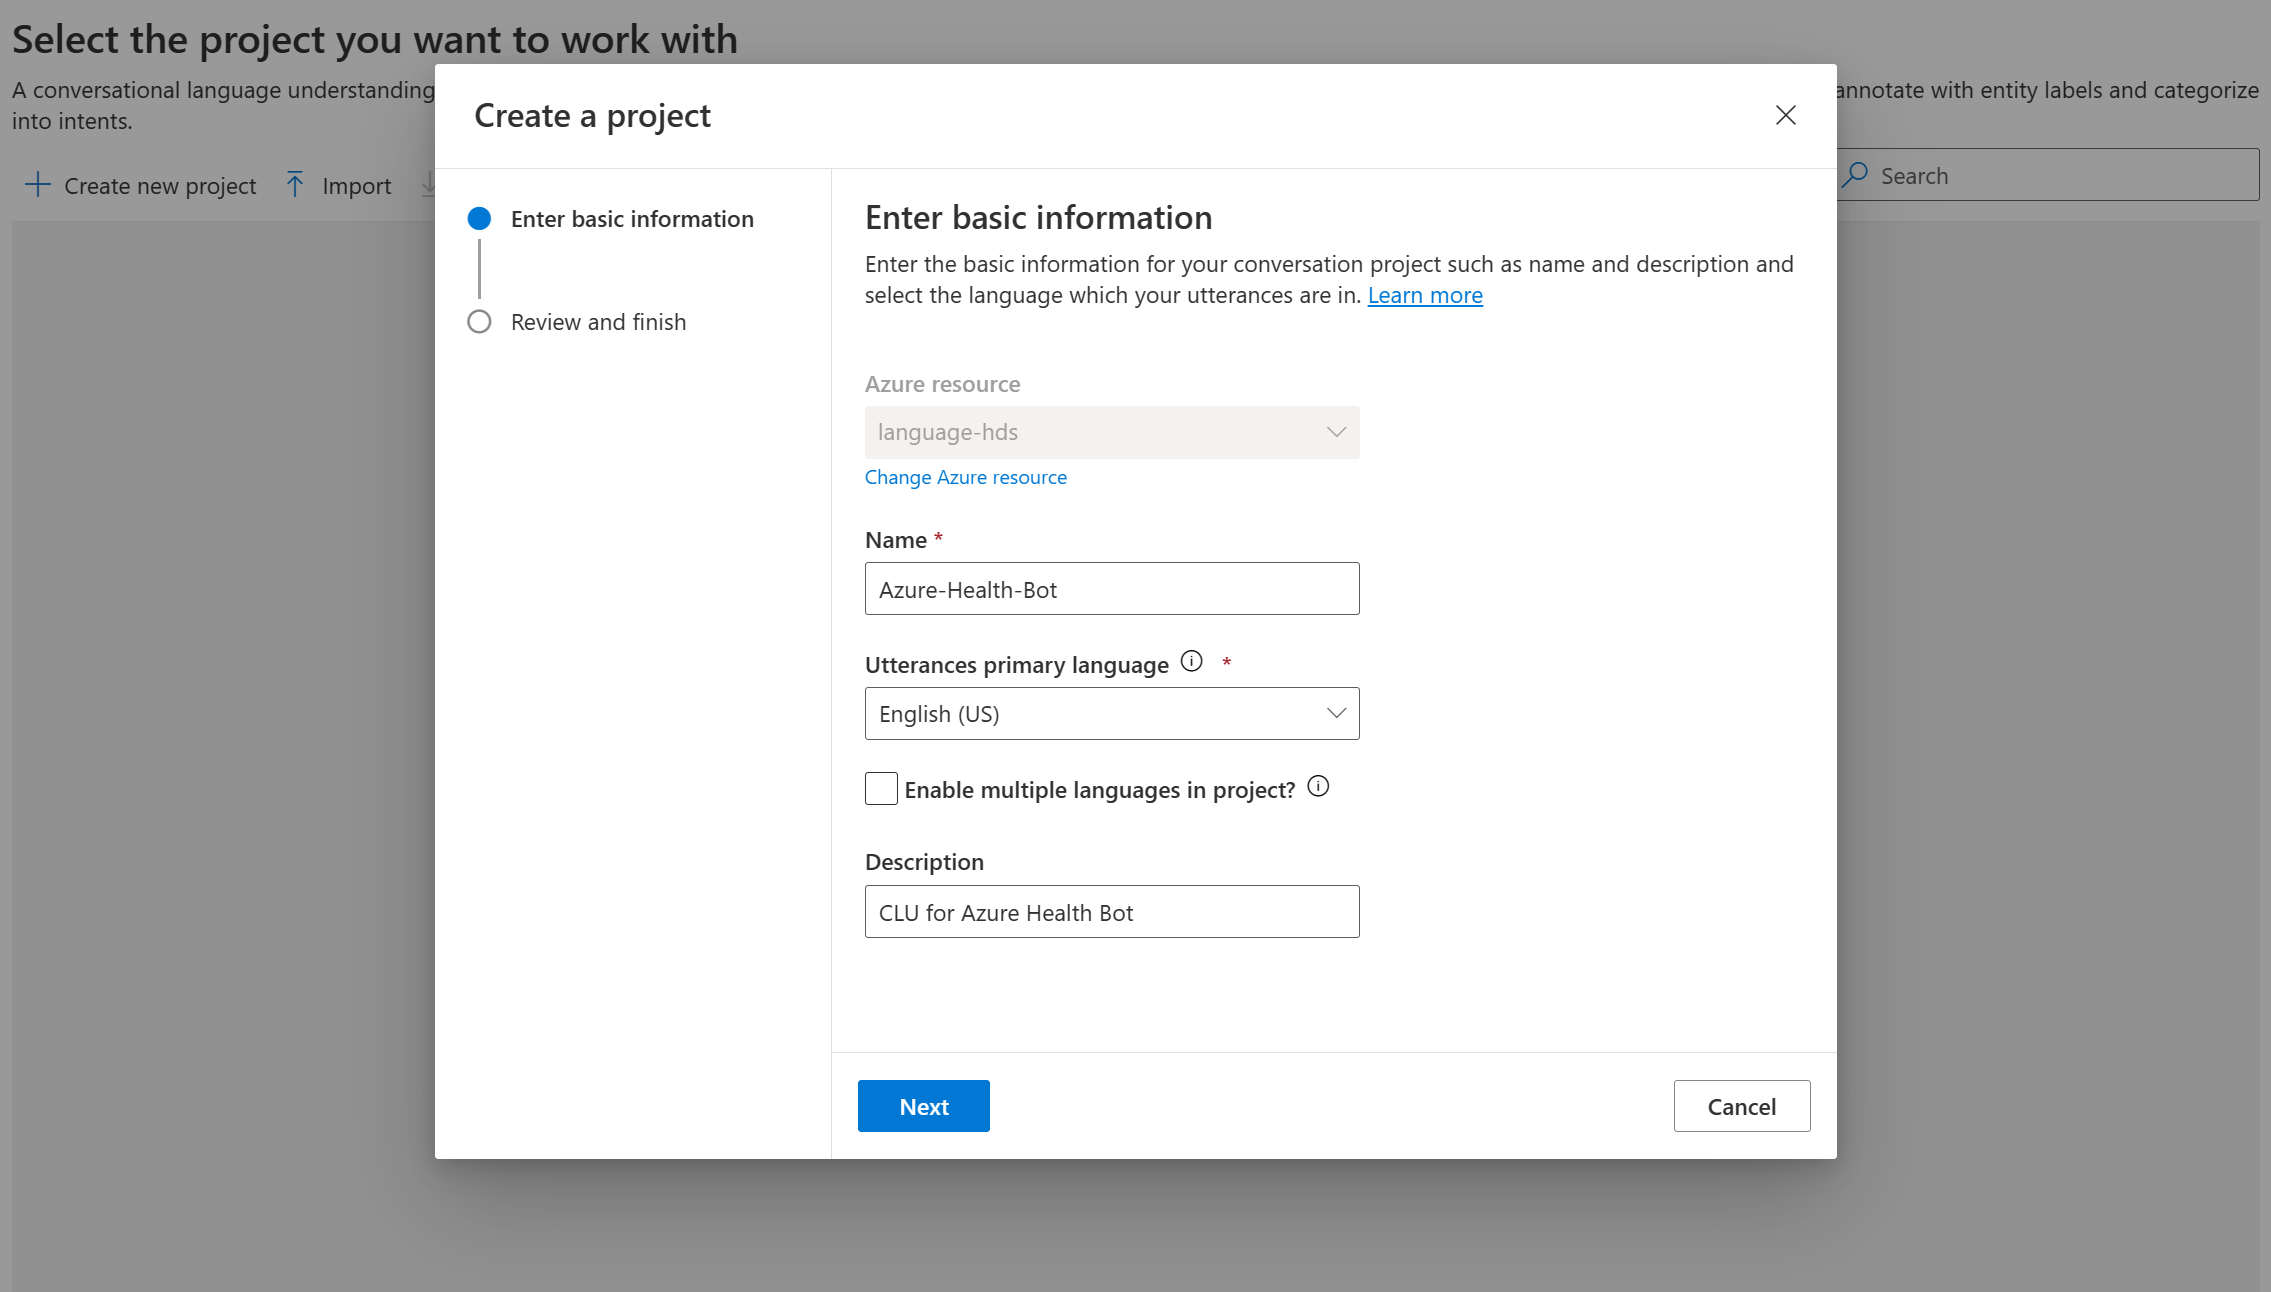
Select Create new project and enter basic information such as your project name, the primary utterance language (you can enable more languages if needed) and an optional description. Hit Next and select on Create
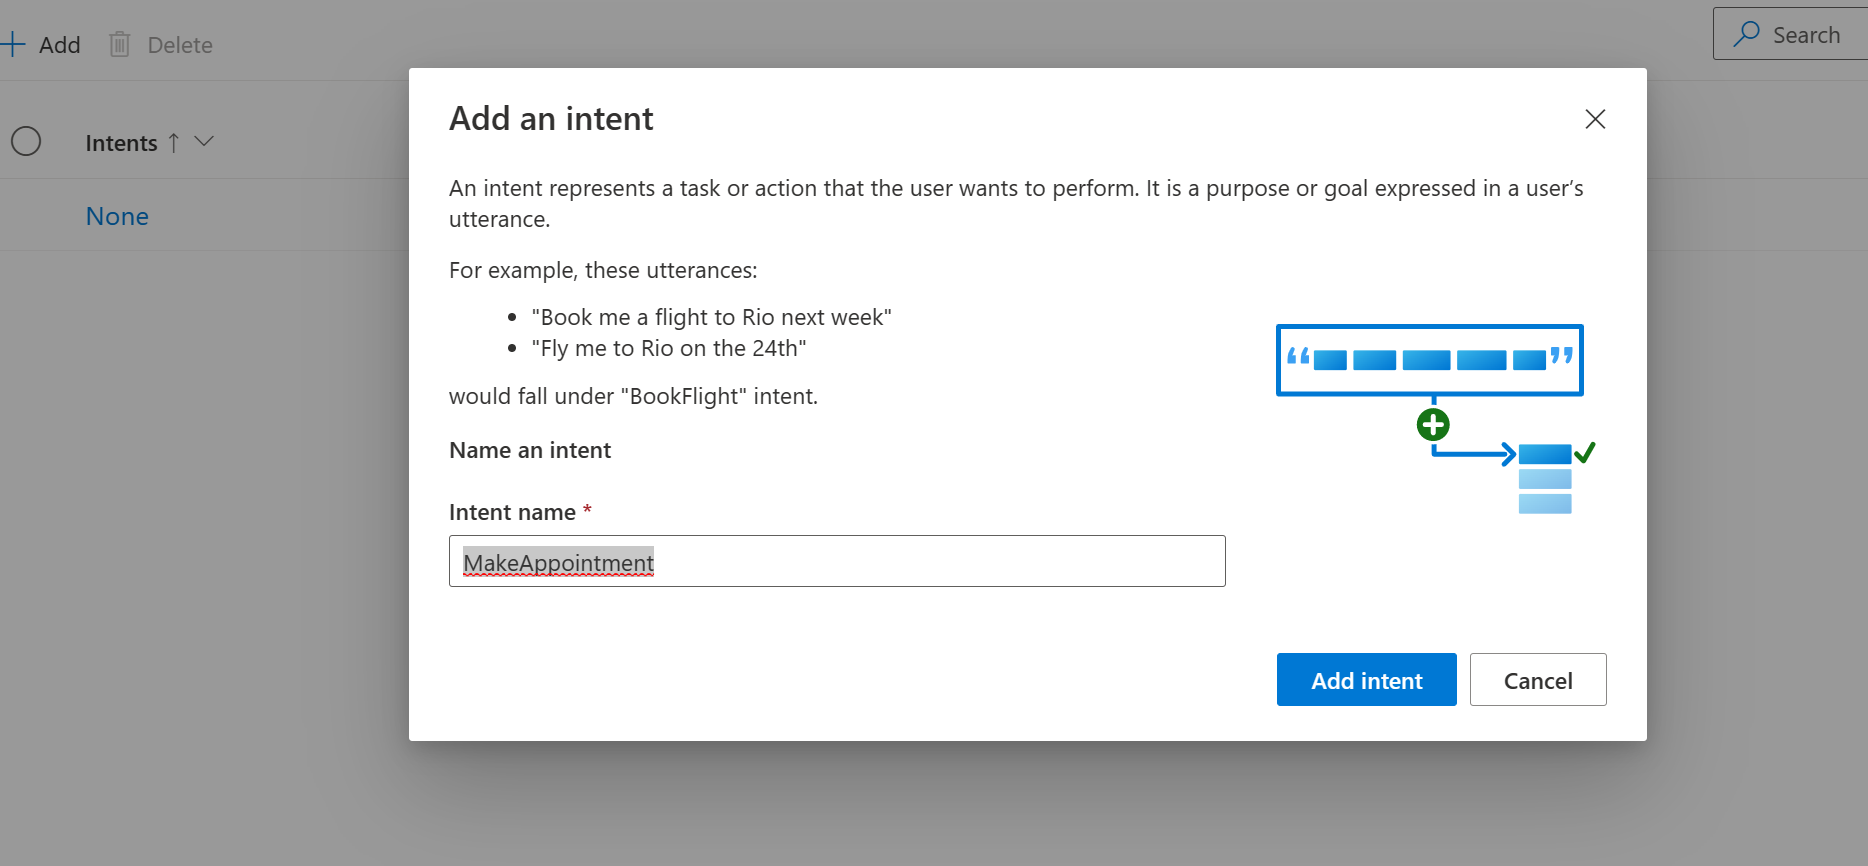
- The Conversational Language Understanding project works with Intents and Entities. Let us create a new Intent to make an appointment. Select on Add and fill in an intent name, such as MakeAppointment and select Add intent
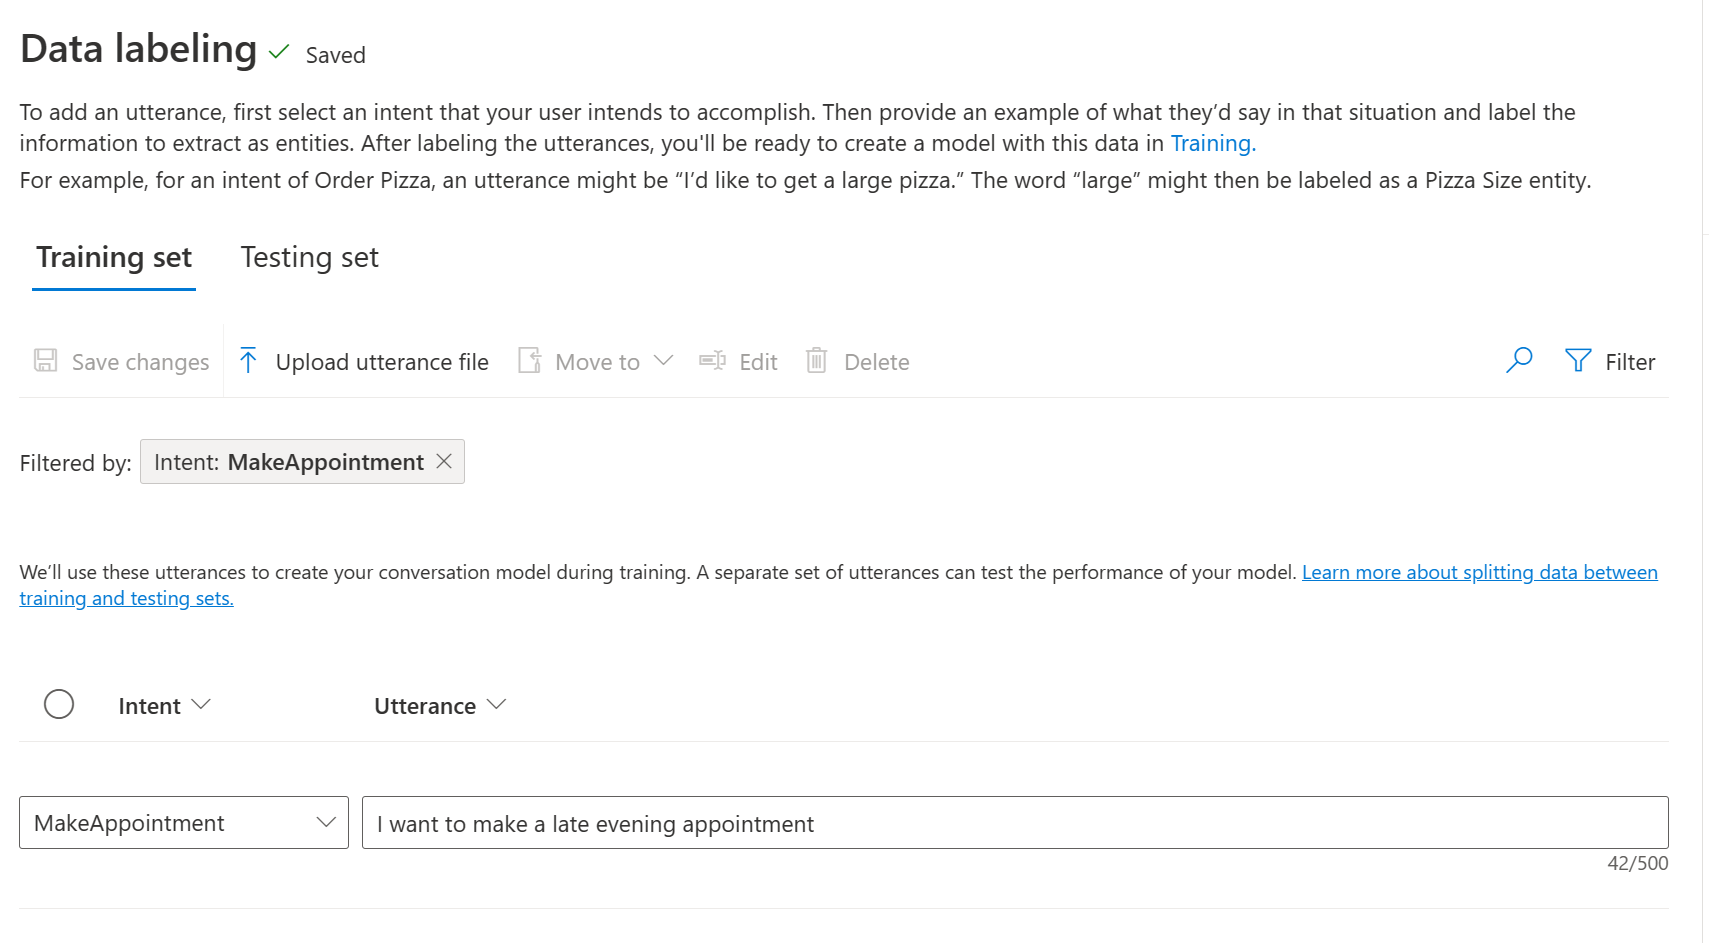
- Select the name of the new intent, navigate to the dropdown where you see Select intent, select your intent, in this case MakeAppointment and write an example utterance such as
I want to make a late evening appointmentand hit Enter
- Add a minimal of 15 sentences to have a good basic model, some examples sentences could be:
- I need an emergency appointment
- Can I setup a routine appointment
- I want to have a telephone appointment
- I would like to have a dentist appointment
- Could you help get a late evening appointment
- What is the next routine appointment I can get?
- What is the next appointment availability for the general practioner
- I want an appointment as soon as possible
- I have a minor ilness, can I have an appointment
- Is there room for an appointment next week with the nurse?
- Can I have an on-site appointment with the specialist
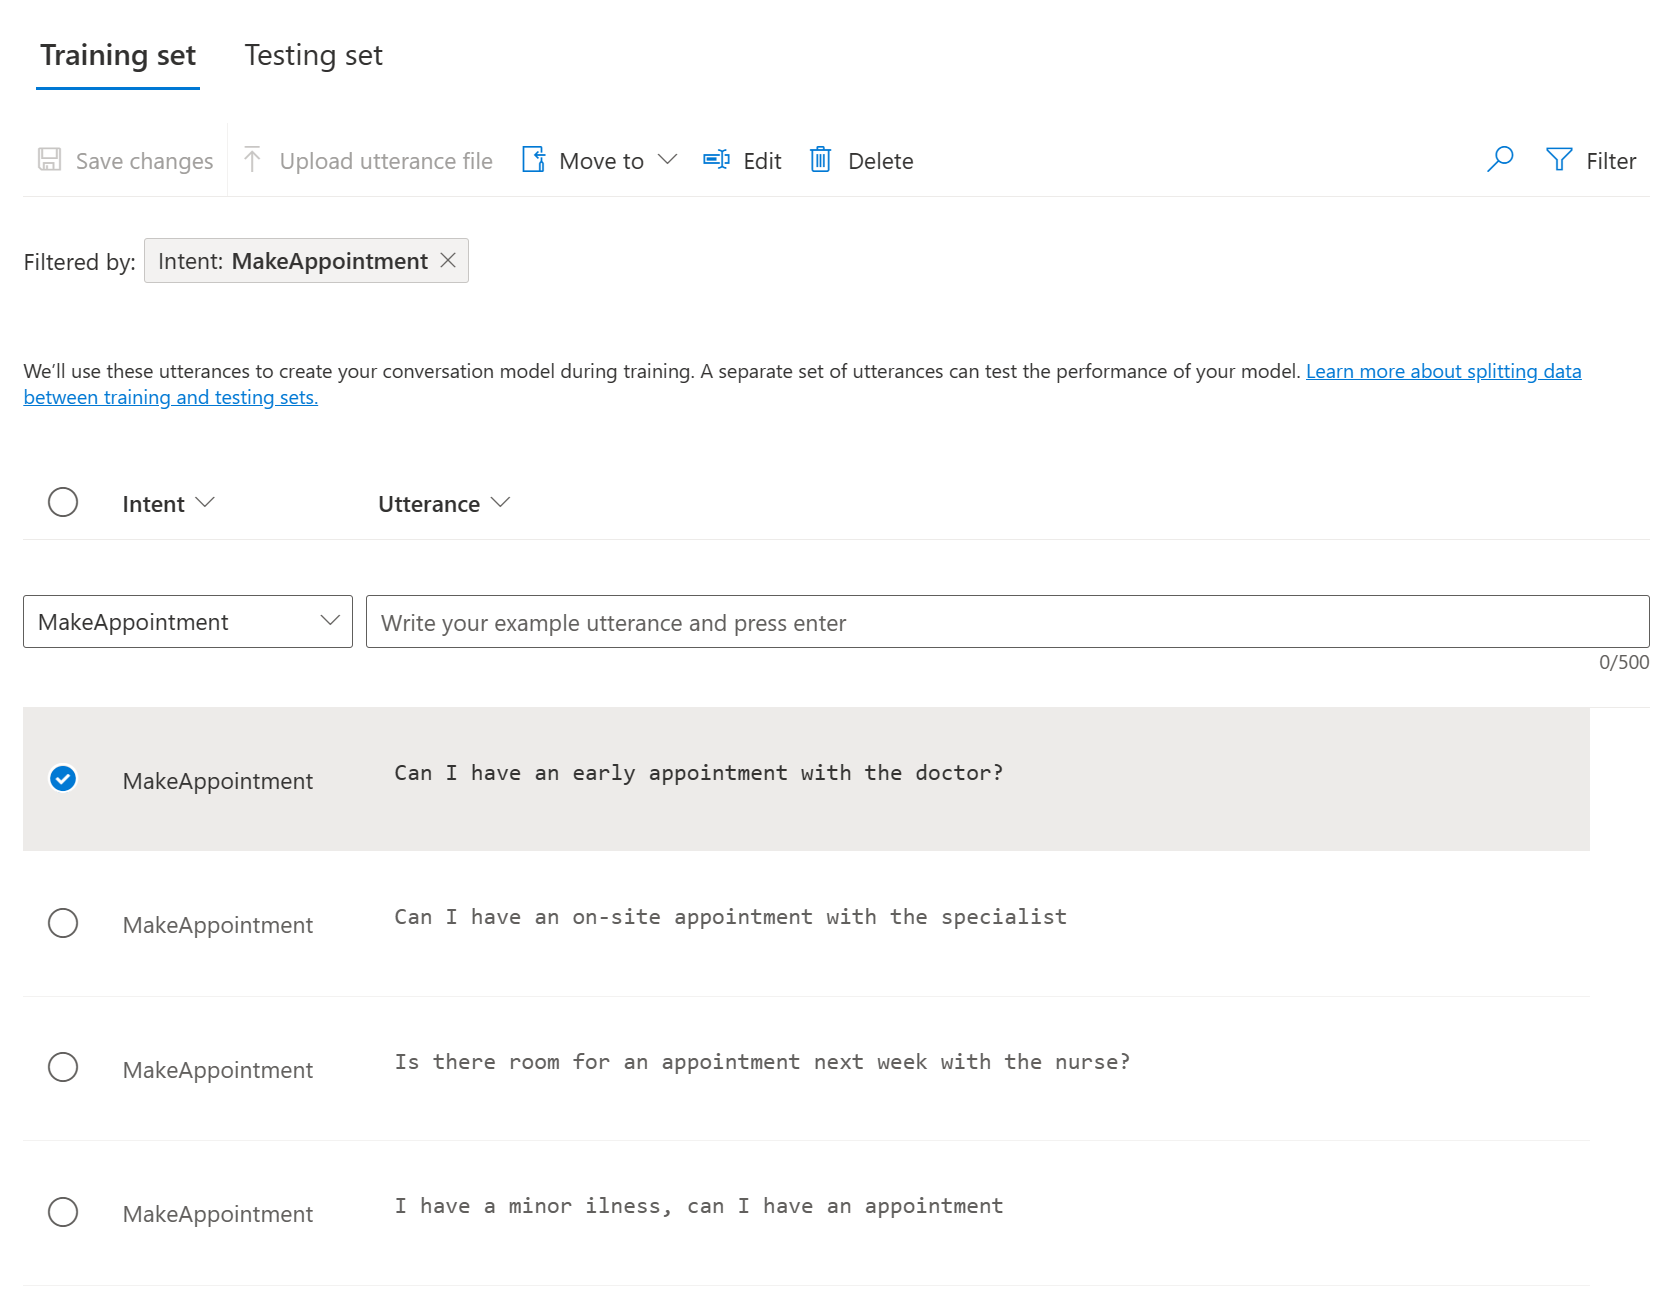
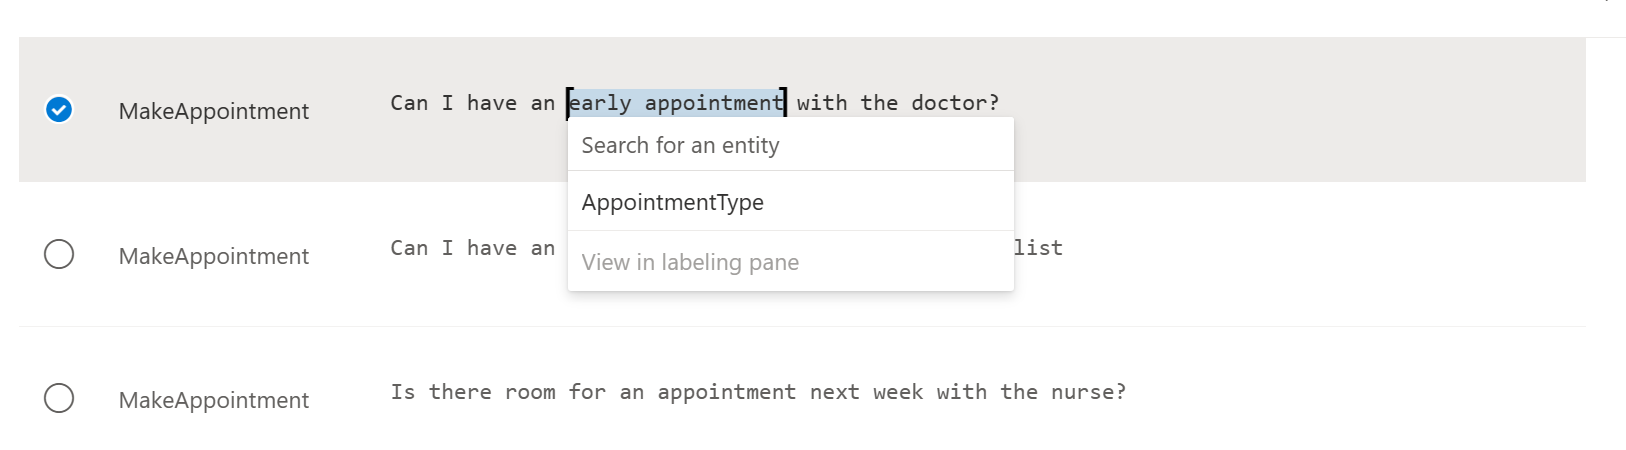
- Can I have an early appointment with the doctor?
You should have something like this:
- You can also start adding entities, by clicking on Add entity on the right side. Provide a name, such as
AppointmentTypeand select Add Entity. Then you can select the appointment types in every sentence and select your entity.
For every sentence, select the correct appointment type and select Save changes
- To enhance the model, you can select Testing Set on the top of the page and create a test batch. We won't be doing that in this tutorial.
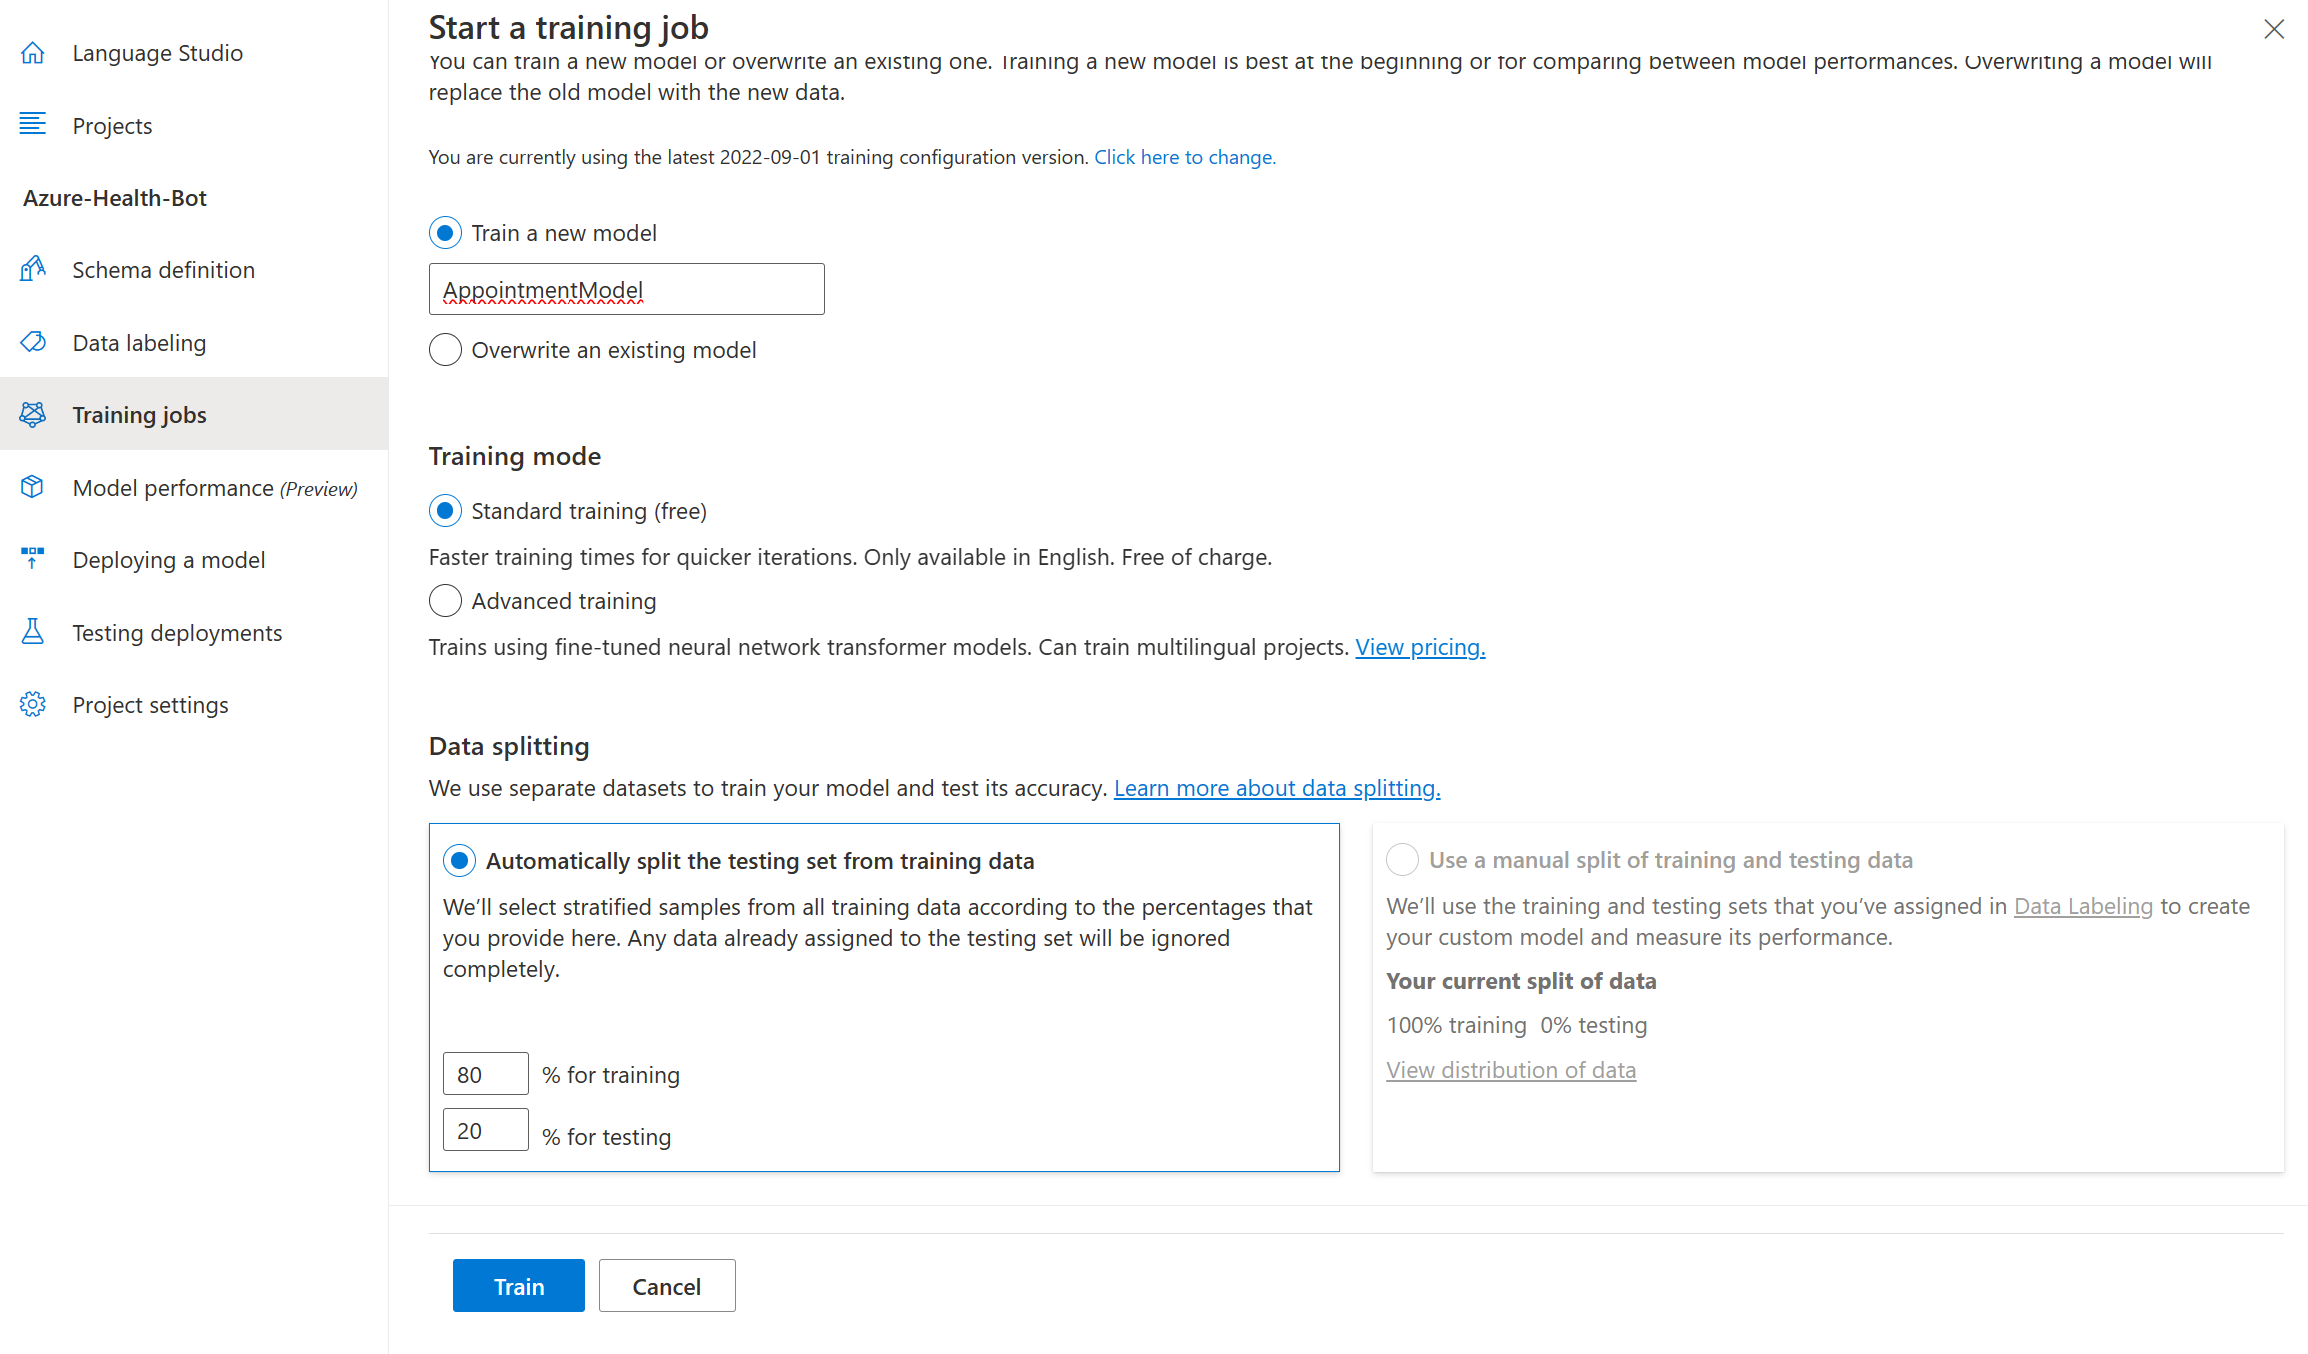
Train your model
- The next step is to start a training job. select Training jobs on the left side and navigate to Start a training job
Give a new name, lets call it
AppointmentModel, leave standard traning(free) select and the same for Data splitting and hit the Train button.
- Wait until the training is complete and then navigate to Deploying a model.
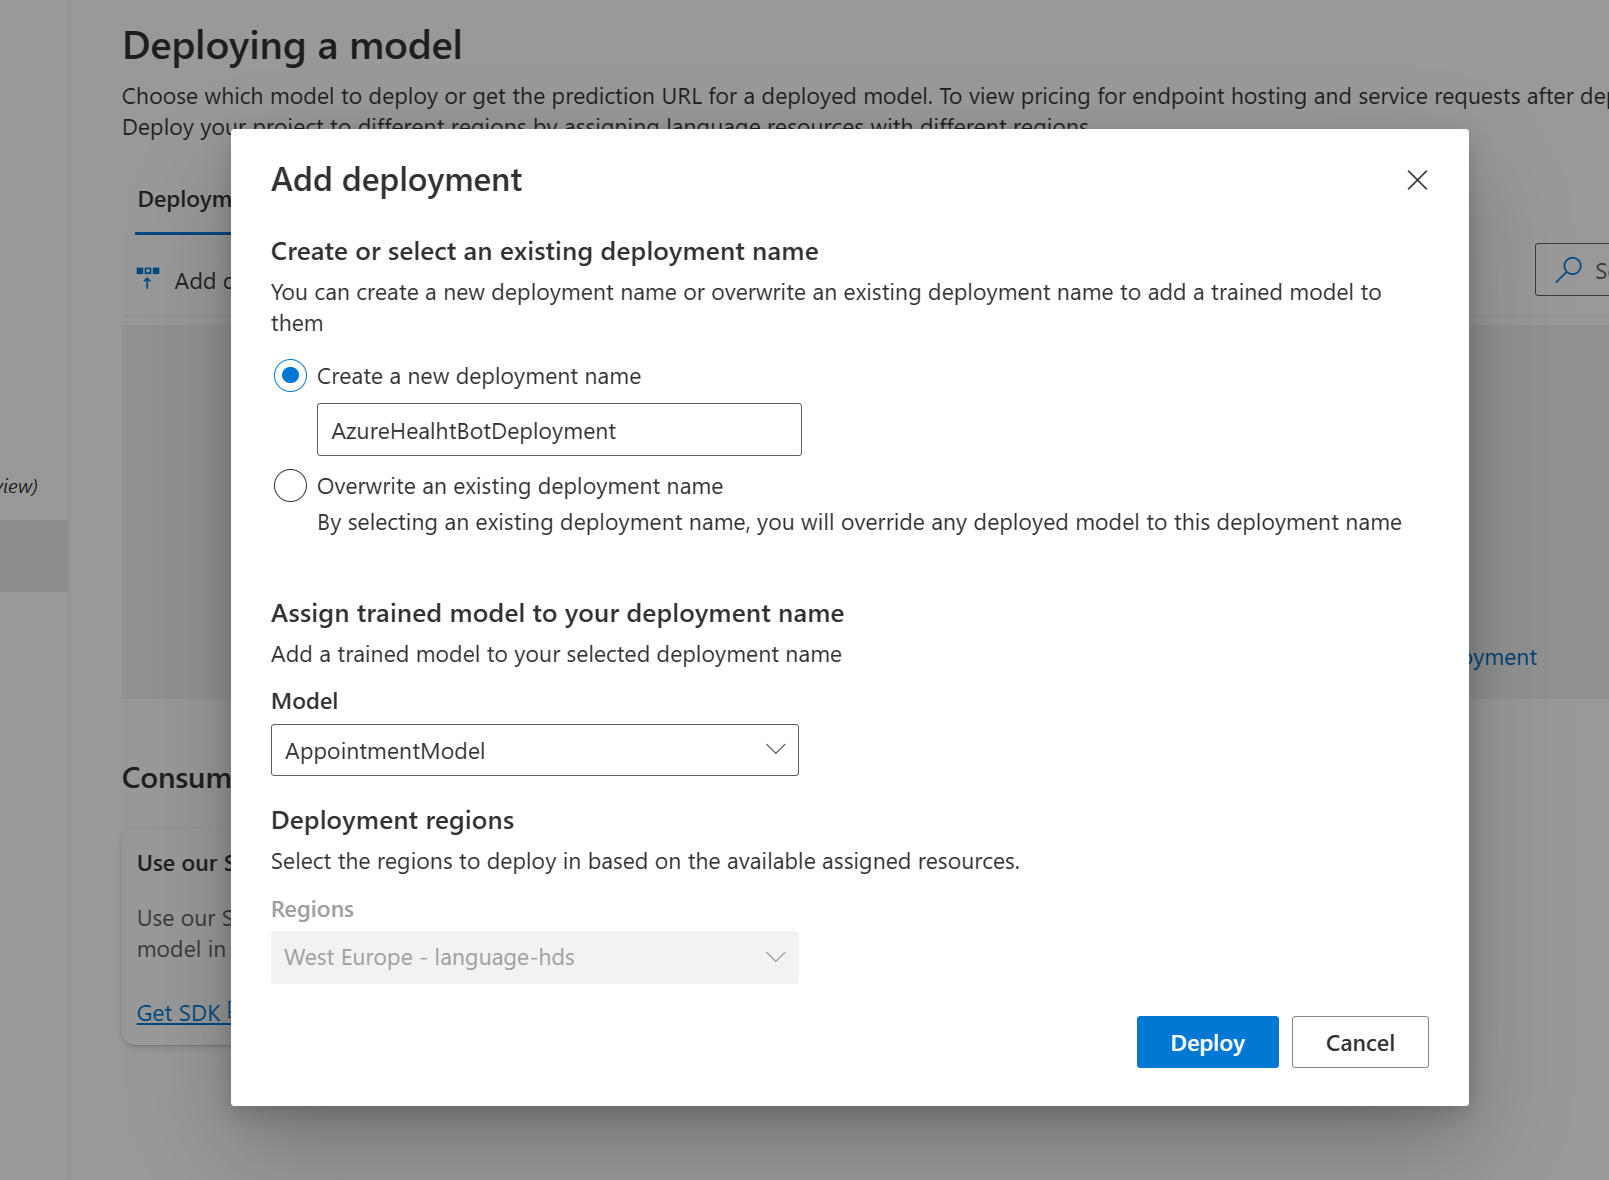
Deploy your model
- we need to add a new deployment, so we can access the model from the Azure AI Health Bot. Select Add Deployment and enter a new deployment name. in this case we're going to use
AzureHealhtBotDeployment, select your trained model and hit Deploy
- When the model is deployed, select on the newly created deployment and select Get Prediction Url, you can now use this information to link to your Azure AI Health Bot.
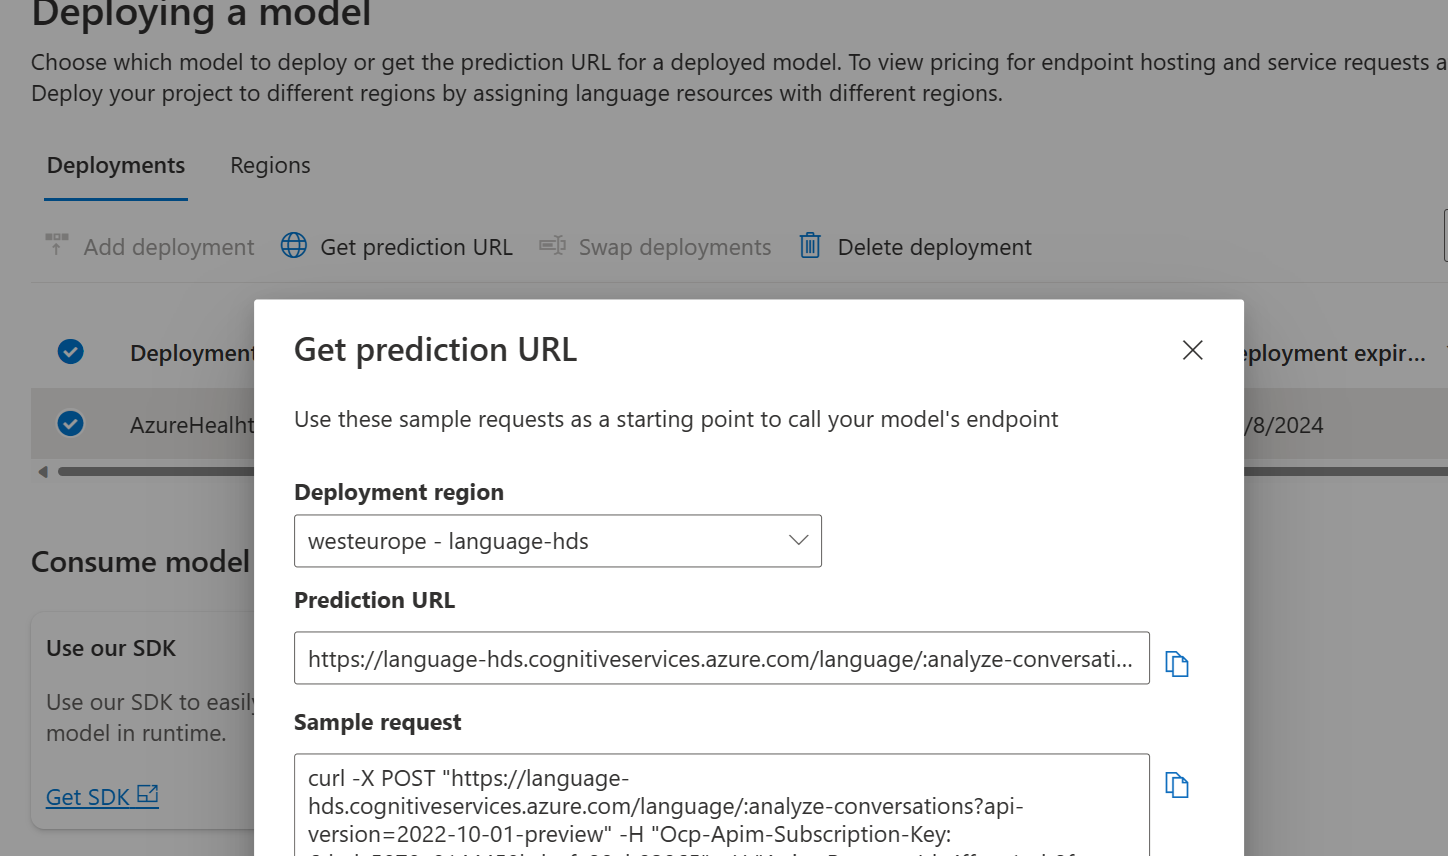
Go to your Azure AI Health Bot
Go to Language -> Models -> Add New Language Model
Select Method -> Conversational Language Understanding
Copy all the Prediction URL parameters.
- Method: Conversational Language Understanding
- Endpoint: The endpoint of your instance
- Subscription: Your Subscription Key
- Project Name: The name of your Question Answer Project
- Deployment Name: The name of your deployment
- Api Version: The Api version of your deployment.

map the intent of the Conversational Language Understanding to your relevant scenario and hit Create
See your new Conversational Language Understanding model on Language Models page

- Test your chat – ask the one of the questions from your Knowledge Base like:
I need an appointment with the dentist
