Use Windows 10/11 templates to configure group policy settings in Microsoft Intune
Administrative Templates in Microsoft Intune include thousands of settings that control features in Microsoft Edge version 77 and later, Internet Explorer, Google Chrome, Microsoft Office programs, remote desktop, OneDrive, passwords, PINs, and more. These settings allow administrators to create group policies using the cloud.
This feature applies to:
- Windows 11
- Windows 10
The Intune templates are 100% cloud-based, are built in to Intune (no downloading), and don't require any customizations, including using OMA-URI. They offer a straight-forward way to configure the settings, and find the settings you want:
The Windows settings are similar to group policy (GPO) settings in on-premises Active Directory (AD). These settings are built in to Windows, and are ADMX-backed settings that use XML.
The Office, Microsoft Edge, and Visual Studio settings are ADMX-ingested, and use the same administrative template files that you would download in on-premises environments.
You can import custom and third party ADMX and ADML files. For more information, including the steps, go to Import custom or partner ADMX files.
When managing devices in your organization, you want to create groups of settings that apply to different device groups. You also want a simple view of the settings you can configure. You can complete this task using Administrative Templates in Microsoft Intune.
As part of your mobile device management (MDM) solution, use these template settings as a one-stop shop to manage your Windows client devices.
This article lists the steps to create a template for Windows client devices, and shows how to filter all the available settings in Intune. When you create the template, it creates a device configuration profile. You can then assign or deploy this profile to Windows client devices in your organization.
Before you begin
Some of these settings are available starting with Windows 10 version 1709 (RS2/build 15063). Some settings aren't included in all the Windows editions. For the best experience, we suggest using Windows 10 Enterprise version 1903 (19H1/build 18362) and newer.
The Windows settings use the Windows policy CSPs. The CSPs work on different editions of Windows, such as Home, Professional, Enterprise, and so on. To see if a CSP works on a specific edition, go to Windows policy CSPs.
There are two ways to create an administrative template: Using a template, or using the Settings Catalog. This article focuses on using the Administrative Templates template. The Settings Catalog has more Administrative Template settings available.
For the specific steps to use the Settings Catalog, and how to use Microsoft Copilot in the settings catalog, go to Use the settings catalog to configure settings.
The ADMX templates use the following sources:
- Azure Virtual Desktop Terminal Server: Administrative template for Azure Virtual Desktop
- FSLogix: FSLogix Group Policy template files for FSLogix
- Google Chrome: Chrome Enterprise policy list
- Microsoft 365 apps and Office: Microsoft 365 Apps, Office 2019, and Office 2016
- Microsoft Edge: Microsoft Edge policy file
- OneDrive: OneDrive policies to control sync settings - policy list
- Visual Studio: Visual Studio Administrative Templates (ADMX)
- Windows: Built in to the Windows client OS.
- Windows Subsystem for Linux: Windows Subsystem for Linux
Create the template
Sign in to the Microsoft Intune admin center.
Select Devices > Configuration > Create.
Enter the following properties:
- Platform: Select Windows 10 and later.
- Profile type: To use a logical grouping of settings, select Templates > Administrative Templates. To see all the settings, select Settings catalog.
Select Create.
In Basics, enter the following properties:
- Name: Enter a descriptive name for the profile. Name your profiles so you can easily identify them later. For example, a good profile name is ADMX: Windows 10/11 admin template that configures xyz settings in Microsoft Edge.
- Description: Enter a description for the profile. This setting is optional, but recommended.
Select Next.
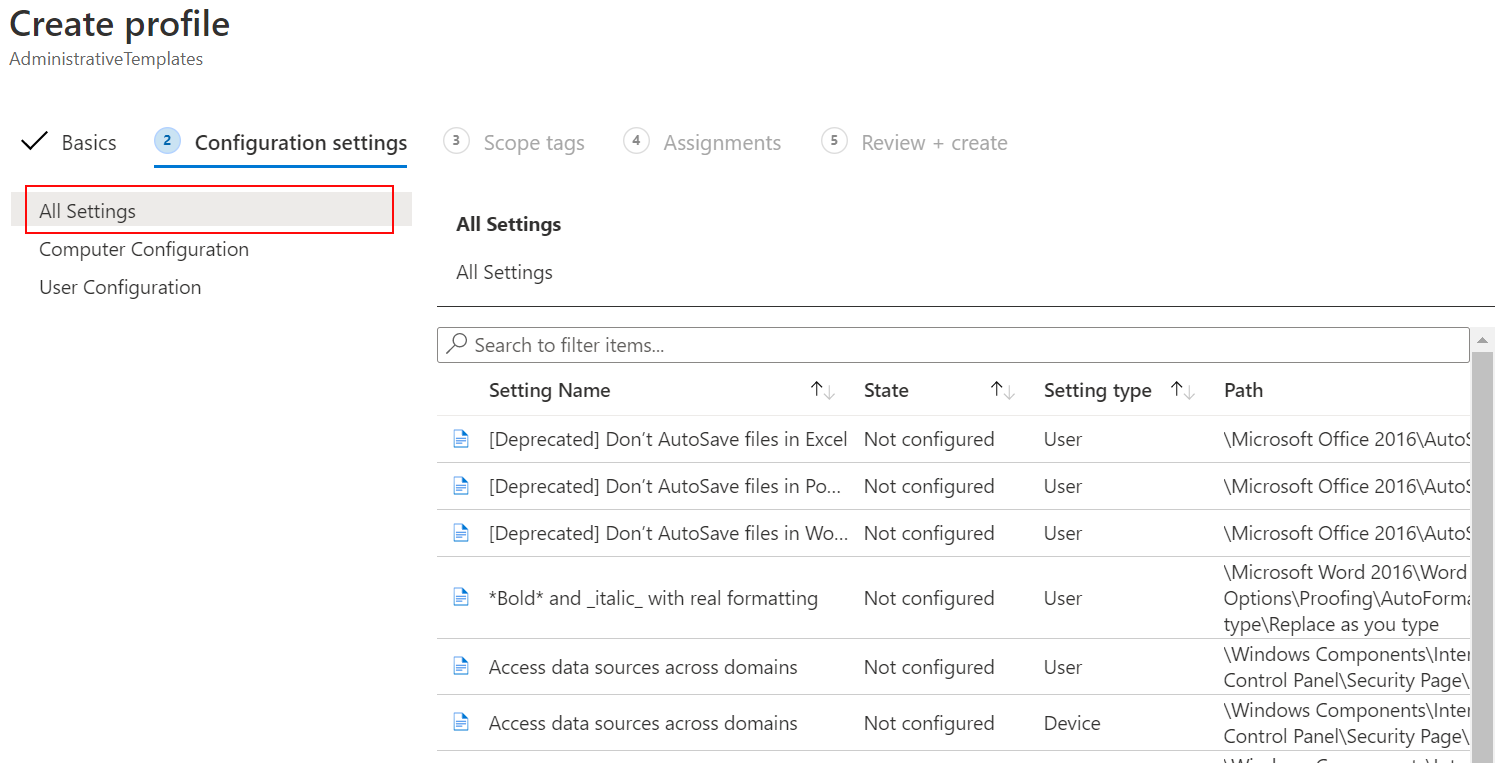
In Configuration settings, select All settings to see an alphabetical list of all the settings. Or, configure settings that apply to devices (Computer configuration), and settings that apply to users (User configuration):
Note
If you're using the Settings catalog, then select Add settings, and expand Administrative Templates. Select any setting to see what you can configure.
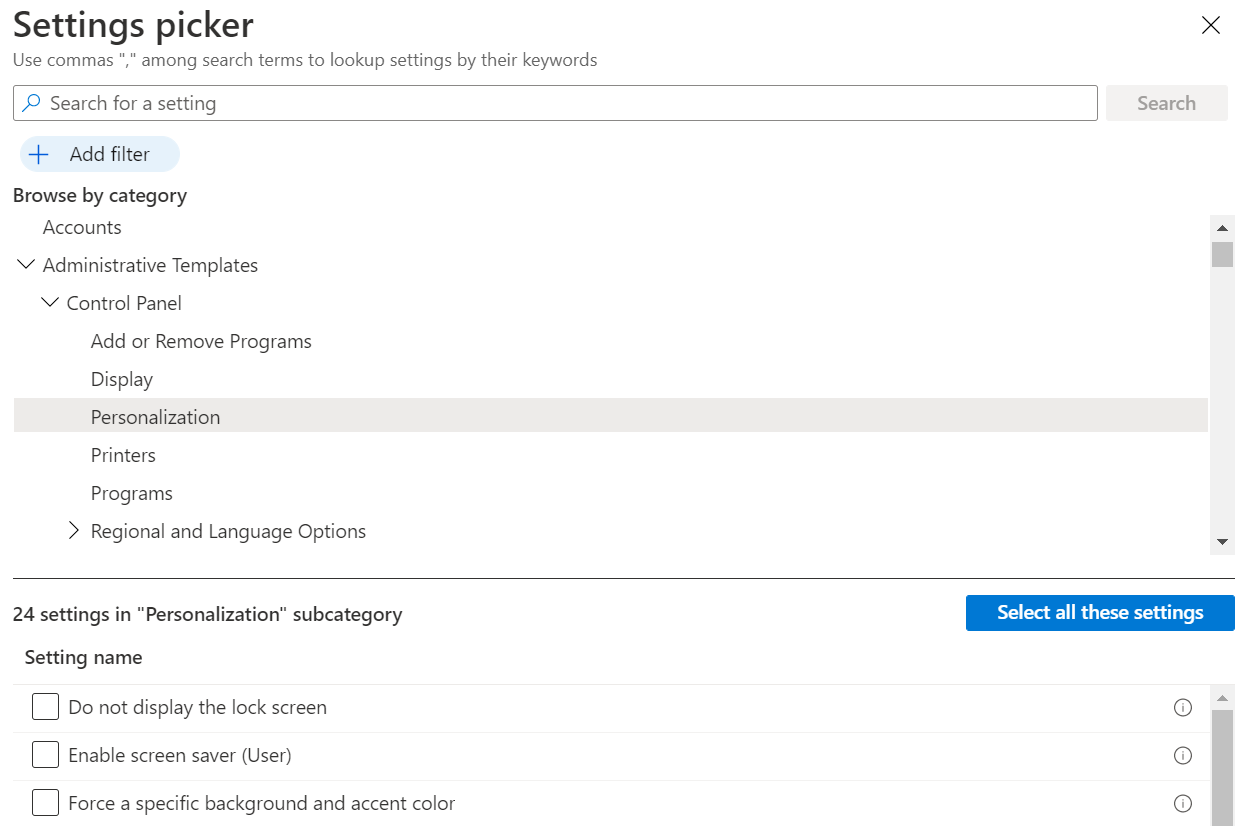
For more information on creating policies using the Settings Catalog, go to Use the settings catalog to configure settings.
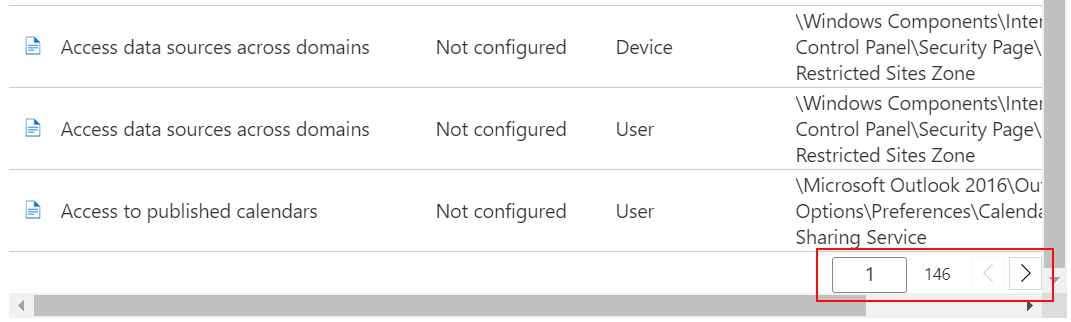
When you select All settings, every setting is listed. Scroll down to use the before and next arrows to see more settings:
Select any setting. For example, filter on Office, and select Activate Restricted Browsing. A detailed description of the setting is shown. Choose Enabled, Disabled, or leave the setting as Not configured (default). The detailed description also explains what happens when you choose Enabled, Disabled, or Not configured.
Tip
The Windows settings in Intune correlate to the on-premises group policy path you see in Local Group Policy Editor (
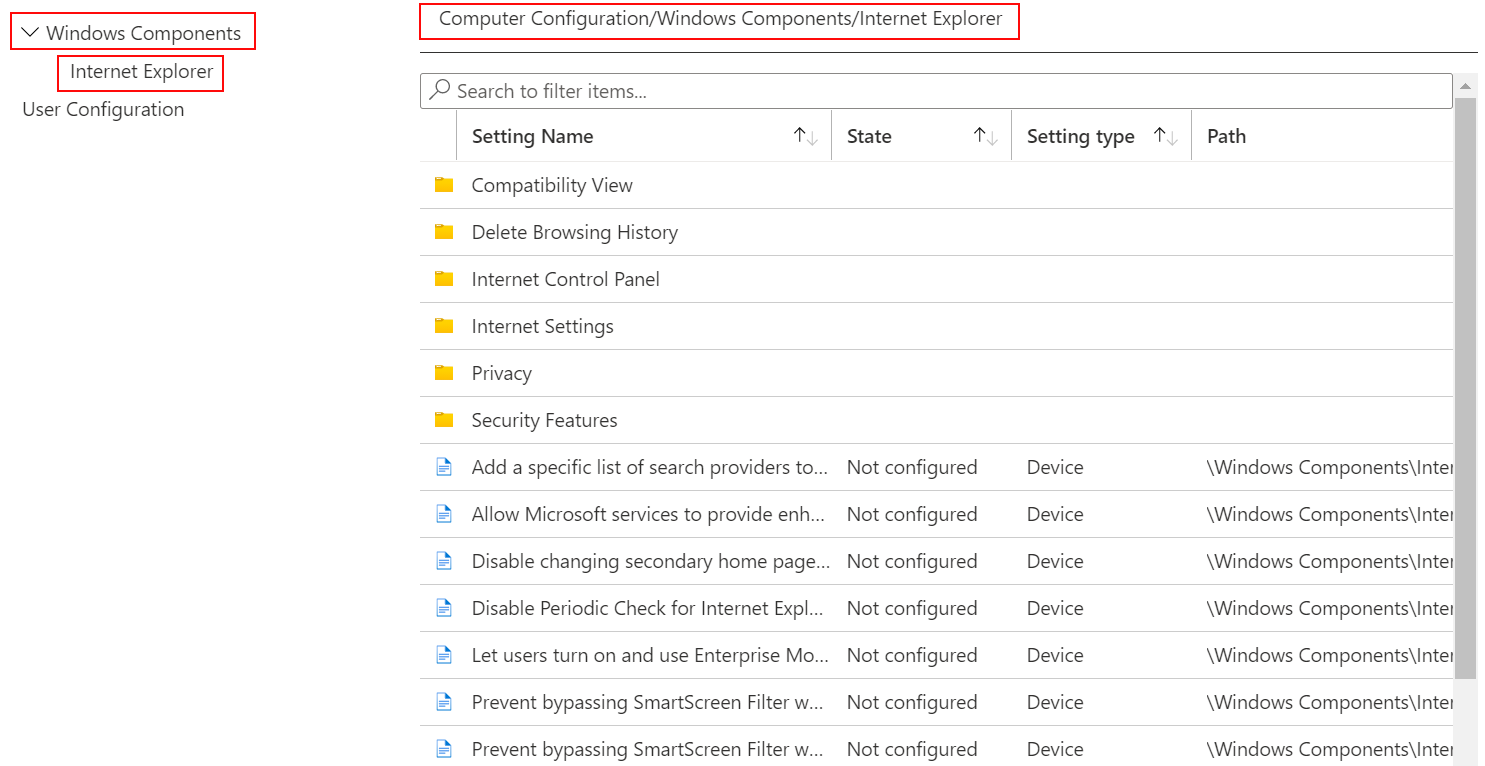
gpedit).When you select Computer configuration or User configuration, the setting categories are shown. You can select any category to see the available settings.
For example, select Computer configuration > Windows components > Internet Explorer to see all the device settings that apply to Internet Explorer:
Select OK to save your changes.
Continue to go through the list of settings, and configure the settings you want in your environment. Here are some examples:
- Use the VBA Macro Notification Settings setting to handle VBA macros in different Microsoft Office programs, including Word and Excel.
- Use the Allow file downloads setting to allow or prevent downloads from Internet Explorer.
- Use Require a password when a computer wakes (plugged in) to prompt users for a password when devices wake from sleep mode.
- Use the Download unsigned ActiveX controls setting to block users from downloading unsigned ActiveX controls from Internet Explorer.
- Use the Turn off System Restore setting to allow or prevent users from running a system restore on the device.
- Use the Allow importing of favorites setting to allow or block users from importing favorites from another browser into Microsoft Edge.
- And more...
Select Next.
In Scope tags (optional), assign a tag to filter the profile to specific IT groups, such as
US-NC IT TeamorJohnGlenn_ITDepartment. For more information about scope tags, go to Use role-based access control (RBAC) and scope tags for distributed IT.Select Next.
In Assignments, select the user or groups that will receive your profile. For more information on assigning profiles, go to Assign user and device profiles in Intune.
If the profile is assigned to user groups, then configured ADMX settings apply to any device that the user enrolls, and signs in to. If the profile is assigned to device groups, then configured ADMX settings apply to any user that signs into that device. This assignment happens if the ADMX setting is a computer configuration (
HKEY_LOCAL_MACHINE), or a user configuration (HKEY_CURRENT_USER). With some settings, a computer setting assigned to a user can also affect the experience of other users on that device.For more information, go to User groups vs. device groups when assigning policies.
Select Next.
In Review + create, review your settings. When you select Create, your changes are saved, and the profile is assigned. The policy is also shown in the profiles list.
The next time the device checks for configuration updates, the settings you configured are applied.
Find some settings
There are thousands of settings available in these templates. To make it easier to find specific settings, use the built-in features:
In your template, select the Settings, State, Setting type, or Path columns to sort the list. For example, select the Path column, and use the next arrow to see the settings in the
Microsoft Excelpath.In your template, use the Search box to find specific settings. You can search by setting, or path. For example, select All settings, and search for
copy. All the settings withcopyare shown: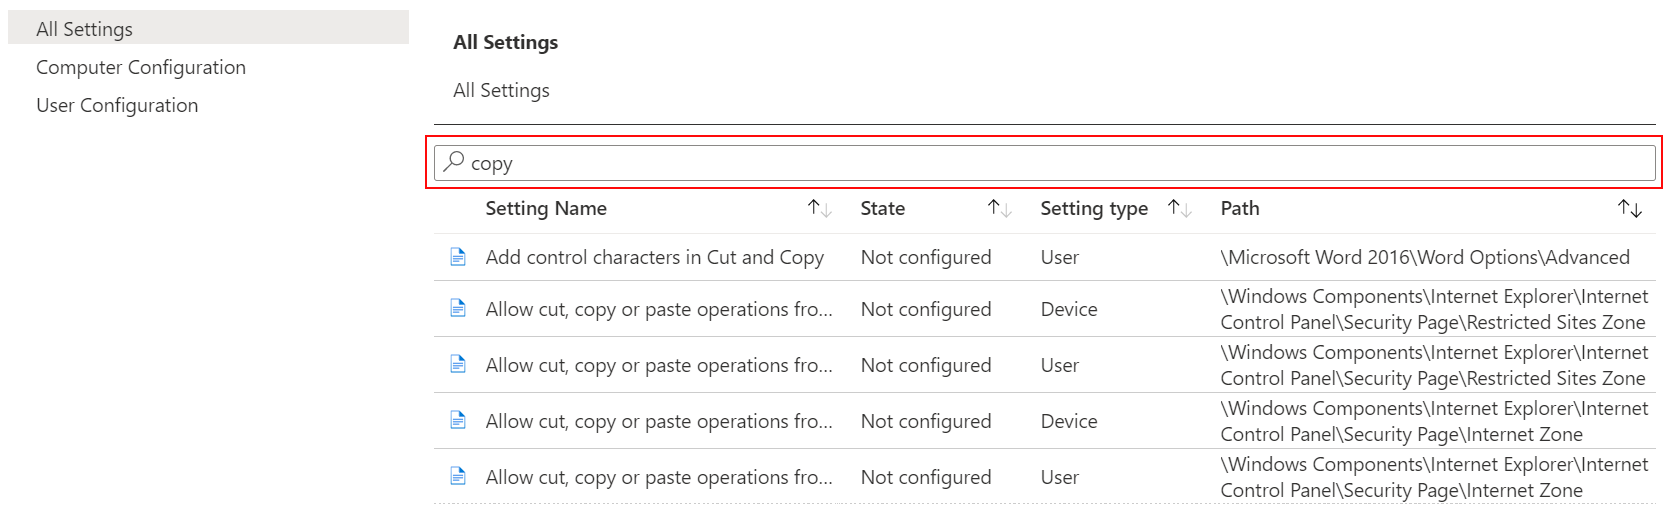
In another example, search for
microsoft word. You see the settings you can set for the Microsoft Word program. Search forexplorerto see the Internet Explorer settings you can add to your template.You can also narrow your search by only selecting Computer configuration or User configuration.
For example, to see all the available Internet Explorer user settings, select User configuration, and search for
Internet Explorer. Only the IE settings that apply to users are shown: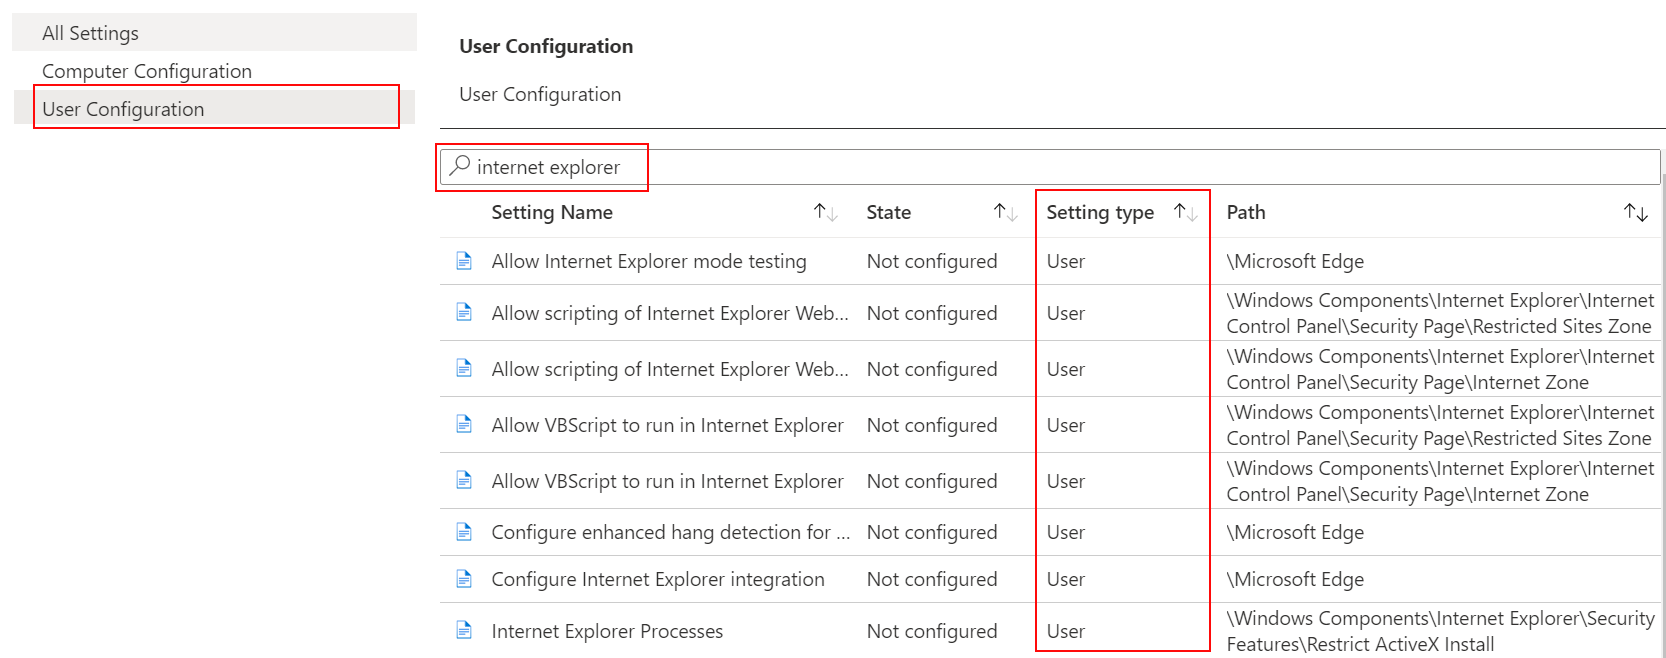
Create a Known Issue Rollback (KIR) policy
On your enrolled devices, you can use administrative templates to create a Known Issue Rollback (KIR) policy, and deploy this policy to your Windows devices. For the specific steps, go to Deploy a KIR activation using Microsoft Intune ADMX policy ingestion to managed devices.
For more information on KIR, and what it is, go to:
- Known Issue Rollback: Helping you keep Windows devices protected and productive
- How to use on-premises Group Policy or Intune to deploy a Known Issue Rollback
Next steps
The template is created, but might not be doing anything yet. Be sure to assign the template (also called a profile) and monitor the policy status.
Feedback
Coming soon: Throughout 2024 we will be phasing out GitHub Issues as the feedback mechanism for content and replacing it with a new feedback system. For more information see: https://aka.ms/ContentUserFeedback.
Submit and view feedback for