Configure the deception capability in Microsoft Defender XDR
Applies to:
- Microsoft Defender XDR
Note
The built-in deception capability in Microsoft Defender XDR covers all Windows clients onboarded to Microsoft Defender for Endpoint. Learn how to onboard clients to Defender for Endpoint in Onboard to Microsoft Defender for Endpoint.
Microsoft Defender XDR has deception technology built in to protect your environment from high-impact attacks that use human-operated lateral movement. This article describes how to configure the deception capability in Microsoft Defender XDR.
Turn on the deception capability
The deception capability is turned off by default. To turn it on, perform the following steps:
- Select Settings > Endpoints.
- Under General, select Advanced features.
- Look for Deception capabilities and toggle the switch to On.

A default rule is automatically created and turned on when the deception capability is enabled. The default rule, which you can edit accordingly, automatically generates decoy accounts and hosts that are integrated into lures and plants these to all target devices in the organization. While the deception feature's scope is set to all devices in the organization, lures are planted in Windows client devices only.

Create and modify deception rules
Note
Microsoft Defender XDR currently supports the creation of up to ten (10) deception rules.
To create a deception rule, perform the following steps:
- Navigate to Settings > Endpoints. Under Rules, select Deception rules.
- Select Add deception rule.

- In the rule creation pane, add a rule name, description, and select what lure types to create. You can select both Basic and Advanced lure types.

- Identify the devices where you intend to plant the lures in the scope section. You can select to plant lures in all Windows client devices or in clients with specific tags. The deception feature currently covers Windows clients.

- The deception capability then takes a few minutes to automatically generates decoy accounts and hosts. Note that the deception capability generates decoy accounts that mimic the User Principal Name (UPN) in Active Directory.
- You can review, edit, or delete automatically generated decoys. You can also add your own decoy accounts and hosts in this section. To prevent false positive detections, ensure that added hosts/IP addresses aren't used by the organization.

- You can edit a decoy account name, host name, and the IP address where the lures are planted in the decoys section. When adding IP addresses, we recommend using a sandbox IP if it exists in the organization. Avoid using commonly used addresses, for example, 127.0.0.1, 10.0.0.1, and the like.


Caution
To avoid false positive alerts, we highly recommend creating unique user accounts and host names when creating and editing decoy accounts and hosts. Ensure that created user accounts and hosts are unique for each deception rule and that these accounts and hosts do not exist in the organization's directory.
- Identify if you use autogenerated or custom lures in the lures section. Select add new lure under Use custom lures only to upload your own lure. Custom lures can be any file type (except .DLL and .EXE files) and are limited to 10 MB each. When creating and uploading custom lures, we recommend lures to contain or mention the fake hosts or fake user accounts generated in the previous steps to ensure that lures are attractive to attackers.

- Provide a lure name and a path where the lure will be planted. You can then select to plant the lure on all devices covered in the scope section and if you want the lure to be planted as a hidden file. If these boxes are left unchecked, the deception feature automatically plants the lures unhidden into random devices within the scope.

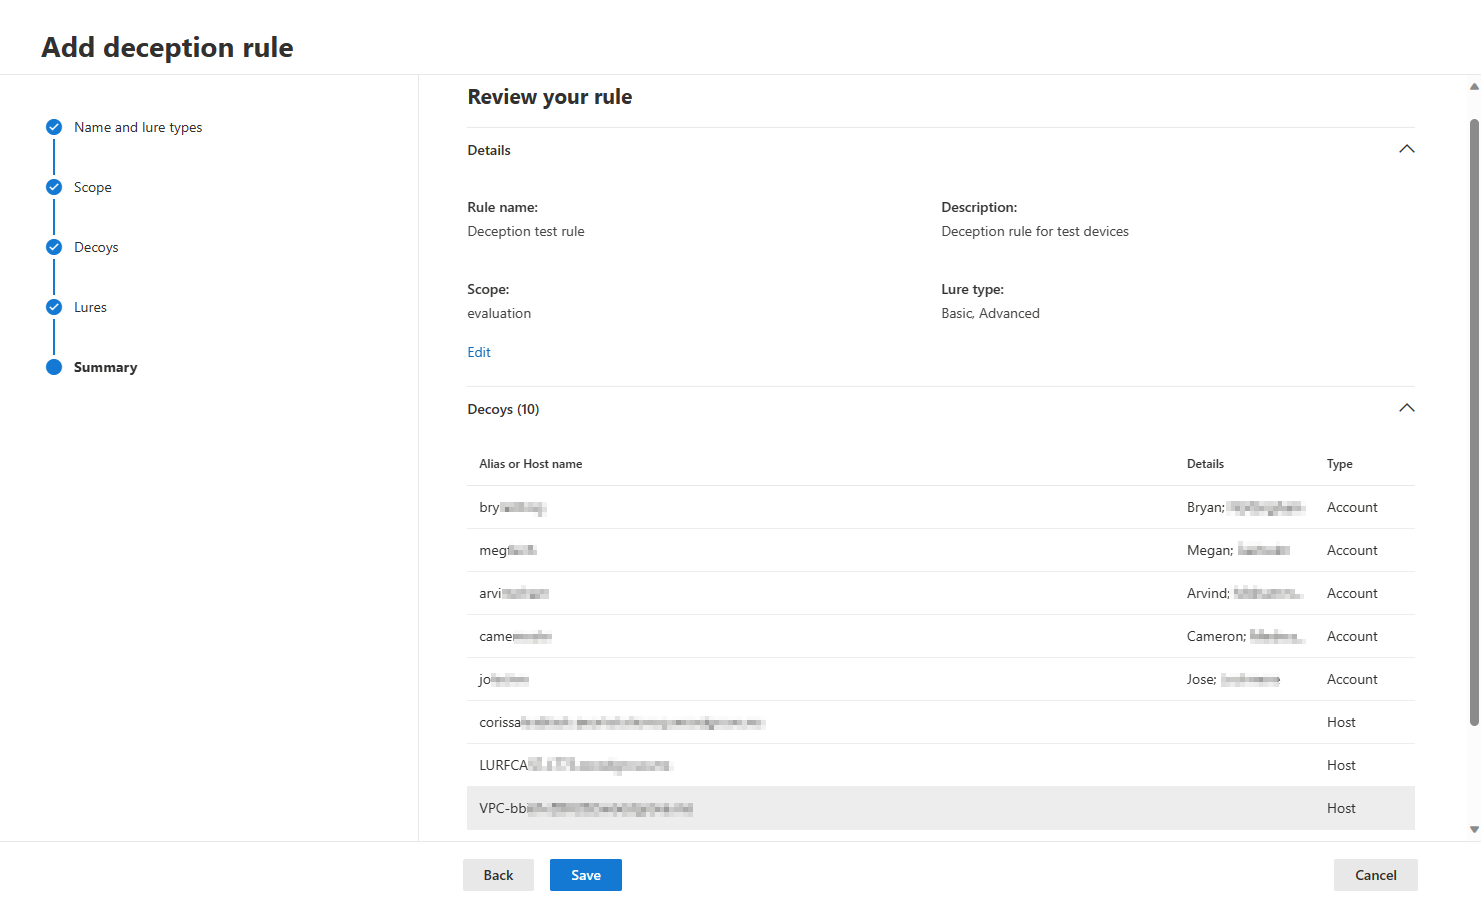
- Review the details of the created rule in the summary section. You can edit the rule details by selecting Edit on the section that you need to modify. Select Save after reviewing.
- The new rule appears in the Deception rules pane after successful creation. It takes approximately 12-24 hours to complete the rule creation. Check the Status to monitor the rule creation progress.
- To check on the details of active rules, including details of devices covered and planted decoys and lures, select Export in the rules pane.


To modify a deception rule, perform the following steps:
- Select the rule to modify in the Deception rules pane.
- Select Edit on the rule details pane.
- To turn off the rule, select Turn off in the editing pane.
- To delete a deception rule, select Delete in the editing pane.
Tip
Do you want to learn more? Engage with the Microsoft Security community in our Tech Community: Microsoft Defender XDR Tech Community.
Feedback
Coming soon: Throughout 2024 we will be phasing out GitHub Issues as the feedback mechanism for content and replacing it with a new feedback system. For more information see: https://aka.ms/ContentUserFeedback.
Submit and view feedback for