Pilot Microsoft Defender for Office 365
Applies to:
- Microsoft Defender XDR
This article is Step 3 of 3 in the process of setting up the evaluation environment for Microsoft Defender for Office 365. For more information about this process, see the overview article.
Use the following steps to set up and configure the pilot for Microsoft Defender for Office 365.

- Step 1: Create pilot groups
- Step 2: Configure protection
- Step 3: Try out capabilities — Get familiar with simulation, monitoring, and metrics
When you evaluate Microsoft Defender for Office 365, you might choose to pilot specific users before enabling and enforcing policies for your entire organization. Creating distribution groups can help manage the deployment processes. For example, create groups such as Defender for Office 365 Users - Standard Protection, Defender for Office 365 Users - Strict Protection, Defender for Office 365 Users - Custom Protection, or Defender for Office 365 Users - Exceptions.
It might not be evident why 'Standard' and 'Strict' are the terms used for these groups, but that will become clear when you explore more about Defender for Office 365 security presets. Naming groups 'custom' and 'exceptions' speak for themselves, and though most of your users should fall under standard and strict, custom and exception groups will collect valuable data for you regarding managing risk.
Step 1: Create pilot groups
Distribution groups can be created and defined directly in Exchange Online or synchronized from on-premises Active Directory.
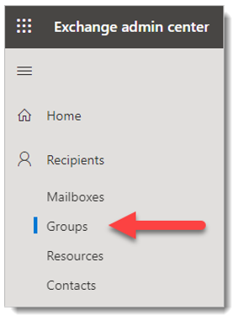
Sign in to the Exchange Admin Center (EAC) at https://admin.exchange.microsoft.com using an account that has been granted Recipient Administrator role or been delegated group management permissions.
Go to Recipients > Groups.
On the Groups page, select
 Add a group.
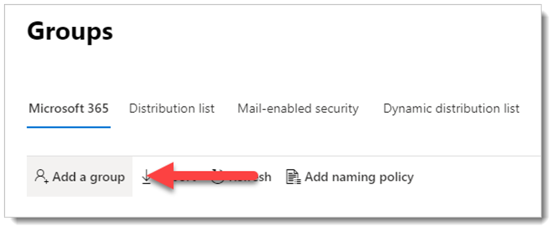
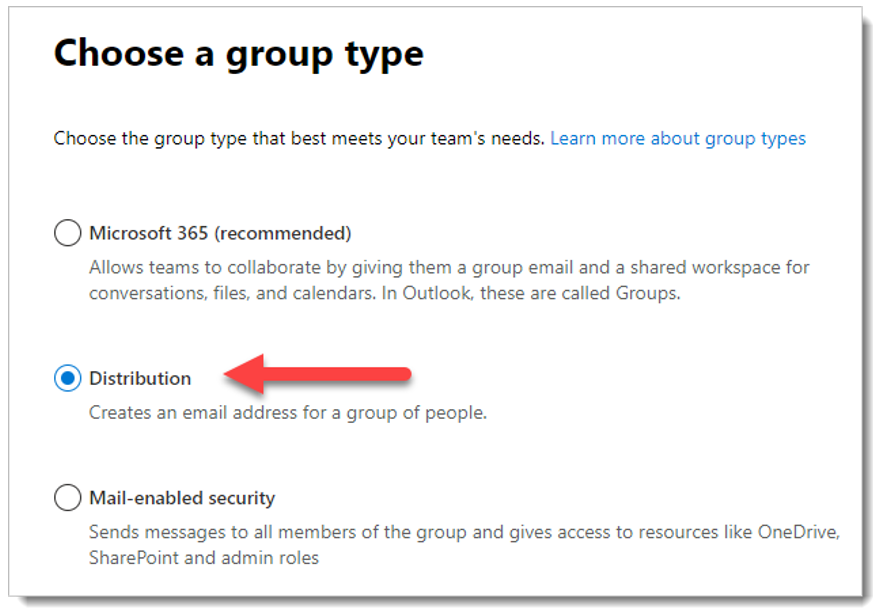
For group type, select Distribution, and then click Next.
Give the group a Name and optional Description, and then click Next.

On the remaining pages, assign an owner, add members to the group, set the email address, join-depart restrictions, and other settings.


Step 2: Configure protection
Some capabilities in Defender for Office 365 are configured and turned on by default, but security operations might want to raise the level of protection from the default.
Some capabilities are not yet configured. You have the following options for configuring protection (which are easy to change later):
Assign users to preset security policies: Preset security policies are the recommended method to quickly assign a uniform level of protection across all of the capabilities. You can choose from Standard or Strict protection. The settings for Standard and Strict are described in the tables here. The differences between Standard and Strict are summarized in the table here.
The advantages of preset security polices are you protect groups of users as quickly as possible using Microsoft's recommended settings based on observations in the datacenters. As new protection capabilities are added and as the security landscape changes, the settings in preset security policies are automatically updated to our recommended settings.
The disadvantage of preset security policies is you can't customize virtually any of the security settings in preset security policies (for example, you can't change an action from deliver to junk to quarantine, or vice-versa). The exception is entries and optional exceptions for user impersonation and domain impersonation protection, which you must configure manually.
Also, keep in mind that preset security policies are always applied before custom policies. So, if you want to create and use any custom policies, you'll need to exclude users in those custom policies from preset security policies.
Configure custom protection policies: If you prefer to configure the environment yourself, compare the default, Standard, and Strict settings in Recommended settings for EOP and Microsoft Defender for Office 365 security. Keep a spreadsheet of where your custom build deviates.
You can also use the Configuration analyzer to compare the settings in your custom policies to the Standard and Strict values.
For detailed information about choosing preset security policies vs. custom policies, see Determine your protection policy strategy.
Assign preset security policies
We recommended you begin with the preset security policies in EOP and Defender for Office 365 fast by assigning them to specific pilot users or defined groups as part of your evaluation. Preset policies offer a baseline Standard protection template or a more aggressive Strict protection template, which can be assigned independently.
For example, an EOP condition for pilot evaluations could be applied if the recipients are members of a defined EOP Standard Protection group, and then managed by adding accounts to, or removing account from, the group.
Likewise, a Defender for Office 365 condition for pilot evaluations could be applied if the recipients are members of a defined Defender for Office 365 Standard Protection group and then managed by adding / removing accounts via the group.
For complete instructions, see Use the Microsoft Defender portal to assign Standard and Strict preset security policies to users.
Configure custom protection policies
The pre-defined Standard or Strict Defender for Office 365 policy templates give your pilot users the recommended baseline protection. However, you can also build and assign custom protection policies as part of your evaluation.
It's important to be aware of the precedence these protection policies take when applied and enforced, as explained in Order of precedence for preset security policies and other policies.
The explanation and table in Configure protection policies provides a handy reference for what you need to configure.
Step 3: Try out capabilities and get familiar with simulation, monitoring, and metrics
Now that your pilot is set up and configured, it's helpful to become familiar with the reporting, monitoring, and attack simulation tools that are unique to Microsoft Defender for Microsoft 365.
| Capability | Description | More information |
|---|---|---|
| Threat Explorer | Threat Explorer is a powerful near real-time tool to help Security Operations teams investigate and respond to threats and displays information about detected malware and phishing in email and files in Office 365, as well as other security threats and risks to your organization. | About Threat Explorer |
| Attack simulation training | You can use Attack simulation training in the Microsoft Defender portal to run realistic attack scenarios in your organization, which help you identify and find vulnerable users before a real attack impacts your environment. | Get started using Attack simulation training |
| Reports dashboard | On the left navigation menu, click Reports and expand the Email & collaboration heading. The Email & collaboration reports are about spotting security trends some of which will allow you to take action (through buttons like 'Go to submissions'), and others that will show trends. These metrics are generated automatically. | View email security reports in the Microsoft Defender portal View Defender for Office 365 reports in the Microsoft Defender portal |
Next steps
Evaluate Microsoft Defender for Endpoint
Return to the overview for Evaluate Microsoft Defender for Office 365
Return to the overview for Evaluate and pilot Microsoft Defender XDR
Tip
Do you want to learn more? Engage with the Microsoft Security community in our Tech Community: Microsoft Defender XDR Tech Community.
Feedback
Coming soon: Throughout 2024 we will be phasing out GitHub Issues as the feedback mechanism for content and replacing it with a new feedback system. For more information see: https://aka.ms/ContentUserFeedback.
Submit and view feedback for