Get email notifications for response actions in Microsoft Defender XDR
Applies to:
- Microsoft Defender XDR
Important
Some information in this article relates to a prereleased product which may be substantially modified before it's commercially released. Microsoft makes no warranties, expressed or implied, with respect to the information provided here.
You can set up Microsoft Defender XDR to notify you through email about manual or automated response actions.
Manual response actions are actions that security teams can use to stop threats or aid in investigation of attacks. These actions vary depending on the Defender workload enabled in your environment.
Automated response actions, on the other hand, are capabilities in Microsoft 35 Defender that scale investigation and resolution to threats automatically. Automated remediation capabilities consist of automatic attack disruption and automated investigation and response.
Note
You need the Manage security settings permission to configure email notification settings. If you've chosen to use basic permissions management, users with Security Administrator or Global Administrator roles can configure email notifications. Likewise, if your organization is using role-based access control (RBAC), you can only create, edit, delete, and receive notifications based on device groups that you are allowed to manage.
Create a rule for email notifications
Note
The response action email notification currently does not support custom detections containing response actions.
To create a rule for email notifications, perform the following steps:
- In the navigation pane of Microsoft Defender XDR, select Settings > Microsoft Defender XDR. Under General, select Email notifications. Go to the Actions tab.

- Select Add notification rule. Add a rule name and description under Basics. Both Name and Description fields accept letters, numbers, and spaces only.

- Proceed to the next section by selecting Next located at the bottom of the pane.
- You can choose what type of action, what status, and where the action will be sourced from in the Notification settings section.

- Under Action source, select if you want to be notified for manual or automated response actions. You can select both options.
- Select the specific response actions in the checklist that appears under Action. You can choose multiple actions available in the checklist. Note that response actions will vary depending on the Defender workload enabled in your environment. All actions selected appears in the Action field upon completion.

- You can choose to be notified based on the device groups where the response actions are applied in the Device groups scope. To be notified of response actions taken in all current and future device groups, selecting All device groups. To be notified of response actions taken in devices that belong to your selected device group, choose Selected device groups.

- Select if you want to be notified if an action is completed or failed in the Action status field. You can select all options available.
- At the bottom of the pane, you can proceed to the next section by selecting Next. Alternately, you can go back to the Basics section by selecting Back.
- In the Recipients section, you can add one or more email addresses that will receive notifications. Separate multiple addresses by adding a comma at the end of each address. Select Add to add the recipients. You can see the recipients at the bottom of the pane after successfully adding addresses.
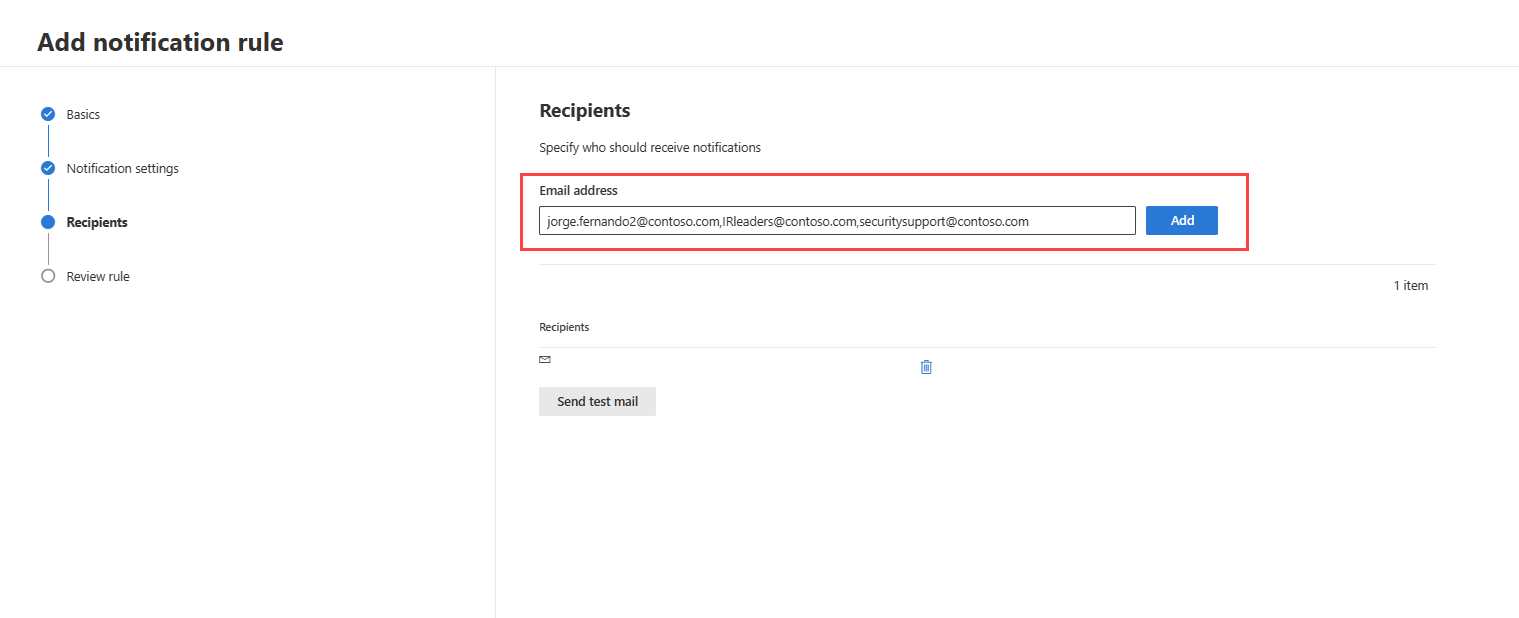
- Test the notification by selecting Send test email. Select Next located on the bottom of the pane to proceed to the review section.
- Check the rule's details in the Review rule section. You can edit the details by selecting Edit under each section's details.

- Select Submit at the bottom of the pane to finish the rule creation. Recipients will start receiving notifications through email based on the settings. The new rule appears in the Notifications rule list under the Actions tab.
- To edit or delete a notification rule, select the rule from the list. Select Edit to change the rule's details. Select Delete to remove the rule.


Once you get the notification, you can go directly to the action and review or remediate the action.
Next steps
See also
Tip
Do you want to learn more? Engage with the Microsoft Security community in our Tech Community: Microsoft Defender XDR Tech Community.
Feedback
Coming soon: Throughout 2024 we will be phasing out GitHub Issues as the feedback mechanism for content and replacing it with a new feedback system. For more information see: https://aka.ms/ContentUserFeedback.
Submit and view feedback for