Override webpage resources with local copies (Overrides tab)
Sometimes you need to try out some possible fixes for a webpage, but you don't have access to the source files, or changing the page requires a slow and complex build process. You can debug and fix all kind of problems in DevTools. But the changes don't persist; after you refresh the local file, all your work is gone. The Overrides feature in the Sources tool helps you solve this problem.
You can now take a resource of the current webpage and store it locally. When you refresh the webpage, the browser doesn't load the resource from the server; instead, the browser replaces the server resource with your local copy of the resource.
Setting up your local folder to store Overrides
Right-click a webpage, such as https://microsoftedge.github.io/Demos/demo-to-do/, and then select Inspect. DevTools opens.
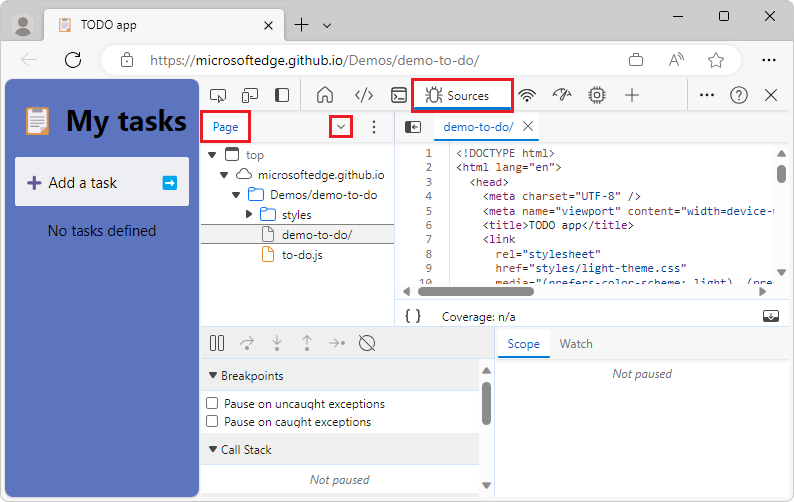
Select the Sources (
 ) tool.
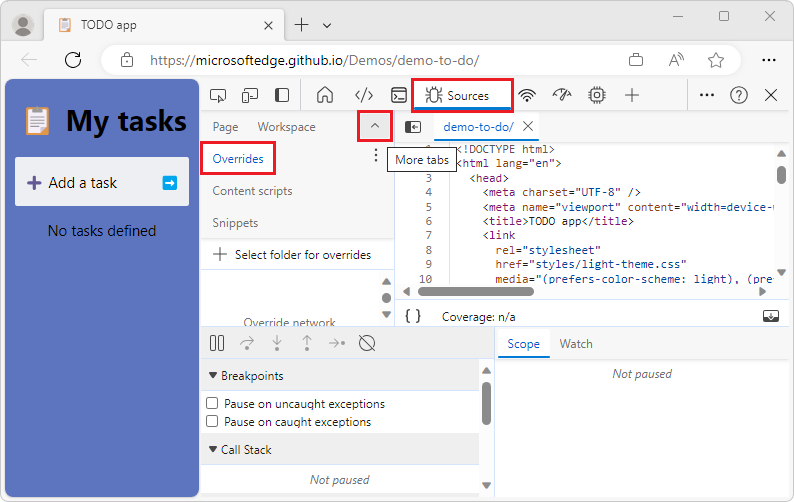
In the Navigator pane (on the left), click the Overrides tab (grouped with the Page tab); if needed, click the More tabs (v) button:
Select the Overrides tab and then click the More tabs button again to collapse the tabs:
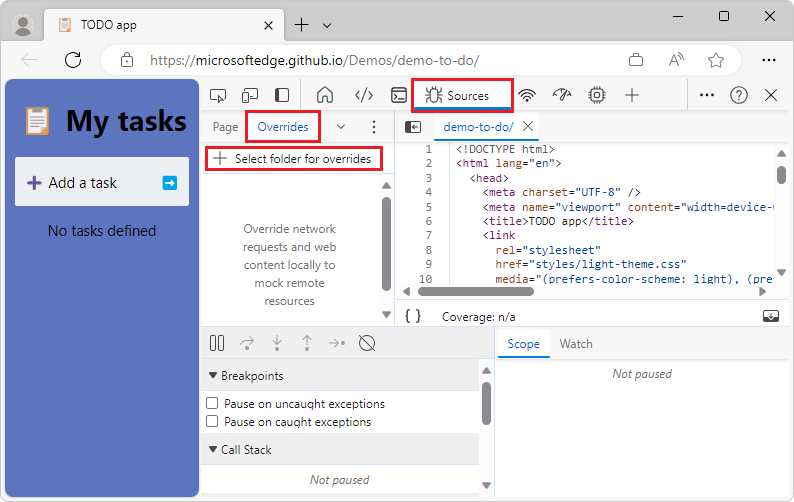
Click + Select folder for overrides:
In the file navigation dialog, select a folder on your local computer to store the resource files that you want to replace, such as
C:\Users\myusername\overrides, and then click the Select Folder button.DevTools warns you that must have full access to the folder and that you should not reveal any sensitive information:
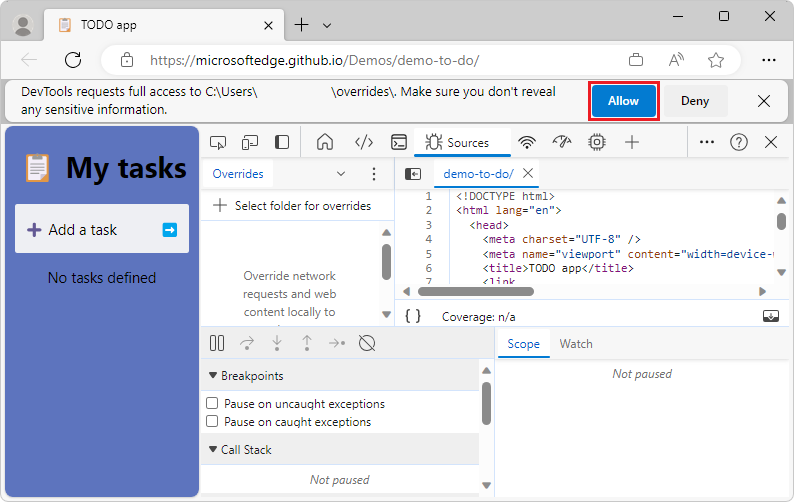
Click the Allow button.
In the Overrides tab, a checkbox is shown next to Enable Local Overrides. To the right of Enable Local Overrides is a Clear configuration icon that allows you to delete your local overrides settings. You are now done setting up your folder, and are ready to replace live resources with local resources:

Adding files to your Overrides folder
Next, add files to your Overrides folder, as follows. This example will add a CSS file.
Select the Elements tool, and then in the Styles tab, click the name of a CSS file, such as
to-do-styles.css: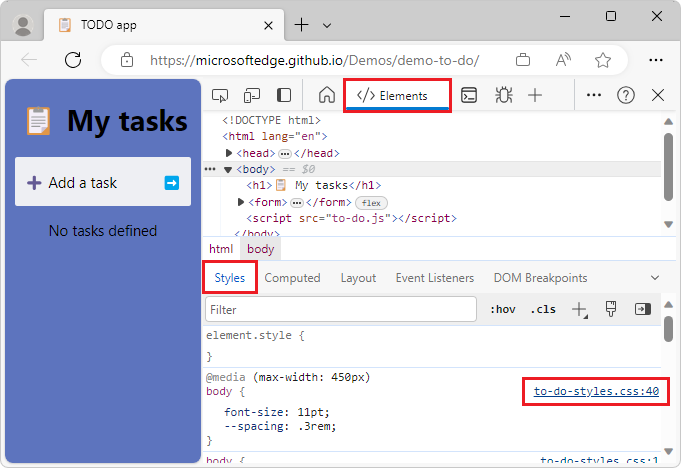
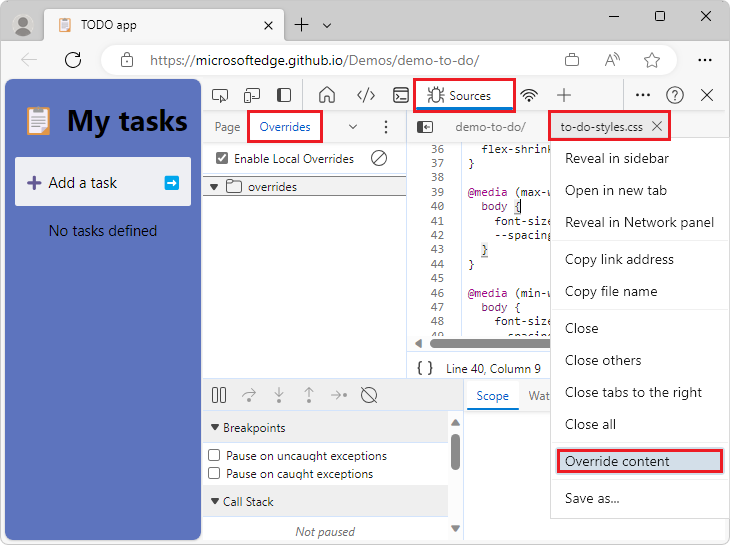
The Sources tool opens, with the selected file opened in a tab in the editor pane.
In the editor pane, right-click the file's tab, such as to-do-styles.css, and then select Override content:
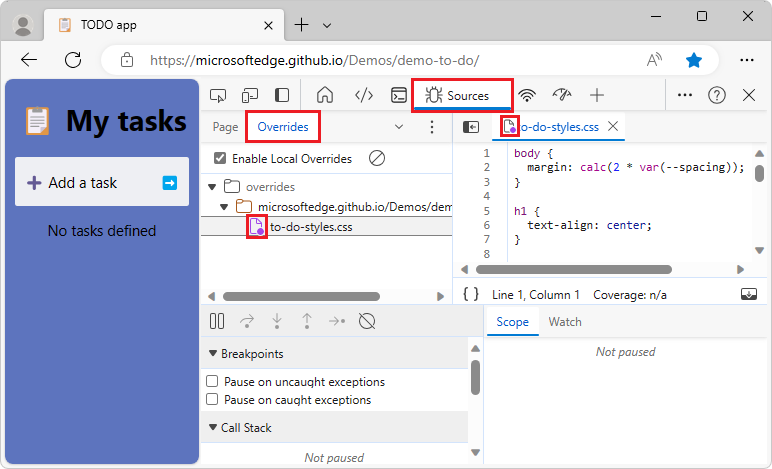
In the file's tab, a page icon with a purple dot is added, and in the Overrides tab, the file is added:

In this example, the file is listed as:
microsoftedge.github.io/Demos/demo-to-do/styles > to-do-styles.cssThe file is stored in a new directory that's in your overrides folder (such as in
C:\Users\myusername\overrides).In File Explorer or Finder, verify that DevTools created a subfolder that is named using the URL of the file (such as microsoftedge.github.io) and contains the correct directory structure, such as
C:\Users\myusername\overrides\microsoftedge.github.io\Demos\demo-to-do\styles. The overriding file is stored in this directory.In the editor pane of the Sources tool, a page icon with a purple dot is added to the file's tab. The purple dot indicates that the file is a local file that overrides the file that's returned from the web server:
Changing the style by using the override file
Continuing from above, you can now change the styles of the webpage by using your local override CSS file (in this example, to-do-styles.css). Add a thick red border around the rendered webpage body, as follows:
In DevTools, select the Elements (
 ) tool, and then make sure the Styles tab is selected.
Copy the following CSS style property, and then paste it into the existing
bodyelement CSS rule that's in your CSS override file, such asto-do-styles.css:border: 10px solid firebrick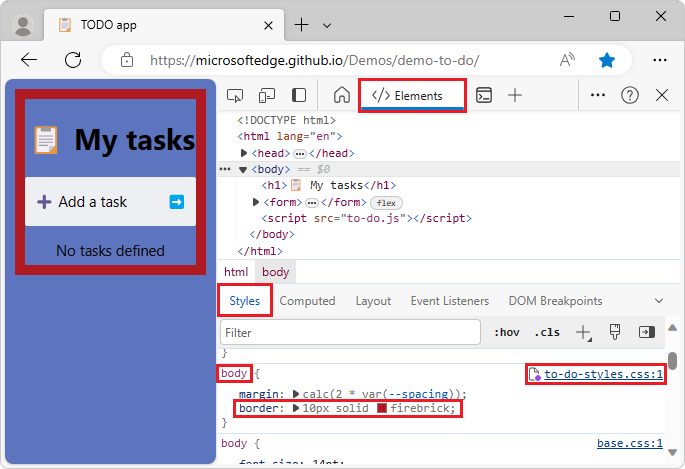
A thick red ("firebrick") border is added around the body of the rendered webpage, and the modified CSS file is automatically saved on your computer, in your Overrides directory.
Refresh the webpage.
The thick red border remains displayed, and none of your work is lost, as it would have been if rendering the CSS file that's returned by the web server instead of using the local override file.
Adding files to Overrides from within other tabs or tools
Continuing from above, select the Sources (
) tool, and then on the left, select the Page tab (grouped with the Overrides tab).In the tree of resource files for the page, expand the styles folder. Files that are already placed in your overrides folder (by using the Overrides tab), such as
to-do-styles.css, have a purple dot on the icon.Right-click a different file, such as (index) (which is
index.html), and then select Override content: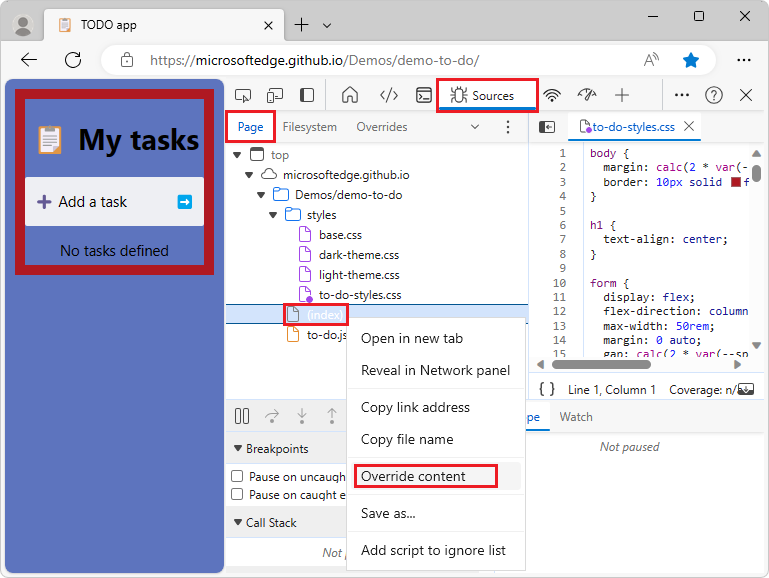
In the Page tab and Overrides tab in the Sources tool, the file's icon changes to a page icon with a purple dot (such as for
index.html), and the file is added to your local drive's Overrides directory.Select the Network (
 ) tool, right-click a resource file for the webpage, such as to-do.js, and then select Override content:
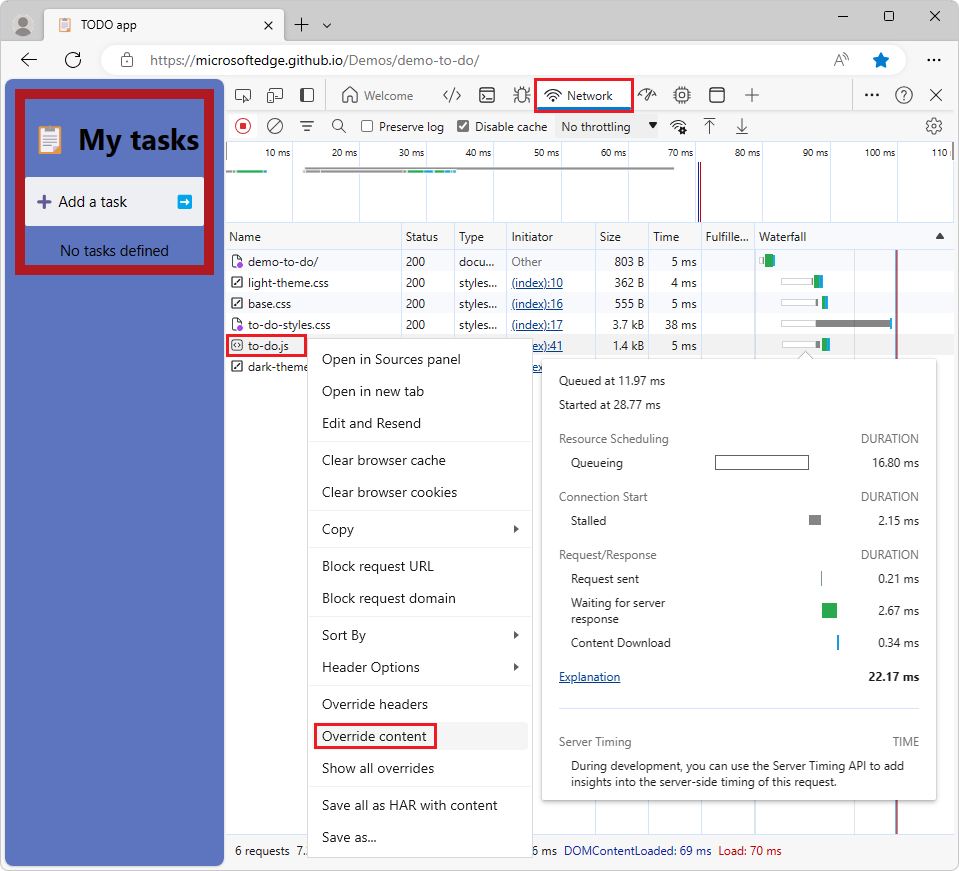
Throughout the DevTools UI, the file's icon changes to a page icon with a purple dot (such as for
to-do.js), and the file is added to your local drive's Overrides directory.When overrides are in effect, resource files that are located on your computer in your Overrides folder are used, rather than resource files that are returned by the web server.
Two-way interaction of overrides
Use the editor provided with the Sources tool of DevTools or any editor you want to change the files. Changes are synced across all the products that access the files in the overrides folder.
Feedback
Coming soon: Throughout 2024 we will be phasing out GitHub Issues as the feedback mechanism for content and replacing it with a new feedback system. For more information see: https://aka.ms/ContentUserFeedback.
Submit and view feedback for