Configure Tasks for external clients
Warning
The Collaboration controls for model-driven applications are set to retire by May 2024. Retirement will be carried out in two phases to ensure a smooth transition. Following table details the timeline of the retirement process and its impacts:
| Timeframe | Action | Impact |
|---|---|---|
| February 2024 | Collaboration controls will no longer be available to install from AppSource. | - New deployments of the collaboration controls in Power Apps environments aren't possible. - Existing installations aren't affected. |
| May 2024 | The internal service that powers the controls will be retired. | - The controls will stop supporting integration with Microsoft 365 and will return errors to users. Data generated and managed through the controls won't be impacted. For more information, see the table later in this article. |
Artifacts created and managed through the controls will continue to exist after the service is retired.
| Control | Impact |
|---|---|
| Approvals | Approvals created in the Approvals control will remain in the Approvals app but will no longer be accessible in the Approvals control. |
| Files | Files managed in the Files control will remain in SharePoint but will no longer be accessible in the Files control. |
| Meetings | Meetings created in the Meeting control will remain in Outlook and Teams calendars but will no longer be accessible in the Meetings control. |
| Notes | Notes created in the Notes control will remain in the Dataverse notes table. |
| Tasks | Tasks created in the Task control will remain in Planner but will no longer be accessible in the Task control. |
We recommend removing the Collaboration controls and Collaboration connector from all Power Apps solutions and prepare users for the upcoming Collaboration controls retirement.
External tasks that can be assigned to users who aren't part of your organization or don't have access to your application such as assigning a task to a customer.
To enable, you need an extra step of passing an XML string to each instance of Tasks PCF control attached to the sub grid component on desired MDA form. XML string is a parametrized query that allows the control to extract the required data from a table that contains customer information.
To create external tasks, follow the steps:
Create a new custom entity such as Customer or reuse an existing customer entity like Contacts.
Create new fields that hold the following information:
- Name
- Parent (Lookup to the parent table such as Inspections)
Note
The customer entity created is where the task control pulls the customer information from when assigning an external task. The Parent field ensures that the customer entity is linked to an Inspection record.
Generate a Fetch XML file to allow the PCF control to pull the right customer information.
Configure XML schema
Following is the schema definition for the tasks configuration Fetch XML. Any Fetch XML needs to be designed to meet the following requirements:
- Query result shall return the following properties for each user object:
- ID
- displayname
- email, use alias if needed.
- Query shall contain the @top parameter to allow caller to limit the number of results.
- Query shall have @rootEntityId parameter to filter results by only related records, if needed.
- Query shall have @useName parameter to allow result filtering by name
- Query shall have @useIdentifier parameter to allow fetching only selected users.
Configuration XML schema and example
Configuration of XML schema pulls data from the customer table. You can adjust the
<fetch/>node to specify your own query to display users from any other custom table.Note
The above entity and attribute name and order attribute in the XML are in PublisherPrefix_TableColumn format.
<custom-tasks> <custom-task id="external" name="External" for="guest"> <fetch top="@top"> <entity name="[Name of table, e.g. Crb2891_customer]"> <attribute name="[Name of ID column, e.g. Crb2891_customerid]" alias="id" /> <attribute name="[Name of primary name column, e.g. Crb2891_name]" alias="displayname" /> <attribute name="[Name of email column, e.g. Crb2891_email]" alias="email" /> <order attribute ="[Name of primary name column, e.g. Crb2891_name]" descending="false" /> <filter type="and"> <condition attribute="[Name of parent lookup column, e.g. Crb2891_parent]" operator="eq" value="@rootEntityId" /> <condition attribute="[Name of primary name column, e.g. Crb2891_name]" operator="like" value="@userName" /> <condition attribute="[Name of email column, e.g. Crb2891_email]" operator="like" value="@userIdentifier" /> </filter> </link-entity> </entity> </fetch> </custom-task> </custom-tasks>- Query result shall return the following properties for each user object:
Bind the Task controls to the subgrid within the classic form designer. Select Save and then select Switch to classic.
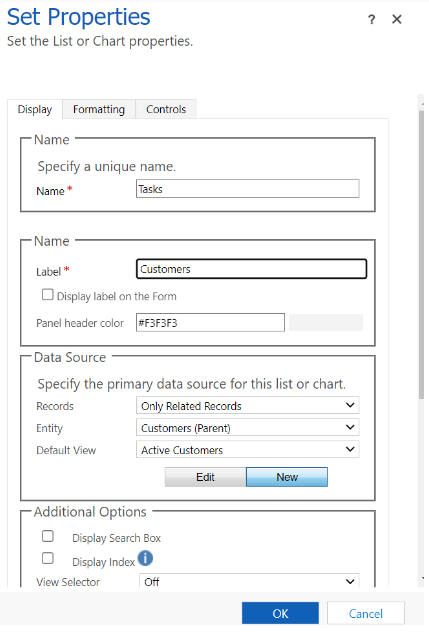
Move through in the classic form designer, until you find the Tasks tab. Double-click the subgrid to open its property dialog.

In the property dialog, set the properties as shown in the following image:
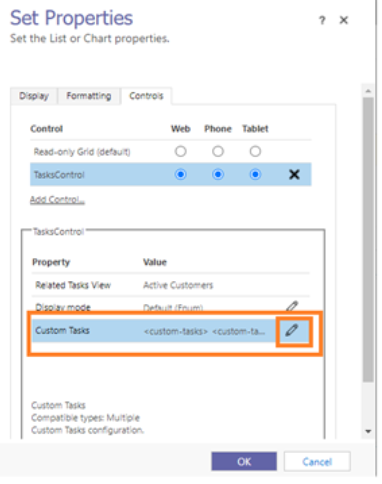
Go to the Controls tab and select
 on Custom Tasks property to add the Fetch XML generated.
Paste the Fetch XML
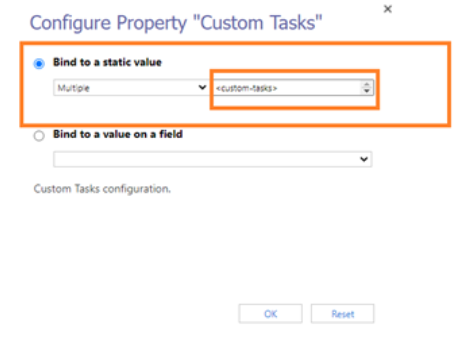
Select Ok in Configure Property "Custom Tasks" and Set Properties windows.
Save and Publish.
See also
Platform Docs
Feedback
Coming soon: Throughout 2024 we will be phasing out GitHub Issues as the feedback mechanism for content and replacing it with a new feedback system. For more information see: https://aka.ms/ContentUserFeedback.
Submit and view feedback for