Enable single sign-on (SSO) in an Office Add-in
Users sign in to Office using either their personal Microsoft account or their Microsoft 365 Education or work account. Take advantage of this and use single sign-on (SSO) to authenticate and authorize the user to your add-in without requiring them to sign in a second time.
How SSO works at runtime
The following diagram shows how the SSO process works. The blue elements represent Office or the Microsoft identity platform. The gray elements represent the code you write and include the client-side code (task pane) and the server-side code for your add-in.

- In the add-in, your JavaScript code calls the Office.js API getAccessToken. If the user is already signed in to Office, the Office host will return the access token with the claims of the signed in user.
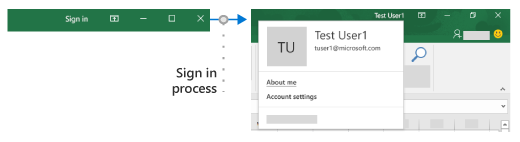
- If the user is not signed in, the Office host application opens a dialog box for the user to sign in. Office redirects to the Microsoft identity platform to complete the sign-in process.
- If this is the first time the current user has used your add-in, they are prompted to consent.
- The Office host application requests the access token from the Microsoft identity platform for the current user.
- The Microsoft identity platform returns the access token to Office. Office will cache the token on your behalf so that future calls to getAccessToken simply return the cached token.
- The Office host application returns the access token to the add-in as part of the result object returned by the
getAccessTokencall. - The token is both an access token and an identity token. You can use it as an identity token to parse and examine claims about the user, such as the user's name and email address.
- Optionally, the add-in can use the token as an access token to make authenticated HTTPS requests to APIs on the server-side. Because the access token contains identity claims, the server can store information associated with the user's identity; such as the user's preferences.
Requirements and Best Practices
Don't cache the access token
Never cache or store the access token in your client-side code. Always call getAccessToken when you need an access token. Office will cache the access token (or request a new one if it expired.) This will help to avoid accidentally leaking the token from your add-in.
Enable modern authentication for Outlook
If you're working with an Outlook add-in, be sure to enable Modern Authentication for the Microsoft 365 tenancy. For information about how to do this, see Enable or disable modern authentication for Outlook in Exchange Online.
Implement a fallback authentication system
You should not rely on SSO as your add-in's only method of authentication. You should implement an alternate authentication system that your add-in can fall back to in certain error situations. For example, if your add-in is loaded on an older version of Office that does not support SSO, the getAccessToken call will fail.
For Excel, Word, and PowerPoint add-ins you will typically want to fall back to using the Microsoft identity platform. For more information, see Authenticate with the Microsoft identity platform.
For Outlook add-ins, there is a recommended fallback system. For more information, see Scenario: Implement single sign-on to your service in an Outlook add-in.
You can also use a system of user tables and authentication, or you can leverage one of the social login providers. For more information about how to do this with an Office Add-in, see Authorize external services in your Office Add-in.
For code samples that use the Microsoft identity platform as the fallback system, see Office Add-in NodeJS SSO and Office Add-in ASP.NET SSO.
Develop an SSO add-in
This section describes the tasks involved in creating an Office Add-in that uses SSO. These tasks are described here independently of language or framework. For step-by-step instructions, see:
- Create a Node.js Office Add-in that uses single sign-on
- Create an ASP.NET Office Add-in that uses single sign-on
Register your add-in with the Microsoft identity platform
To work with SSO you need to register your add-in with the Microsoft identity platform. This will enable the Microsoft identity platform to provide authentication and authorization services for your add-in. Creating the app registration includes the following tasks.
- Get an application (client) ID to identify your add-in to the Microsoft identity platform.
- Generate a client secret to act as a password for your add-in when requesting a token.
- Specify the permissions that your add-in requires. The Microsoft Graph "profile" and "openid" permissions are always required. You may need additional permissions depending on what your add-in needs to do.
- Grant the Office applications trust to the add-in.
- Pre-authorize the Office applications to the add-in with the default scope access_as_user.
For more details about this process, see Register an Office Add-in that uses SSO with the Microsoft identity platform.
Configure the add-in
Add new markup to the add-in manifest.
- <WebApplicationInfo> - The parent of the following elements.
- <Id> - The application (client) ID you received when you registered the add-in with the Microsoft identity platform. For more information, see Register an Office Add-in that uses SSO with the Microsoft identity platform.
- <Resource> - The URI of the add-in. This is the same URI (including the
api:protocol) that you used when registering the add-in with the Microsoft identity platform. The domain part of this URI must match the domain, including any subdomains, used in the URLs in the <Resources> section of the add-in's manifest and the URI must end with the client ID specified in the <Id> element. - <Scopes> - The parent of one or more <Scope> elements.
- <Scope> - Specifies a permission that the add-in needs. The
profileandopenIDpermissions are always needed and may be the only permissions needed. If your add-in needs access to Microsoft Graph or other Microsoft 365 resources, you'll need additional <Scope> elements. For example, for Microsoft Graph permissions you might request theUser.ReadandMail.Readscopes. Libraries that you use in your code to access Microsoft Graph may need additional permissions. For more information, see Authorize to Microsoft Graph from an Office Add-in.
For Word, Excel, and PowerPoint add-ins, add the markup to the end of the <VersionOverrides ... xsi:type="VersionOverridesV1_0"> section. For Outlook add-ins, add the markup to the end of the <VersionOverrides ... xsi:type="VersionOverridesV1_1"> section.
The following is an example of the markup.
<WebApplicationInfo>
    <Id>5661fed9-f33d-4e95-b6cf-624a34a2f51d</Id>
    <Resource>api://addin.contoso.com/5661fed9-f33d-4e95-b6cf-624a34a2f51d</Resource>
    <Scopes>
        <Scope>openid</Scope>
        <Scope>user.read</Scope>
        <Scope>files.read</Scope>
        <Scope>profile</Scope>
    </Scopes>
</WebApplicationInfo>
Important
If your add-in is deployed by one or more admins to their organizations, adding new scopes to the manifest will require the admin to consent to the updates. Users will be blocked from the add-in until consent is granted.
Note
If you don't follow the format requirements in the manifest for SSO, your add-in will be rejected from AppSource until it meets the required format.
Include the Identity API requirement set
To use SSO your add-in requires the Identity API 1.3 requirement set. For more information, see IdentityAPI.
Add client-side code
Add JavaScript to the add-in to:
- Call getAccessToken.
- Parse the access token or pass it to the add-in’s server-side code.
The following code shows a simple example of calling getAccessToken and parsing the token for the user name and other credentials.
Note
This example handles only one kind of error explicitly. For examples of more elaborate error handling, see Office Add-in NodeJS SSO and Office Add-in ASP.NET SSO.
async function getUserData() {
    try {
        let userTokenEncoded = await OfficeRuntime.auth.getAccessToken();
        let userToken = jwt_decode(userTokenEncoded); // Using the https://www.npmjs.com/package/jwt-decode library.
        console.log(userToken.name); // user name
        console.log(userToken.preferred_username); // email
        console.log(userToken.oid); // user id
    }
    catch (exception) {
        if (exception.code === 13003) {
            // SSO is not supported for domain user accounts, only
            // Microsoft 365 Education or work account, or a Microsoft account.
        } else {
            // Handle error
        }
    }
}
When to call getAccessToken
If your add-in requires a signed in user, then you should call getAccessToken from inside Office.initialize. You should also pass allowSignInPrompt: true in the options parameter of getAccessToken. For example; OfficeRuntime.auth.getAccessToken( { allowSignInPrompt: true }); This will ensure that if the user is not yet signed in, that Office prompts the user through the UI to sign in now.
If the add-in has some functionality that doesn't require a signed in user, then you can call getAccessToken when the user takes an action that requires a signed in user. There is no significant performance degradation with redundant calls of getAccessToken because Office caches the access token and will reuse it, until it expires, without making another call to the Microsoft identity platform whenever getAccessToken is called. So you can add calls of getAccessToken to all functions and handlers that initiate an action where the token is needed.
Important
As a best security practice, always call getAccessToken when you need an access token. Office will cache it for you. Don't cache or store the access token using your own code.
Pass the access token to server-side code
If you need to access web APIs on your server, or additional services such as Microsoft Graph, you'll need to pass the access token to your server-side code. The access token provides access (for the authenticated user) to your web APIs. Also the server-side code can parse the token for identity information if it needs it. (See Use the access token as an identity token below.) There are many libraries available for different languages and platforms that can help simplify the code you write. For more information, see Overview of the Microsoft Authentication Library (MSAL).
If you need to access Microsoft Graph data, your server-side code should do the following:
- Validate the access token (see Validate the access token below).
- Initiate the OAuth 2.0 On-Behalf-Of flow with a call to the Microsoft identity platform that includes the access token, some metadata about the user, and the credentials of the add-in (its ID and secret). The Microsoft identity platform will return a new access token that can be used to access Microsoft Graph.
- Get data from Microsoft Graph by using the new token.
- If you need to cache the new access token for multiple calls, we recommend using Token cache serialization in MSAL.NET.
Important
As a best security practice, always use the server-side code to make Microsoft Graph calls, or other calls that require passing an access token. Never return the OBO token to the client to enable the client to make direct calls to Microsoft Graph. This helps protect the token from being intercepted or leaked. For more information on the proper protocol flow, see the OAuth 2.0 protocol diagram
The following code shows an example of passing the access token to the server-side. The token is passed in an Authorization header when sending a request to a server-side web API. This example sends JSON data, so it uses the POST method, but GET is sufficient to send the access token when you are not writing to the server.
$.ajax({
    type: "POST",
    url: "/api/DoSomething",
    headers: {
        "Authorization": "Bearer " + accessToken
    },
    data: { /* some JSON payload */ },
    contentType: "application/json; charset=utf-8"
}).done(function (data) {
    // Handle success
}).fail(function (error) {
    // Handle error
}).always(function () {
    // Cleanup
});
For more details about getting authorized access to the user's Microsoft Graph data, see Authorize to Microsoft Graph in your Office Add-in.
Validate the access token
Web APIs on your server must validate the access token if it is sent from the client. The token is a JSON Web Token (JWT), which means that validation works just like token validation in most standard OAuth flows. There are a number of libraries available that can handle JWT validation, but the basics include:
- Checking that the token is well-formed
- Checking that the token was issued by the intended authority
- Checking that the token is targeted to the Web API
Keep in mind the following guidelines when validating the token.
- Valid SSO tokens will be issued by the Azure authority,
https://login.microsoftonline.com. Theissclaim in the token should start with this value. - The token's
audparameter will be set to the application ID of the add-in's Azure app registration. - The token's
scpparameter will be set toaccess_as_user.
For more information on token validation, see Microsoft identity platform access tokens.
Use the access token as an identity token
If your add-in needs to verify the user's identity, the access token returned from getAccessToken() contains information that can be used to establish the identity. The following claims in the token relate to identity.
name- The user's display name.preferred_username- The user's email address.oid- A GUID representing the ID of the user in the Microsoft identity system.tid- A GUID representing the tenant tha the user is signing in to.
For more details on these and other claims, see Microsoft identity platform ID tokens. If you need to construct a unique ID to represent the user in your system, refer to Using claims to reliably identify a user for more information.
Example access token
The following is a typical decoded payload of an access token. For information about the properties, see Microsoft identity platform access tokens.
{
    aud: "2c3caa80-93f9-425e-8b85-0745f50c0d24",
    iss: "https://login.microsoftonline.com/fec4f964-8bc9-4fac-b972-1c1da35adbcd/v2.0",
    iat: 1521143967,
    nbf: 1521143967,
    exp: 1521147867,
    aio: "ATQAy/8GAAAA0agfnU4DTJUlEqGLisMtBk5q6z+6DB+sgiRjB/Ni73q83y0B86yBHU/WFJnlMQJ8",
    azp: "e4590ed6-62b3-5102-beff-bad2292ab01c",
    azpacr: "0",
    e_exp: 262800,
    name: "Mila Nikolova",
    oid: "6467882c-fdfd-4354-a1ed-4e13f064be25",
    preferred_username: "milan@contoso.com",
    scp: "access_as_user",
    sub: "XkjgWjdmaZ-_xDmhgN1BMP2vL2YOfeVxfPT_o8GRWaw",
    tid: "fec4f964-8bc9-4fac-b972-1c1da35adbcd",
    uti: "MICAQyhrH02ov54bCtIDAA",
    ver: "2.0"
}
Using SSO with an Outlook add-in
There are some small, but important differences in using SSO in an Outlook add-in from using it in an Excel, PowerPoint, or Word add-in. Be sure to read Authenticate a user with a single sign-on token in an Outlook add-in and Scenario: Implement single sign-on to your service in an Outlook add-in.
Google Chrome 3rd party cookie support
Google Chrome is phasing out 3rd party cookies in 2024 and introducing a feature named Tracking Prevention. If Tracking Prevention is enabled in the Chrome browser, your add-in will not be able to use any 3rd party cookies. Your add-in may encounter issues when authenticating the user, such as multiple sign-on requests, or errors.
For improved authentication experiences, see Using device state for an improved SSO experience on browsers with blocked third-party cookies.
For more information about the Google Chrome rollout, see the following resources:
- The next step toward phasing out third-party cookies in Chrome.
- The Privacy Sandbox Timeline for the Web
See also
Office Add-ins
Feedback
Coming soon: Throughout 2024 we will be phasing out GitHub Issues as the feedback mechanism for content and replacing it with a new feedback system. For more information see: https://aka.ms/ContentUserFeedback.
Submit and view feedback for