Map input fields of a component
A component can receive input values to emit or process data using custom input properties. In this article, you'll learn about working with such components expecting one or more input properties with a specific schema for the given table or record, and how to map the component input fields to the columns of the data source.
Tip
To learn about what the custom input and output properties in components are, see Custom properties in components.
Map columns
Use the RenameColumns() function to rename one or more columns of a table to match the input property schema for input column selection.
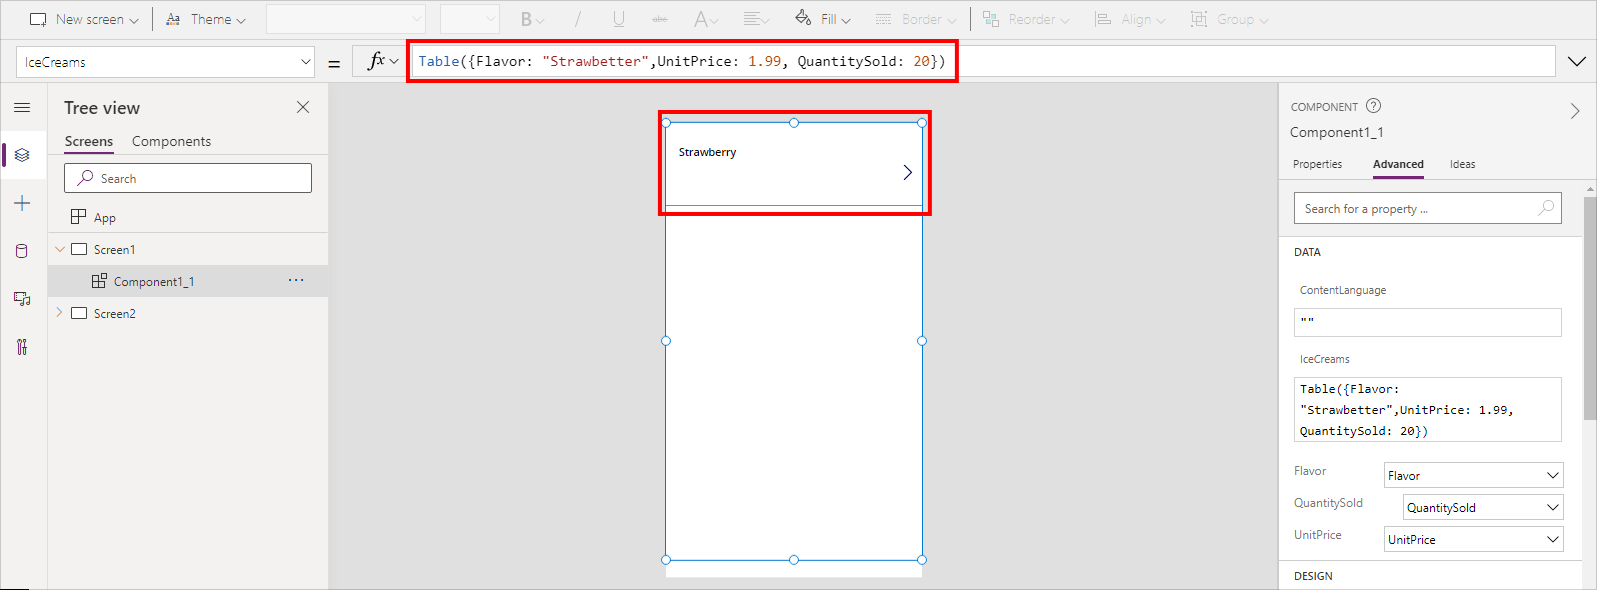
For example, consider a component that expects a table input with the following format:
| Flavor | UnitPrice | QuantitySold |
|---|---|---|
| Strawberry | 1.99 | 20 |
| Chocolate | 2.99 | 45 |
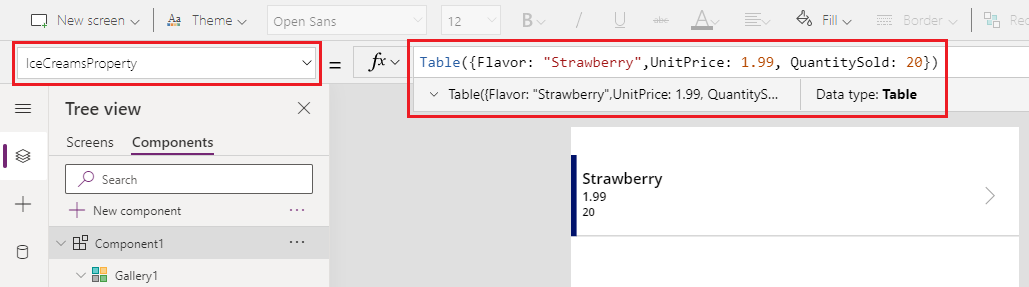
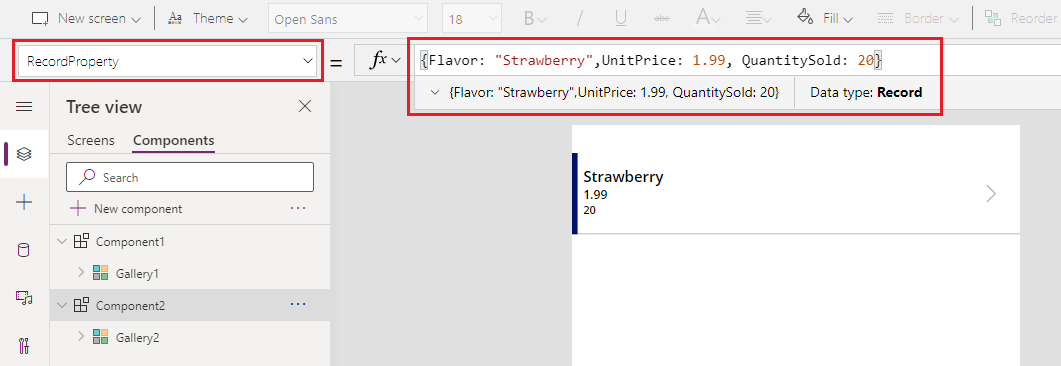
The input property expects table data type:
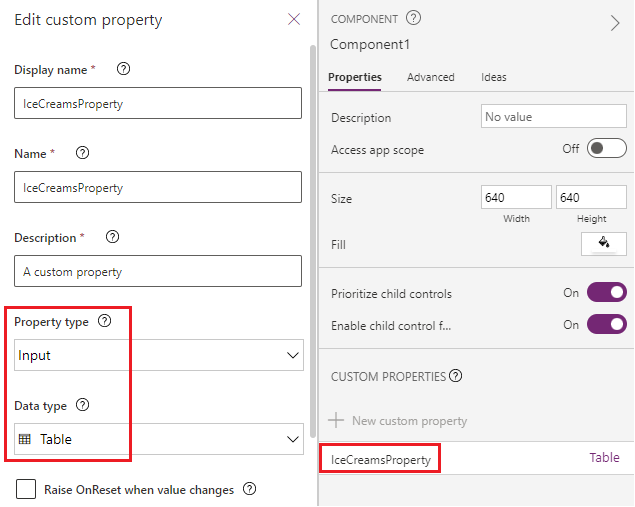
The schema of the input property looks like the following formula:
Table({Flavor: "Strawberry",UnitPrice: 1.99, QuantitySold:20})
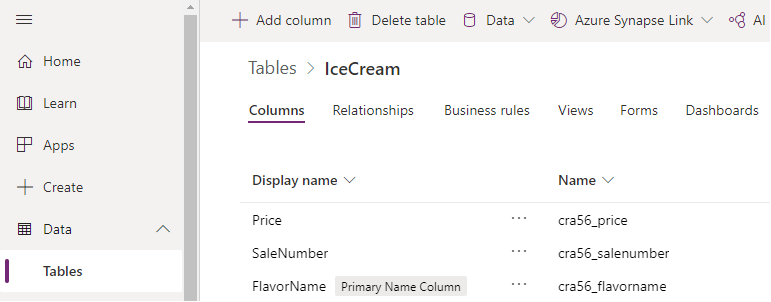
The app consuming this component has the following IceCreams table that doesn’t match with the component schema:
| FlavorName | Price | SaleNumber |
|---|---|---|
| Strawberry | 1.99 | 20 |
| Chocolate | 2.99 | 45 |
To map the correct fields, use RenameColumn() function to rename expected columns.
RenameColumns(IceCreams,"cra56_flavorname","Flavor","cra56_price","UnitPrice","cra56_salenumber","QuantitySold")
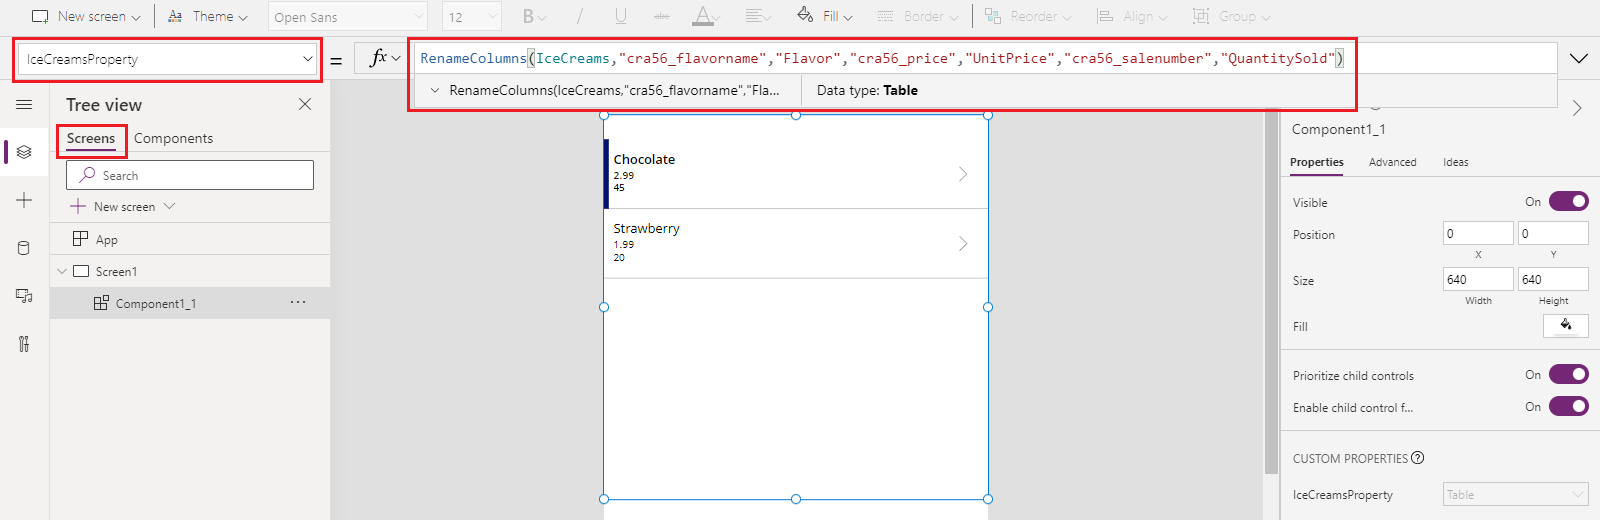
The input fields that the component expects are now mapped with the matching columns from the data source.
Map records
Use With() function to map a single record.
For example, continuing from the earlier example for mapping columns, the custom input property of a component inside an app expects a record type with the following schema:
{Flavor: "Strawberry",UnitPrice: 1.99, QuantitySold: 20}
Since the IceCreams data source expects column names as FlavorName, Price, and SaleNumber, we'll need to change the mapping for the record once the component is added to the app.
Use With() function to select the columns of the IceCreams table, and map them to the input fields of the component:
With(Gallery3.Selected,{Flavor:FlavorName,UnitPrice:Price,QuantitySold:SaleNumber})
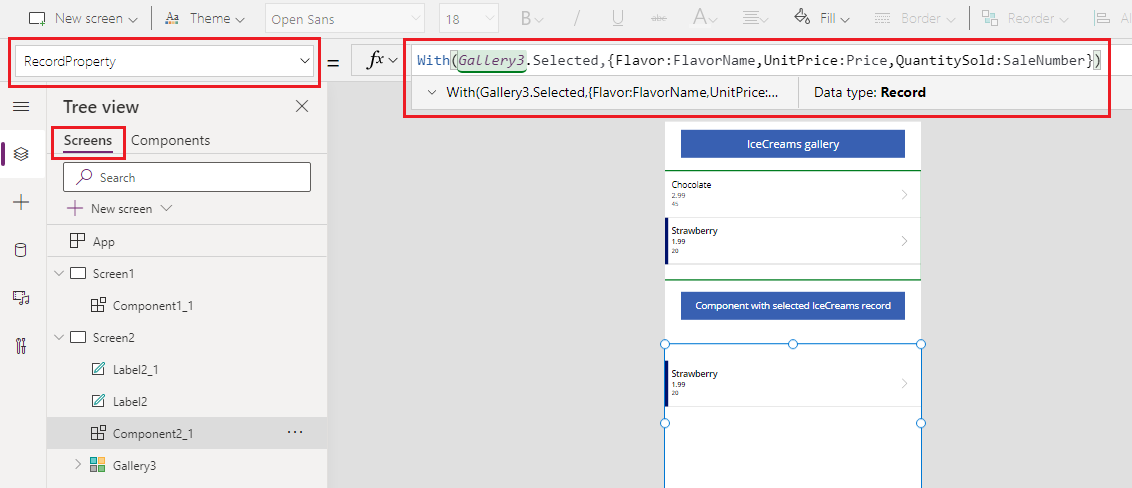
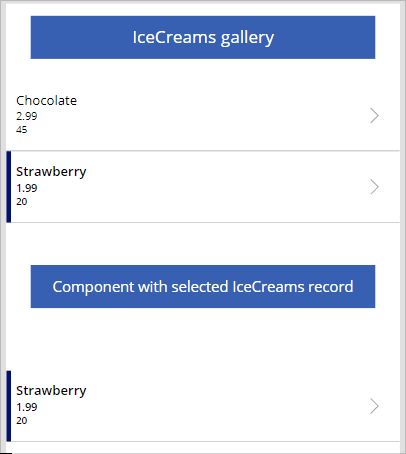
The following animation shows the example of a component added to the app that shows the selected record from the gallery (above the component):
Map tables
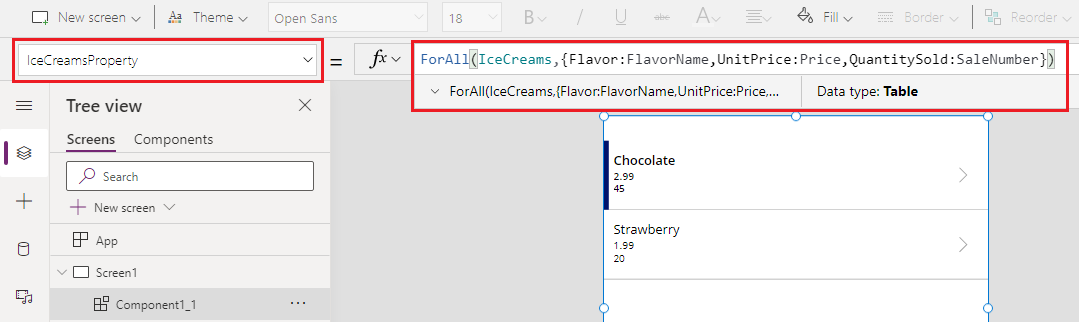
Use ForAll() function to map a table of records with the records expected by the component added to the app.
For example, at the end of the map columns example, you can use the ForAll() function to map the entire table with the specific columns to point to the fields from the component for each row:
ForAll(IceCreams,{Flavor:FlavorName,UnitPrice:Price,QuantitySold:SaleNumber})
Map using dropdown (deprecated)
You can use the Advanced tab for a component added to an app that expects input property of table or record type, and select the field mappings using the dropdown option. This mapping is assigned by default, and unless you manually select the appropriate mapping fields, the mapping might not yield expected results.
For example, the following animation shows the formula being updated to rename columns. The component on screen doesn't change the field mapping since the default field selection using this dropdown needs to be updated manually.
This method of selecting the mapping using the dropdown has been deprecated. Instead, use the column, record, or table mapping methods as described earlier in this article.
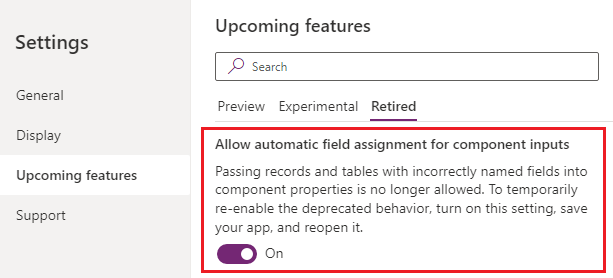
You can still use the dropdown option to choose mapping for existing apps, though not recommended. For new apps, this option will be unavailable by default. To turn this deprecated capability on or off, go to Settings > Upcoming features > Retired, and choose Allow automatic field assignment for component inputs.
When turning the setting on, ensure you save and reopen the app in Power Apps Studio. Once reopened, update the input property formula to trigger formula validation so that the dropdown options start to appear in the Advanced properties pane.
See also
- Behavior formulas for components
- Deprecated: Map component fields using dropdown option
- Canvas components
- Component library
- Component library application lifecycle management (ALM)
- Add multimedia to a component
- Behavior formulas for components
- Power Apps component framework
- Add canvas components to a custom page in a model-driven app
Feedback
Coming soon: Throughout 2024 we will be phasing out GitHub Issues as the feedback mechanism for content and replacing it with a new feedback system. For more information see: https://aka.ms/ContentUserFeedback.
Submit and view feedback for