Create the cloud flow with the Power Automate
You can close both Power Automate Desktop windows and then go to the Power Automate designer. Here, we'll create a Power Automate cloud flow that calls our desktop flow by using secure input parameters from the cloud.
Note
This cloud flow is designed as a "happy path," which means it has no exception handling, scoping, or try-catch-finally patterns. You can find a more resilient design approach in the Low-code RPA with SAP GUI in Power Automate Desktop section.
Go to Power Automate, sign in, and confirm that you're in the same Microsoft Dataverse environment as the one you were in when you created the previous flow in Power Automate Desktop.


On the left pane, select My flows, select New flow, and then select Instant cloud flow.
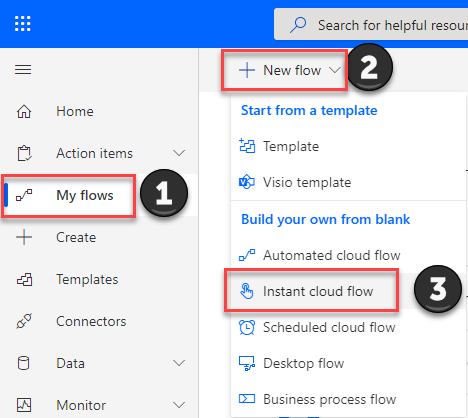
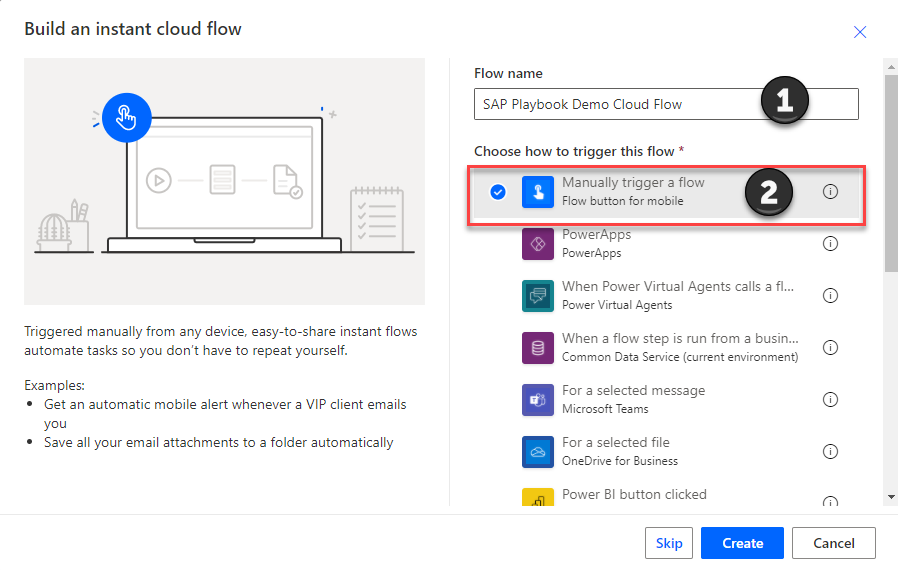
In the Build an instant flow dialog, enter a flow name, select the Manually trigger a flow trigger from the list, and then select Create.
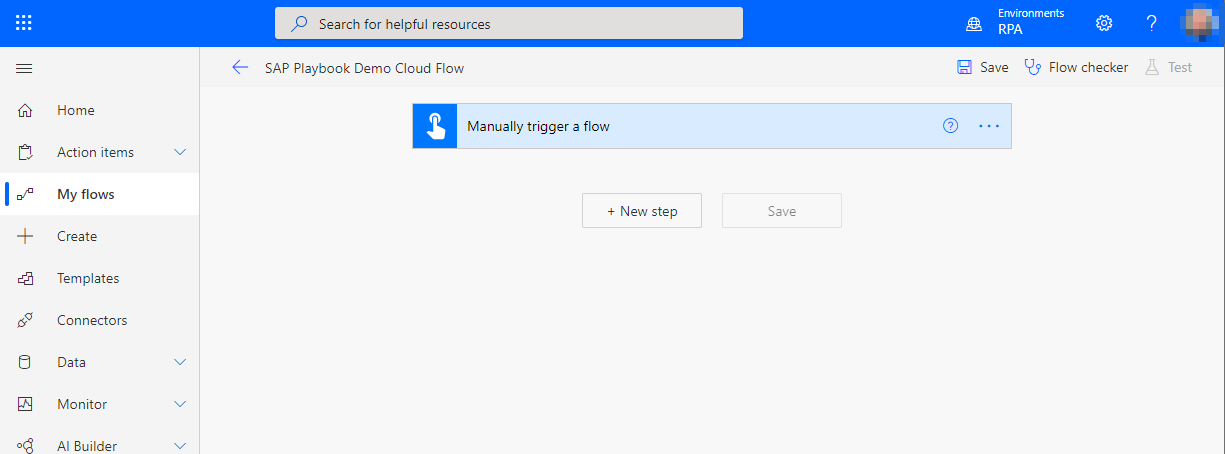
This opens the designer, and it should look similar to the following image.
Important
The next steps will involve configuring action components. To securely pass parameters into our desktop flow, we'll be following the optional, but recommended, approach of using Azure Key Vault secrets.
Note
If you don't have access to Key Vault, you can skip the following steps that show you how to configure Key Vault and provide your credentials and other parameters later as clear text. Microsoft does not recommend that you use clear text credentials in production environments.
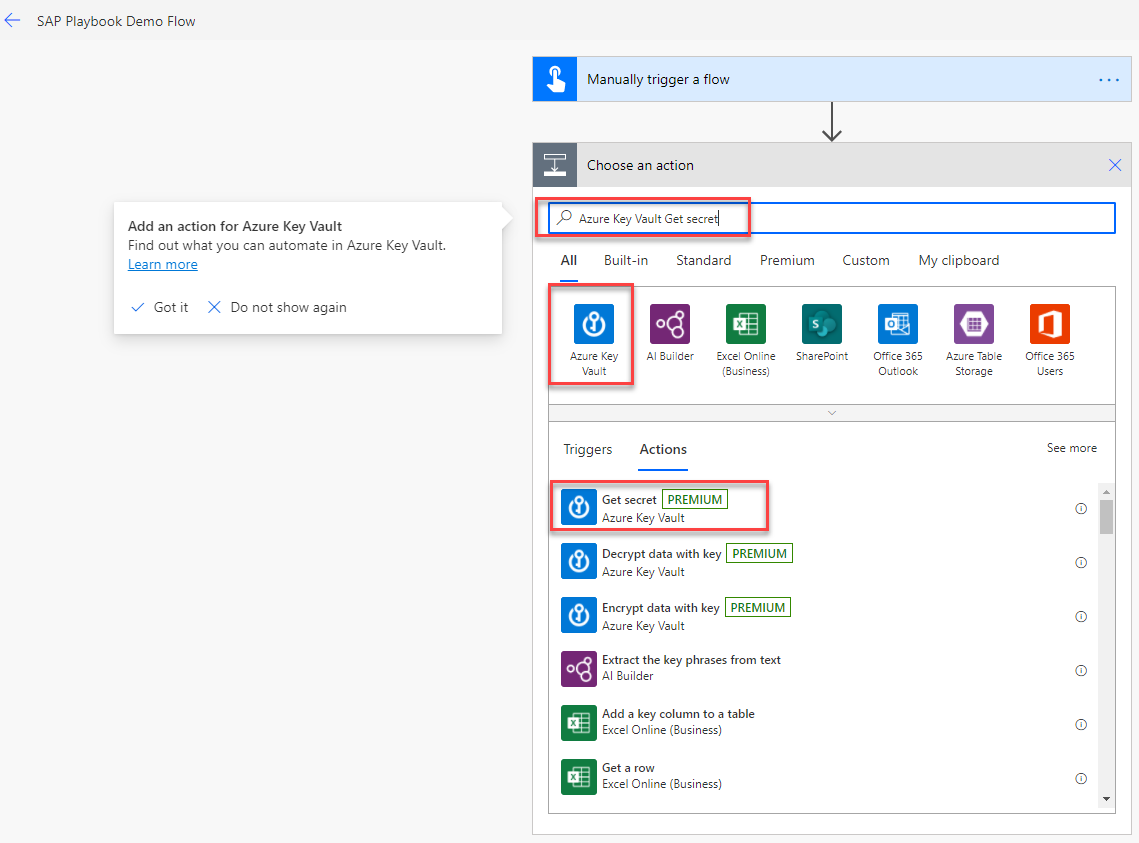
Select New step.
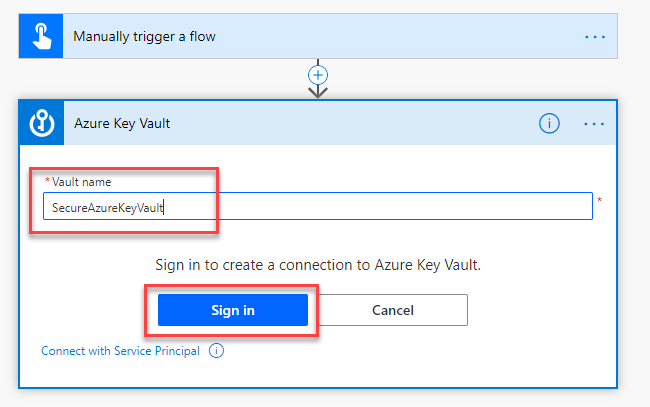
Search for Azure Key Vault Get secret, and then select Get secret action.
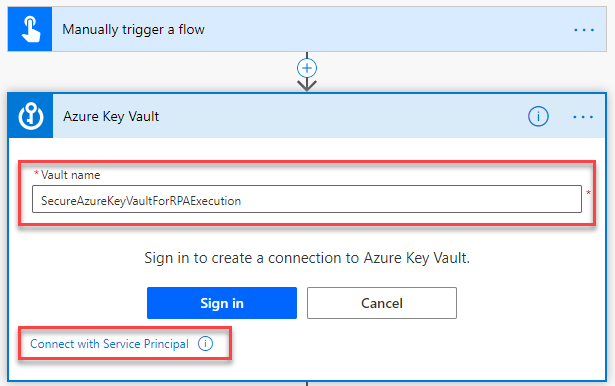
If this is the first time you've configured Key Vault in a flow, you'll get a prompt to set up a connection. You can choose to connect either through user credentials or a service principal account (which we recommend for production scenarios).
Establishing a connection with user credentials
Establishing a connection with service principal

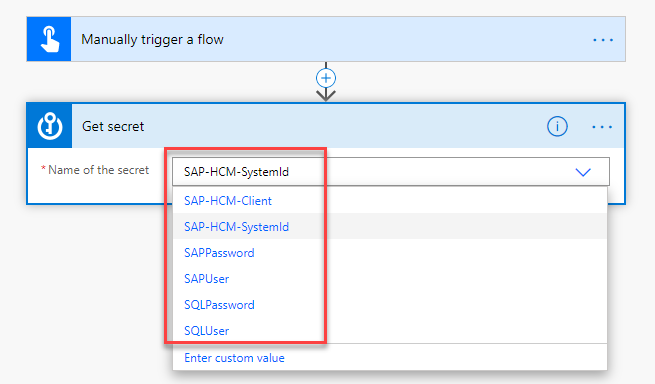
After you configure the connection, select the appropriate Name of the secret from the list.
Select More (...), and then select Settings.
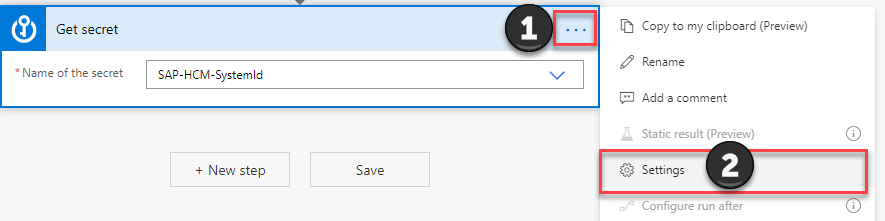
Turn on Secure Inputs and Secure Outputs, and then select Done.
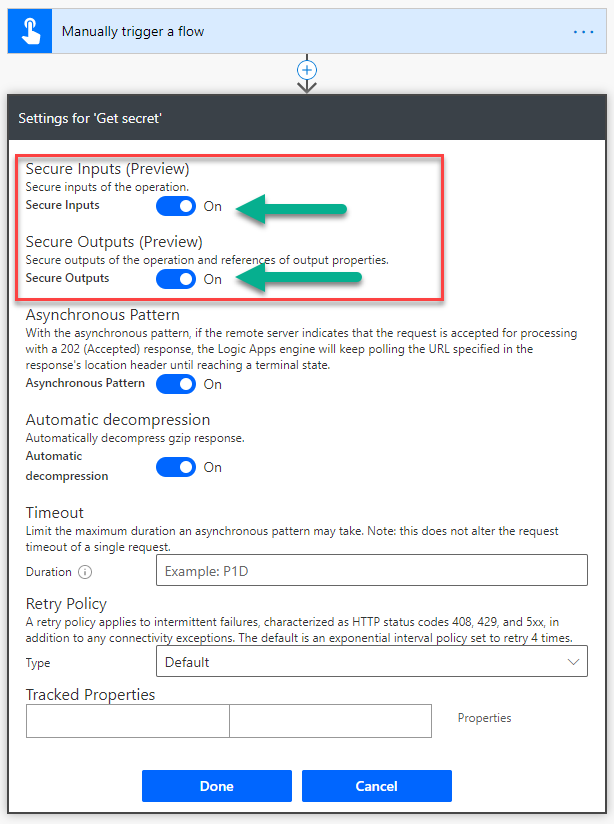
Note
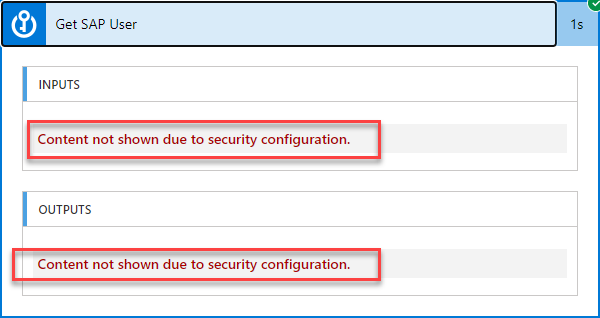
These settings will hide sensitive text from the run flow history.
Select ..., and then select Rename to enter a more specific action name—for example, Get SAP User.
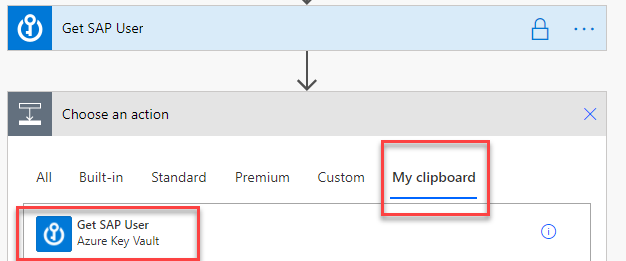
Select ..., and then select Copy to my clipboard.
Select New step.
Select My Clipboard, and then select the name of the previously copied action—in our example, Get SAP User.
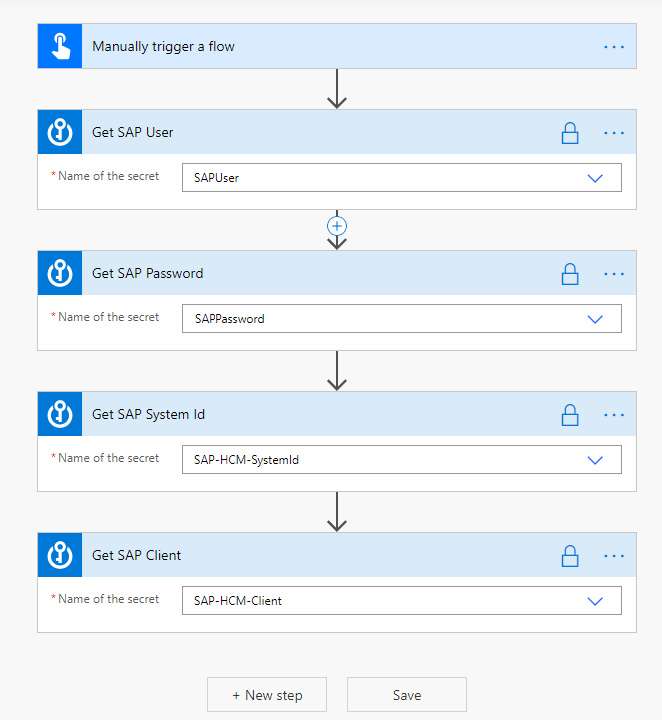
Select ..., and then select Rename. Enter a more specific action name—for example, Get SAP Password.
Repeat steps 14 through 18 for all other Key Vault–based secrets.
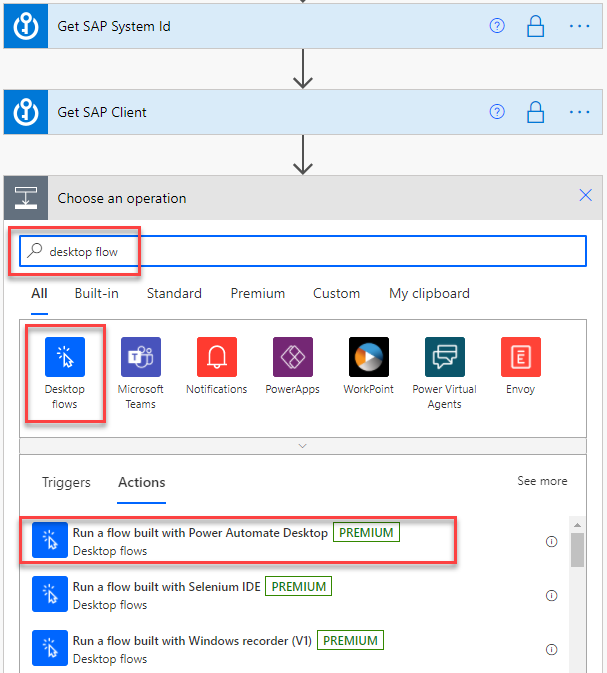
Select New step.
Search for Desktop flows, and then select Run a flow built with Power Automate Desktop.
If this is the first time you've used the desktop flow action, you'll be prompted to create a connection. Provide your Gateway name, Domain and username (DOMAIN\User), and Password.
After the connection is established, select the previously created desktop flow.

Select Attended – Runs when you're signed in as Run Mode.
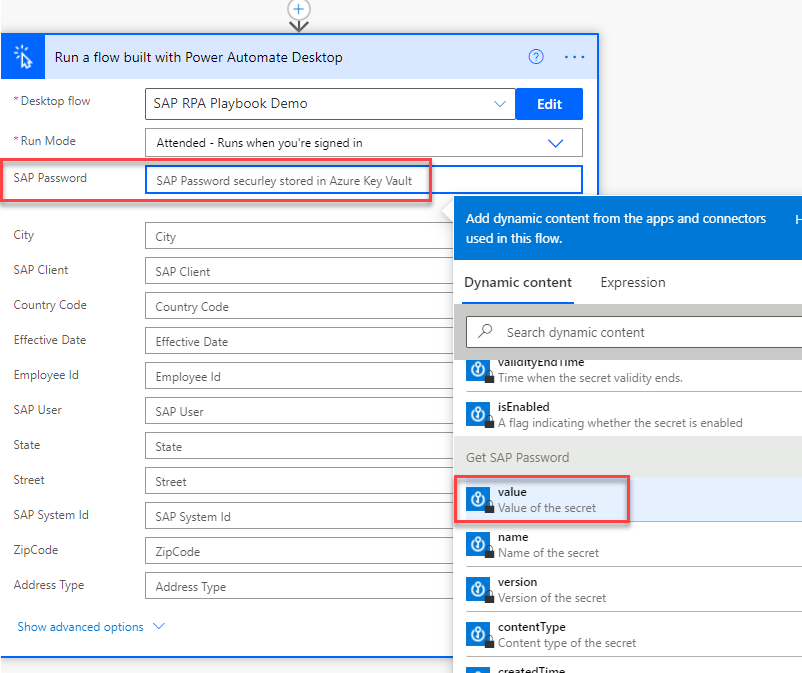
Enter each parameter field and either select the appropriate data from the Dynamic content pop-up window (such as SAP System Id, SAP Client, SAP User, and SAP Password) or manually enter placeholder data (for all the other parameters in the list). If you aren't using the Key Vault option for your SAP credentials, enter them manually and in free text instead.
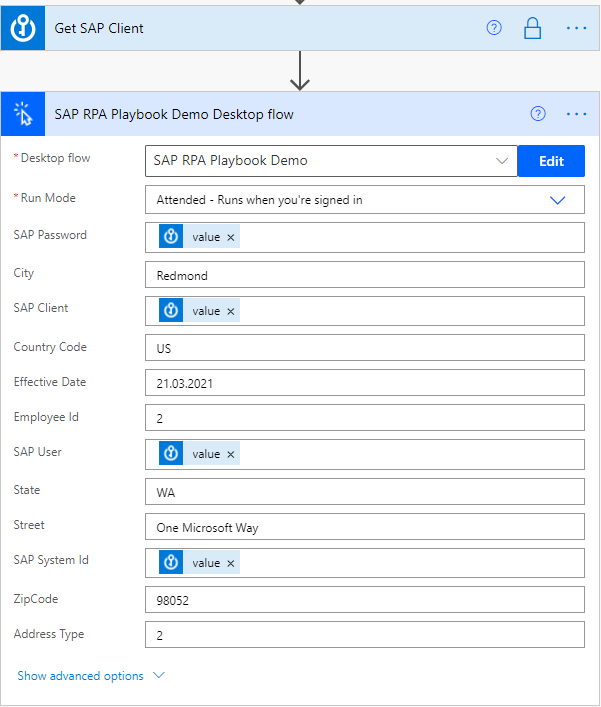
After you've renamed the action to something meaningful and supplied all parameters, the action should look like this.
Test the flow
Close all SAP windows.
Select Save, and then wait until the flow is saved.
Select Test, and then under Test Flow, select Test again.

Authorize any connections, if needed, and then select Continue.
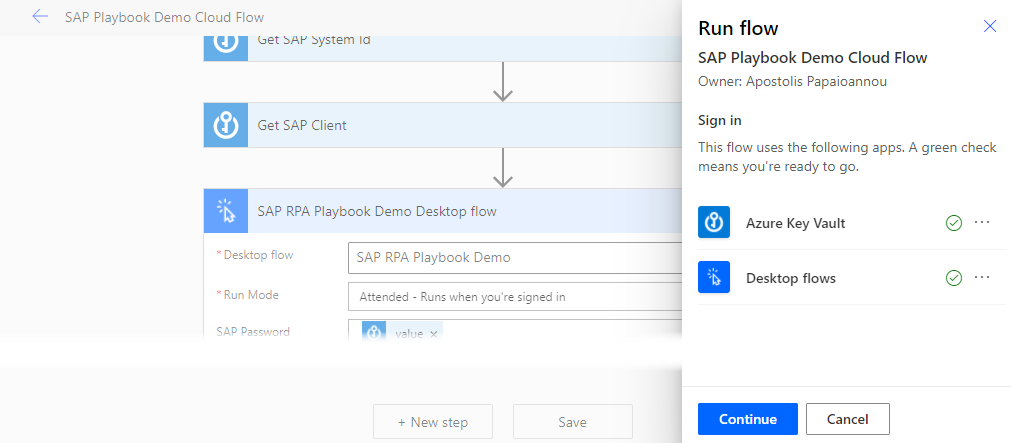
Select Run flow.
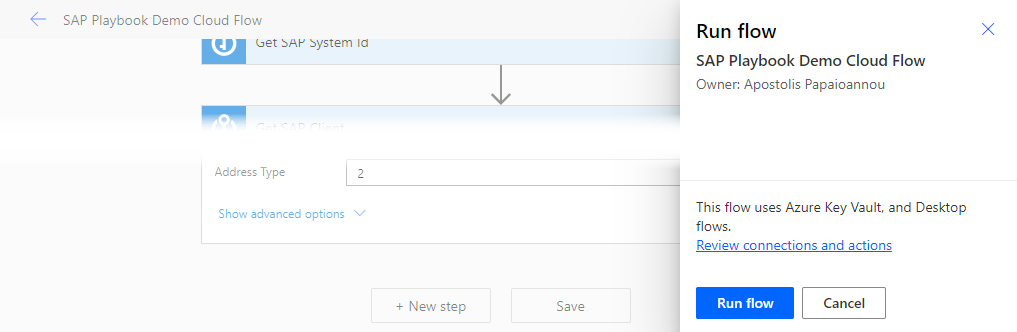
Select Done.
Important
Don't interact with your mouse or keyboard until the process completes.
Watch the desktop flow execution.
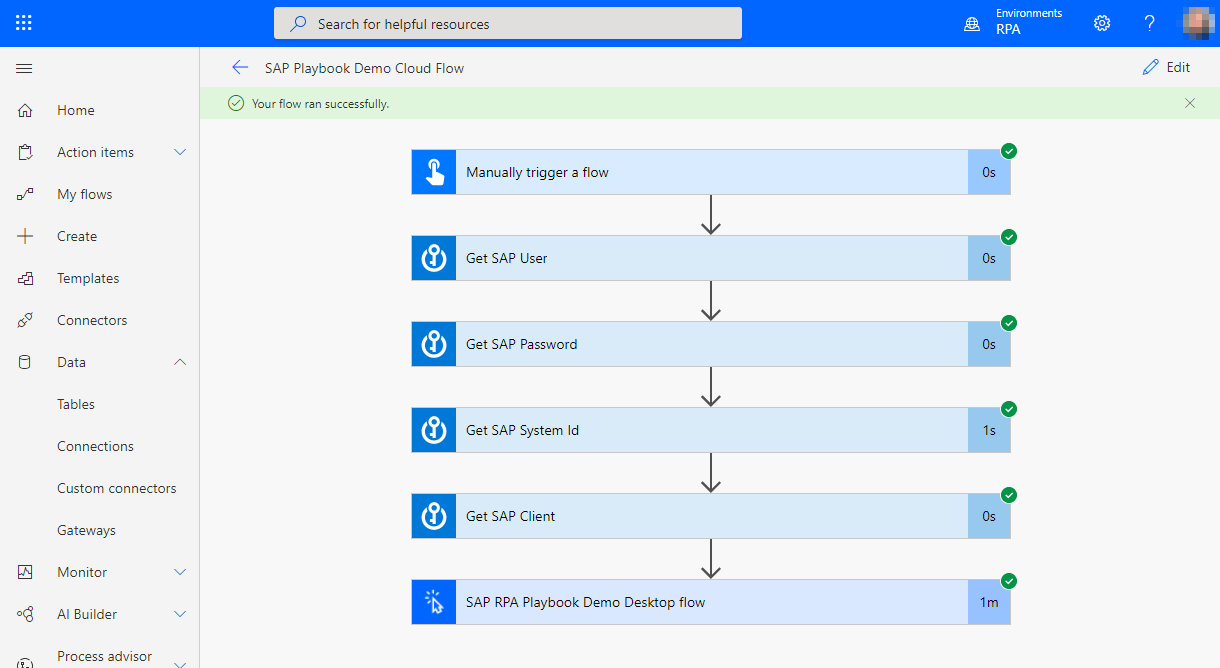
Congratulations, you've just created and launched a secure desktop flow from the cloud and connected to your desktop flow to add an employee address to SAP.
Feedback
Coming soon: Throughout 2024 we will be phasing out GitHub Issues as the feedback mechanism for content and replacing it with a new feedback system. For more information see: https://aka.ms/ContentUserFeedback.
Submit and view feedback for